
As I stood in the kitchen, the scent of melting cheese mixed with the vibrant colors of fresh toppings filled the air, transporting me straight into the heart of Halloween magic. These Mini Halloween Pizzas are not just a dish; they’re a canvas for creativity, perfect for little hands eager to participate in the kitchen! Quick to make and endlessly customizable, they transform ordinary meal prep into a thrilling family activity. Whether you’re throwing a spooky gathering or simply enjoying a cozy night in, these delightful pizzas come together in no time, ensuring both kids and adults alike will be eager to dive in. Curious about how to make these festive bites come alive? Let’s get started on a spooktacular journey!
Why are Mini Halloween Pizzas a Must-Try?
Kid-Friendly Fun: These Mini Halloween Pizzas allow kids to unleash their creativity, picking toppings and constructing their spooky designs.
Quick and Easy: With a preparation time of under 30 minutes, weeknight dinners just got a fun upgrade!
Endlessly Customizable: Feel free to swap out ingredients, making them a great canvas for personal preferences or dietary needs!
Perfect for Gatherings: Whether it’s a Halloween party or a cozy night, these pizzas are a hit among guests of all ages.
Delicious Comfort: The combination of gooey cheese and festive toppings delivers unforgettable taste, sure to become a family favorite!
For more holiday-themed fun, check out my White Chocolate Halloween treats and the spooky Eyeball Pasta Salad.
Mini Halloween Pizzas Ingredients
For the Crust
- Mini Pizza Crusts – These serve as the perfect bite-sized base; you can use store-bought for ease or whip up your own!
- Olive Oil Spray – A quick mist keeps the crusts from sticking and ensures a crispy finish.
For the Sauce
- Pizza Sauce (3/4 cup) – This tasty layer adds moisture and flavor; marinara makes a great substitute if you’re in a pinch!
For the Toppings
- Mozzarella Cheese (1 cup, shredded) – This cheesy delight melts beautifully, creating that gooey texture everyone loves.
- String Cheese (4 sticks) – Fantastic for mummy designs; just pull apart for a fun decoration element!
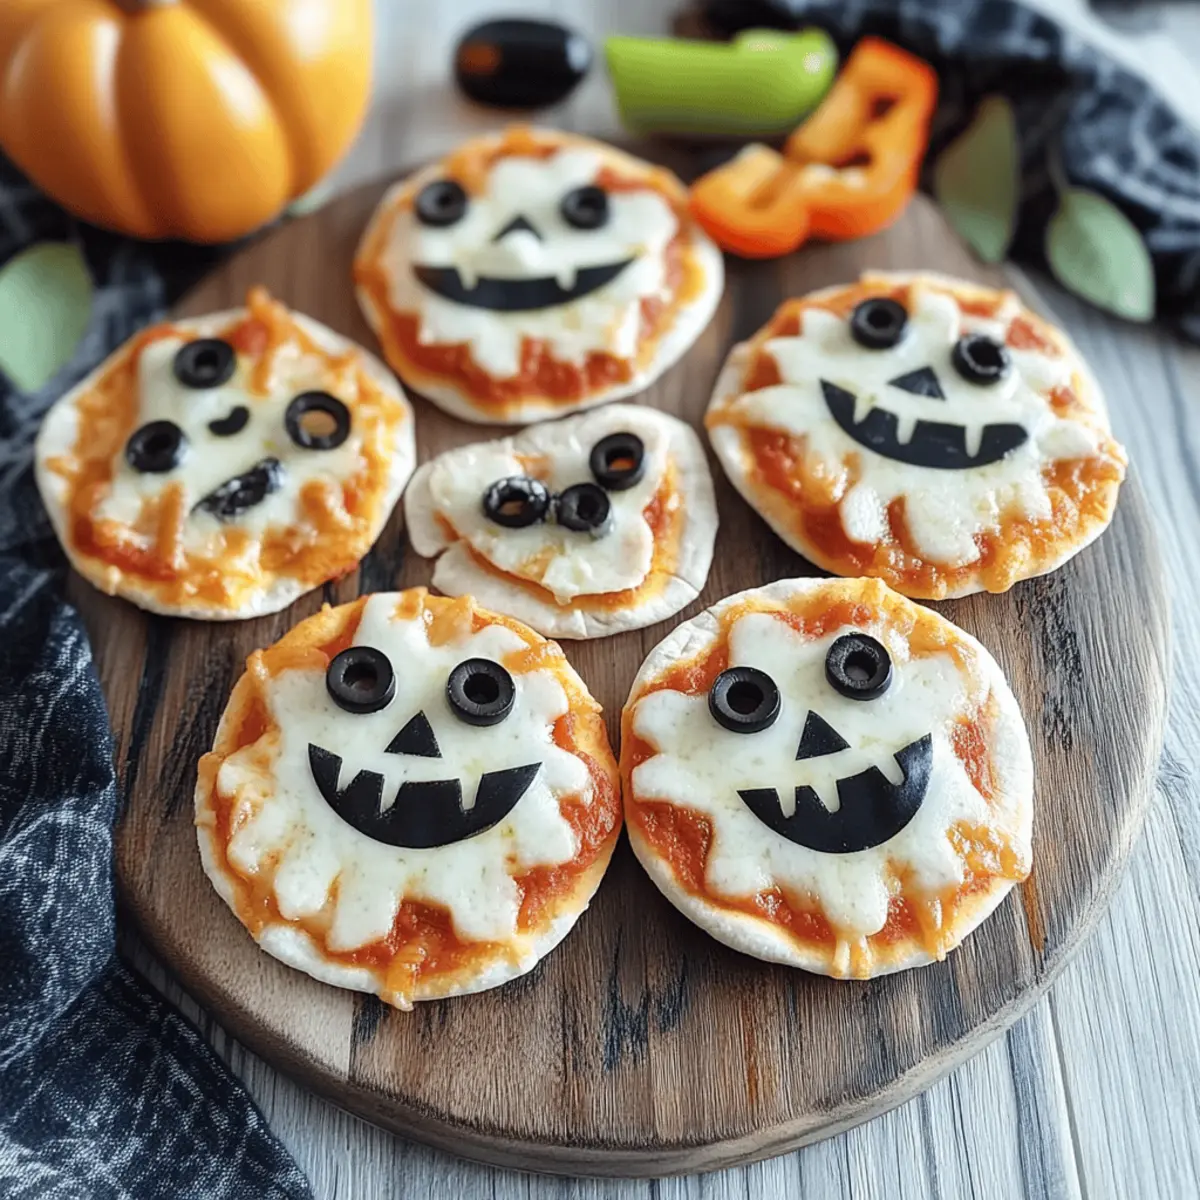
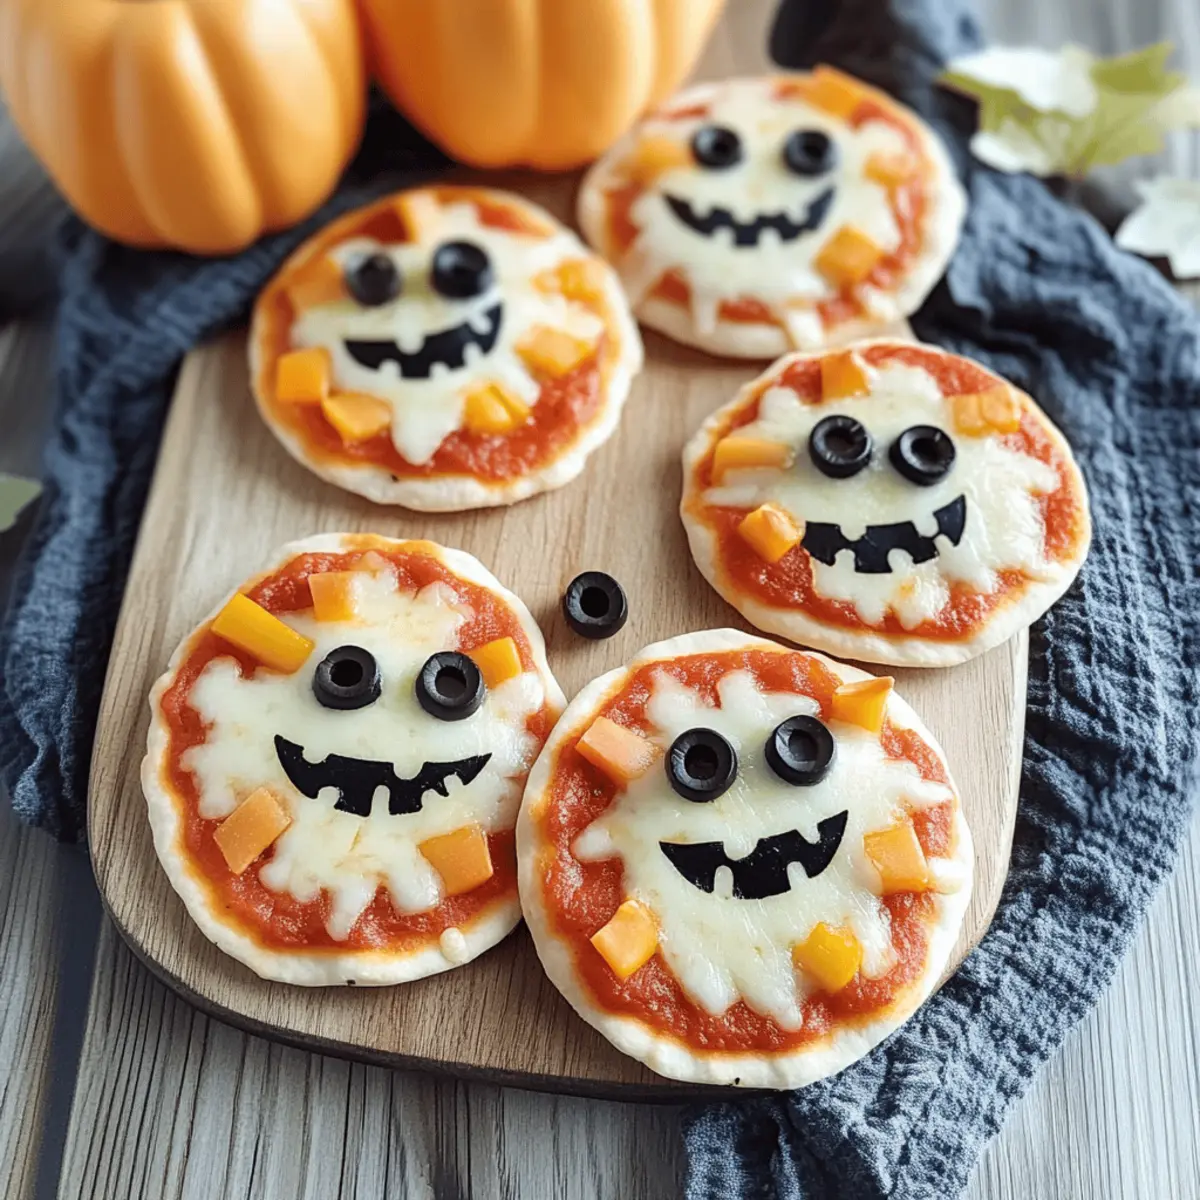
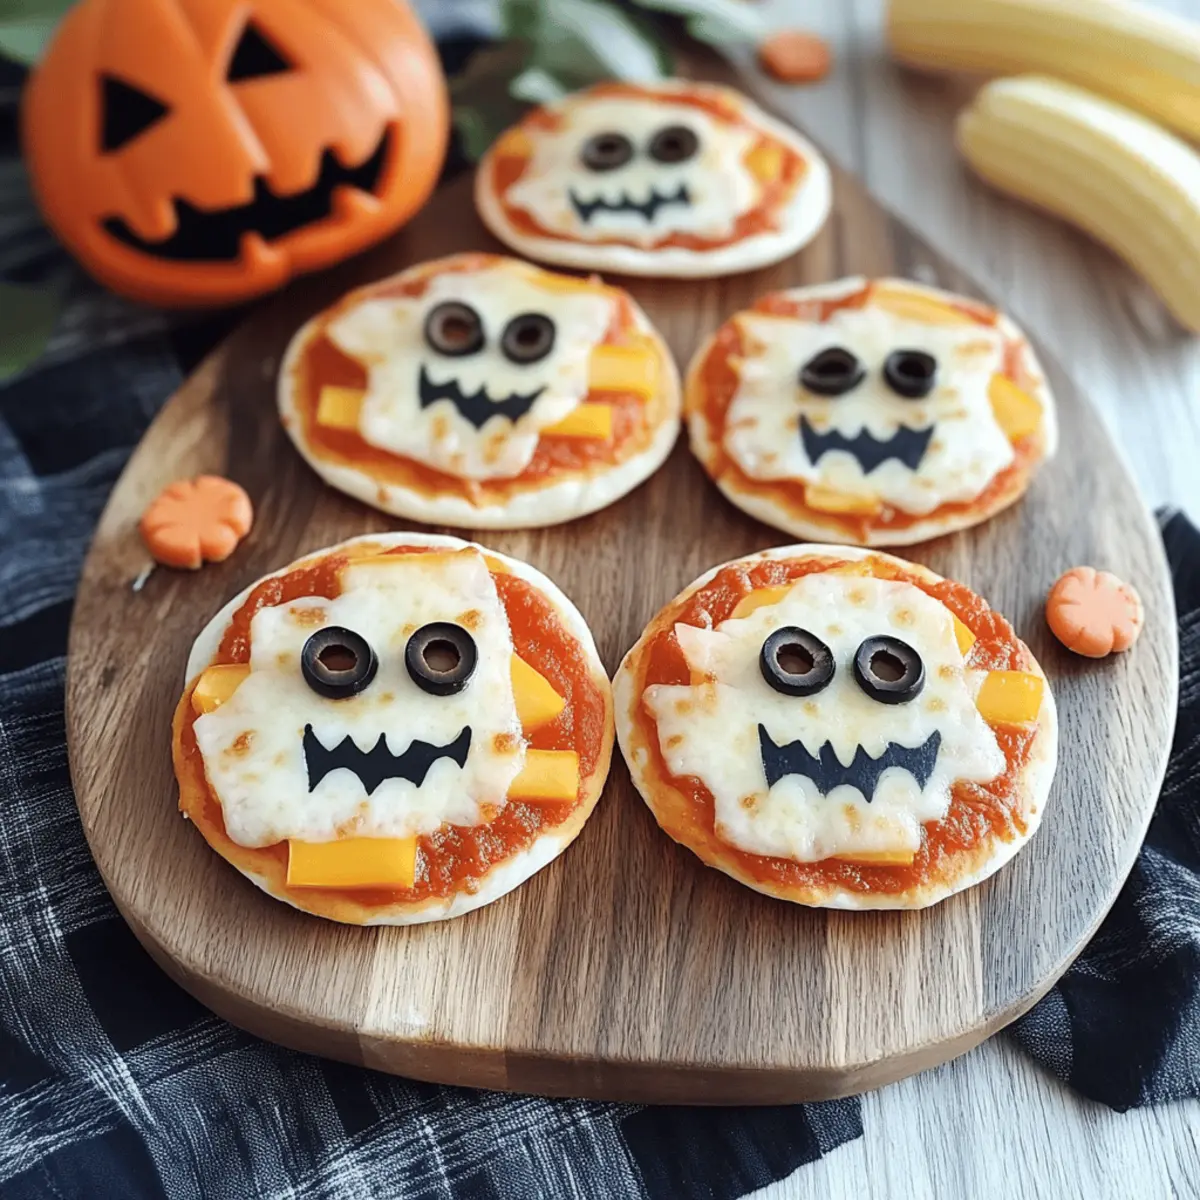
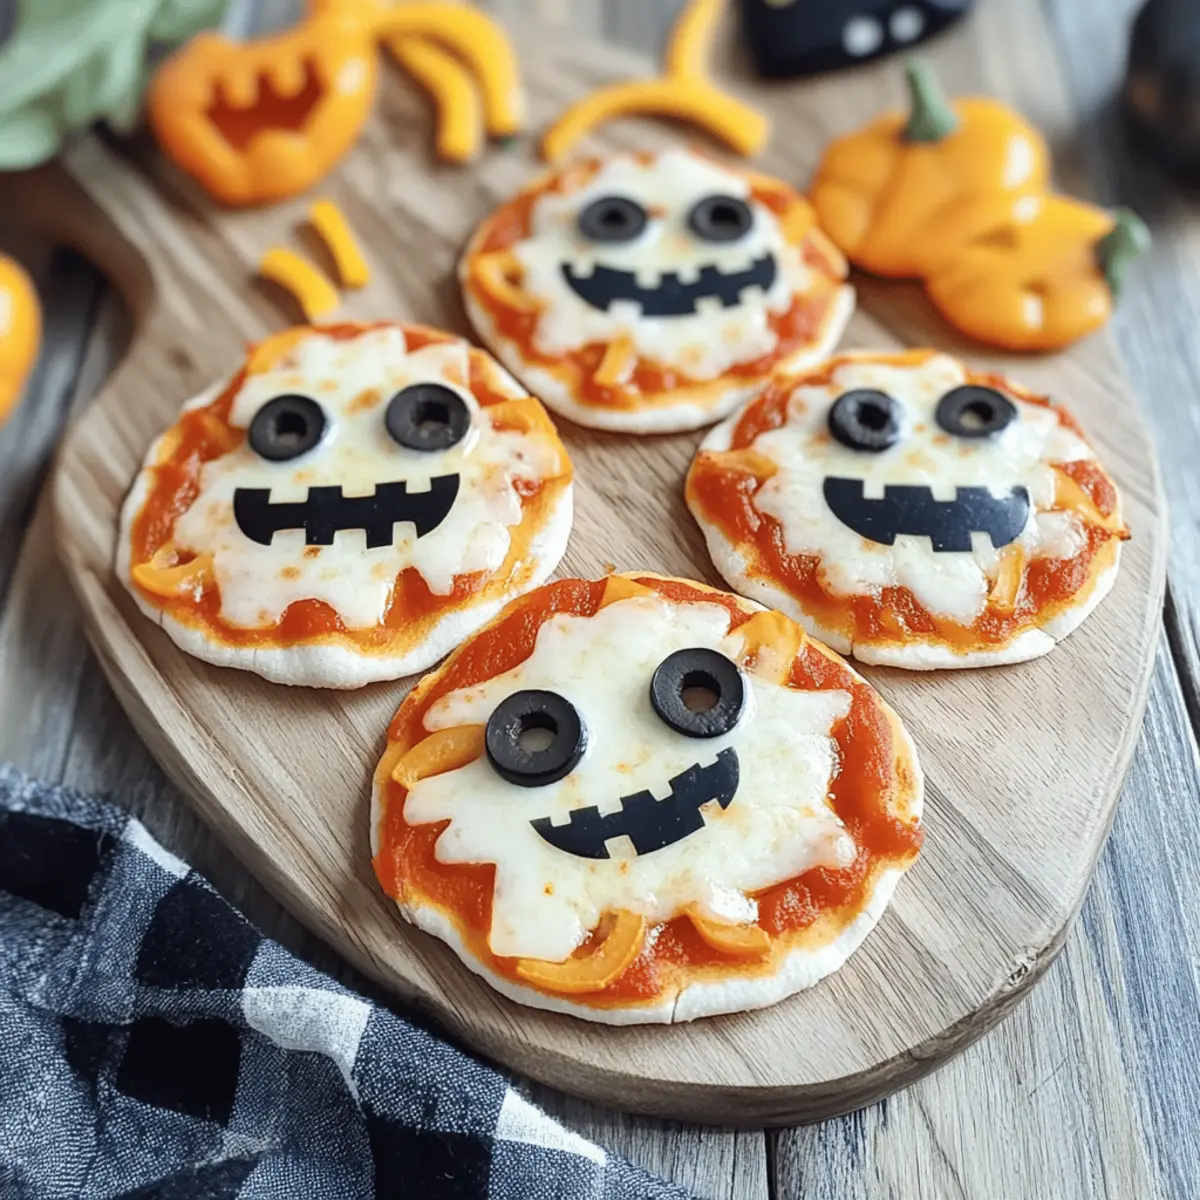
- Black Olives (1/4 cup, sliced) – Perfect for adding a spooky touch as spider bodies on your pizzas.
- Mini Pepperoni (1/4 cup, optional) – An extra crunch and flavor kick; you can skip for a veggie version!
- Orange & Green Bell Peppers (1 cup, thin strips) – Use these vibrant strips to create fun jack-o’-lantern faces!
- Fresh Basil (2 tbsp, chiffonade) – A sprinkle of this aromatic herb adds freshness and a pop of color.
These Mini Halloween Pizzas are not only a delight to eat but also a fun way for the whole family to get involved in the kitchen!
Step‑by‑Step Instructions for Mini Halloween Pizzas
Step 1: Preheat the Oven
Start by preheating your oven to 425°F (220°C). While it heats, grab a baking sheet and lightly mist it with olive oil spray to prevent sticking. This will help your Mini Halloween Pizzas achieve a perfect crispy finish. Once the oven is ready, you’re all set for the delicious pizza-making fun ahead!
Step 2: Sauce the Crusts
Take your mini pizza crusts and spread 1-2 tablespoons of pizza sauce on each one, leaving a small border around the edges for the crust. This is where the flavor begins! Make sure to distribute the sauce evenly using the back of a spoon, creating a vibrant base for your Mini Halloween Pizzas that will combine beautifully with the toppings.
Step 3: Add the Cheese
Next, sprinkle shredded mozzarella cheese generously over half of the sauced mini pizzas. For the remaining pizzas, pull apart string cheese sticks to create mummy wraps—just lay them in a fun, crisscross pattern. This step brings ooey-gooey goodness to your Mini Halloween Pizzas while adding a spooky twist that kids will love!
Step 4: Decorate with Toppings
Now it’s time to get creative! Use black olives as spider bodies on your pizzas and have fun creating jack-o’-lantern faces with the orange and green bell pepper strips. If desired, scatter mini pepperoni on some pizzas for an extra burst of flavor. Your Mini Halloween Pizzas should now look as festive as they taste!
Step 5: Bake to Perfection
Place the assembled pizzas in the oven and bake for 10-12 minutes. Keep an eye on them; you’re looking for the crust to turn golden brown and the cheese to bubble and melt. To ensure even baking, rotate the pan halfway through. You’re one step closer to enjoying your delightful Mini Halloween Pizzas!
Step 6: Cool and Garnish
Once baked, remove your pizzas from the oven and let them cool for about 2 minutes. This brief cooling period allows the cheese to set slightly. Just before serving, garnish with fresh basil chiffonade for added aroma and a pop of color, enhancing both the look and taste of your festive Mini Halloween Pizzas!
Make Ahead Options
These Mini Halloween Pizzas are perfect for meal prep, allowing you to spend more time enjoying the festivities! You can prepare the mini pizza crusts and toppings up to 24 hours in advance. To do this, assemble the pizzas with sauce, cheese, and decorations, then store them in an airtight container in the refrigerator. This not only saves time but keeps the pizzas fresh and flavorful. When you’re ready to bake, preheat your oven and simply pop them in for 10-12 minutes until golden and bubbly. You’ll have delicious, spooky treats that are just as delightful as if made fresh!
Expert Tips for Mini Halloween Pizzas
-
Pre-Prep Toppings: Organize and chop your toppings in advance to make assembly smoother and quicker, perfect for these fun Mini Halloween Pizzas.
-
Crispy Crust Secrets: For an extra crispy crust, ensure your baking sheet is thoroughly misted with olive oil spray before placing the mini crusts on it.
-
Watch the Bake Time: Mini pizzas can overcook quickly, so keep a close eye on them; the goal is golden brown crusts and melted cheese without burning.
-
Creative Designs: Encourage kids to create their own spooky faces—this not only makes meal prep exciting but also helps them engage with food in a fun way.
-
Veggie Options: Swap out traditional toppings for seasonal vegetables like roasted pumpkin or zucchini to keep the festive theme while catering to different dietary preferences.
-
Store Efficiently: If you have leftovers, separate them with parchment paper in an airtight container to keep your Mini Halloween Pizzas fresh for up to 3 days!
What to Serve with Mini Halloween Pizzas
Get ready to elevate your Halloween feast with delightful sides and drinks that enhance these spooky pizza bites!
-
Crispy Veggie Platter: Fresh and crunchy veggies like carrots, cucumbers, and bell peppers balance the cheesy richness of mini pizzas, making for a colorful and healthy accompaniment.
-
Witch’s Brew Punch: A fun, fizzy drink made with lime soda and green fruit punch adds a festive flair, perfect for kids and adults alike to sip while enjoying the eerie atmosphere.
-
Pumpkin Soup: This creamy, warm soup provides a comforting contrast to the crispy pizzas, featuring a hint of spice that complements the Halloween theme beautifully.
-
Ghostly Garlic Bread: Soft and buttery garlic bread, cut into ghost shapes, serves as a perfect side, adding an aromatic crunch to the pizzas while inviting everyone to dig in.
-
Spooky Fruit Salad: A mix of seasonal fruits like oranges, apples, and blackberries, tossed with a splash of lime juice, adds sweetness and a refreshing note to your Halloween spread.
-
Mummy Hot Dogs: Wrap mini hot dogs in crescent roll dough to create adorable mummies, adding a fun, savory element to your Halloween meal that pairs wonderfully with the pizzas.
-
Chocolate-Covered Pretzels: These sweet and salty treats provide a satisfying crunch that contrasts nicely with the gooey texture of the mini pizzas, making for an irresistible dessert option.
Create a memorable meal that keeps the Halloween magic alive with these delightful pairings!
How to Store and Freeze Mini Halloween Pizzas
Fridge: Store leftovers in an airtight container, separated by parchment paper, for up to 3 days. This helps maintain freshness and prevents them from sticking together.
Freezer: For long-term storage, fully assembled mini pizzas can be frozen for up to 2 months. Wrap each pizza tightly in plastic wrap, then place them in a freezer bag.
Reheating: Bake from frozen at 425°F (220°C) for about 15-20 minutes until bubbly and heated through. This way, your Mini Halloween Pizzas can be enjoyed anytime!
Variations & Substitutions for Mini Halloween Pizzas
Get ready to put your own spin on these delightful Mini Halloween Pizzas—each bite can be as unique as your imagination!
-
Gluten-Free Crust: Swap regular crusts for gluten-free mini crusts to make this dish accessible for everyone. Just ensure they’re fresh to avoid a crumbly texture.
-
Dairy-Free Cheese: Use plant-based cheese shreds as a substitute for mozzarella, allowing lactose-intolerant guests to join in on the fun!
-
Enhanced Flavor: Add a sprinkle of Italian seasoning or garlic powder to the pizza sauce for an aromatic twist, making every bite burst with flavor.
-
Vegetable Medley: Incorporate seasonal veggies like sautéed mushrooms, spinach, or even thinly sliced zucchini as toppings for added nutrition and color.
-
Spicy Kick: Introduce some sliced jalapeños or crushed red pepper for those who crave a bit of heat. It’s a fun surprise that adds excitement to each mini pizza.
-
Sweet Twist: Try drizzling a balsamic glaze over your pizza after baking for a sweet and tangy finish that beautifully complements the savory toppings.
-
Theme Variations: Create a “monster” theme by using ingredients like green pesto and sun-dried tomatoes, or even a “witch’s brew” using black beans and a sprinkling of crushed tortilla chips for crunch.
Like a fun Halloween gathering brought to life, these variations can keep the spirit alive while allowing for personalization! Looking for more spooky fun in the kitchen? Don’t miss my White Chocolate Halloween treats and the festive Eyeball Pasta Salad.
Mini Halloween Pizzas Recipe FAQs
How do I choose the best mini pizza crusts?
Absolutely! For mini pizza crusts, look for ones that are fresh and have a good texture, whether store-bought or homemade. If you’re opting for store-bought, I recommend brands that have a crisp finish—check for ones without dark spots and that feel firm to the touch.
How long can I store leftover mini pizzas?
Very! Leftovers can be stored in an airtight container in the fridge for up to 3 days. To keep them fresh and prevent sticking, separate each pizza with parchment paper. They’re perfect for a quick snack or light meal during the week!
Can I freeze Mini Halloween Pizzas?
Yes, indeed! To freeze, wrap each fully assembled mini pizza tightly in plastic wrap, ensuring they’re sealed well, then place them in a freezer bag. They’ll last for about 2 months in the freezer. When you’re ready to enjoy them, bake from frozen at 425°F (220°C) for approximately 15-20 minutes until hot and bubbly.
What should I do if my mini pizzas burn during baking?
If you notice your mini pizzas are getting too brown, try reducing the temperature by 25°F (about 15°C) and keep an eye on them while baking. Remember to rotate the pan halfway through to ensure even cooking. It’s a fun activity, so don’t forget to supervise the little chefs while doing this!
Can I make Mini Halloween Pizzas vegetarian or allergy-friendly?
Absolutely! These mini pizzas are wonderfully customizable. You can skip the pepperoni and opt for fresh veggies like mushrooms, or spinach for a vegetarian version. If there are dairy allergies, you can use vegan cheese alternatives. Just make sure to check all labels for potential allergens to accommodate everyone’s needs.
What toppings are safe for children to use?
I recommend using safe, kid-friendly toppings such as the bell peppers, olives, and cheese. Just be sure to supervise children while they handle any sharp utensils when helping out in the kitchen! Encourage creativity with fun designs—it’s part of the magic of making Mini Halloween Pizzas together!
Mini Halloween Pizzas: Easy, Spooky Fun for the Whole Family
Ingredients
Equipment
Method
- Preheat your oven to 425°F (220°C) and lightly mist a baking sheet with olive oil spray.
- Spread 1-2 tablespoons of pizza sauce on each mini pizza crust.
- Sprinkle shredded mozzarella cheese over half of the pizzas and use string cheese to create mummy wraps on the others.
- Decorate with black olives, bell pepper strips, and mini pepperoni as desired.
- Bake for 10-12 minutes until crusts are golden brown and cheese is bubbly.
- Let cool for 2 minutes and garnish with fresh basil before serving.
Leave a Reply