
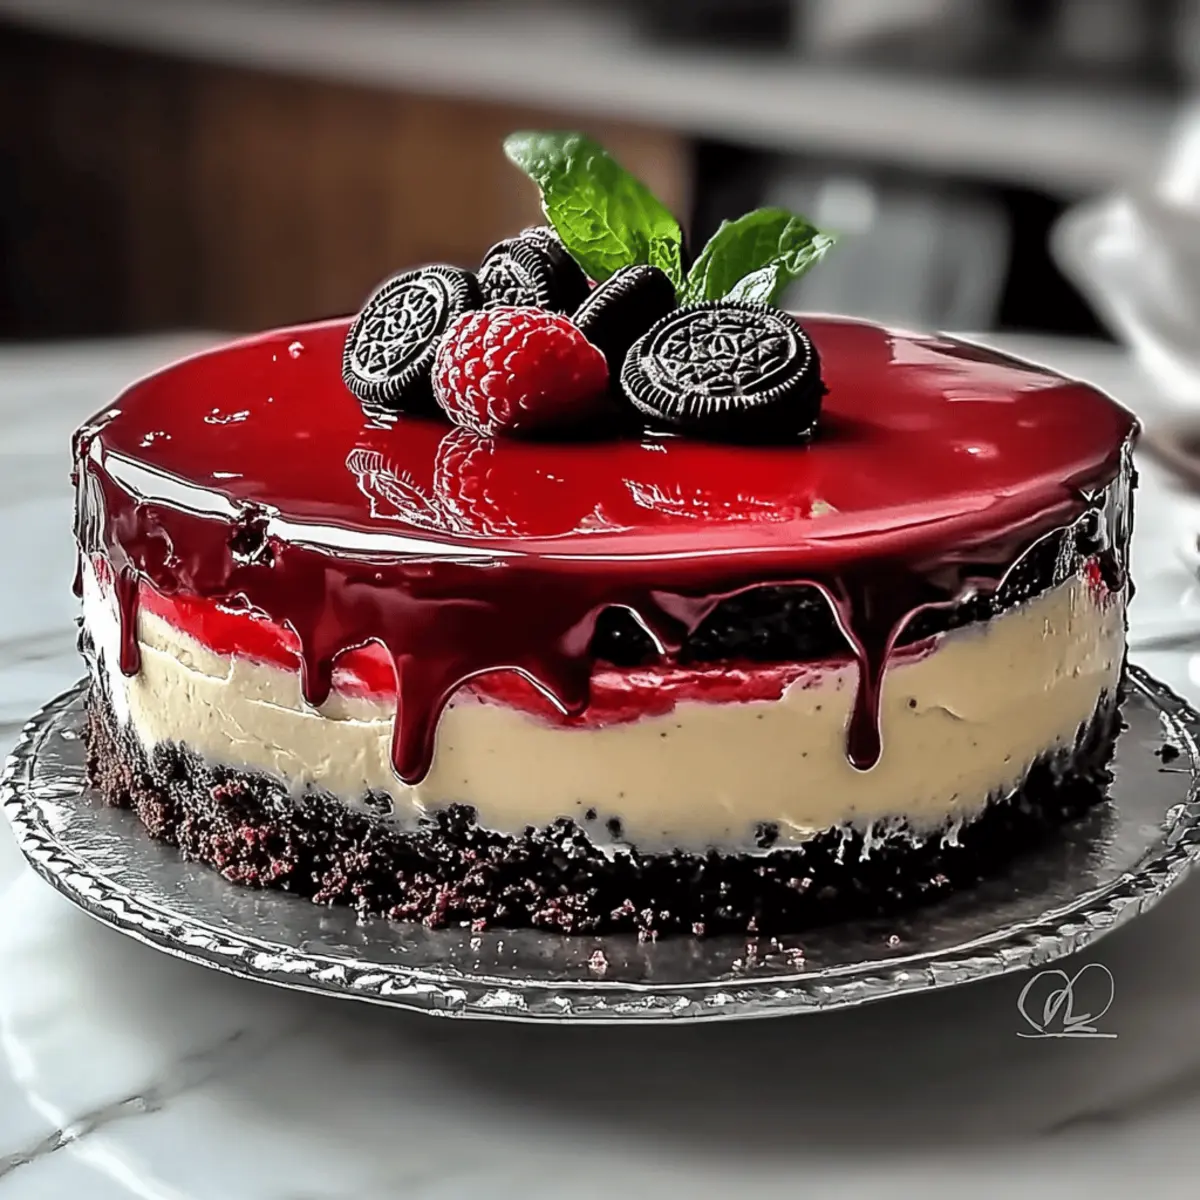
As I stood in the kitchen, the vibrant red batter swirling in my mixing bowl sparked a wave of nostalgia. This Irresistible Red Velvet Cheesecake with Oreo Delight is not just a dessert; it’s an experience that bridges the gap between classic indulgence and modern flair. The layers of moist red velvet cake meet a creamy, rich cheesecake packed with the delightful crunch of Oreos, making it a stunning centerpiece for any gathering. Beyond its breathtaking appearance, this recipe offers the pleasure of quick prep time and the comfort of a crowd-pleasing treat, perfect for both intimate celebrations and grand festivities. So, what are you waiting for? Let’s dive into the world of deliciousness and explore how you can create this show-stopping, gluten-free option that everyone will adore! What’s your favorite way to add a twist to classic flavors?
How can classic flavors be elevated?
Elevated with a delightful twist: This Red Velvet Cheesecake combines classic tastes with an exciting Oreo crunch that will have everyone asking for seconds! Versatile for all diets: With simple substitutions, you can make it gluten-free without sacrificing flavor. Quick prep time means you’ll have more time to celebrate while impressing your guests. Unforgettable presentation: The vibrant red layers and luscious ganache make this a show-stopper dessert that’s perfect for any occasion. Whether you enjoy it solo or pair it with fresh berries, each slice is a moment of indulgent bliss! Don’t forget to check out other delightful treats like my Oreo Cheesecake Cookie or Blueberry Crumble Cheesecake for more dessert inspiration!
Red Velvet Cheesecake Ingredients
• A delightful treat awaits you!
For the Cake:
- All-Purpose Flour – Provides structure; substitute with a gluten-free flour blend for a gluten-free version.
- Cocoa Powder – Adds chocolate flavor and depth to the cake.
- Salt – Enhances flavor and balances sweetness.
- Butter – Contributes richness and moisture; use unsalted for better control over salt levels.
- Granulated Sugar – Sweetens the cake and helps achieve the perfect texture.
- Sour Cream – Adds tanginess and moisture to the cake.
- Vegetable Oil – Keeps the cake moist and tender.
- Vanilla Extract – Enhances flavor, complementing all other ingredients.
- Eggs – Provide binding and structure; use room temperature for better mixing.
- Red Food Coloring – Gives the cake its iconic red hue.
- Buttermilk – Adds moisture and acidity for a tender crumb.
- Baking Soda & Vinegar – Work together as leavening agents for a light and fluffy cake.
For the Cheesecake Filling:
- Oreos – Crushed Oreos provide flavor and texture to the filling.
- Cream Cheese – The creamy base; full-fat is recommended for the best results.
- Cornstarch – Stabilizes the filling and prevents cracking.
- Granulated Sugar – Sweetens the filling perfectly.
- Sour Cream – Adds creaminess and a subtle tang.
- Vanilla Extract – Elevates the overall flavor profile.
- Eggs – Essential for binding the filling; again, use at room temperature for optimal mixing.
For the Ganache:
- Heavy Cream – Creates a rich ganache, adding luxurious texture.
- Dark Chocolate Chips – Forms the ganache topping, delivering a decadent chocolate flavor.
Step‑by‑Step Instructions for Irresistible Red Velvet Cheesecake with Oreo Delight
Step 1: Preheat and Prepare
Preheat your oven to 350°F (175°C). While it’s heating, take a 9-inch springform pan and an 8-inch round pan, and line them with parchment paper. Spray the insides with non-stick spray to ensure easy release later. This initial prep sets the stage for baking your gorgeous Red Velvet Cheesecake.
Step 2: Whisk Dry Ingredients
In a medium mixing bowl, whisk together 2 cups of all-purpose flour, ½ cup of cocoa powder, and 1 teaspoon of salt until well combined. This step not only blends the dry ingredients but also adds air to the mixture. Set your bowl aside as you move on to the next exciting phase of making your Red Velvet Cheesecake.
Step 3: Cream Butter and Sugar
In a large mixing bowl, use an electric mixer to cream together ½ cup of unsalted butter and 1 cup of granulated sugar until the mixture is light and fluffy, about 3-4 minutes. Then, add in 1 cup of sour cream, ⅓ cup of vegetable oil, 2 teaspoons of vanilla extract, 2 large eggs, and 1 tablespoon of red food coloring, mixing until everything is well incorporated and smooth.
Step 4: Combine Dry and Wet Ingredients
Gradually add the dry mixture to your wet ingredients while alternating with 1 cup of buttermilk. Begin with the dry mix and finish with the buttermilk, mixing gently until everything is just combined. Finally, fold in 1 teaspoon of baking soda mixed with 1 teaspoon of vinegar, which will create a bubbly reaction ensuring a light and airy cake.
Step 5: Bake the Cake Layers
Divide your vibrant red velvet batter evenly between the prepared pans. Bake for 18-20 minutes, or until the cakes spring back when lightly pressed in the center. Keep an eye on them, as you want their beautiful crimson tops to stay intact. Once baked, remove from the oven and let them cool completely on wire racks.
Step 6: Prepare the Oreo Cheesecake Filling
While the cakes are cooling, crush 15 Oreos into fine crumbs and place them in a mixing bowl. In another bowl, beat 16 ounces of cream cheese until smooth. Add the Oreo crumbs, ½ cup of granulated sugar, 2 tablespoons of cornstarch, ½ cup of sour cream, 1 teaspoon of vanilla extract, and 2 large eggs; blend until the mixture is rich and creamy.
Step 7: Assemble the Cheesecake
Fold in any remaining Oreo crumbs into the cheesecake filling for an extra crunch. Once your red velvet cake layers are completely cool, pour the creamy cheesecake mixture over the bottom layer in the springform pan, smoothing it out evenly. Layer the second red velvet cake on top, sealing in the Oreo goodness beneath.
Step 8: Bake the Cheesecake
Place the springform pan in a water bath to maintain moisture, and bake the cheesecake at 300°F (150°C) for 90 minutes. When done, the filling should be set but slightly jiggly in the center. Turn off the oven and let the cheesecake cool gradually inside to prevent cracks, then refrigerate overnight to firm up.
Step 9: Make the Ganache
On the day you plan to serve your Irresistible Red Velvet Cheesecake, prepare the ganache by microwaving 1 cup of heavy cream until hot but not boiling. Pour it over 1 cup of dark chocolate chips in a bowl, letting it sit for a minute before stirring until smooth and glossy. This decadent topping will elevate your dessert to new heights.
Step 10: Decorate and Serve
Once the ganache has cooled slightly, pour it over your cheesecake, letting it drip down the sides for a stylish finish. For added flair, crumble the remaining red velvet cake and sprinkle it on top, along with a swirl of cream cheese frosting if desired. Your stunning Red Velvet Cheesecake with Oreo Delight is now ready to wow your guests!
How to Store and Freeze Red Velvet Cheesecake
Fridge: Keep your Red Velvet Cheesecake covered in the refrigerator for up to 5 days. This will help maintain its creamy texture and delicious flavor while keeping it fresh for your indulgent cravings.
Freezer: Tightly wrap your cheesecake in plastic wrap and then aluminum foil to preserve its quality in the freezer for up to 3 months. Thaw it overnight in the refrigerator before serving for the best texture.
Reheating: If you prefer to enjoy your cheesecake warm, gently reheat slices in the microwave for 10-15 seconds. This brings out the flavors while keeping the cheesecake deliciously moist.
Airtight Storage: For optimal freshness, always store your cheesecake in an airtight container. This helps to prevent any absorption of odors from other foods in the fridge.
What to Serve with Irresistible Red Velvet Cheesecake with Oreo Delight?
Indulge in a full meal experience that complements the luxurious layers of this stunning dessert, bringing joy to every gathering.
-
Fresh Berries: The tartness of strawberries, raspberries, or blueberries contrasts beautifully with the sweetness of the cheesecake, adding a refreshing burst of flavor.
-
Vanilla Ice Cream: A scoop of creamy vanilla ice cream enhances the rich flavors while creating a luscious mouthfeel that pairs perfectly with the velvety cheesecake.
-
Chocolate Sauce Drizzle: A warm drizzle of chocolate sauce elevates the dessert, intensifying the chocolate and creamy notes of the ganache while adding a delightful finishing touch.
-
Espresso or Coffee: A cup of freshly brewed coffee complements the sweetness, providing a perfect balance while the bold flavors enliven every bite of the rich cheesecake.
-
Whipped Cream Topping: Light and fluffy whipped cream adds an airy texture that contrasts with the dense cheesecake, making each forkful a delightful experience.
-
Course-Foamed Milk: If you’re feeling adventurous, pair with lightly frothed milk infused with a hint of vanilla or caramel. It adds a warm touch and matches the dessert’s indulgence.
-
Mint Garnish: Sprinkling fresh mint leaves around the plate adds a pop of color and a cool herbal note that refreshes the palate after each decadent bite.
-
Chocolate-Covered Strawberries: Combining the flavors of chocolate and berry creates a delightful pre-dessert treat that sets the stage for the rich and creamy finale.
-
Lemon Tart: A petite lemon tart offers a zesty counterpart to the sweetness, cleansing your palate beautifully and providing a delightful contrast to the Cheesecake.
Make Ahead Options
These Irresistible Red Velvet Cheesecake with Oreo Delight layers are perfect for busy weeknights or special occasions! You can bake the red velvet cake layers up to 24 hours in advance, storing them in an airtight container at room temperature to maintain their moisture. Additionally, the Oreo cheesecake filling can be prepared and refrigerated for up to 3 days before layering it with the cake. Just make sure to let it sit at room temperature for about 30 minutes before assembling for easier spreading. When you’re ready to serve, simply bake the cheesecake as directed, cool, and finish with the ganache for a beautiful, stress-free dessert that’s just as delicious and ready to impress!
Red Velvet Cheesecake Variations
Get ready to unleash your creativity in the kitchen! There are so many delicious avenues to explore with this recipe, ensuring every slice is truly memorable.
-
Gluten-Free: Substitute all-purpose flour with a gluten-free flour blend for a delightful, gluten-free dessert without losing flavor.
-
Dairy-Free: Swap cream cheese with a dairy-free cream cheese alternative, ensuring everyone can enjoy this indulgent treat without the dairy.
-
Flavor Twist: Experiment with crushed chocolate wafers instead of Oreos for a different flavor profile, bringing a new yet familiar deliciousness to the cheesecake filling.
-
Nutty Addition: Fold in chopped walnuts or pecans for a delightful crunch that contrasts with the creamy filling, adding a touch of heartiness.
-
Fruit Infusion: Add a layer of fresh raspberries or strawberries before pouring the cheesecake batter for a zesty, fruity surprise that balances beautifully with the flavors.
-
Caramel Drizzle: Top with a homemade caramel sauce before slicing. This gets a little bit into every bite, elevating the overall taste experience.
-
Increased Heat: Incorporate a dash of cayenne or chili powder into the ganache for a surprising kick that contrasts beautifully with the sweet elements in the cheesecake.
Dive into these variations to personalize this delectable dessert, and if you’re still craving more heavenly ideas, don’t forget to check out my Choco Cheesecake Cookie or the rich flavors of my Spicy Thai Red Curry for your next cooking adventure!
Expert Tips for Red Velvet Cheesecake
-
Room Temperature Ingredients: Ensure all your ingredients, especially cream cheese and eggs, are at room temperature. This helps achieve a smooth and even batter for your Red Velvet Cheesecake.
-
Don’t Overmix: Mix just until combined, especially after adding eggs. Overmixing can make your cheesecake dense and lead to cracks during baking.
-
Water Bath: Always bake your cheesecake in a water bath. This method keeps the temperature stable, preventing cracks and ensuring a creamy filling.
-
Gradual Cooling: Allow the cheesecake to cool slowly in the oven after baking. This helps minimize the risk of cracks and improves the overall texture.
-
Use Quality Chocolate: For the ganache, opt for high-quality dark chocolate chips. It makes a significant difference in flavor and creates a luxurious finish for your dessert.
Irresistible Red Velvet Cheesecake with Oreo Delight Recipe FAQs
How do I select the right ripeness of ingredients?
Absolutely! For the best results, use whole, fresh eggs and room-temperature cream cheese—this makes mixing a breeze. Your red food coloring should be vibrant; if it’s too old, the color might not be as rich. When selecting your Oreos, pick ones with no broken or stale cookies to maintain that delightful crunch in your cheesecake.
How should I store my Red Velvet Cheesecake?
To keep your Red Velvet Cheesecake fresh, cover it with plastic wrap and refrigerate for up to 5 days. Ensure it’s well-sealed to prevent it from absorbing any odd flavors in the fridge. If you want to save it for later, wrap it tightly and store it in the freezer for up to 3 months.
What is the best way to freeze my cheesecake?
Certainly! To freeze your Red Velvet Cheesecake, follow these steps:
- Allow the cheesecake to cool completely in the refrigerator.
- Wrap it tightly in plastic wrap, ensuring no exposed areas.
- Then, wrap it in aluminum foil for extra protection against freezer burn.
- Label it with the date and freeze for up to 3 months. To serve, simply transfer it to the refrigerator to thaw overnight.
What should I do if my cheesecake shows cracks after baking?
Very common! If your cheesecake cracks, it may be due to overmixing or rapid temperature changes. To minimize this, bake it in a water bath to maintain even heat. If cracks still happen, don’t worry—just garnish with your ganache or crumble some extra red velvet on top to disguise any imperfections!
Are there any dietary considerations I should keep in mind?
Absolutely! For gluten-free options, just swap the all-purpose flour with a quality gluten-free flour blend in the cake batter. If you’re catering to dairy-free eaters, you can use dairy-free cream cheese for the filling. Always check the Oreo brand as well, since some may contain gluten or dairy. Enjoying delicious desserts that meet dietary needs is all about those smart substitutions!
How long can I leave my cheesecake at room temperature?
I recommend enjoying your Red Velvet Cheesecake after about 2 hours at room temperature. After that, it’s best to return it to the refrigerator to maintain its creamy texture and flavor. Temperatures above this can cause the cheesecake to lose its quality, so keep an eye on it!
Decadent Red Velvet Cheesecake with Oreo Crunch Delight
Ingredients
Equipment
Method
- Preheat your oven to 350°F (175°C). Line a 9-inch springform pan and an 8-inch round pan with parchment paper and spray insides with non-stick spray.
- In a medium mixing bowl, whisk together the flour, cocoa powder, and salt until combined. Set aside.
- In a large mixing bowl, cream butter and sugar until light and fluffy. Add in sour cream, vegetable oil, vanilla extract, eggs, and red food coloring, mixing until smooth.
- Gradually incorporate the dry mixture with the buttermilk, mixing until just combined. Fold in baking soda and vinegar.
- Divide the batter between the pans and bake for 18-20 minutes or until the cakes spring back when pressed. Cool on wire racks.
- Crush Oreos and beat cream cheese until smooth. Mix in crushed Oreos, sugar, cornstarch, sour cream, vanilla extract, and eggs until creamy.
- Fold in remaining Oreo crumbs into the filling. Pour cheesecake mixture over the cool red velvet base and layer with the second cake.
- Place in a water bath and bake at 300°F (150°C) for 90 minutes. Let cool gradually in the oven, then refrigerate overnight.
- Prepare the ganache by heating heavy cream, then pour over dark chocolate chips. Stir until smooth.
- Pour ganache over cheesecake, allowing it to drip down the sides. Top with crumbled red velvet and cream cheese frosting if desired.
Leave a Reply