
The aroma of freshly baked cookies fills the air, transporting me back to my childhood kitchen, where my family would gather, laughter mixing with the sweet scent of Peanut Butter Cookies. These Soft Peanut Butter Cookies encapsulate everything I adore about baking—easy preparation and a texture that’s irresistibly chewy. In just a few simple steps, you can whip up a batch that’s perfect for any occasion, whether it’s a cozy family gathering or simply satisfying a sweet craving. Plus, with a gluten-free adaptation available, everyone can indulge in these delicious treats. So, are you ready to recreate those cherished moments and fill your home with the warmth of homemade cookies? Let’s dive in and get baking!
Why are these cookies so irresistible?
Softness that Melts: These Soft Peanut Butter Cookies boast an incredibly chewy texture that will have you reaching for seconds.
Quick & Easy: With a straightforward recipe, even novice bakers can whip them up in no time – perfect for those busy weeknights!
Family-Friendly Treat: Designed to please everyone, these cookies are a guaranteed hit for family gatherings, making them the ultimate comfort dessert.
Gluten-Free Option: Don’t worry if you or your loved ones are gluten-sensitive – easily transform this recipe with a gluten-free flour blend.
Endless Customization: Feel free to mix in chocolate chips or crunchy peanut butter for a delightful twist, just like in my Biscoff Cookie Butter recipe!
Nostalgic Aroma: The sweet, nutty scent wafting through your kitchen will evoke fond memories, filling your home with warmth and joy.
Soft Peanut Butter Cookies Ingredients
For the Cookie Dough
• All-Purpose Flour – Provides structure and texture; for gluten-free version, substitute with a gluten-free 1:1 flour blend.
• Baking Soda – Acts as a leavening agent, helping your cookies rise perfectly.
• Baking Powder – Enhances the puffiness of the cookies for that soft, chewy bite.
• Salt – Balances sweetness and elevates the overall flavor profile.
• Unsalted Butter – Adds richness; ensure it’s softened but still cool to prevent the dough from spreading.
• Granulated Sugar – Contributes sweetness and assists in achieving that desirable texture.
• Brown Sugar – Adds moisture and a deeper flavor, enhancing your cookie experience.
• Creamy Peanut Butter – Essential for flavor and texture; avoid natural styles that can separate.
• Eggs – Binds all ingredients together for a cohesive dough.
• Vanilla Extract – Introduces depth of flavor, making every bite more delightful.
Feel free to gather these ingredients and dive into the nostalgia of baking with my Soft Peanut Butter Cookies!
Step‑by‑Step Instructions for Soft Peanut Butter Cookies
Step 1: Preheat the Oven
Begin by preheating your oven to 350°F (175°C). This step is crucial as it ensures that the Soft Peanut Butter Cookies bake evenly, providing that golden, chewy texture we all love. While the oven warms up, gather your mixing bowls and prepare your baking sheet by lining it with parchment paper.
Step 2: Cream the Butter and Sugars
In a large mixing bowl, combine softened unsalted butter with granulated sugar and brown sugar. Using an electric mixer, beat the mixture on medium speed for about 2-3 minutes until it’s light and fluffy. This process not only incorporates air but also helps create those delightful soft edges in your cookies.
Step 3: Mix in the Wet Ingredients
Next, add creamy peanut butter, eggs, and vanilla extract to your butter and sugar mixture. Beat everything together until smooth and well combined. You’ll know you’re ready to move on when the mixture is creamy and the colors are evenly blended, filling the kitchen with a comforting peanut butter aroma.
Step 4: Combine the Dry Ingredients
In a separate bowl, whisk together the all-purpose flour, baking soda, baking powder, and salt until evenly mixed. This vital step helps ensure that every bite of your Soft Peanut Butter Cookies has consistent flavor and texture. The whisking also aerates the flour, which is essential for a light and chewy cookie.
Step 5: Blend Wet and Dry Mixtures
Gradually add the dry mixture to the wet ingredients, mixing on low speed. Stop once everything is just combined; overmixing can result in tough cookies. You’re looking for a dough that holds together without any dry flour lingering—this is the perfect time to savor the combination of scents wafting through your kitchen.
Step 6: Portion the Dough
Using your hands or a cookie scoop, roll the dough into 1-inch balls and place them on your lined baking sheet. Make sure to leave enough space between each ball (about 2 inches) to allow for spreading while they bake. Visualize a cookie paradise filling your tray, ready to go into the oven.
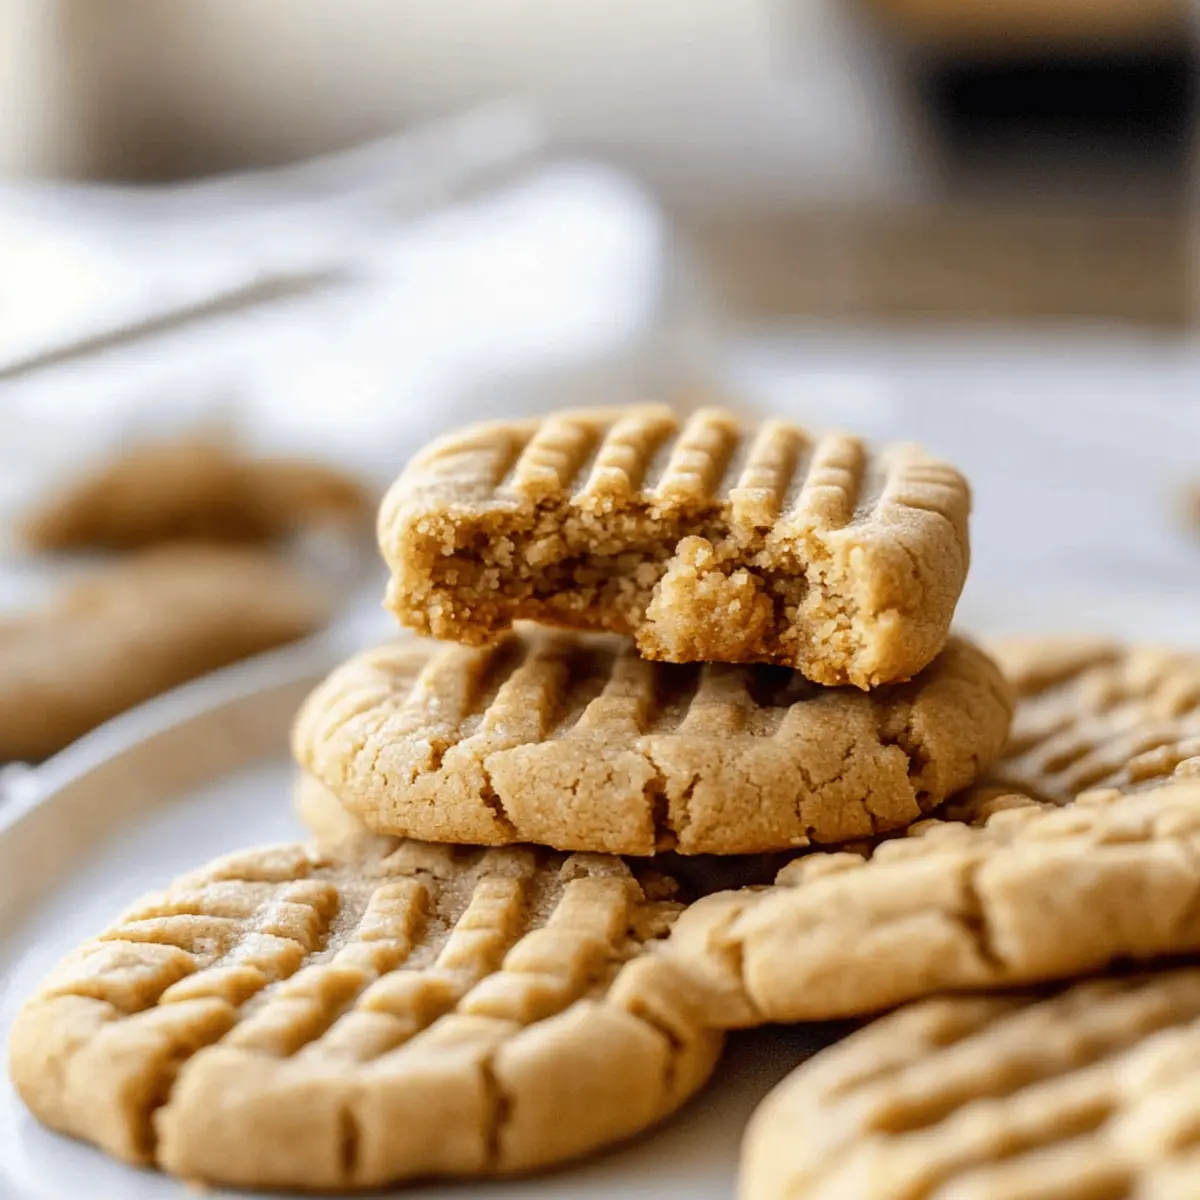
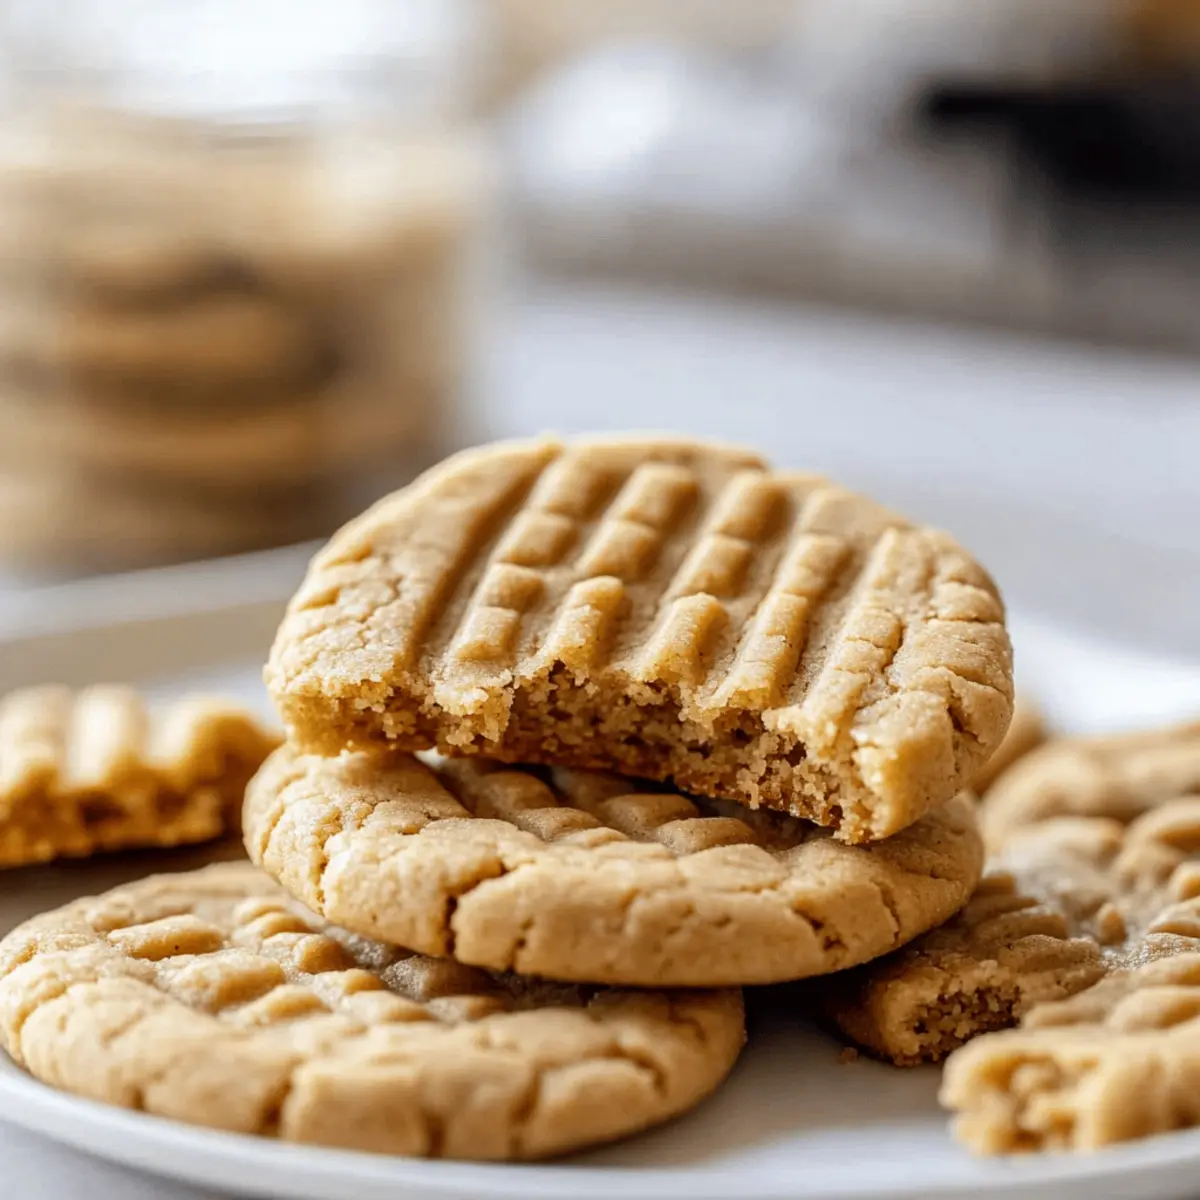
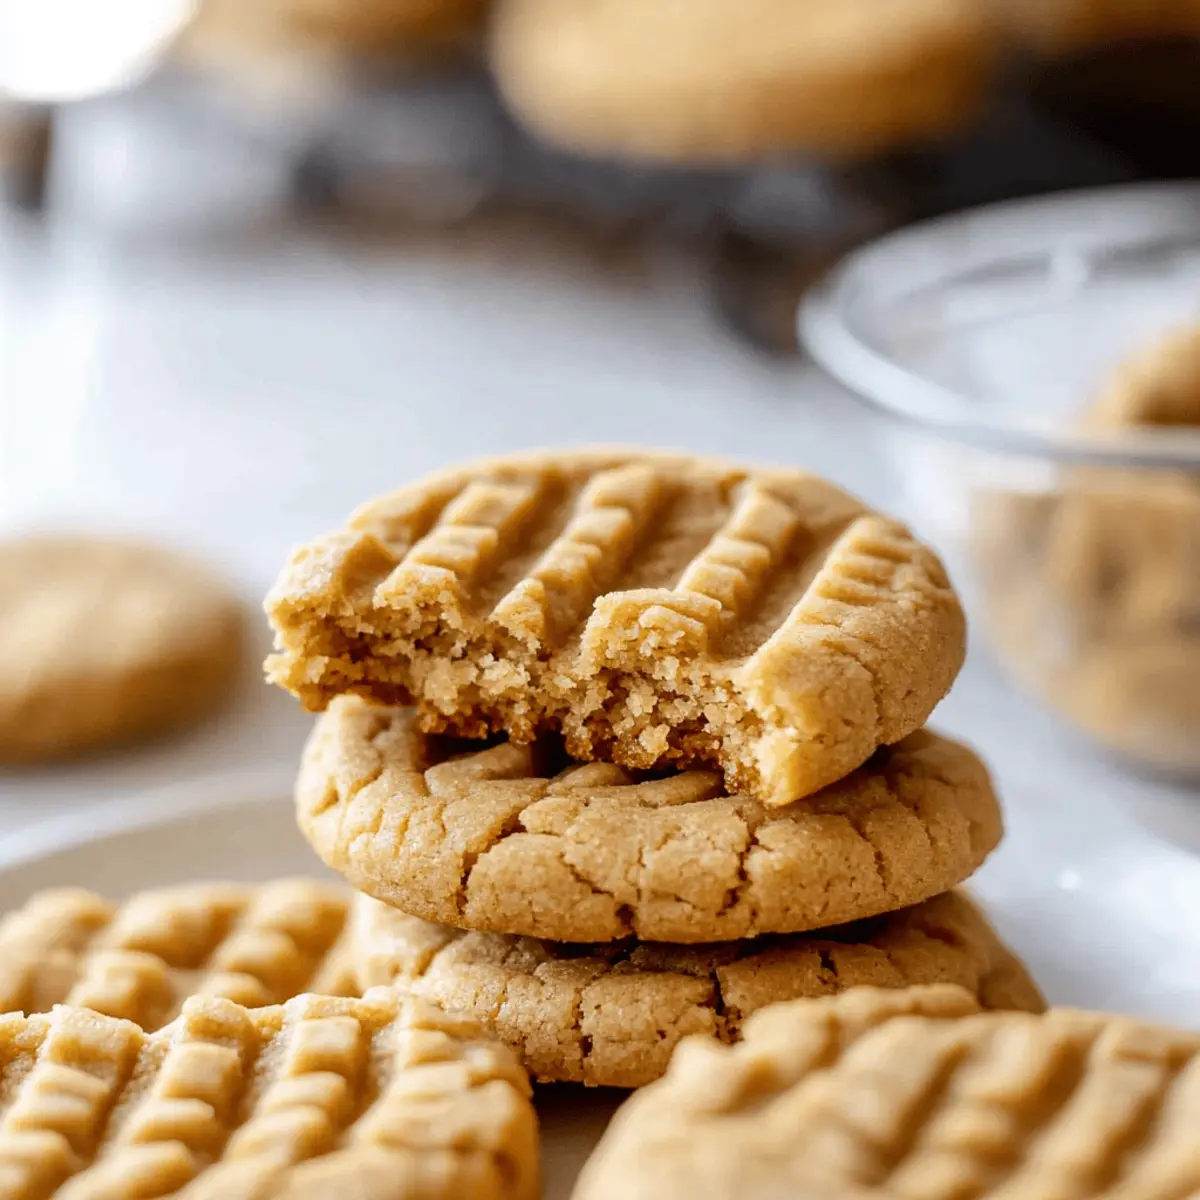
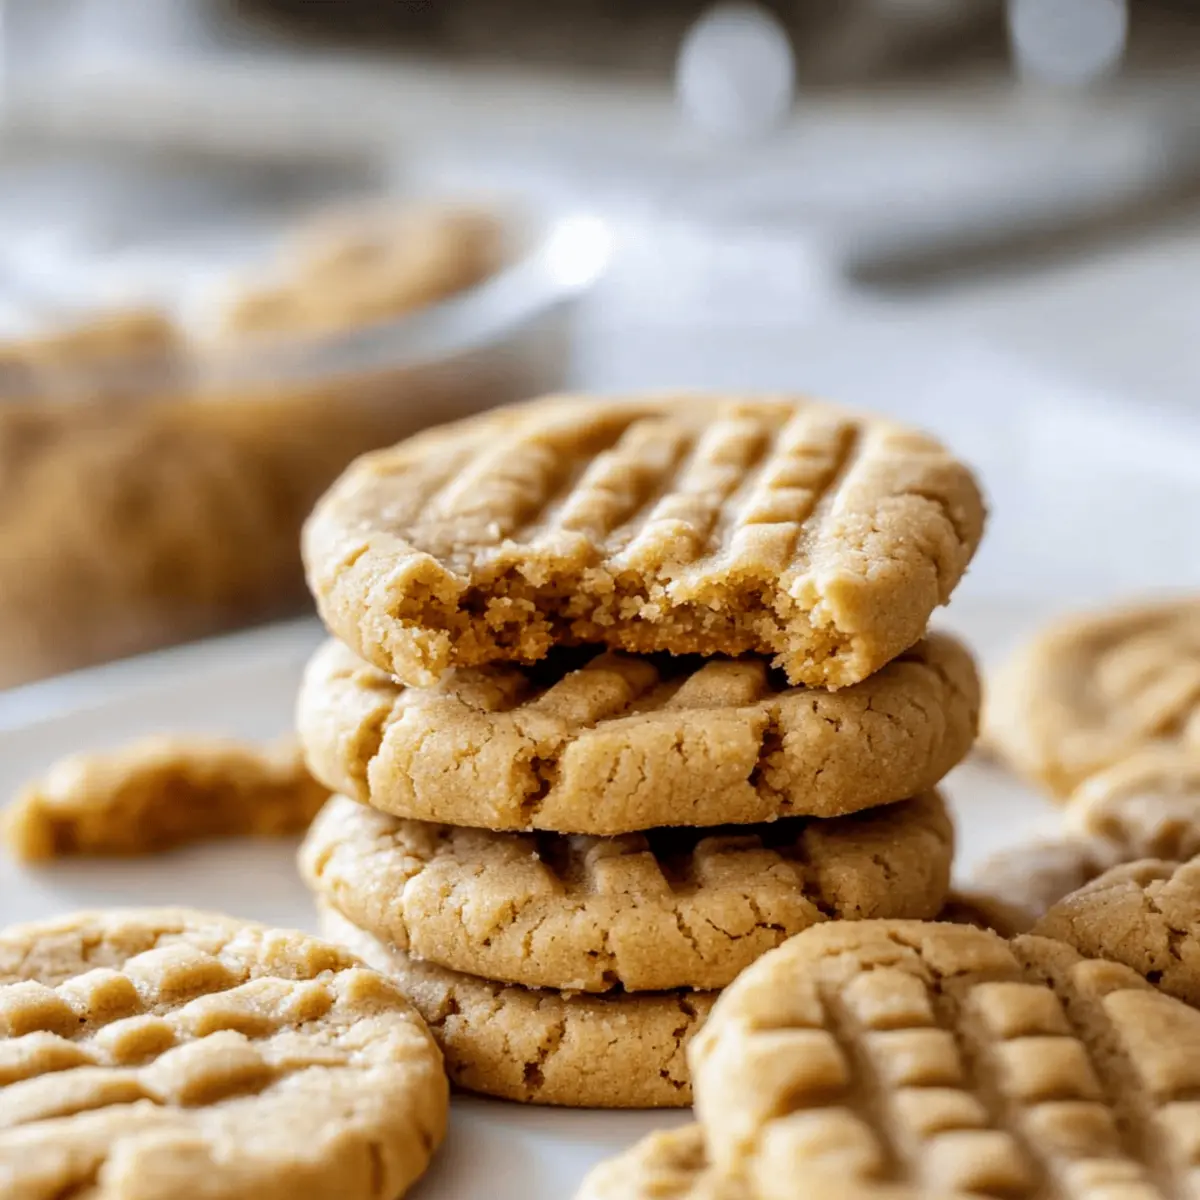
Step 7: Create the Criss-Cross Pattern
Take a fork and gently press down on each dough ball, creating a criss-cross pattern on top. This not only flattens the cookies for more even baking but also adds a lovely decorative touch. The dough should stick slightly, but if it clings to your fork, lightly flour the tines for easier handling.
Step 8: Bake the Cookies
Place the baking sheet in the preheated oven and bake the cookies for 10-12 minutes. Keep an eye on them, as you want the edges to be golden brown while the centers remain soft and slightly underbaked. The sweet aroma will fill your home, signaling that deliciousness is just moments away!
Step 9: Cool the Cookies
Once baked, remove the baking sheet from the oven and let the cookies cool on the sheet for about 5 minutes. This allows them to set up perfectly. After they’ve firmed slightly, transfer them to a cooling rack to enjoy their full soft and chewy goodness as they cool down completely.
Soft Peanut Butter Cookies Variations
Customize your Soft Peanut Butter Cookies to tantalize your taste buds and suit everyone’s preferences!
-
Gluten-Free: Use a gluten-free 1:1 flour blend instead of all-purpose flour for a cookie that everyone can enjoy.
For those embracing gluten-free lifestyles, this swap will still keep the soft texture intact, ensuring each bite is delightful. -
Chocolate Chip Boost: Fold in semi-sweet or dark chocolate chips for a rich flavor contrast.
Chocolate and peanut butter are a classic duo, adding a sweet touch that makes these cookies even more indulgent! -
Crunchy Peanut Butter: Substitute creamy peanut butter with crunchy variety for a delightful texture change.
The added crunch from peanuts brings an unexpected surprise in every bite, making them extra satisfying! -
Butterscotch Surprise: Incorporate butterscotch chips for a sweet, buttery twist.
These rich morsels melt into the cookies, creating pockets of gooey goodness that pair perfectly with peanut butter. -
Oatmeal Twist: Add rolled oats to the dough for a heartier cookie experience.
This variation not only adds texture but gives a wholesome feel, turning your cookies into a delicious treat with a bit of extra fiber! -
Cinnamon Infusion: Sprinkle in ground cinnamon to enhance flavors with a warm spiciness.
Cinnamon and peanut butter create a fantastic harmony that transports you to cozy baking days in your mom’s kitchen. -
Spicy Kick: Mix in a pinch of cayenne pepper for a surprising yet delectable heat.
This twist adds a unique flavor profile, offering a delightful dance of sweet and spicy that will intrigue adventurous palates! -
Nutty Medley: Incorporate chopped nuts such as walnuts or pecans for extra crunch and flavor depth.
The combination of peanut butter and mixed nuts creates a wonderful nutty experience that’s both rich and satisfying.
Feel free to explore these variations like I do with my Lemon Butter Chicken or Spicy Garlic Butter Clams. Each twist brings its own charm to the table, enhancing your baking adventure!
Make Ahead Options
These Soft Peanut Butter Cookies are a fantastic choice for meal prep, allowing busy home cooks to savor homemade goodness without the last-minute rush! You can prepare the cookie dough and refrigerate it for up to 24 hours. Simply roll the dough into balls and place them in an airtight container. Make sure to separate the dough layers with parchment paper to prevent sticking. When you’re ready to bake, just preheat your oven, flatten the cookie balls, and pop them in, baking for 10-12 minutes until they’re golden at the edges. This way, you’ll have freshly baked Soft Peanut Butter Cookies that are just as delightful, saving you precious time in the kitchen!
What to Serve with Soft Peanut Butter Cookies?
Indulging in warm, chewy cookies just begs for the perfect accompaniments to elevate your delightful experience.
-
Cold Milk: A classic pairing that balances the sweetness of cookies, enhancing the nostalgic feel of childhood snacks.
-
Vanilla Ice Cream: The creamy richness of vanilla ice cream melting over these cookies creates a heavenly dessert experience. This irresistible duo will please everyone at your table.
-
Fruit Salad: Fresh fruits like berries or sliced apples add a burst of freshness, cutting through the cookie’s richness and providing a lovely contrast in textures.
-
Coffee or Tea: A warm cup of coffee or herbal tea provides a comforting warmth, enhancing the nutty flavors of the cookies while creating a cozy atmosphere.
-
Chocolate Drizzle: Add a drizzle of melted chocolate for extra decadence. This rich layer can elevate the cookies into a gourmet treat that speaks to your sweet tooth.
-
Peanut Butter Spread: Take it to another level by slathering on more peanut butter for those who can’t get enough of the rich, nutty flavor.
-
Cookie Platter: Pair these with other cookies like oatmeal raisin or chocolate chip for a delightful dessert spread. Offer your guests a sweetly curated experience!
-
Nutty Trail Mix: A blend of nuts and dried fruit adds a crunchy, wholesome touch, which makes every bite feel even more satisfying and elevates the homemade feel.
Expert Tips for Soft Peanut Butter Cookies
Avoiding Spreading: Ensure butter is softened but still cool before creaming. Too warm can lead to spreading cookies.
Don’t Overbake: Start checking the cookies at 10 minutes; they should have soft edges but be slightly underbaked in the center for that perfect soft texture.
Measure Flour Correctly: Use the spoon-and-level method to prevent dry cookies. Too much flour can lead to a tough texture in your Soft Peanut Butter Cookies.
Variety is Key: Feel free to experiment with mix-ins like chocolate chips or butterscotch to add fun flavors while keeping the core recipe intact.
Let Them Cool: Allow cookies to cool on the baking sheet for about 5 minutes before transferring them to a rack to retain their softness.
Storage Tips for Soft Peanut Butter Cookies
Room Temperature: Store cookies in an airtight container at room temperature for up to 1 week to maintain their soft texture and flavor.
Refrigerator: For a longer shelf life, refrigerate cookies for up to 2 weeks; just let them come to room temperature before enjoying.
Freezer: Freeze baked cookies in an airtight container for up to 3 months. You can also freeze dough for up to 2 months; bake from frozen when ready.
Reheating: To rejuvenate cold cookies, warm them in the microwave for 10-15 seconds for that fresh-out-of-the-oven experience. Enjoy your Soft Peanut Butter Cookies!
Soft Peanut Butter Cookies Recipe FAQs
What type of peanut butter should I use?
I recommend using creamy peanut butter that doesn’t separate, as it will provide the best texture and flavor for your Soft Peanut Butter Cookies. Avoid natural peanut butter types that are more runny and may cause your cookies to turn out too flat.
How should I store my Soft Peanut Butter Cookies?
To keep your cookies fresh, store them in an airtight container at room temperature for up to 1 week. If you prefer, you can refrigerate them for up to 2 weeks, but make sure to let them return to room temperature for optimal softness before enjoying.
Can I freeze Soft Peanut Butter Cookies? How?
Absolutely! Freeze your baked Soft Peanut Butter Cookies in an airtight container for up to 3 months. If you want to freeze the dough, shape it into 1-inch balls and freeze them on a baking sheet until firm, then transfer to a container. When ready to bake, simply pop them in the oven directly from the freezer, adding a couple of extra minutes to the baking time.
What do I do if my cookie dough is too dry?
If you find your cookie dough is too dry, it’s likely that you’ve added too much flour. To fix this, gradually mix in small amounts of water or an extra tablespoon of creamy peanut butter until the dough reaches the right consistency—soft but not sticky. Remember to measure your flour correctly, using the spoon-and-level method for best results!
Are there any allergy considerations for this recipe?
Yes! This recipe contains gluten from all-purpose flour, peanuts, and eggs. For a gluten-free option, simply substitute all-purpose flour with a gluten-free 1:1 flour blend, and be sure to check your peanut butter for any additional allergens if you’re baking for someone with allergies.
How long will these cookies last?
When stored properly, your Soft Peanut Butter Cookies will stay delicious for up to 1 week at room temperature or 2 weeks in the refrigerator. For longer storage options, you can freeze them, which will keep them tasty for several months. Enjoy the comfort of these homemade treats!
Soft Peanut Butter Cookies: The Ultimate Comfort Treat
Ingredients
Equipment
Method
- Preheat your oven to 350°F (175°C) and prepare a baking sheet with parchment paper.
- In a large mixing bowl, cream together softened unsalted butter with granulated sugar and brown sugar until light and fluffy.
- Mix in creamy peanut butter, eggs, and vanilla extract until smooth and well combined.
- In a separate bowl, whisk together all-purpose flour, baking soda, baking powder, and salt.
- Gradually blend the dry mixture into the wet ingredients until just combined.
- Roll the dough into 1-inch balls and place them on the prepared baking sheet with enough space between each.
- Using a fork, create a criss-cross pattern on each dough ball.
- Bake in the preheated oven for 10-12 minutes until edges are golden brown but centers are slightly underbaked.
- Let cookies cool on the baking sheet for about 5 minutes before transferring to a cooling rack.
Leave a Reply