
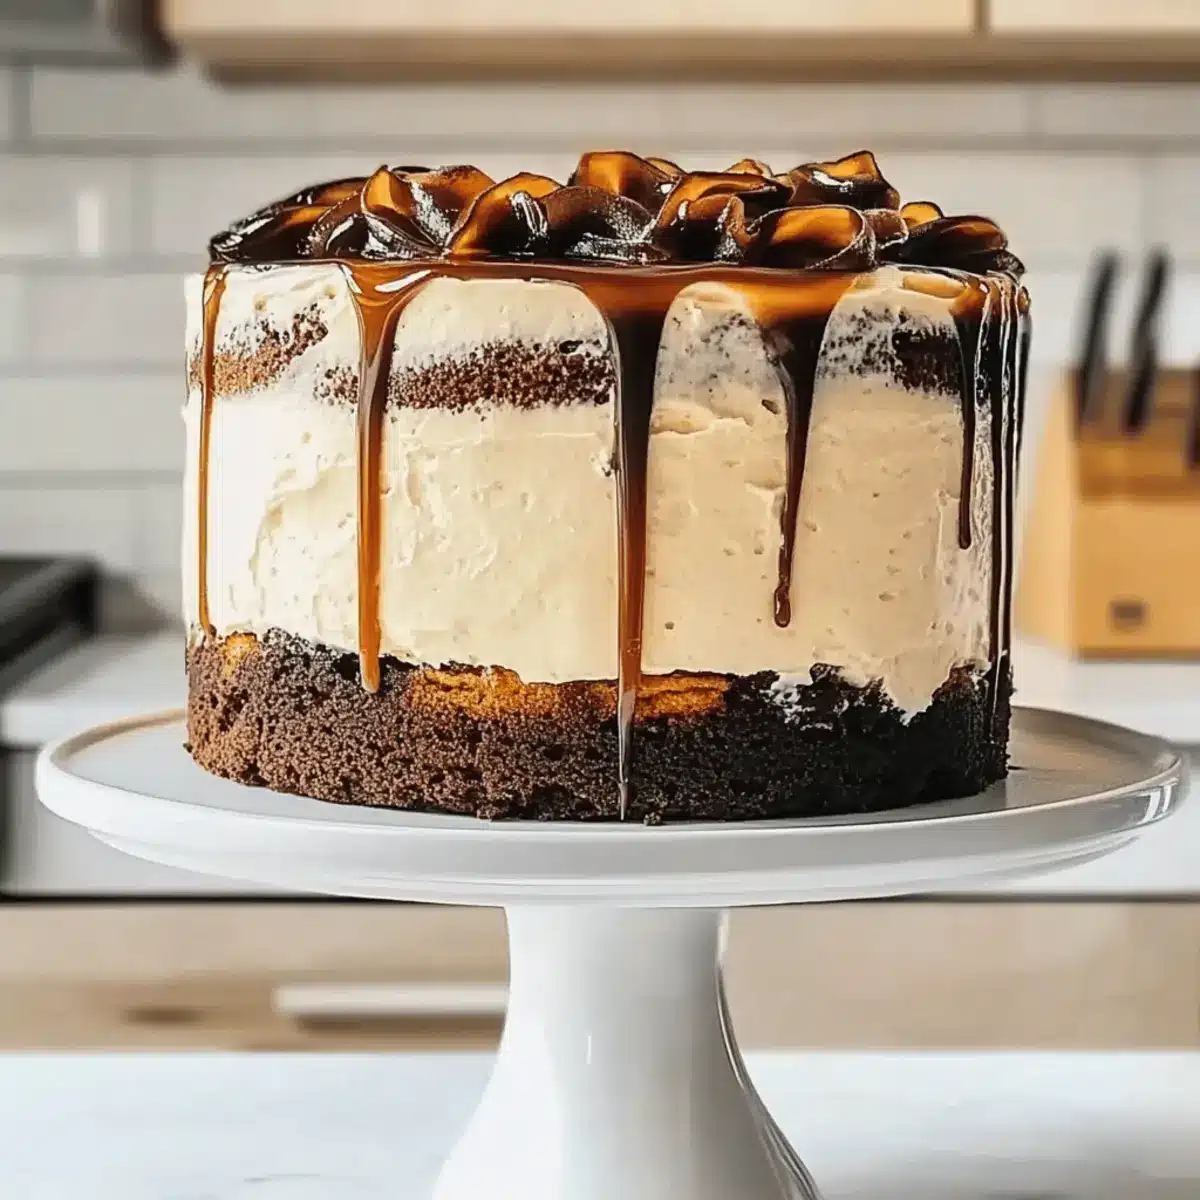
As I stood in my kitchen, the rich aroma of freshly brewed coffee mingled with the anticipation of dessert, I couldn’t help but smile. This Vietnamese Iced Coffee Cake is not just any cake—it’s a delightful fusion of two of my favorite things: coffee and dessert. With its moist layers and creamy frosting adorned with luscious mocha fudge swirls, this cake is a crowd-pleaser that will elevate your dessert game. Plus, it’s incredibly easy to make, making it perfect for both celebrations and cozy afternoons at home. Let’s uncover the secrets to bringing the café experience right to your kitchen. Ready to indulge in this charming slice of sweetness?
Why is this cake a must-try?
Coffee Lovers Unite: This Vietnamese Iced Coffee Cake brings together rich coffee flavor and a delicious dessert experience, making it irresistible for any caffeine enthusiast.
Versatile Ingredients: You can easily adapt this recipe, making it gluten-free or dairy-free without sacrificing taste.
Quick & Simple: With straightforward steps, even novice bakers will feel confident whipping this up in no time.
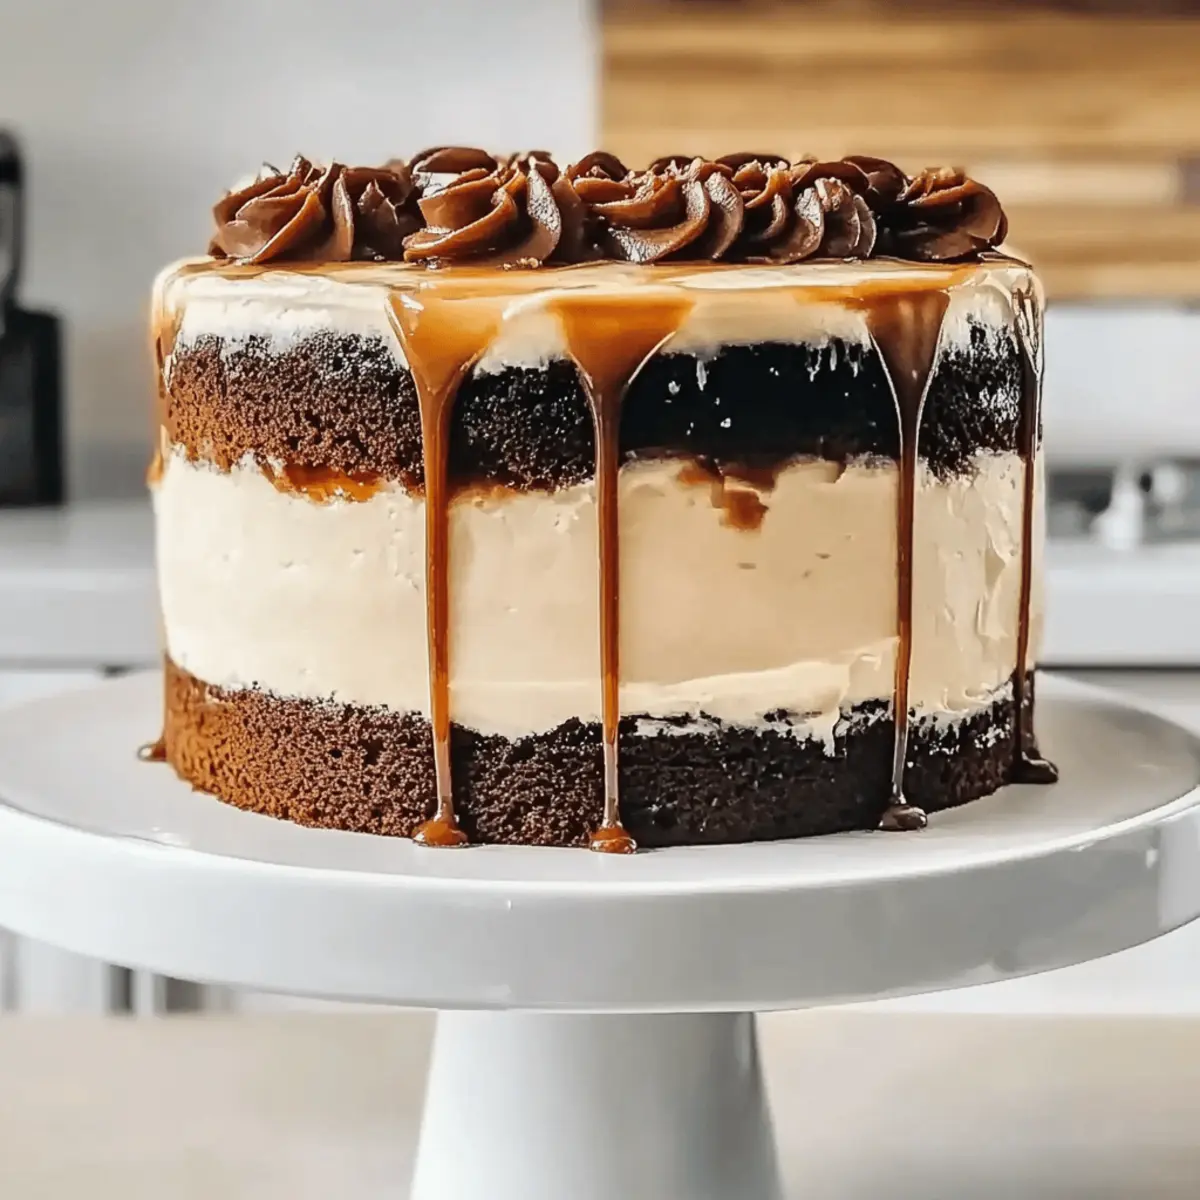
Visually Stunning: The beautiful mocha fudge swirls not only add flavor but also elevate its elegance, perfect for impressing guests at any gathering.
Perfect Pairings: Serve it alongside a refreshing glass of Vietnamese iced coffee or a dollop of whipped cream for an experience that’s wonderfully decadent!
Vietnamese Iced Coffee Cake Ingredients
To create this delightful Vietnamese Iced Coffee Cake, here’s what you’ll need:
For the Cake Batter
- All-Purpose Flour – This provides the structure of the cake; for a gluten-free option, use a gluten-free flour blend.
- Ground Coffee or Instant Coffee Granules – Infuses the cake with rich coffee flavor; instant espresso offers a bolder taste.
- Baking Powder & Baking Soda – Essential for helping the cake rise; make sure both are fresh for the best results.
- Kosher Salt – Balances the sweetness; you can use table salt as a substitute.
- Granulated Sugar – Adds sweetness and moisture; brown sugar lends a deeper flavor.
- Large Eggs – Provides moisture and binds the ingredients; use room temperature eggs for optimal blending.
- Pure Vanilla Extract – Enhances the flavors in both the cake and frosting; avoid imitation for the best taste.
- Sour Cream – Adds richness and moisture; Greek yogurt is a great dairy substitute.
- Canola Oil – Ensures the cake remains moist; vegetable oil can work just as well.
- Strongly Brewed Coffee – This is the main flavor component; cold brew or espresso gives the best results.
For the Frosting
- Unsalted Butter – Provides richness; ensure it’s at room temperature for easy mixing.
- Confectioners’ Sugar – Sweetens the frosting and gives it structure; consider using powdered monk fruit for a lower-sugar option.
- Sweetened Condensed Milk – Crucial for that creamy texture; you can use evaporated milk, though the flavor changes slightly.
For the Decoration
- Chocolate Sauce – Enhances the mocha flavor; a homemade coffee fudge sauce can be a delicious alternative.
- Strongly Brewed Coffee (for fudge) – Deepens the chocolate flavor, making each bite more decadent.
With these ingredients in hand, you’ll be well on your way to baking a delightful Vietnamese Iced Coffee Cake that will impress family and friends alike!
Step‑by‑Step Instructions for Vietnamese Iced Coffee Cake
Step 1: Prep the Oven and Pans
Preheat your oven to 350°F (175°C) and prepare two 8-inch round cake pans. Grease the pans thoroughly with butter or cooking spray, then line the bottoms with parchment paper. This will ensure your Vietnamese Iced Coffee Cake releases easily once baked.
Step 2: Whisk Together the Dry Ingredients
In a large mixing bowl, combine all-purpose flour, ground coffee or instant coffee granules, baking powder, baking soda, and kosher salt. Whisk these together until well blended, creating a uniform dry mixture. Set this bowl aside as you prepare the wet ingredients.
Step 3: Mix the Wet Ingredients
In a separate bowl, cream together the granulated sugar, large eggs, and pure vanilla extract until the mixture is light and fluffy. This should take about 2-3 minutes using a hand mixer. Gradually mix in the sour cream, canola oil, and strongly brewed coffee until everything is well combined.
Step 4: Combine Dry and Wet Mixtures
Pour the dry ingredient mixture into the bowl with the wet ingredients. Gently fold them together using a spatula until just combined; avoid overmixing to keep the texture of your Vietnamese Iced Coffee Cake light and fluffy.
Step 5: Bake the Cake Layers
Divide the batter evenly between the prepared cake pans. Smooth the tops with a spatula and place them in the preheated oven. Bake for 30-35 minutes, or until a toothpick inserted into the center comes out with a few crumbs. Allow the cakes to cool in the pans for 10 minutes before transferring them to a wire rack to cool completely.
Step 6: Prepare the Frosting
While the cakes are cooling, take a bowl and whip together the unsalted butter, vanilla extract, and a pinch of salt until creamy—around 2-3 minutes. Gradually add in the confectioners’ sugar, mixing until smooth, then blend in the sweetened condensed milk for a rich, fluffy frosting that complements the Vietnamese Iced Coffee Cake perfectly.
Step 7: Assemble the Cake
Once the cake layers are completely cool, level the tops with a serrated knife if they have domed. Place one layer on a serving plate and spread a layer of frosting on top. Carefully stack the second cake layer on top, then apply a thin crumb coat of frosting all around the sides and top. Chill for 30 minutes to set the frosting.
Step 8: Decorate the Cake
Using the remaining frosting, cover the entire cake smoothly. For a beautiful touch, create mocha fudge swirls by mixing chocolate sauce with a bit of brewed coffee and dolloping it onto the frosting. Use a toothpick or knife to swirl together for an elegant finish that makes your Vietnamese Iced Coffee Cake visually stunning.
Step 9: Slice and Serve
Once decorated, slice the cake into generous pieces and serve right away, or refrigerate until needed. This delightful Vietnamese Iced Coffee Cake can be stored covered at room temperature for up to two days, ready to be enjoyed whenever the craving strikes!
How to Store and Freeze Vietnamese Iced Coffee Cake
Room Temperature: Store the cake covered at room temperature for up to 2 days to enjoy its fresh flavor.
Fridge: Keep the cake in the refrigerator for up to 5 days. Make sure it’s tightly wrapped to prevent drying out.
Freezer: For longer storage, freeze slices of the Vietnamese Iced Coffee Cake wrapped well in plastic wrap and then in aluminum foil for up to 3 months.
Reheating: Thaw in the refrigerator overnight and serve at room temperature, or gently heat individual slices in the microwave for a warm treat!
Vietnamese Iced Coffee Cake Variations
Feel free to let your creativity flow with these delightful twists on the classic Vietnamese Iced Coffee Cake!
- Dairy-Free: Substitute sour cream with coconut milk or use dairy-free margarine for the frosting. Enjoying this cake without dairy doesn’t mean compromising on flavor.
- Nutty Texture: Fold in chopped walnuts or hazelnuts to the cake batter for a subtle crunch. Nuts add not only texture but also a depth of flavor that complements the coffee.
- Chocolate Boost: Include unsweetened cocoa powder to the batter for an extra chocolate mocha taste. The addition of chocolate deepens the cake’s richness, making it an instant favorite!
- Fruit Addition: Toss in diced bananas or apples for added moisture and a slightly fruity surprise in every slice. This cozy addition brings a lovely sweetness to balance the coffee’s bold notes.
- Flavor Enhancements: Experiment with flavored coffee, like hazelnut or vanilla, or add a splash of coffee liqueur to elevate the cake. Each variation creates another layer of flavor, taking your dessert to the next level.
- Gluten-Free: Use a gluten-free flour blend to create a cake everyone can enjoy. This way, you can share the joy of your baking with those who have dietary restrictions.
- Mocha Frosting: Add a tablespoon of cocoa powder to the frosting for a mocha-flavored cream that pairs beautifully with the cake. You’ll love the enriching twist that complements each delectable bite.
- Spicy Kick: Incorporate a pinch of cinnamon or even cayenne pepper into the batter for a subtle, spicy warmth. This unexpected twist adds a hint of excitement that coffee lovers will appreciate.
For delightful accompanying dishes, consider serving your cake with a refreshing glass of Vietnamese iced coffee or topping it with a dollop of whipped cream for that classic touch of sweetness. Enjoy the adventure of making this cake uniquely yours!
What to Serve with Vietnamese Iced Coffee Cake
Indulging in this delightful cake opens up a world of pairing possibilities that will elevate your dessert experience to new heights.
- Vietnamese Iced Coffee: The rich coffee flavor here perfectly echoes the cake’s essence, creating a harmonious blend that coffee lovers will cherish.
- Whipped Cream: A dollop of fluffy whipped cream adds a light, airy contrast and balances the sweetness of the cake.
- Fresh Berries: Juicy strawberries or raspberries provide a refreshing burst of tartness that cuts through the rich, creamy frosting.
- Chocolate Ganache: Drizzling warm chocolate ganache over a slice not only enhances the mocha vibes but adds an irresistible glossy finish.
- Coconut Sorbet: For a refreshing touch, coconut sorbet adds a tropical element that complements the coffee flavors beautifully.
- Chilled Sweetened Condensed Milk: A small drizzle of this traditional Vietnamese treat brings another layer of sweetness, melding perfectly with the cake’s flavors.
- Mint Tea: An iced, fragrant mint tea offers a refreshing palette cleanser between bites, enhancing the overall enjoyment.
- Almond Biscotti: Crunchy biscotti dipped in espresso can add a satisfying texture contrast alongside each slice of cake.
- Dark Chocolate: Serve with dark chocolate squares for an elegant pairing; their bitterness contrasts delightfully with the cake’s sweetness.
Make Ahead Options
These Vietnamese Iced Coffee Cake components are perfect for busy home cooks looking to save time! You can prepare the cake layers up to 24 hours in advance; simply bake them, allow them to cool completely, and wrap each layer tightly in plastic wrap before refrigerating. The frosting can also be made ahead and stored in an airtight container in the fridge for up to 3 days. When you’re ready to assemble, simply re-whip the frosting if needed and layer it between the cooled cakes. This way, you’ll have a delicious, indulgent dessert ready to impress without the last-minute rush!
Expert Tips for Vietnamese Iced Coffee Cake
-
Fresh Ingredients: Always use fresh baking powder and baking soda to ensure your cake rises beautifully and doesn’t turn out dense.
-
Avoid Overmixing: Mix the wet and dry ingredients just until combined. Overmixing can lead to a tough cake.
-
Room Temperature: Use room temperature eggs and butter; this helps create a smooth batter and better texture in your Vietnamese Iced Coffee Cake.
-
Chill for Stability: Allow the frosted cake to chill for at least 30 minutes before cutting. This sets the frosting and makes serving easier.
-
Customize Your Flavor: Experiment with flavored coffee or add a splash of liqueur to elevate the cake’s flavor profile and make it uniquely yours.

Vietnamese Iced Coffee Cake Recipe FAQs
How do I select the best coffee for this recipe?
Absolutely! For the richest flavor, I recommend using freshly ground coffee or instant espresso granules. Look for a medium to dark roast for a robust coffee essence that complements the cake beautifully. If you’re using brewed coffee, a strong cold brew will enhance the cake’s flavor remarkably.
What is the proper way to store this cake?
You can store your Vietnamese Iced Coffee Cake covered at room temperature for up to 2 days. If you anticipate keeping it longer, refrigerate for up to 5 days, making sure it’s tightly wrapped to maintain moisture. I often place a piece of plastic wrap directly against the frosting before wrapping the entire cake to prevent drying out!
Can I freeze leftover slices of the cake?
Very! To freeze, wrap each slice of Vietnamese Iced Coffee Cake tightly in plastic wrap and then in aluminum foil to prevent freezer burn. It can be stored in the freezer for up to 3 months. When you’re ready to enjoy, simply thaw in the refrigerator overnight and serve at room temperature for the best taste.
What should I do if my cake is too dense?
No worries! A dense cake often results from overmixing the batter or using expired leavening agents. Make sure to gently fold the wet and dry ingredients until just combined, and always check that your baking powder and baking soda are fresh. If you find yourself with a dense cake, you can try slicing it into layers and adding extra frosting between them to increase moisture!
Are there any allergy considerations for this cake?
Absolutely! This Vietnamese Iced Coffee Cake can be made gluten-free by swapping the all-purpose flour with a gluten-free blend. For dairy sensitivities, use coconut milk instead of sour cream and dairy-free margarine for frosting. Always double-check ingredient labels for any hidden allergens, especially if serving to guests with restrictions.
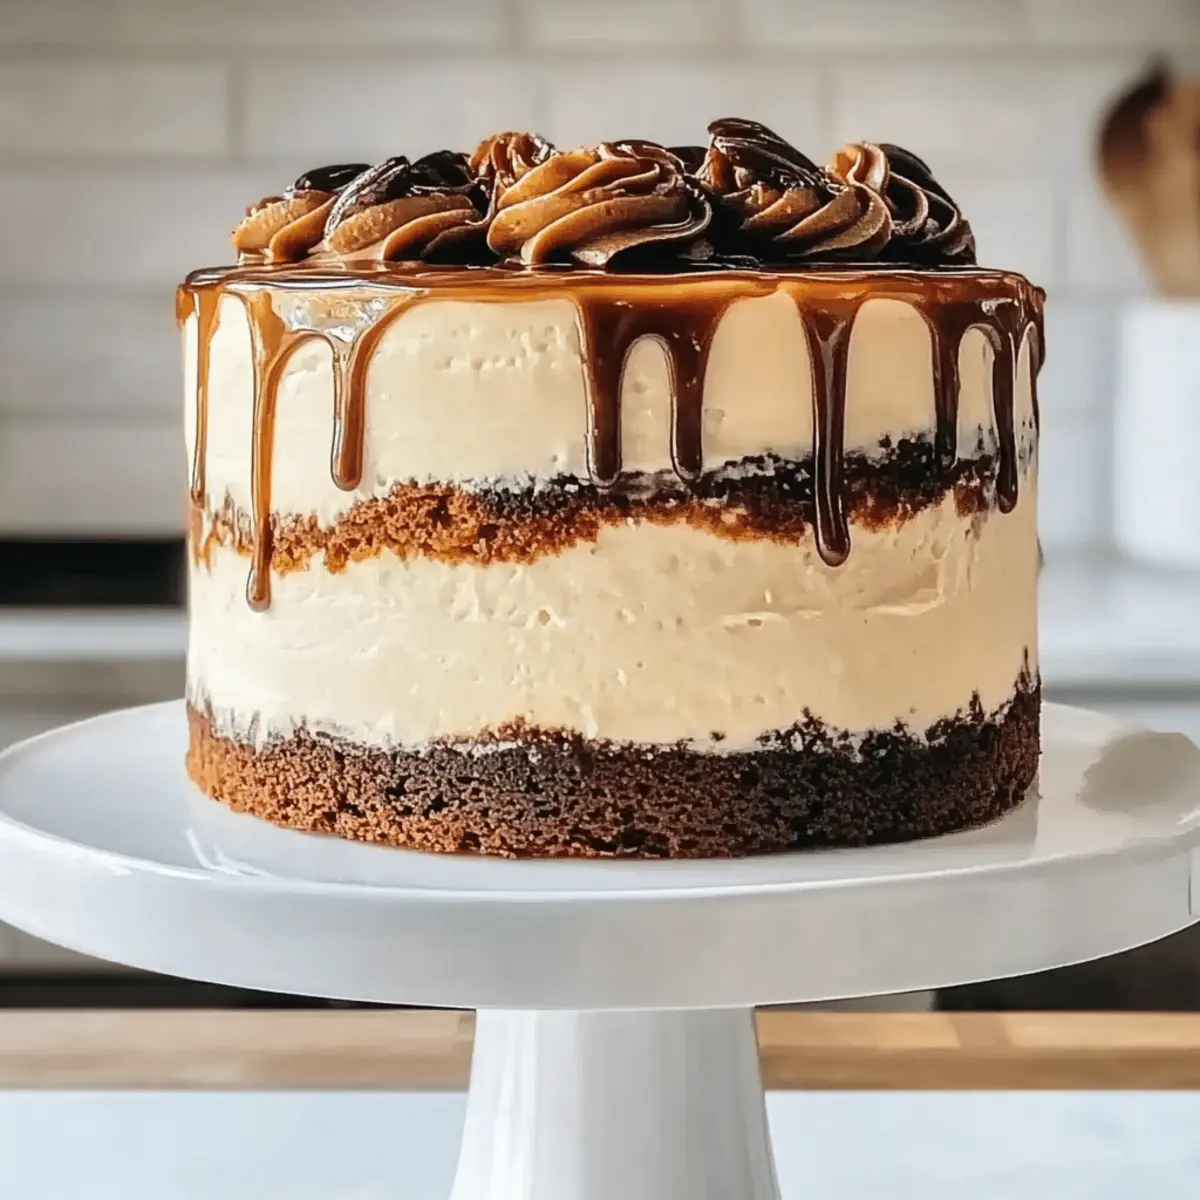
Irresistible Vietnamese Iced Coffee Cake for Sweet Moments
Ingredients
Equipment
Method
- Preheat your oven to 350°F (175°C) and prepare two 8-inch round cake pans. Grease the pans thoroughly with butter or cooking spray, then line the bottoms with parchment paper.
- In a large mixing bowl, combine all-purpose flour, ground coffee or instant coffee granules, baking powder, baking soda, and kosher salt. Whisk until well blended.
- In a separate bowl, cream together the granulated sugar, large eggs, and pure vanilla extract until light and fluffy. Gradually mix in the sour cream, canola oil, and firmly brewed coffee.
- Pour the dry ingredient mixture into the bowl with the wet ingredients. Gently fold them together until just combined.
- Divide the batter evenly between the prepared cake pans. Bake for 30-35 minutes, or until a toothpick comes out with a few crumbs. Allow cakes to cool in pans for 10 minutes before transferring to a wire rack.
- While the cakes cool, whip together the unsalted butter and a pinch of salt until creamy, then gradually add confectioners' sugar and sweetened condensed milk.
- Level the tops of the cooled cake layers, spread frosting on one layer, stack the second layer, and apply a thin crumb coat. Chill for 30 minutes.
- Cover the entire cake with the remaining frosting and create mocha fudge swirls with chocolate sauce mixed with brewed coffee.
- Slice the cake into generous pieces and serve immediately, or refrigerate until needed.
Leave a Reply