
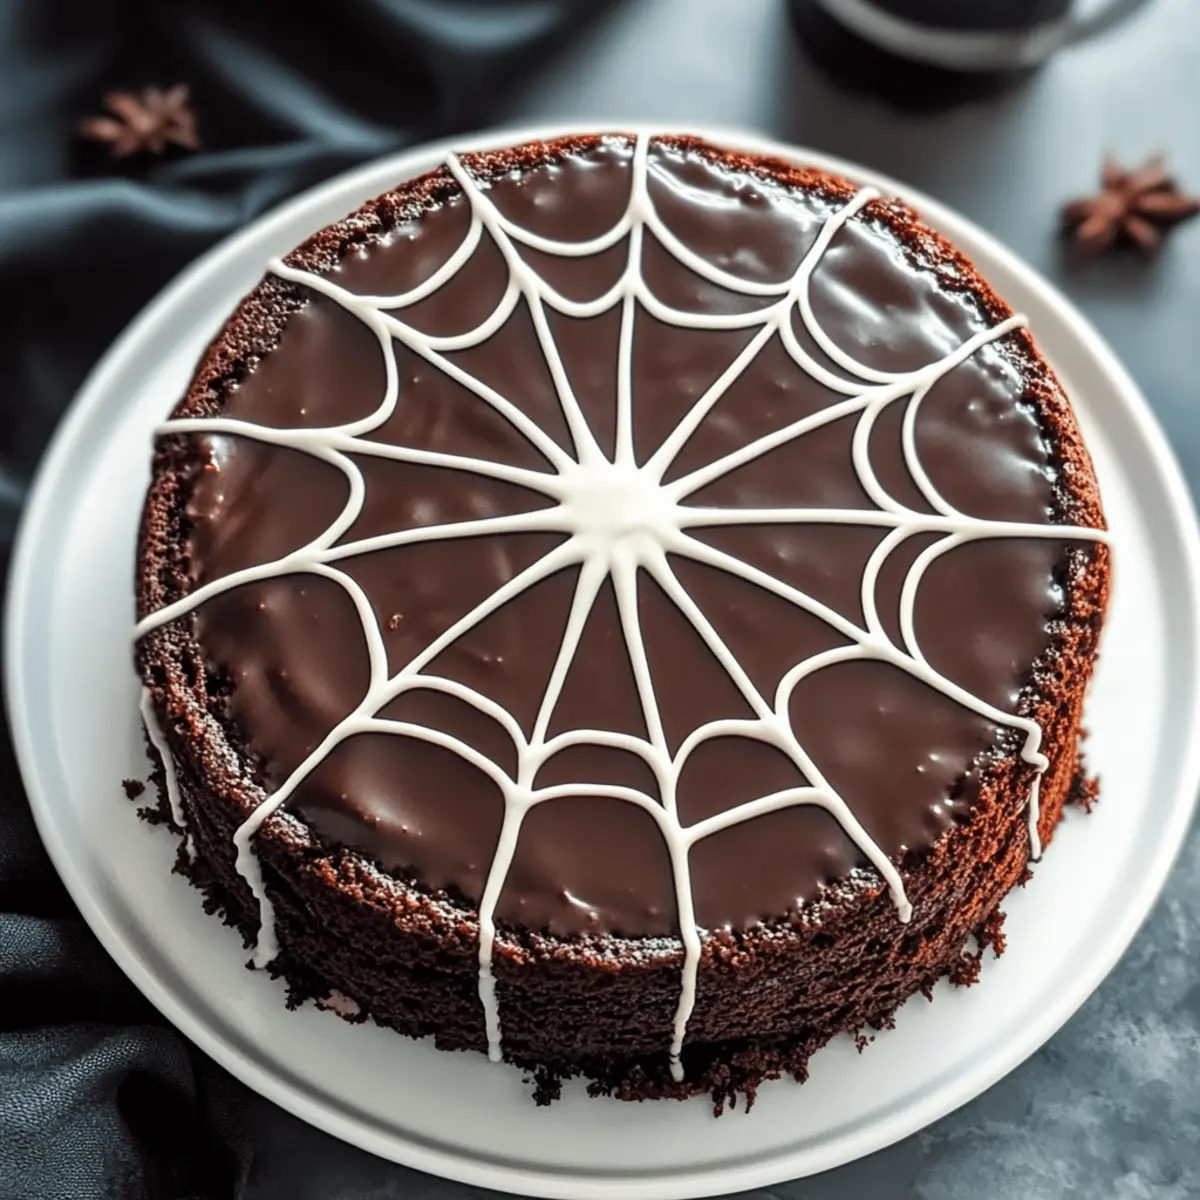
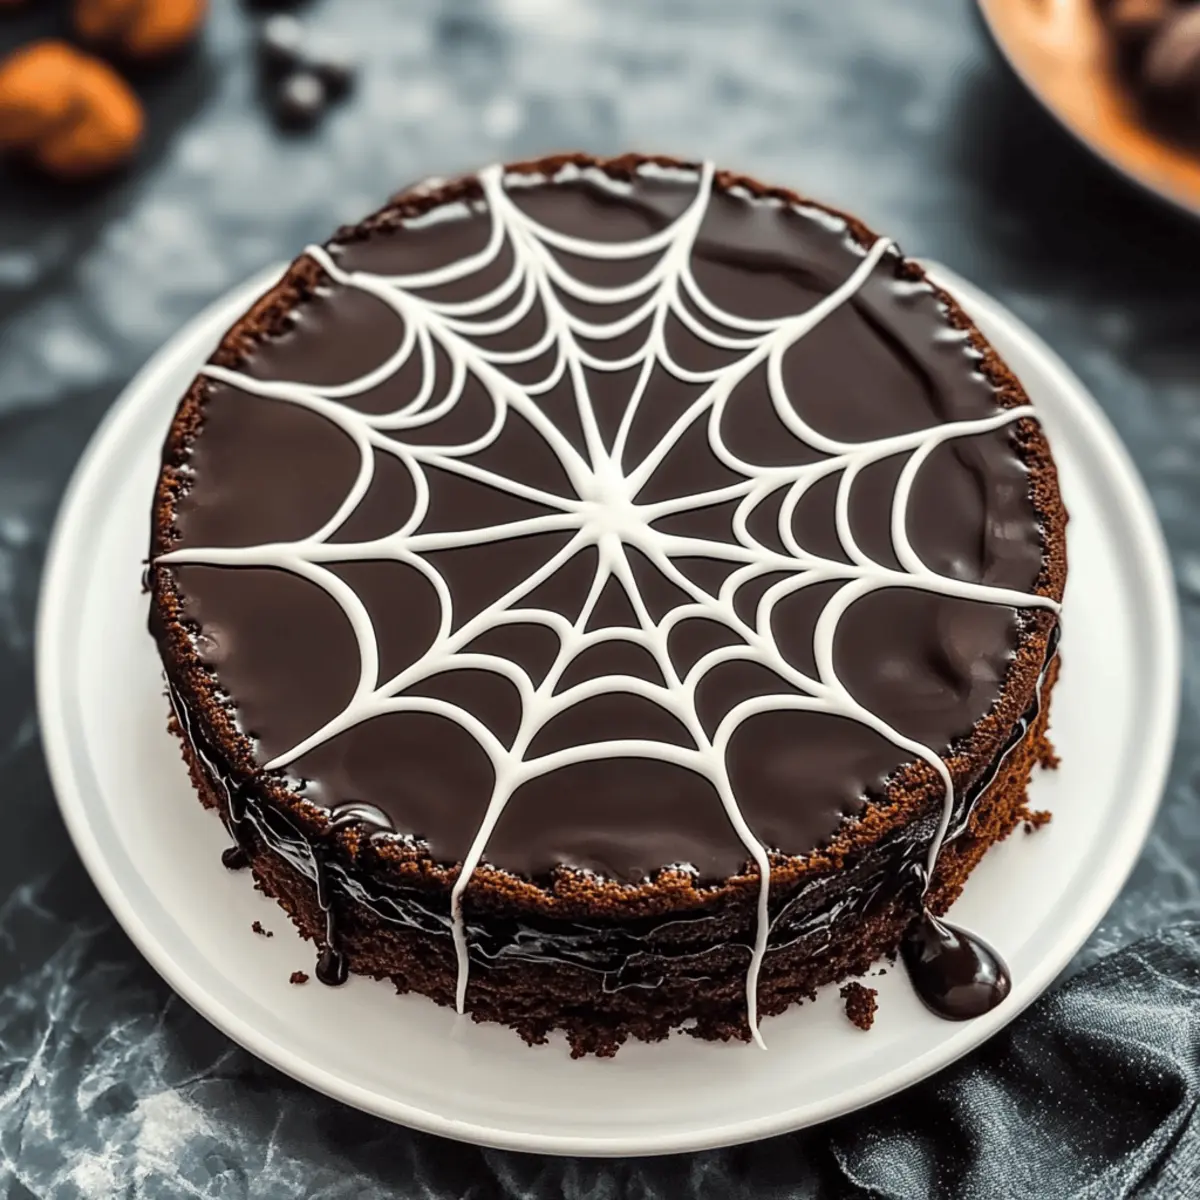
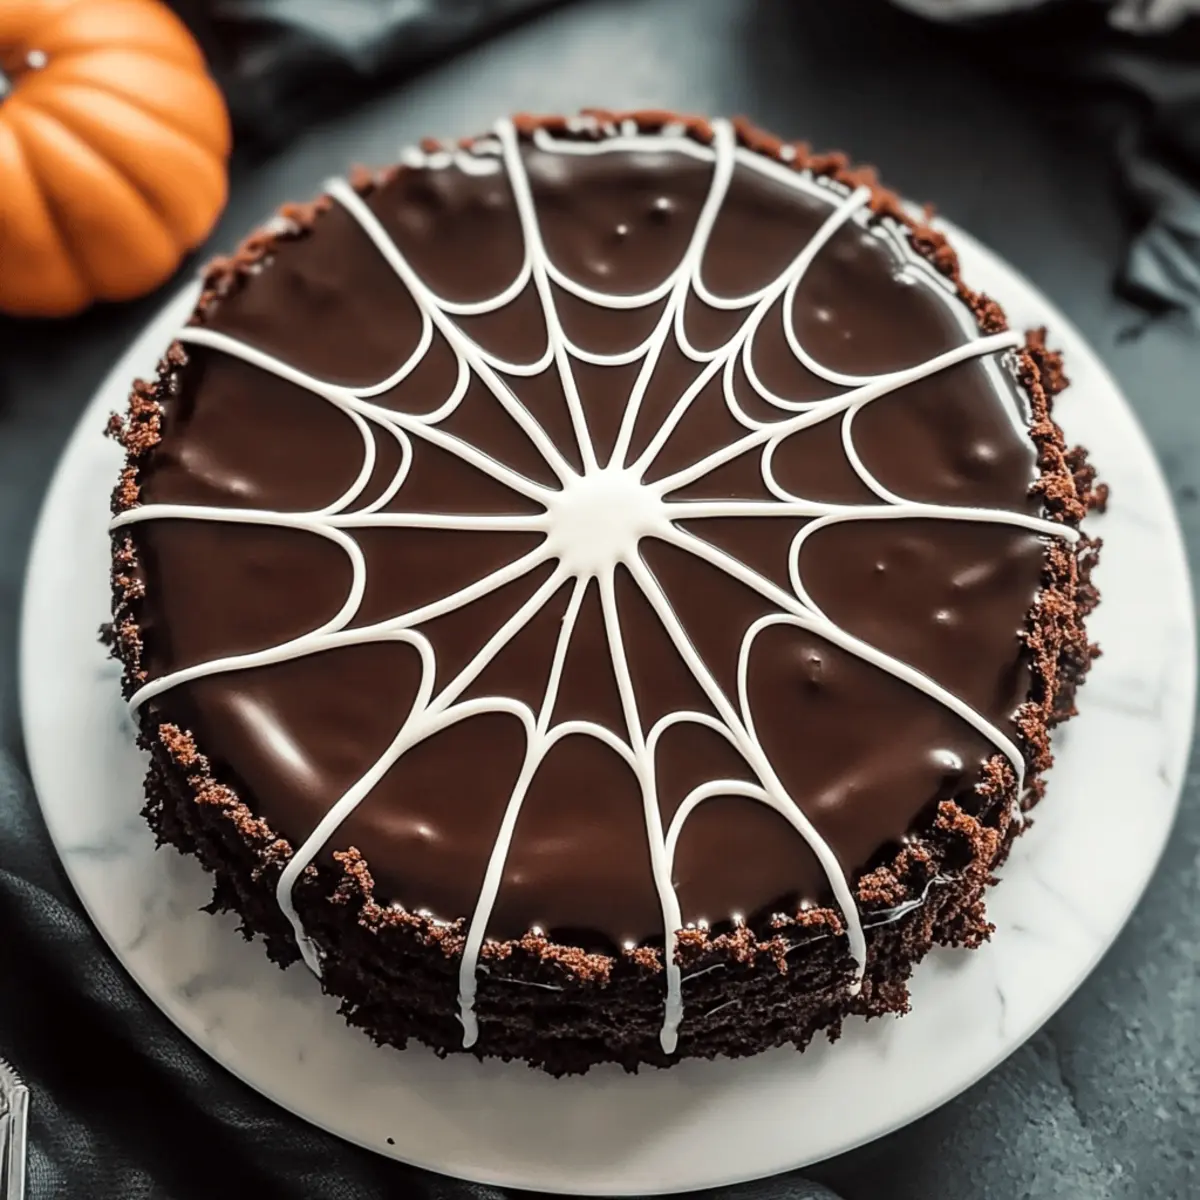
As I was preparing for Halloween last year, I stumbled upon a delightful idea that transformed my usual baking routine into a festive celebration. The Spiderweb Chocolate Cake quickly became a favorite, showing off a stunning white chocolate spiderweb atop a rich, moist chocolate base. Not only is this cake a showstopper for gatherings, but it also caters to various dietary needs—it’s easy to make gluten-free or vegan without sacrificing any of the deliciousness! Whether you’re an experienced baker or just starting out, this recipe promises joy and satisfaction in every bite. Plus, it’s perfect for make-ahead planning, allowing you to savor more time with your guests. Curious how to create this spooky masterpiece? Let’s dive in!
Why is this cake a must-try?
Delightfully Unique: The Spiderweb Chocolate Cake is not just about looks; it’s a showstopper with a moist, rich chocolate flavor that keeps everyone coming back for more.
Dietary Flexibility: With easy substitutions for gluten-free and vegan diets, you can cater to all your friends and family’s preferences.
Fun Presentation: The striking white chocolate spiderweb elevates any festivity, making this dessert perfect for Halloween or themed parties.
Effortless Recipe: Simplified instructions make it accessible for bakers of all skill levels, ensuring a stress-free baking experience.
Make-Ahead Magic: Prepare the cake in advance, allowing you to spend more time enjoying the company of your loved ones.
Whether you pair it with a scoop of vanilla ice cream or explore other treats like Raspberry Chocolate Chip Muffins or Chewy Oreo Chocolate Chip Cookies, this cake is certain to leave a lasting impression!
Spiderweb Chocolate Cake Ingredients
-
For the Cake Base
• All-Purpose Flour – Provides structure for a moist, tender cake; replace with a 1:1 gluten-free flour blend for gluten-free variations.
• Sugar – Adds sweetness and crucial texture to your cake; no direct substitutions recommended for balanced sweetness.
• Cocoa Powder – Infuses rich chocolate flavor; use unsweetened cocoa powder for the best result.
• Baking Powder/Soda – Ensures the cake rises beautifully; no substitutions necessary.
• Salt – Balances sweetness and enhances overall flavor; it’s essential for taste.
• Eggs – Binds ingredients and provides fluffiness; substitute with flaxseed meal for vegan options (1 tbsp flaxseed + 2.5 tbsp water per egg).
• Milk – Adds moisture and creates a rich crumb; opt for plant-based milk for a dairy-free version.
• Vegetable Oil – Keeps the cake moist and enhances texture; no specific substitutions recommended.
• Vanilla Extract – Adds a warm, aromatic flavor; essential for the cake’s overall profile.
• Boiling Water – Intensifies chocolate flavor; make sure it’s boiling for the best batter consistency. -
For the Frosting & Decoration
• Chocolate Frosting – Use your favorite recipe for a decadent topping; consider vegan chocolate frosting for a dairy-free alternative.
• White Chocolate Chips – Essential for creating the stunning spiderweb effect on top of the cake; ensure they’re melted for easy drizzling.
Dive right into this delightful Spiderweb Chocolate Cake adventure! With these ingredients, you’ll be well on your way to creating a dessert that’s not only festive but also accommodates various dietary preferences. Enjoy the baking experience and the sweet smiles it will bring!
Step‑by‑Step Instructions for Spiderweb Chocolate Cake
Step 1: Preheat the Oven
Preheat your oven to 350°F (175°C) to ensure the perfect baking environment for your Spiderweb Chocolate Cake. This initial step is crucial, as starting with a properly heated oven allows the cake to rise evenly and achieve a delightful texture. While the oven warms up, gather all your ingredients for a smooth baking experience.
Step 2: Mix the Dry Ingredients
In a large mixing bowl, whisk together the all-purpose flour, sugar, cocoa powder, baking powder, baking soda, and salt. This dry mix will be the foundation of your cake, contributing to its rich flavor and tender crumb. Ensure everything is well combined, with no lumps remaining, as this will help create a uniform batter.
Step 3: Combine Wet Ingredients
In another bowl, beat the eggs, and then mix in the milk, vegetable oil, and vanilla extract until fully incorporated. Pour this mixture into the dry ingredients, stirring gently to combine. You should end up with a thick batter that is glossy and smooth—this is a sign you’re on the right path to a luscious Spiderweb Chocolate Cake.
Step 4: Incorporate Boiling Water
Carefully add the boiling water to your batter, mixing slowly to avoid splashes. This step is essential as it enhances the chocolate flavor and ensures a smooth, velvety consistency. After the water is fully mixed in, your batter should be thin yet well combined, ready to transform into a moist cake once baked.
Step 5: Prepare the Cake Pans
Grease and flour your cake pans thoroughly to prevent sticking. You can use parchment paper for an extra layer of protection if desired. This preparation not only ensures easy removal of the cake but also encourages even baking, leading to a beautifully shaped Spiderweb Chocolate Cake.
Step 6: Bake the Cake
Divide the batter evenly between the prepared pans. Place them in the preheated oven and bake for 30 to 35 minutes, or until a toothpick inserted into the center comes out clean. Keep an eye on your cakes as they bake; a slight spring when gently pressed on top indicates they are done.
Step 7: Cool the Cakes
Once baked, remove the cakes from the oven and let them cool in the pans for about 10 minutes. After this initial cooling, carefully transfer them to a wire rack to cool completely. Allowing the cakes to cool completely is essential for perfect frosting later on, as warm cakes can melt your frosting.
Step 8: Frost the Cake
Once completely cooled, generously frost the top of one cake layer with chocolate frosting before stacking the second layer on top. Spread more frosting on the top and sides of the cake for a luscious finish. Prepare to create your spiderweb design by melting the white chocolate chips until smooth and drizzling them over the frosted cake.

Storage Tips for Spiderweb Chocolate Cake
- Room Temperature: Keep the Spiderweb Chocolate Cake covered at room temperature for up to 3 days to maintain its moisture and flavor. A cake dome or plastic wrap works well for this.
- Fridge: If you plan to enjoy it longer, refrigerate the cake for up to 5 days; this helps retain freshness. Just be sure to wrap it properly to prevent it from drying out.
- Freezer: Wrap individual slices in plastic wrap and then in foil, and store in the freezer for up to 3 months for a delightful treat later on. Thaw slices in the fridge before enjoying.
- Reheating: If desired, warm individual slices in the microwave for about 10-15 seconds to enhance the chocolatey goodness before serving.
Make Ahead Options
These Spiderweb Chocolate Cakes are perfect for meal prep, providing a delightful treat that saves you time for celebrations! You can bake the cakes up to 3 days in advance. Simply allow the cakes to cool completely, wrap them tightly in plastic wrap, and refrigerate. For the best quality, keep the frosting separate until you’re ready to serve. When you’re set to impress your guests, frost the cooled cakes with your chocolate frosting, then create the beautiful white chocolate spiderweb design just before presenting. This thoughtful prep ensures your dessert is just as delicious and visually stunning, allowing you to enjoy more time with your loved ones.
Expert Tips for Spiderweb Chocolate Cake
-
Mix Thoroughly: Ensure all dry ingredients are well combined to avoid dry pockets in your Spiderweb Chocolate Cake batter. Uneven mixing can lead to an inconsistent texture.
-
Check for Doneness: Start testing your cake for doneness a few minutes before the suggested baking time. This helps prevent overbaking, which can dry out your cake.
-
Careful with Boiling Water: Always use boiling water when adding it to the batter. This step intensifies the chocolate flavor and contributes to a smoother texture—don’t skip it!
-
Melt White Chocolate Slowly: When preparing the white chocolate for the spiderweb design, melt it on low heat. This prevents burning and ensures it drizzles beautifully over your cake.
-
Chill Before Serving: For the best presentation, after frosting, let the cake set in the fridge for about 30 minutes before serving. This helps the frosting firm up and enhances the spiderweb look.
-
Explore Variations: Don’t hesitate to adapt the recipe! The Spiderweb Chocolate Cake is great for experimenting with flavors, whether adding a hint of coffee or a fruity twist.
Spiderweb Chocolate Cake Variations
Feel free to explore these delightful variations for your Spiderweb Chocolate Cake and make it uniquely yours! Each option adds a special twist that everyone will love.
- Gluten-Free: Substitute flour with a 1:1 gluten-free blend for a cake that caters to dietary needs without sacrificing flavor.
- Vegan: Replace eggs with flaxseed meal and milk with almond milk; use vegan chocolate frosting for an amazing dairy-free option.
- Extra Chocolatey: Fold in chocolate chips to the batter for an indulgent texture that chocolate lovers will adore. A bite of melty goodness awaits!
- Nutty Texture: Stir in chopped nuts like walnuts or pecans for a delightful crunch that complements the cake’s softness perfectly.
- Coffee Enhancer: Swap half of the boiling water with brewed coffee to deepen the chocolate’s richness; this hidden surprise elevates the flavor profile.
- Spicy Kick: Mix in a teaspoon of cayenne pepper or a dash of cinnamon for a warm, unexpected twist that pairs beautifully with chocolate.
- Berry Burst: Toss in raspberries or strawberries for a burst of fruity freshness that brightens the cake’s overall taste and adds color.
If you are intrigued by delicious chocolate recipes, why not try the indulgent Strawberry Chocolate Decadent or the festive White Chocolate Halloween treat? Each recipe guarantees an extraordinary dessert experience!
What to Serve with Spiderweb Chocolate Cake?
Imagine a delightful gathering filled with laughter and the sweet aroma of freshly baked cake wafting through the air. As you slice into the rich, moist layers of the Spiderweb Chocolate Cake, it’s the perfect time to consider what delicious accompaniments will elevate this sweet treat into a complete festive experience.
-
Vanilla Ice Cream: A scoop of creamy vanilla ice cream adds a delightful contrast to the rich chocolate. The cold creaminess enhances every bite!
-
Whipped Cream: Light and fluffy, a dollop of freshly whipped cream brings a touch of elegance, balancing the indulgence of the cake beautifully.
-
Fresh Berries: Raspberries or strawberries not only add vibrant color but also a refreshing tartness that pairs wonderfully with the chocolate.
-
Chocolate Ganache: For the ultimate chocolate lover, a rich chocolate ganache drizzled over the top amplifies the decadence, creating an irresistible experience.
-
Coffee or Espresso: A steaming cup of coffee serves as the ideal beverage to round off the sweetness of the cake while enhancing its chocolate flavor with its warm, bitter notes.
-
Pumpkin Spice Latte: Capture the fall vibes with a cozy pumpkin spice latte, which harmonizes beautifully with the festive spirit of this Halloween-inspired cake.
-
Spiced Nuts: Roasted spiced nuts add a crunchy texture and warm flavors that contrast nicely with the cake’s soft crumb, creating a delightful bite.
-
Cheesecake Bars: For a fun dessert table, serve these alongside the Spiderweb Chocolate Cake for a delightful variety, ensuring all taste buds are satisfied.
Consider these pairing options to transform your Spiderweb Chocolate Cake into a memorable centerpiece at your next gathering!
Spiderweb Chocolate Cake Recipe FAQs
What type of flour should I use for the Spiderweb Chocolate Cake?
For the best results, use all-purpose flour, as it provides the structure needed for a moist, tender cake. If you or your guests require a gluten-free option, don’t worry! You can easily substitute with a 1:1 gluten-free flour blend, which will yield delightful results without compromising flavor.
How should I store my Spiderweb Chocolate Cake?
To enjoy your cake at its best, cover it at room temperature for up to 3 days. For longer storage, you can refrigerate it for up to 5 days. Wrapping it in plastic wrap is a great option to maintain moisture. If you want to prepare ahead of time, you can wrap individual slices in plastic wrap and foil, storing them in the freezer for up to 3 months. Just thaw the slices in the fridge before diving in!
Can I freeze the Spiderweb Chocolate Cake?
Absolutely! Freezing is a fantastic way to keep this treat for later. Once completely cooled, wrap your cake tightly in plastic wrap, followed by a layer of aluminum foil to prevent freezer burn. It can be stored for up to 3 months. When you’re ready to enjoy the cake, simply transfer it to the fridge to thaw overnight. If you prefer a warm slice, you can gently reheat it in the microwave for about 10-15 seconds.
What if my cake doesn’t rise properly?
If your Spiderweb Chocolate Cake doesn’t rise as expected, it may be due to expired baking powder or soda. Always check expiration dates before baking! Also, make sure to properly mix your wet and dry ingredients until just combined; over-mixing can lead to a dense cake. If the batter looks thick, you’ve done a great job; just remember the boiling water is vital for creating a smooth texture and enhancing the chocolate flavor.
Are there any common allergens in this recipe?
Yes, the Spiderweb Chocolate Cake contains common allergens such as eggs and dairy (from the milk and chocolate frosting). However, it’s easy to adapt! You can replace eggs with flaxseed meal (1 tbsp flaxseed + 2.5 tbsp water per egg) for a vegan option and use almond milk or other plant-based milk. Also, ensure that any chocolate or frosting you choose is free of allergens if needed.
Can I make this cake a day ahead of time?
Definitely! In fact, making the Spiderweb Chocolate Cake a day ahead not only saves you time, but it also allows the flavors to meld beautifully. Just be sure to store it properly at room temperature once it’s frosted, and consider refrigerating it if you live in a warm climate. This way, you’ll be ready to impress your guests with minimal stress!
Spiderweb Chocolate Cake: A Spooky Sweet Delight for All
Ingredients
Equipment
Method
- Preheat your oven to 350°F (175°C).
- In a large mixing bowl, whisk together the all-purpose flour, sugar, cocoa powder, baking powder, baking soda, and salt.
- In another bowl, beat the eggs, then mix in the milk, vegetable oil, and vanilla extract until fully incorporated. Stir gently into the dry ingredients.
- Carefully add the boiling water to the batter, mixing slowly to avoid splashes.
- Grease and flour your cake pans thoroughly.
- Divide the batter evenly between the prepared pans. Bake for 30 to 35 minutes.
- Allow the cakes to cool in the pans for about 10 minutes, then transfer them to a wire rack.
- Frost the top of one cake layer with chocolate frosting before stacking the second layer on top.
- Melt the white chocolate chips and drizzle over the frosted cake to create the spiderweb effect.
Leave a Reply