
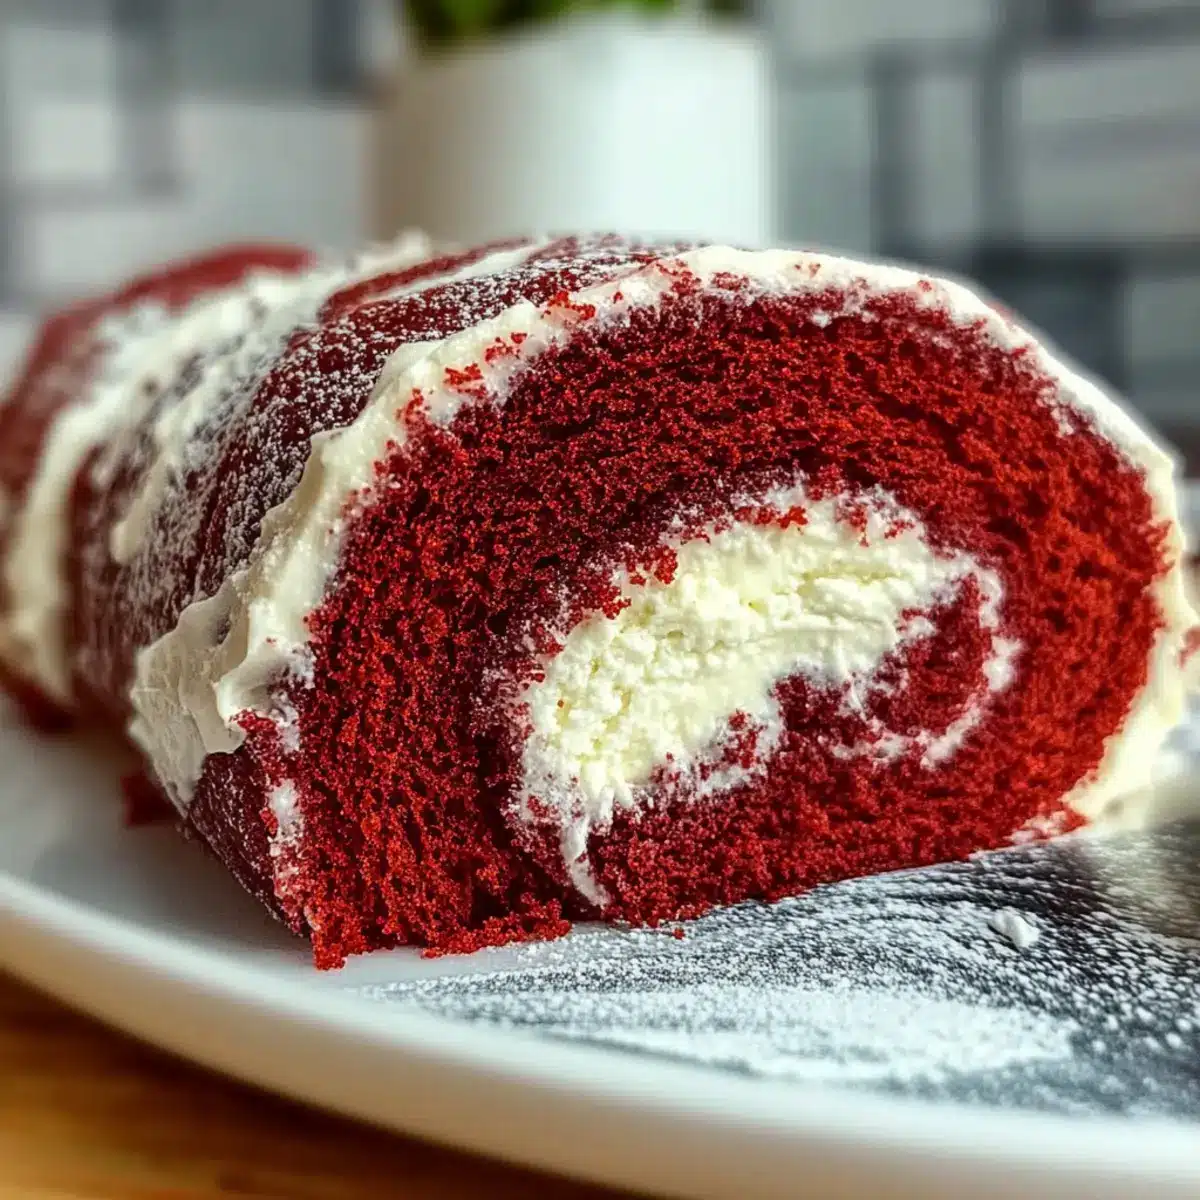
“Isn’t it just wonderful how a single dessert can transform an occasion?” This thought danced in my mind as I recently prepared my beloved Red Velvet Cake Roll. This stunning creation is not just a feast for the eyes; the combination of rich red velvet cake and a luscious cream cheese filling delivers a delightful symphony of flavors. Not only does this recipe fill your kitchen with an irresistible aroma, but it also comes together surprisingly quickly, making it a perfect crowd-pleaser for any celebration or a cozy family gathering. Plus, it’s vegetarian-friendly, inviting everyone to indulge without hesitation. Intrigued by how easy this elegant dessert is to whip up? Let’s dive into the delicious details!

Why is this Red Velvet Cake Roll special?
Irresistible Elegance: This Red Velvet Cake Roll is a showstopper that impresses with its vibrant color and sophisticated design.
Effortless Preparation: You’ll love how quick and simple it is to create this delightful dessert, perfect for both novice and experienced bakers.
Luscious Filling: The creamy cream cheese filling perfectly complements the rich cocoa flavor of the cake, making every bite a heavenly experience.
Versatile Variations: Feel free to switch up the ingredients with natural food coloring or different fillings like mascarpone for a delightful twist.
Perfect for All Occasions: Whether it’s a birthday, holiday, or just a sweet treat for the family, this cake roll fits seamlessly into any celebration.
Discover even more delicious possibilities with Cabbage Roll Casserole or indulge in a rich Swirl Bundt Cake!
Red Velvet Cake Roll Ingredients
Here’s everything you need for your stunning Red Velvet Cake Roll!
For the Cake
- Large Eggs – Provides structure and moisture; ensure they’re at room temperature for better mixing.
- Granulated Sugar – Adds sweetness and aids in creating a light texture; adjust to taste.
- Oil – Keeps the cake moist and tender; substitute with melted butter for a richer flavor.
- Baking Powder – Acts as a leavening agent for a light cake; check expiration date for best results.
- Salt – Enhances flavor and balances sweetness; don’t omit for optimal taste.
- Vanilla Extract – Adds depth of flavor; almond extract can be used for a unique twist.
- Cocoa Powder – Provides chocolate flavor; use unsweetened cocoa for authenticity.
- All-Purpose Flour – Gives structure to the cake; a gluten-free blend works as a substitute.
For the Cream Cheese Filling
- Powdered Sugar – Essential for dusting and in the filling; no substitutes for texture.
- Cream Cheese – Primary filling that provides creaminess and tang; full-fat is recommended for best results.
- Unsalted Butter – Adds richness to the filling; make sure it’s at room temperature for easy mixing.
Get ready to impress your loved ones with this exquisite Red Velvet Cake Roll!
Step‑by‑Step Instructions for Red Velvet Cake Roll
Step 1: Preheat and Prepare Pan
Begin by preheating your oven to 350°F (175°C). While it heats up, prepare a 10×15-inch baking pan by lining it with foil and applying nonstick spray to ensure easy release after baking. This crucial first step sets you up for success with your beautiful Red Velvet Cake Roll.
Step 2: Beat the Eggs
In a large mixing bowl, grab your electric mixer and beat the large eggs on medium speed for about 3-5 minutes. Watch as they turn foamy and a light yellow color, signifying that they’re well-aerated. This step is essential for achieving that delightful texture in your cake roll.
Step 3: Add Sugar and Thicken
Gradually sprinkle in the granulated sugar while continuing to mix for an additional 2 minutes. You’ll notice the mixture thickening and becoming creamy. This process will help create the sweetness and lightness that makes the Red Velvet Cake Roll irresistible.
Step 4: Incorporate Oils and Dry Ingredients
Carefully mix in the oil, baking powder, salt, vanilla extract, and cocoa powder. Once combined, gradually add the all-purpose flour, mixing until just combined. Avoid overmixing; you want to keep that light texture intact in your cake batter.
Step 5: Spread and Bake
Pour the batter evenly into your prepared pan, smoothing it out with a spatula. Bake in the preheated oven for 10-15 minutes or until the cake is set and lightly browned, with a springy texture. Keep an eye on it; a perfectly baked Red Velvet Cake Roll will spring back when gently touched.
Step 6: Roll the Cake
Once baked, take the cake out and immediately dust a clean kitchen towel with powdered sugar. Flip the warm cake upside down onto the towel, then carefully roll it up, starting from one of the shorter ends. This allows the cake to cool in its rolled shape, which is critical for the next steps.
Step 7: Prepare the Cream Cheese Filling
In a separate bowl, prepare the cream cheese filling by mixing together the cream cheese, unsalted butter, powdered sugar, and a splash of vanilla extract. Beat until the mixture is smooth and creamy. The lusciousness of this filling will perfectly complement your Red Velvet Cake Roll.
Step 8: Assemble the Cake Roll
Once the rolled cake has cooled completely, gently unroll it and spread the cream cheese filling evenly over the cake’s surface. Be careful not to tear the cake. After spreading, roll it back up without the towel, creating a delightful spiral of cake and cream.
Step 9: Chill and Serve
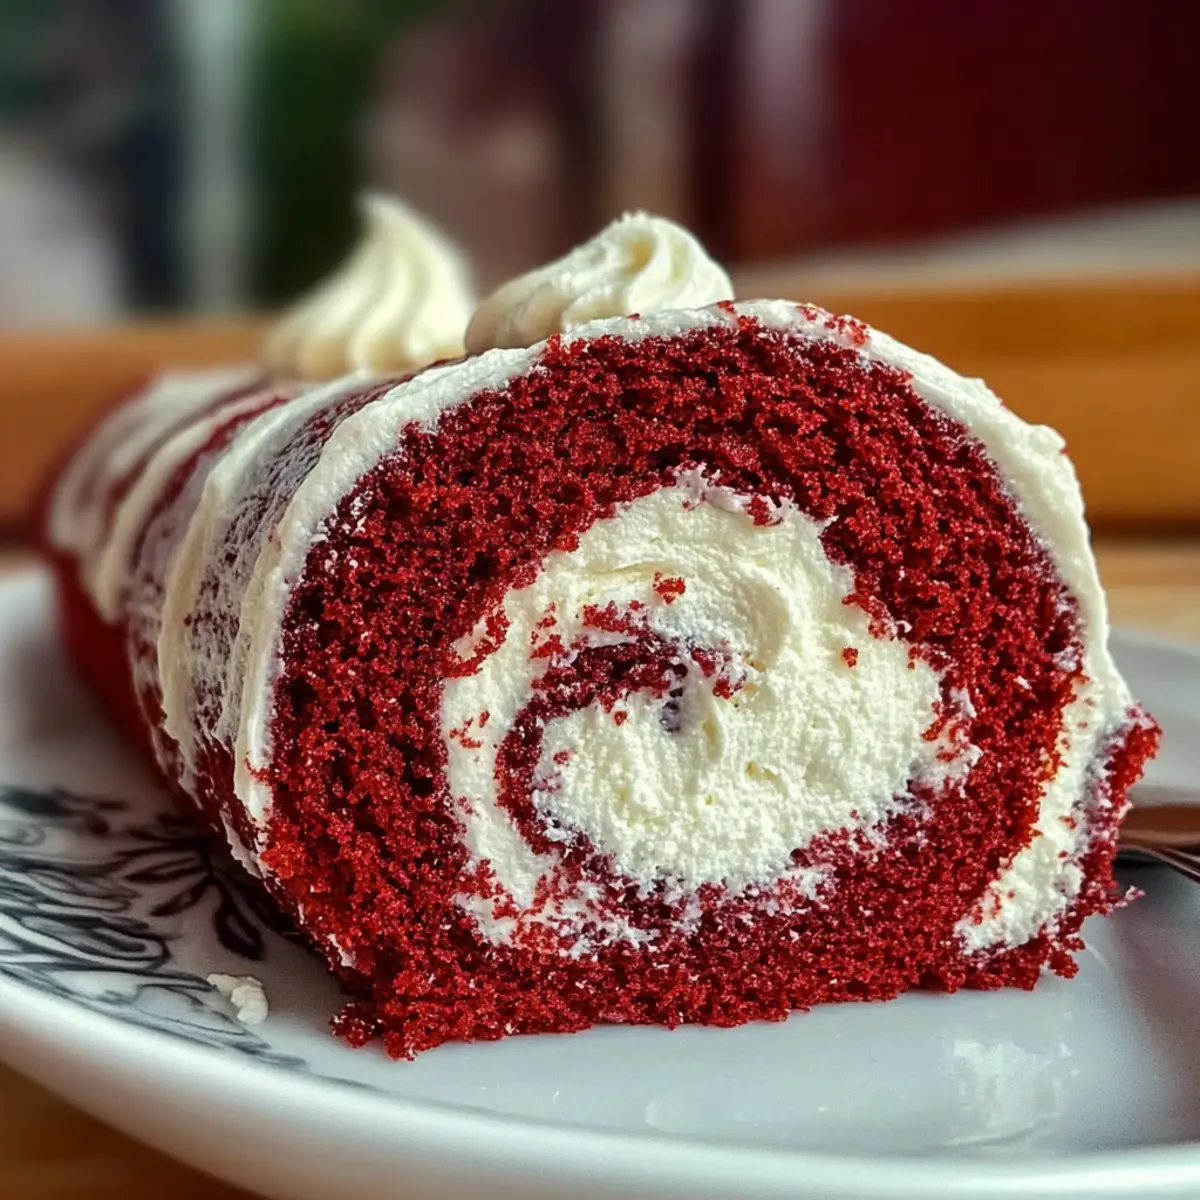
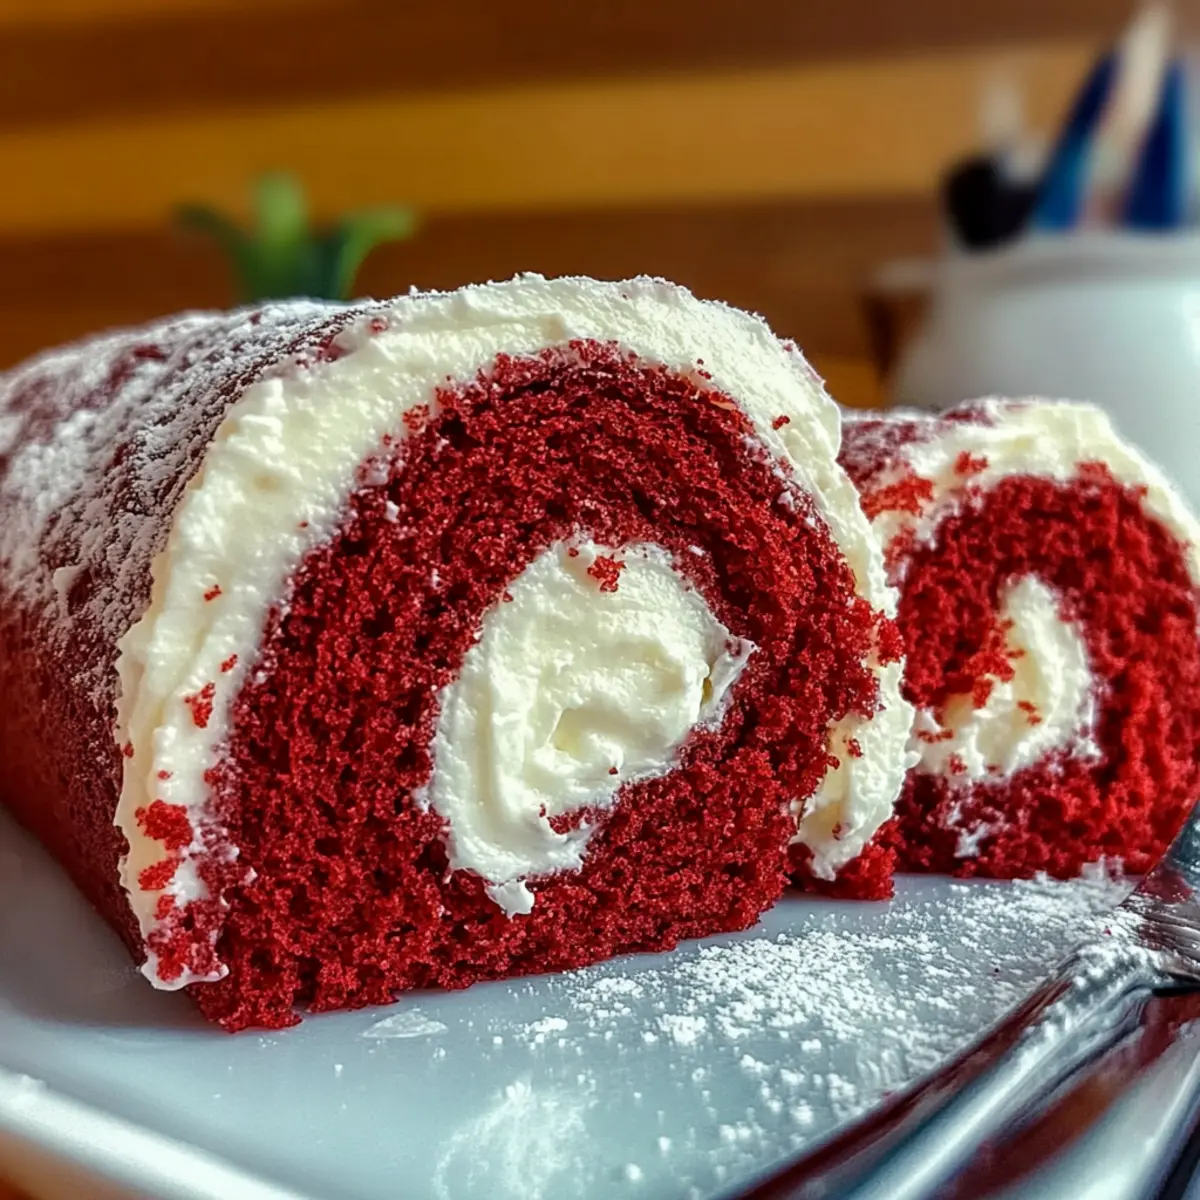
Wrap the rolled cake tightly in plastic wrap and refrigerate for at least 1 hour to allow the flavors to meld and the filling to set. Once chilled, dust the top of your beautiful Red Velvet Cake Roll with powdered sugar before slicing and serving to impress your guests!
Make Ahead Options
These Red Velvet Cake Rolls are perfect for meal prep enthusiasts seeking to save time! You can prepare the cake itself up to 24 hours in advance. Simply bake the cake, roll it up in a kitchen towel, and let it cool completely before wrapping it tightly in plastic wrap and refrigerating. The cream cheese filling can also be made up to 3 days ahead; just store it in an airtight container in the fridge. When you’re ready to serve, unroll the cooled cake, spread the filling evenly, roll it back up, and let it chill for about an hour before dusting with powdered sugar. This way, you’ll enjoy a delicious Red Velvet Cake Roll that’s just as delightful as fresh, with minimal effort on the day of serving!
What to Serve with Elegant Red Velvet Cake Roll
Indulge in a delightful culinary experience as you create the perfect spread to complement this visually stunning treat.
-
Fresh Berries: Juicy strawberries, blueberries, or raspberries add a burst of freshness that cuts through the richness of the cake roll.
-
Chocolate Sauce: A warm drizzle of chocolate sauce enhances the dessert, adding a luxurious touch and an enticing flavor contrast.
-
Whipped Cream: Light and airy, whipped cream provides a delightful texture and balances the cake’s creaminess beautifully.
-
Vanilla Ice Cream: The coolness and creaminess of vanilla ice cream paired with the moist cake roll brings an indulgent treat that’s hard to resist.
-
Mint Tea: A soothing cup of mint tea refreshes the palate and complements the rich flavors without overpowering them.
-
Coffee: Brewed coffee, whether black or with cream, offers a classic pairing that enhances dessert time with its rich aroma and flavor.
-
Chocolate-Covered Strawberries: Luxurious and decadent, these treats bring an extra touch of elegance, perfect for special occasions.
-
Pistachio Crumble: A sprinkle of crushed pistachios adds a delightful crunch and a pop of color, creating a stunning presentation alongside the cake roll.
-
Coconut Macaroons: These sweet, chewy treats enhance the texture contrast and add a bit of tropical flair to your dessert table.
Explore these wonderful options and watch your gatherings transform into memorable culinary experiences!
Red Velvet Cake Roll Variations
Feel free to get creative with this delightful dessert, transforming it into something uniquely yours!
-
Natural Color: Use beet juice for a gorgeous red hue, creating a healthier alternative to artificial coloring.
-
Lighter Filling: Substitute cream cheese with mascarpone for a lighter, less tangy taste that still satisfies your sweet tooth.
-
Chocolate Boost: Add chocolate chips or chunks to the batter for an extra burst of chocolate love in every bite. This added texture elevates the cake roll to new heights!
-
Nutty Twist: Fold chopped walnuts or pecans into the cream cheese filling, adding a delightful crunch and rustic flavor that complements the soft cake.
-
Spiced Up: Incorporate a pinch of cinnamon or nutmeg into the batter for a warm spice that perfectly marries with the rich cocoa taste.
-
Creamy Variants: Swap cream cheese for whipped cream mixed with a touch of vanilla for a fluffier and lighter option that’s equally delicious.
-
Zesty Flair: Add lemon or orange zest to the filling for a refreshing twist that cuts through the richness and adds brightness to each slice.
These variations not only allow you to tailor this recipe to your tastes but also keep your baking adventures exciting! Enjoy pairing this luscious creation with a slice of Tres Leches Cake or indulge your sweet tooth with an Oreo Icebox Cake for something uniquely delightful!
Expert Tips for the Best Red Velvet Cake Roll
-
Egg Temperature: Ensure your eggs are at room temperature for better aeration and structure in the cake roll; cold eggs can lead to uneven textures.
-
Cooling Technique: Always roll the cake while it’s warm using a towel dusted with powdered sugar to prevent sticking and cracks. A cool cake won’t roll properly.
-
Flavor Depth: For a more complex flavor, consider adding a tablespoon of buttermilk to the batter. It enhances the moisture and makes the cake even richer.
-
Natural Color Alternatives: If you prefer a healthier option, replace artificial food coloring with beet juice for a natural hue while still enjoying the gorgeous red of the Red Velvet Cake Roll.
-
Avoid Overmixing: When adding flour, mix until just combined to maintain the light and fluffy texture that is essential for a perfect cake roll.
-
Store Properly: Wrap the leftovers tightly in plastic wrap and refrigerate for up to 3 days, or freeze for up to 2 months to enjoy your Red Velvet Cake Roll later.
How to Store and Freeze Red Velvet Cake Roll
Fridge: Wrap tightly in plastic wrap or use an airtight container to store your Red Velvet Cake Roll for up to 3 days. This keeps it fresh and maintains its flavor.
Freezer: If you want to keep it longer, freeze the rolled cake wrapped in plastic wrap and then aluminum foil. It can be stored for up to 2 months while preserving its delicious taste.
Thawing: To enjoy, thaw in the refrigerator overnight. Once thawed, dust with powdered sugar before serving to revive its delightful presentation.
Reheating: For a warm treat, briefly microwave slices for 10-15 seconds. Avoid heating the whole roll to maintain its texture.
Red Velvet Cake Roll Recipe FAQs
What type of eggs should I use for the Red Velvet Cake Roll?
I recommend using large eggs that are at room temperature. This helps to aerate the mixture better, resulting in a fluffier cake. Cold eggs can cause the cake to turn out dense rather than light and airy.
How should I store the Red Velvet Cake Roll?
Wrap your Red Velvet Cake Roll tightly in plastic wrap or place it in an airtight container. It will stay fresh in the refrigerator for up to 3 days. Ensure it’s well-wrapped to prevent it from drying out or absorbing odors from other foods.
Can I freeze the Red Velvet Cake Roll?
Absolutely! To freeze, wrap the rolled cake in plastic wrap, followed by a layer of aluminum foil. This will protect it and keep it fresh for up to 2 months. When you’re ready to enjoy it, simply thaw it overnight in the refrigerator before serving.
What should I do if my cake cracks while rolling?
If you notice cracks, don’t worry! You can cover them up by adding extra cream cheese frosting over the cracked area. This not only hides imperfections but also adds more deliciousness to every bite of your Red Velvet Cake Roll.
Are there any dietary considerations for this recipe?
This Red Velvet Cake Roll is vegetarian-friendly! If you or your guests have allergies, be sure to check for sensitivities to gluten in the flour and dairy in the cream cheese. There are gluten-free flour blends available if needed, and you can make the filling with dairy-free alternatives if lactose is a concern.
Can I use natural food coloring instead of traditional red food dye?
Yes! I often recommend using beet juice as a natural alternative for achieving that lovely red color in your Red Velvet Cake Roll. It not only provides color but also adds a touch of earthiness to the flavor!
Heavenly Red Velvet Cake Roll That Will Impress Everyone
Ingredients
Equipment
Method
- Preheat your oven to 350°F (175°C) and prepare a 10x15-inch baking pan with foil and nonstick spray.
- In a mixing bowl, beat the large eggs on medium speed for 3-5 minutes until foamy and light yellow.
- Gradually add granulated sugar while mixing for an additional 2 minutes until the mixture thickens.
- Mix in oil, baking powder, salt, vanilla extract, and cocoa powder, then gradually add flour.
- Pour the batter into the prepared pan and bake for 10-15 minutes until lightly browned.
- Once baked, dust a clean towel with powdered sugar, flip the cake onto it, and roll it up from one end.
- In a separate bowl, prepare the filling by mixing cream cheese, butter, powdered sugar, and vanilla until smooth.
- Unroll the cooled cake and spread the filling evenly, then roll it back up without the towel.
- Wrap the rolled cake in plastic wrap and refrigerate for at least 1 hour.
- Before serving, dust the top with powdered sugar and slice to serve.
Leave a Reply