
The scent of warm chocolate wafting through the kitchen can instantly transform any afternoon into a delightful escape. As I gathered just four simple ingredients—oats, nut butter, maple syrup, and cocoa powder—I realized how little it takes to create a batch of Chocolate Oat Cookies that are not only indulgent but also gluten-free. These cookies are perfect for anyone craving a sweet treat without the fuss. They come together in a matter of minutes, making them an ideal choice for last-minute cravings or a cozy snack after a long day. Plus, with the option to add your favorite mix-ins, every bite can be a little adventure of its own. What flavors would you choose to elevate your cookies?

Why Do You Need This Recipe?
Simplicity at its finest: With just four ingredients, you’ll whip up these cookies in no time, making them a go-to for busy days.
Flexibility reigns supreme: Customize with your favorite add-ins, such as chocolate chips or dried fruit, to keep things exciting!
Guilt-Free Indulgence: These gluten-free delights offer a rich chocolate flavor without the heaviness, satisfying your sweet tooth.
Crowd-Pleasing treats: Perfect for sharing at gatherings or enjoying solo, they’ll disappear in a flash, leaving everyone wanting more!
Don’t forget to pair them with a glass of cold milk or try accompanying them with a dish like Lemon Garlic Shrimp and Asparagus for a complete evening of deliciousness.
Chocolate Oat Cookie Ingredients
For the Cookies
- Oats – Use rolled oats for the best chewy texture.
- Nut Butter – Almond, peanut, or sunflower seed are great options for added creaminess.
- Maple Syrup – Opt for pure maple syrup for natural sweetness; honey works too!
- Cocoa Powder – Ensure it’s unsweetened to achieve that rich chocolate flavor.
Optional Mix-ins
- Chocolate Chips – Add for bursts of chocolatey goodness in every bite.
- Dried Fruit – Consider adding raisins or cranberries for a fruity twist.
- Sea Salt – A pinch on top before baking enhances the flavor contrast beautifully.
Feel free to experiment as you master this simple recipe, leading you to delicious Chocolate Oat Cookies that can easily accompany a flavorful dinner, like Lemon Garlic Shrimp and Asparagus.
Step‑by‑Step Instructions for 4-Ingredient Gluten-Free Chocolate Oat Cookies
Step 1: Preheat Oven
Begin by preheating your oven to 350°F (175°C). This step is essential, as it ensures your cookies bake evenly. While the oven heats up, gather your ingredients and prepare a baking sheet lined with parchment paper to prevent sticking and make cleanup easy.
Step 2: Mix Ingredients
In a large mixing bowl, combine the oats, nut butter, maple syrup, and cocoa powder using a spatula or wooden spoon. Stir continuously until all ingredients are fully incorporated into a sticky mixture. You should see a cohesive dough form, perfect for shaping into cookies.
Step 3: Form Cookies
Scoop tablespoon-sized portions of cookie dough and place them onto the lined baking sheet, ensuring they are spaced about 2 inches apart. Gently flatten each mound of dough with the back of a spoon to help them spread evenly while baking. This step will help achieve the delightful texture of your chocolate oat cookies.
Step 4: Bake
Transfer the baking sheet to the preheated oven and bake for 10-12 minutes. Keep an eye on the cookies; you’ll know they’re done when the edges are set and the tops appear dry. This is crucial for achieving that perfectly chewy center while ensuring the cookies don’t overbake.
Step 5: Cool
Once baked, remove the tray from the oven and allow the cookies to cool on the baking sheet for about 5 minutes. This resting time will help them firm up as you get ready to transfer them. After cooling slightly, gently move the cookies to a wire rack to cool completely, enhancing their delightful texture.
What to Serve with 4-Ingredient Gluten-Free Chocolate Oat Cookies
Treat yourself to an unforgettable culinary experience by pairing these cookies with dishes that elevate their irresistible flavors and textures.
- Ice Cream Sundae: A scoop of rich vanilla bean ice cream drizzled with chocolate sauce complements the cookies’ chewy, chocolaty texture beautifully.
- Fresh Berries: Juicy strawberries or raspberries add a refreshing zing, balancing the sweetness of the cookies with their natural tartness.
- Creamy Yogurt: A dollop of Greek yogurt creates a delightful contrast, adding creaminess and a tangy kick that enhances each chocolatey bite.
- Nutty Granola: Serve alongside a small bowl of crunchy granola for a wonderful mix of textures, adding extra chew and satisfying nutty flavors.
- Herbal Tea: Pair with a fragrant chamomile or peppermint tea, offering a soothing contrast that’s perfect for a relaxing afternoon snack.
- Nut Butter Dip: For an indulgent twist, enjoy the cookies with a side of your favorite nut butter for extra creaminess and depth of flavor.
- Milk or Milk Alternative: A classic pairing, a glass of cold milk or a creamy almond milk perfectly harmonizes with the sweetness, making every bite even more enjoyable.
Discover the delightful combinations waiting for you when enjoying your scrumptious cookies!
Variations & Substitutions for Chocolate Oat Cookies
Feel free to get creative and make this cookie recipe your own with these delightful variations!
-
Nut-Free: Use sunflower seed butter instead of nut butter to keep these cookies safe for school lunches or nut allergies.
The nutty richness of nut butter can easily be swapped out without sacrificing that satisfying, chewy texture. -
Sweetness Boost: Add a splash of vanilla extract to elevate the flavor, making your cookies even richer and more delicious.
A hint of vanilla can make these treats feel extra special and indulgent, perfect for any occasion! -
Fruit-Forward: Mix in dried fruit like cranberries or raisins to add natural sweetness and chewiness.
These vibrant additions create bursts of flavor in every bite, transforming your cookies into a delightful snack. -
Chocolate Lovers: Stir in chocolate chips or chunks for that ultimate chocolate experience.
With each mouthful, you’ll get more chocolate goodness, turning these cookies into a sweet indulgence! -
Texture Twist: Experiment with adding chopped nuts or seeds for a crunchy contrast to the soft cookie base.
This added crunch not only gives your cookies an interesting texture but also adds nutritional benefits. -
Cocoa Swap: Substitute cocoa powder with carob powder for a unique flavor profile that’s a bit milder and sweeter.
Carob offers a slightly different twist, appealing to those who might want a change from traditional chocolate. -
Seasoned Flair: Sprinkle a pinch of cinnamon or nutmeg into the mix to give your cookies a warm, aromatic twist.
These spices add depth and warmth, making each cookie feel like a cozy treat, perfect for chilly days. -
Salted Delight: Top each cookie with a small pinch of flaky sea salt before baking to create a sweet and salty combo.
The balance of sweetness and saltiness elevates the overall flavor experience, making your cookies truly irresistible!
Explore these variations, and don’t hesitate to get adventurous as you perfect your chocolate oat cookies! Enjoy them alongside something fresh, like Lemon Garlic Shrimp and Asparagus, for a lovely meal pairing.
Expert Tips for Chocolate Oat Cookies
- Room Temperature Ingredients: Ensure all ingredients are at room temperature for better mixing and a smoother cookie dough.
- Measure Oats Carefully: Use precise measurements for oats, as too much can lead to dense cookies. Aim for the perfect balance for chewy perfection!
- Watch the Baking Time: Keep a close eye on the cookies as they bake—overbaking can dry them out quickly. Set a timer to avoid this common mistake.
- Experiment with Mix-ins: Don’t hesitate to get creative! Adding chocolate chips or dried fruit can elevate these cookies and cater to your taste preferences.
- Cooling is Key: Allow cookies to cool fully on a wire rack. This step solidifies their structure and enhances their delightful chewy texture.
Enjoy these tips to make your chocolate oat cookies a delicious success!
Make Ahead Options
These 4-Ingredient Gluten-Free Chocolate Oat Cookies are a fantastic option for meal prep enthusiasts! You can mix the ingredients and form the cookie dough up to 24 hours in advance; simply scoop the dough onto a lined baking sheet, cover it tightly with plastic wrap, and refrigerate. To maintain their chewy texture, avoid letting the dough sit at room temperature for too long before baking. When you’re ready to indulge, just pop the chilled cookie dough directly in the oven and bake for 10-12 minutes as usual. This way, you’ll enjoy warm, freshly baked cookies with minimal effort, perfectly satisfying those chocolate cravings on busy weeknights!
Storage Tips for Chocolate Oat Cookies
Room Temperature: Store leftover cookies in an airtight container at room temperature for up to 1 week to maintain their chewy texture.
Fridge: For a longer shelf life, keep them in the fridge for up to 2 weeks. Just be sure to allow them to come to room temperature before enjoying for the best flavor.
Freezer: Freeze cookies in a single layer on a baking sheet, then transfer to an airtight container or freezer bag for up to 3 months. Thaw overnight in the fridge before serving.
Reheating: Warm individual cookies in the microwave for 10-15 seconds for that freshly baked taste, making your chocolate oat cookies even more delightful!

Chocolate Oat Cookies Recipe FAQs
What type of oats should I use for the cookies?
You should use rolled oats for the best chewy texture in your chocolate oat cookies. Quick oats can make the cookies too soft, while steel-cut oats won’t provide the right consistency. Rolled oats give that delightful chew you’re looking for!
How should I store the chocolate oat cookies?
For optimal freshness, store your leftover cookies in an airtight container at room temperature for up to 1 week. If you’d like to keep them longer, the fridge can extend their shelf life to about 2 weeks. Just remember to let them warm up to room temperature before indulging for the best flavor and texture.
Can I freeze chocolate oat cookies?
Absolutely! To freeze, first arrange your cookies in a single layer on a baking sheet and place them in the freezer for about 2 hours until they are firm. Then transfer them to an airtight container or freezer bag. They can stay frozen for up to 3 months. When you’re ready to enjoy, simply thaw them in the fridge overnight.
What should I do if my cookie dough is too dry?
If your cookie dough feels too dry, it might be due to too many oats or not enough nut butter. Try adding a tablespoon more of nut butter or a splash of maple syrup to help bind the ingredients together. Remember to mix well so that everything combines seamlessly!
Are chocolate oat cookies a safe option for those with nut allergies?
If you or someone you’re serving has a nut allergy, you can substitute traditional nut butter with seed butter, like sunflower seed butter, for a safe and delicious alternative. This way, everyone can enjoy these delightful cookies!
Can I add other mix-ins for variety?
Very much so! Feel free to experiment with different additions like chocolate chips, dried fruit, or even a pinch of sea salt on top before baking. Each will give your chocolate oat cookies a unique twist, ensuring each batch is a delightful adventure!

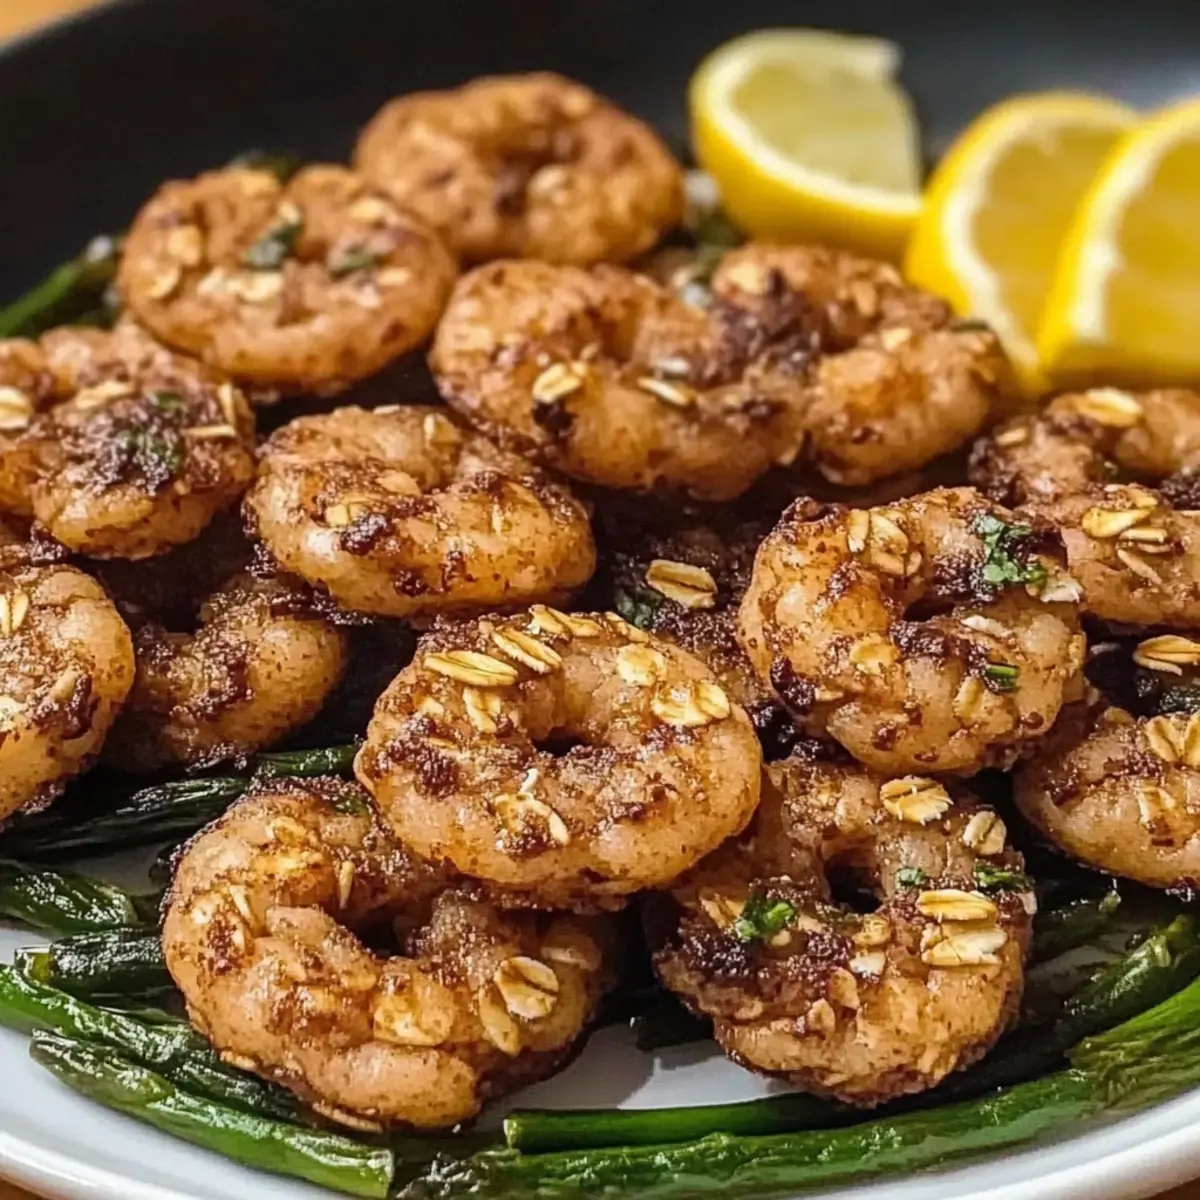
Lemon Garlic Shrimp and Asparagus for a Fresh, Zesty Dinner
Ingredients
Equipment
Method
- Heat olive oil in a skillet over medium-high heat.
- Add minced garlic and sauté for about 30 seconds until fragrant.
- Add shrimp to the skillet, season with salt and black pepper, and cook for about 2-3 minutes until they turn pink.
- Stir in the asparagus and lemon juice and zest.
- Cook for another 5-7 minutes until asparagus is tender-crisp.
- Serve hot with lemon wedges if desired.
Leave a Reply