
With a sprinkle of magic, these No-Bake Cookie Butter Cheesecake Cups transform ordinary moments into extraordinary memories. As I stirred together the creamy filling, I couldn’t help but think how perfect these little wonders are for any gathering or a cozy night in—after all, who wouldn’t want a delicious, indulgent mini dessert at their fingertips? Made with dreamy layers of spiced cookie butter and a buttery crumb crust, every bite is a delightful escape from the everyday hustle. Plus, they’re a breeze to throw together, allowing you to impress your friends and family without breaking a sweat. So, are you ready to dive into this sweet adventure? Let’s whip up these delightful cheesecake cups together!
Why are Cookie Butter Cheesecake Cups irresistible?
Decadent flavor merges beautifully with simple preparation—these no-bake delights require minimal effort, making them perfect for even the busiest home cooks. Versatile enough to adapt to different tastes, you can swap cookie butter with peanut butter for a nutty twist. Stunning presentation in individual cups makes them ideal for gatherings, while their rich, creamy texture ensures satisfaction in every bite. If you’re a fan of indulgent desserts, you’ll also love my Cheesecake Cookie Cups or the decadent Biscoff Cookie Butter recipe for more epic treats.
Cookie Butter Cheesecake Cups Ingredients
Let’s gather the goodies for these delightful treats!
For the Crust
- Biscoff or Speculoos Cookie Crumbs – Provides the buttery, spiced crust; you can use gingersnap crumbs for a different flavor twist!
- Melted Butter – Binds the cookie crumbs together, essential for crust formation.
For the Cheesecake Filling
- Cream Cheese (8 oz) – Creates the creamy base; make sure it’s softened for easy mixing.
- Powdered Sugar (¾ cup) – Sweetens the filling; adjust based on your taste preference.
- Cookie Butter (½ cup, plus extra for drizzling) – Infuses rich flavor into the filling; feel free to swap it with peanut butter if you like!
- Vanilla Extract (1 tsp) – Adds a delicious hint of warmth to the flavor.
For the Whipped Topping
- Heavy Whipping Cream (1 cup) – Whipped to soft peaks, gives a light, airy texture to the mousse for those luscious Cookie Butter Cheesecake Cups!
Step‑by‑Step Instructions for Cookie Butter Cheesecake Cups
Step 1: Prepare the Crust
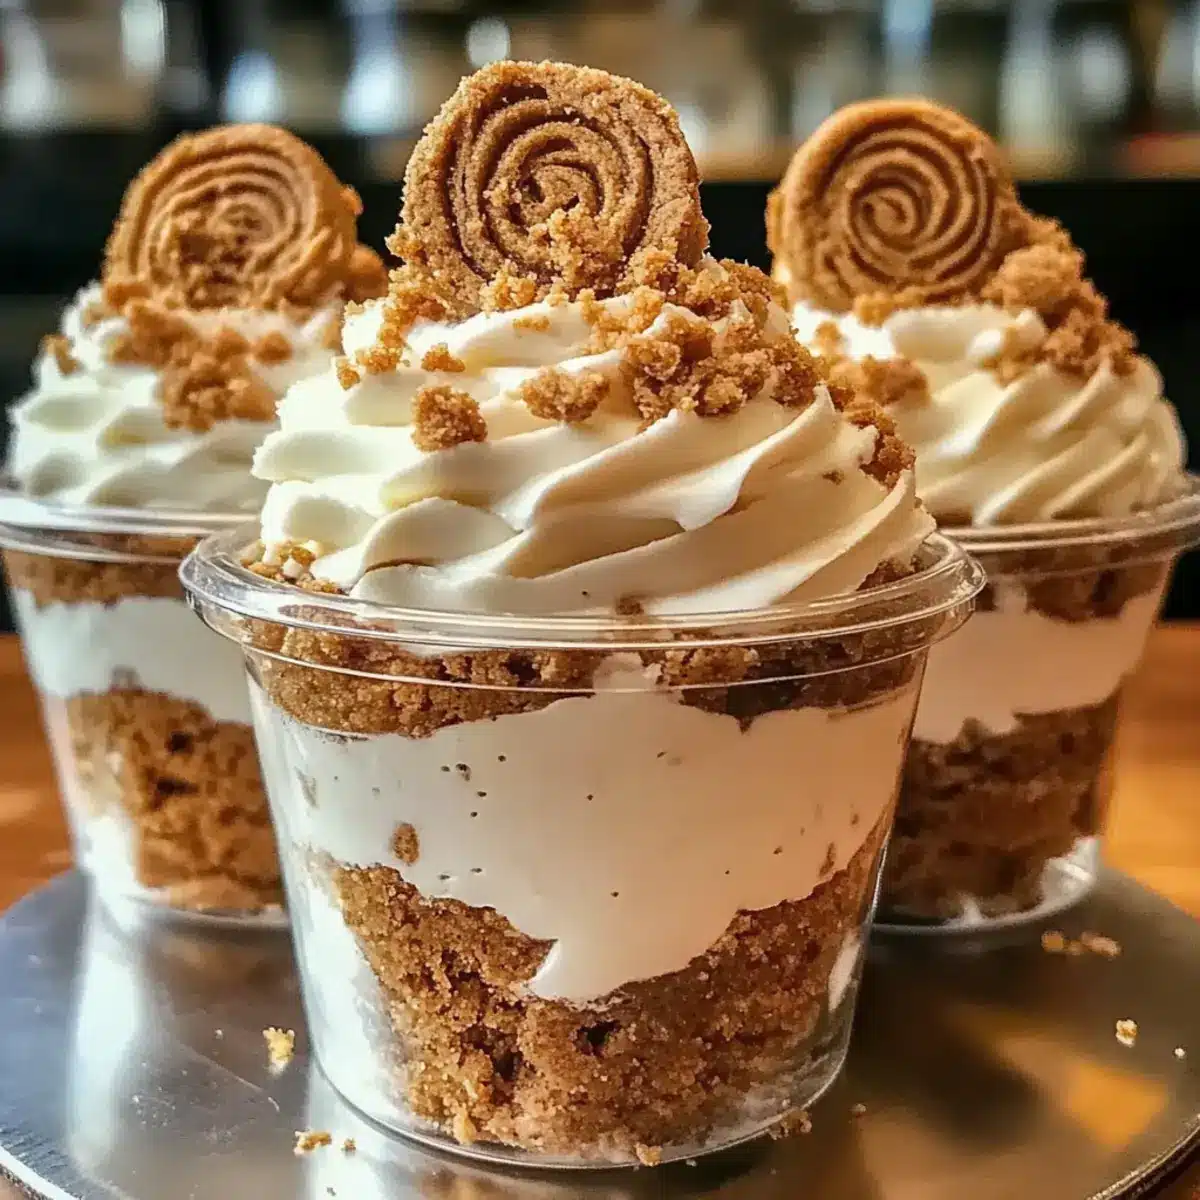
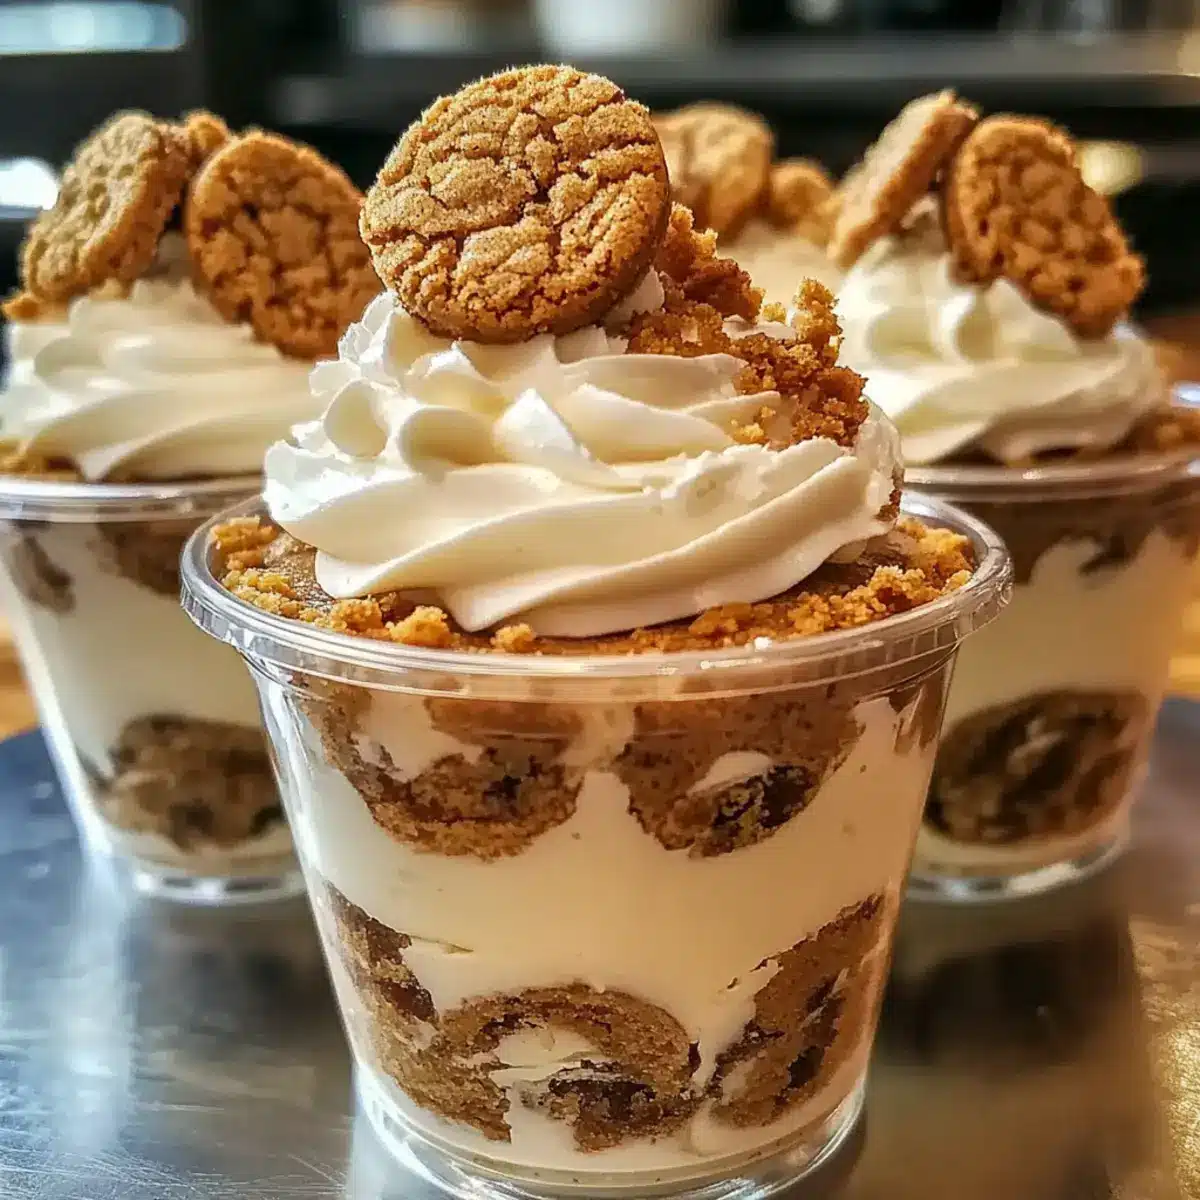
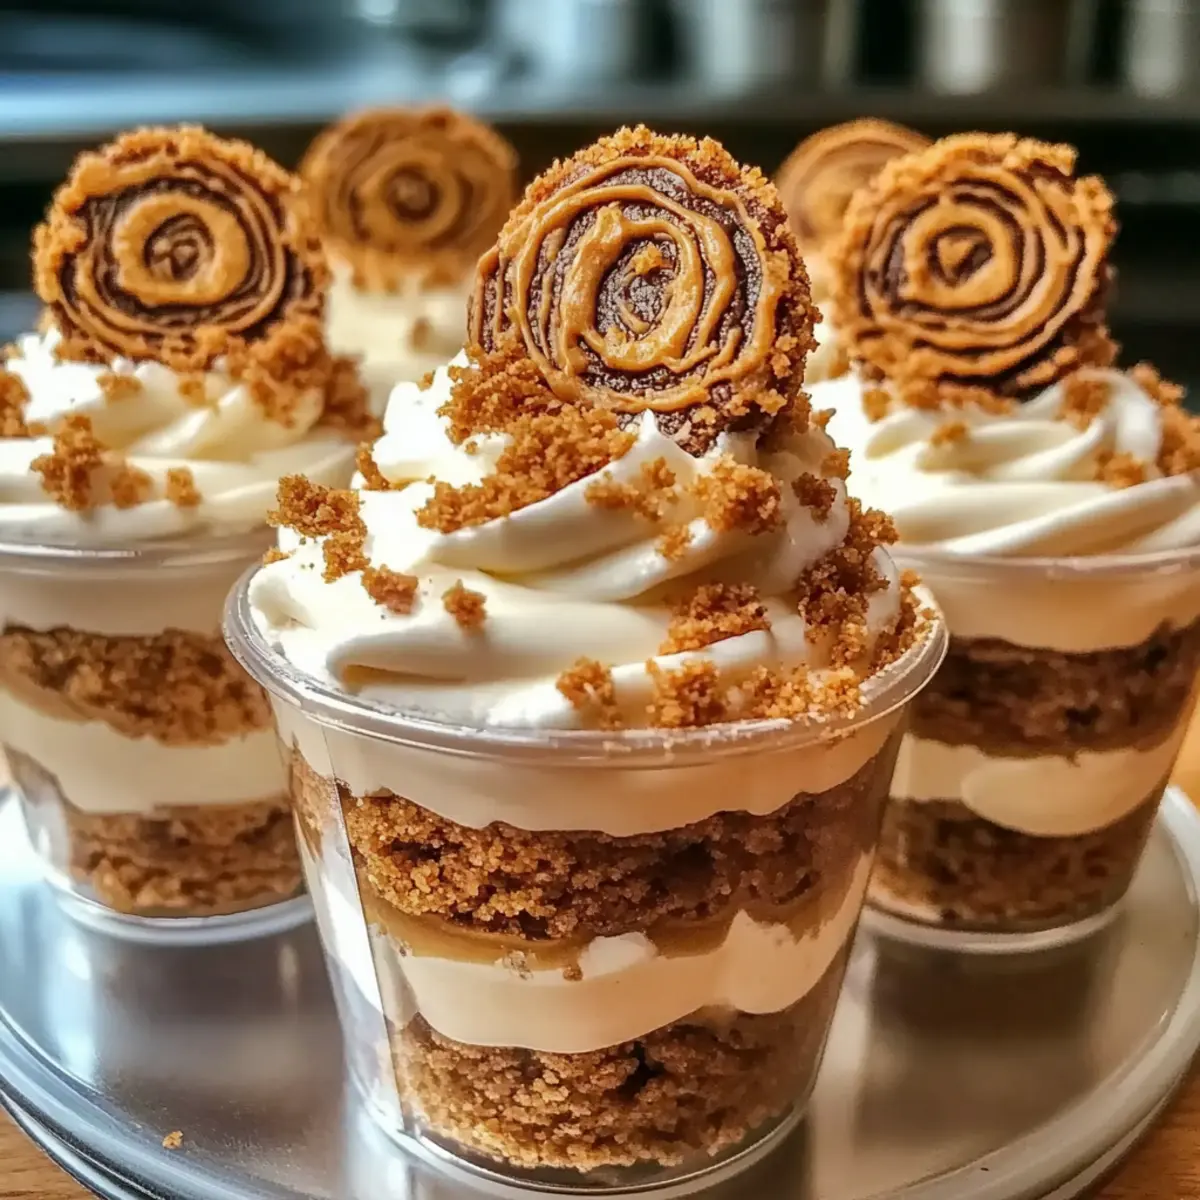
In a medium bowl, combine 1 cup of Biscoff cookie crumbs and 4 tablespoons of melted butter. Mix until the crumbs are evenly coated and the mixture resembles wet sand. Spoon the mixture evenly into the bottom of 6 to 8 serving cups, pressing down firmly with the back of a spoon to form a solid crust layer.
Step 2: Whip the Cream
In a separate large mixing bowl, use an electric mixer to whip 1 cup of heavy cream on medium-high speed until soft peaks form, which should take about 2 to 3 minutes. As you whip it, watch for the cream to thicken and hold its shape when the beaters are lifted. Once ready, set the whipped cream aside, allowing it to maintain its airy texture.
Step 3: Make the Filling
In another mixing bowl, beat together 8 oz of softened cream cheese, ¾ cup powdered sugar, ½ cup of cookie butter, and 1 teaspoon of vanilla extract using the electric mixer. Mix on medium speed until the filling is completely smooth and creamy, taking about 2 to 3 minutes. This forms the rich base of your Cookie Butter Cheesecake Cups.
Step 4: Combine Mixtures
Gently fold the whipped cream into the cream cheese mixture using a spatula. Start by adding one-third of the whipped cream to lighten the batter, then gradually incorporate the remaining whipped cream. Be careful not to overmix; you want to keep the mixture light and fluffy for that ideal cheesecake texture.
Step 5: Layer the Cups
Using a spoon or piping bag, add a generous layer of the cheesecake filling over the crust layer in each cup. Fill until the cups are about three-quarters full for an appealing look. Drizzle a spoonful of melted cookie butter over the top of the cheesecake filling, letting it swirl for a decorative touch.
Step 6: Repeat Layers
To create more depth, repeat the layering process by adding more cheesecake filling on top of the first layer in each cup, finishing with a thick layer of filling. Leave a little space at the top to accommodate any garnishes. This layering technique will enhance the flavor experience in your Cookie Butter Cheesecake Cups.
Step 7: Garnish
As an optional finishing touch, sprinkle additional cookie crumbs or place a whole Biscoff cookie on top of each cup. This adds both texture and visual appeal, making your Cookie Butter Cheesecake Cups look even more inviting for your guests or family.
Step 8: Chill
Finally, cover the cups with plastic wrap and refrigerate them for at least 1 hour, or until set. This chilling step is crucial, as it helps the flavors meld together while giving the filling a creamy consistency that’s ready to be savored.

How to Store and Freeze Cookie Butter Cheesecake Cups
Fridge: Keep your Cookie Butter Cheesecake Cups in an airtight container for up to 3 days. This way, they’ll remain fresh and their delightful flavors intact!
Freezer: For longer storage, wrap each cup tightly in plastic wrap and place them in a freezer-safe container. They can be frozen for up to 1 month, perfect for a last-minute dessert!
Thawing: When ready to enjoy, move the frozen cups to the fridge to thaw overnight. Avoid using a microwave, as it can compromise their creamy texture.
Reheating: Serve your cups chilled straight from the fridge for the best taste experience. No reheating is necessary, as these no-bake delights are meant to be enjoyed cool!
Make Ahead Options
These Cookie Butter Cheesecake Cups are perfect for busy home cooks looking for convenient dessert solutions! You can prepare the crust and the cheesecake filling up to 24 hours in advance. Simply make the crust, layer it into your serving cups, and refrigerate until you’re ready to whip up the filling. This two-step prep keeps them fresh and delicious. When you’re ready to serve, just fold the whipped cream into the cheesecake mixture, layer it on top of the chilled crust, and pop them back in the fridge for a quick chill if needed. This way, you can impress guests with minimal last-minute effort, all while ensuring your treats remain just as delightful!
Cookie Butter Cheesecake Cups Variations
Feel free to get creative and customize your Cookie Butter Cheesecake Cups with these delightful twists!
-
Nutty Alternative: Swap cookie butter for peanut butter to create a delightful nutty flavor. The change adds a warm, comforting vibe to your cups.
-
Gingersnap Crust: Use gingersnap cookie crumbs instead of Biscoff for an extra spiced kick. This twist brings a whole new zing to your crust!
-
Chocolate Delight: Incorporate cocoa powder into the cheesecake filling for a chocolatey version. Make sure to mix it well for even distribution!
-
Pumpkin Spice: Stir in some pumpkin puree and spices to the filling for a seasonal favorite. Reminiscent of fall, these cups will warm your heart.
-
Add Some Heat: A pinch of cayenne pepper in the filling can give your dessert a surprising kick. It’s a daring twist that will intrigue your guests!
-
Fresh Fruit Topping: Top with fresh strawberries or blueberries for a burst of color and sweetness. The freshness balances the richness perfectly.
-
Layered Flavors: Alternate layers of cheesecake filling with crushed cookies for added texture. It creates a delightful surprise in each bite!
For more delightful treats, don’t forget to check out my Choco Cheesecake Cookie bites or the tempting Strawberry Crunch Cheesecake for inspired dessert options that are as easy to make as they are to enjoy!
Helpful Tricks for Cookie Butter Cheesecake Cups
-
Perfect Creaminess: Use softened cream cheese before mixing; it ensures a silky-smooth filling while avoiding lumps in your Cookie Butter Cheesecake Cups.
-
Whipping Cream Secrets: Don’t overwhip the heavy cream. Whip just until soft peaks form to keep the cheesecake filling light and airy.
-
Layering Like a Pro: For a neater presentation, use a piping bag to layer the cheesecake filling. It allows for gorgeous swirls in your cups!
-
Make Ahead Magic: Prepare these cups a day in advance and store them in the refrigerator. This not only saves time but also enhances the flavors as they chill!
-
Frozen Treats: For longer storage, freeze the cups without garnishes. They can stay fresh for up to a month, delighting you with a quick treat whenever you crave one.
What to Serve with Cookie Butter Cheesecake Cups?
These delightful mini desserts shine on their own but can truly elevate your meal experience when paired with the right sides and drinks.
-
Fresh Berries: Add a burst of brightness with mixed fresh berries like strawberries and blueberries. Their tartness beautifully balances the rich sweetness of the cheesecake cups.
-
Sweet Whipped Cream: A dollop of lightly sweetened whipped cream enhances the creamy texture while adding an airy touch that complements the dense cheesecake.
-
Coffee or Espresso: The bold flavors of coffee contrast wonderfully with the sweet cheesecake, creating a delightful pairing that comforts the soul.
-
Chocolate Drizzle: For chocoholics, a rich, warm chocolate drizzle over the cheesecake cups adds both a luxurious taste and an appealing look that guests won’t resist.
-
Crushed Nuts: Sprinkle crushed pistachios or walnuts on top for added crunch, providing a pleasing texture that contrasts with the silky smoothness of your treats.
-
Tea Selection: A warm cup of chamomile or chai tea offers a soothing complement, perfect for winding down after enjoying your decadent dessert.
-
Chocolate Chip Cookies: Serve a few classic chocolate chip cookies on the side for an extra dose of nostalgia and a gooey, chewy contrast.
-
Sparkling Lemonade: Brighten the table with a refreshing glass of sparkling lemonade. Its zesty fizz cuts through the creaminess of the cheesecake cups, making every bite transport you to summer bliss.
Cookie Butter Cheesecake Cups Recipe FAQs
How do I choose the right cookie butter?
Absolutely! When selecting cookie butter, look for brands that clearly list natural ingredients without added preservatives. The texture should be smooth and spreadable, with a rich flavor profile. If you’re feeling adventurous, try different flavors like speculoos or even chocolate cookie butter to elevate your cheesecake cups!
How should I store my Cookie Butter Cheesecake Cups?
To maintain their freshness, store your Cookie Butter Cheesecake Cups in an airtight container in the refrigerator for up to 3 days. This keeps them creamy and delicious! If you’re not planning to consume them right away, you can opt to freeze them instead.
Can I freeze Cookie Butter Cheesecake Cups?
Definitely! For longer preservation, wrap each cup tightly in plastic wrap and place them in a freezer-safe container. They can be stored in the freezer for up to 1 month. To enjoy, simply thaw them in the refrigerator overnight, and they’ll be ready to delight your taste buds once again!
What if my whipped cream doesn’t hold its shape?
No worries! If your whipped cream doesn’t form soft peaks, it may be because it hasn’t been chilled enough or was overwhipped. Ensure your heavy cream is cold, and beat at medium-high speed until you notice it thickening, which should take 2 to 3 minutes. If it becomes too stiff, just fold in a bit of fresh whipped cream to lighten it.
Are there any allergens to consider with this recipe?
Yes, be mindful of allergies! This recipe contains dairy (cream cheese, heavy whipping cream) and gluten (from cookie crumbs). If you have gluten sensitivities, you can use gluten-free cookie crumbs. For lactose intolerance, try using dairy-free cream cheese and whipped cream alternatives, allowing everyone to indulge in these delightful treats!
Decadent Cookie Butter Cheesecake Cups for Easy Indulgence
Ingredients
Equipment
Method
- In a medium bowl, combine Biscoff cookie crumbs and melted butter. Mix until coated and resembles wet sand. Spoon into cups and press to form a solid crust layer.
- In a separate bowl, whip heavy cream on medium-high speed until soft peaks form, about 2 to 3 minutes. Set aside.
- Beat together cream cheese, powdered sugar, cookie butter, and vanilla extract until smooth and creamy, about 2 to 3 minutes.
- Gently fold the whipped cream into the cream cheese mixture, adding in thirds to maintain the light texture.
- Add a layer of cheesecake filling over the crust in each cup, filling three-quarters full. Drizzle melted cookie butter on top.
- Repeat the process by adding more cheesecake filling on top, leaving space for garnishes.
- Garnish with additional cookie crumbs or a whole Biscoff cookie on top of each cup.
- Cover with plastic wrap and refrigerate for at least 1 hour to set.
Leave a Reply