
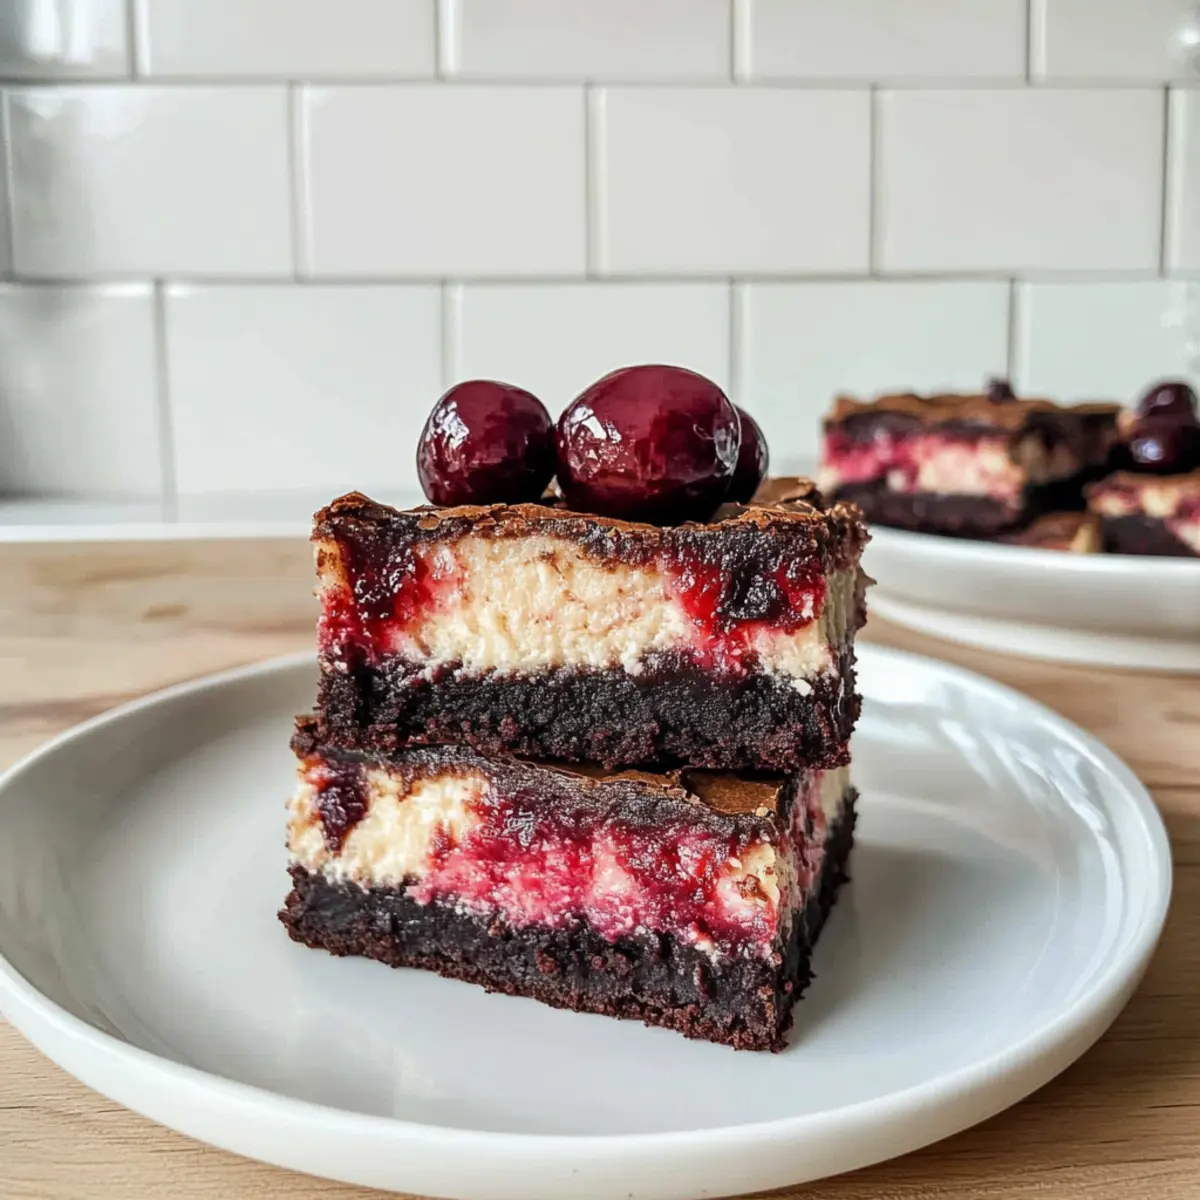
As the cherry blossoms begin to bloom, I find myself reminiscing about sunny afternoons spent indulging in desserts that bring joy with every bite. One of my all-time favorites is these decadent Cherry Cheesecake Brownies. Picture a rich and fudgy brownie base, perfectly topped with a velvety cheesecake layer and a swirl of tangy cherries, all gluten-free to ensure everyone can savor this delight. Not only are these brownies easy to prepare, but they also shine at any gathering, turning heads and delighting taste buds. Whether you’re looking to impress guests or satisfy a sweet tooth, this recipe is your ticket to a crowd-pleasing dessert. Are you ready to create something truly special?
Why are these Cherry Cheesecake Brownies special?
Decadent Flavors: Each bite is a delightful harmony of rich chocolate and creamy cheesecake, perfectly balanced with the tartness of cherries.
Gluten-Free Goodness: Using a gluten-free brownie mix allows everyone to indulge without worry, making it a versatile dessert option for gatherings.
Easy to Make: With simple instructions, you can whip these up in no time, perfect for a last-minute treat or special occasion.
Crowd-Pleaser: Impress your friends and family; they won’t believe this dessert is gluten-free! It’s the ideal choice for any event or fun dinner party.
Customization Options: Feeling adventurous? Try swapping cherries for other fruits like blueberries or raspberries, as suggested in our Strawberry Crunch Cheesecake or Blueberry Crumble Cheesecake recipes!
Embrace your inner baker and enjoy the deliciousness of these brownies today!
Cherry Cheesecake Brownies Ingredients
For the Brownie Base
- Box of Simple Mills Gluten Free Brownie Mix – This mix sets the stage for a rich and fudgy brownie base. Feel free to use any brownie mix or your favorite homemade recipe.
For the Cheesecake Filling
- Cream Cheese (2 x 8oz blocks, softened) – This gives the cheesecake its smooth and creamy texture. Dairy-free alternatives have not been tested, but traditional cream cheese is a must for authentic flavor.
- Coconut Sugar (½ cup) – Adds a rich sweetness that complements the cheesecake well. You can swap it with cane sugar or monk fruit sweetener if desired.
- Vanilla Extract (2 tsp) – Enhances the overall flavor of the filling, making it even more divine!
- Large Egg (1) – Serves as a binding agent for the cheesecake filling, ensuring a lovely texture.
For the Cherry Mixture
- Frozen Cherries (12 oz) – Adds a fruity layer that bursts with flavor; fresh pitted cherries can also be a delightful alternative!
- Coconut Sugar (¼ cup) – Sweetens the cherry topping, creating a perfect balance of flavors; can be replaced with cane sugar or monk fruit sweetener.
- Arrowroot Starch (1 tsp) – This helps thicken the cherry filling for that perfect consistency; corn starch or tapioca flour is a great substitute.
These Cherry Cheesecake Brownies are truly a treat to make and indulge in. Happy baking!
Step‑by‑Step Instructions for Cherry Cheesecake Brownies
Step 1: Preheat and Prepare
Begin by preheating your oven to 350°F (175°C). While the oven warms up, take an 8×8-inch baking dish and line it with parchment paper, allowing some overhang to help with easy removal later. This prep work ensures that your Cherry Cheesecake Brownies will bake evenly and be simple to lift out once they’re perfectly set.
Step 2: Simmer the Cherry Mixture
In a medium saucepan over low heat, combine the frozen cherries and coconut sugar. Allow the mixture to simmer gently for about 3-5 minutes, stirring occasionally until the cherries begin to soften and release their juices. This creates a deliciously sweet base for the brownies, setting the stage for the perfect topping.
Step 3: Thicken the Cherry Filling
Using a potato masher, gently break down the cherries into a chunky sauce. Stir in the arrowroot starch and continue simmering for another 3 minutes, or until the mixture thickens to a lovely consistency. Once thickened, remove the saucepan from the heat and set the cherry filling aside to cool to room temperature, allowing flavors to meld beautifully.
Step 4: Prepare the Brownie Base
Next, prepare the gluten-free brownie mix according to the package instructions. Once mixed, pour the batter into the lined baking dish, pressing it evenly into the corners and smoothing the top with a spatula. This will form a rich, fudgy base for your Cherry Cheesecake Brownies that is sure to impress.
Step 5: Mix the Cheesecake Filling
In a stand mixer or large bowl, combine the softened cream cheese, coconut sugar, egg, and vanilla extract. Beat the mixture until it becomes smooth and creamy, taking care to scrape down the sides as needed. This luscious cream cheese filling will be the crowning glory of your brownies, adding richness and flavor.
Step 6: Layer the Cheesecake Mixture
Spread the creamy cheesecake mixture evenly over the prepared brownie base. Use a spatula to ensure it covers every inch, creating a beautiful layered effect. Then, spoon the cooled cherry filling on top and use a butter knife to swirl the mixtures together lightly, creating a delightful marbled pattern.
Step 7: Bake to Perfection
Carefully place the baking dish in the preheated oven and bake for 45-50 minutes. The edges should be set, while the center will have a slight jiggle, indicating that the cherry cheesecake brownies are done but not overbaked. Keep an eye on them toward the end to ensure they don’t dry out.
Step 8: Cool and Chill
Once baked, remove the brownies from the oven and let them cool at room temperature for about 1 hour. After that, refrigerate the brownies for at least 4 hours, preferably overnight. This chilling step allows the flavors to deepen and the texture to firm up, making for easier slicing and a perfect dessert experience.
Expert Tips for Cherry Cheesecake Brownies
-
Cooling Time Matters: Allow the brownies to cool completely before chilling to optimize firmness and ease of slicing later.
-
Knife Skills: Use a clean, sharp knife to cut the brownies for clean edges; wiping the knife after each cut ensures neat squares.
-
Storage Strategy: Store leftovers in an airtight container in the fridge for up to 5-6 days, or freeze for longer freshness, perfect for your sweet tooth cravings.
-
Mix it Up: Feel free to experiment with different fruits like raspberries or blueberries; just be mindful of their moisture content when creating your Cherry Cheesecake Brownies.
-
Check for Doneness: The center of the brownies should have a slight jiggle when they’re done; overbaking can lead to dry brownies, so keep an eye on them!
Cherry Cheesecake Brownies Variations
Feel free to get creative and customize your Cherry Cheesecake Brownies for a delightful twist!
-
Dairy-Free: Substitute regular cream cheese with plant-based cream cheese for a creamy yet dairy-free dessert. It’s a small change that opens up the brownies to everyone!
-
Different Sweeteners: Swap coconut sugar with maple syrup or honey for a unique flavor profile. These natural sweeteners can enhance the richness of your cheesecake layer.
-
Berry Bliss: Replace cherries with fresh raspberries or blueberries for a seasonal twist. The tartness of these berries will create a refreshing contrast that’s simply divine!
-
Nutty Crunch: Add chopped walnuts or pecans into the brownie mix for a delightful crunch. This exciting texture can turn your rich brownies into decadent treats that everyone will love.
-
Chocolate Drizzle: Drizzle melted dark chocolate over the top before serving for an added layer of indulgence. It creates an attractive finish that beckons for a bite!
-
Spiced Up: Incorporate a dash of cinnamon or nutmeg into your cheesecake filling for a warm, spicy undertone. It’s a subtly delicious change reminiscent of cozy autumn flavors.
-
Vegan Twist: Use a flax egg in place of a chicken egg for a vegan-friendly version of the cheesecake filling. It’s an easy substitute that keeps the dessert plant-based!
For more delish inspirations, check out our Oreo Cheesecake Cookie or Strawberry Brownies Decadent for even more fun variations! Enjoy the baking adventure!
Make Ahead Options
These Cherry Cheesecake Brownies are perfect for meal prep, saving you time on busy weeknights! You can prepare the brownie base and cheesecake filling up to 24 hours in advance. Simply bake the brownie layer, let it cool completely, and then refrigerate it, tightly covered. The cheesecake mixture can be whipped up and stored separately in the fridge until you’re ready to assemble. When you’re ready to finish, simply spread the cheesecake filling over the brownie base, top with the cherry mixture, and bake as directed. This approach keeps your delicious brownies just as rich and moist, while taking the stress out of last-minute dessert preparations!
What to Serve with Cherry Cheesecake Brownies
Indulge in a delightful array of complementary dishes that elevate your Cherry Cheesecake Brownies into an unforgettable experience.
-
Whipped Cream: A dollop of freshly whipped cream adds a light and airy texture, balancing the rich and creamy dessert perfectly.
-
Vanilla Ice Cream: Serve with a scoop of creamy vanilla ice cream for an irresistibly indulgent pairing that melts in your mouth.
-
Fresh Berries: A side of juicy strawberries, blueberries, or raspberries brightens the plate; their tartness complements the sweetness of the brownies beautifully.
-
Chocolate Sauce: Drizzle warm chocolate sauce over your brownies for a decadent touch that enhances the chocolate flavor and adds an extra layer of indulgence.
-
Coffee: A rich, bold coffee contrasts wonderfully with the sweetness of the brownies, creating a delightful balance that many dessert lovers adore.
-
Fruit Salad: A refreshing fruit salad introduces a burst of natural sweetness and acidity, cleansing the palate and balancing the richness of the brownies.
-
Mint Tea: For a soothing accompaniment, a cup of mint tea offers a calming and aromatic experience, perfect for winding down after a sweet treat.
-
Cheese Plate: Pairing your brownies with a selection of cheeses creates an interesting flavor contrast that can kick up your dessert game.
-
Nutty Crunch: Serve with a handful of mixed nuts or a sprinkle of crushed almonds for added texture and a delightful crunch that compliments the chewy brownie base.
How to Store and Freeze Cherry Cheesecake Brownies
Room Temperature: Allow Cherry Cheesecake Brownies to cool completely before storing at room temperature in an airtight container for up to 3 days.
Fridge: Keep the brownies stored in an airtight container in the fridge for up to 5-6 days. This helps maintain their rich flavors and texture.
Freezer: For longer storage, freeze the brownies in an airtight container or wrap them tightly in plastic wrap for up to 30 days. Thaw in the fridge before enjoying.
Reheating: If you prefer warm brownies, microwave for 10-15 seconds, or enjoy them chilled for a refreshing treat!
Cherry Cheesecake Brownies Recipe FAQs
What type of cherries should I use for the Cherry Cheesecake Brownies?
You can use either frozen or fresh cherries for the filling. Frozen cherries are convenient and bursting with flavor, while fresh pitted cherries can lend a delightful texture. If you choose fresh, just ensure they’re ripe and sweet for the best taste!
How should I store Cherry Cheesecake Brownies?
Store your brownies in an airtight container in the fridge for up to 5-6 days. This keeps them fresh and delicious! If you want to enjoy them longer, I often freeze them. They can last for up to 30 days when stored in a sealed container or wrapped tightly in plastic.
Can I freeze Cherry Cheesecake Brownies?
Absolutely! To freeze, allow them to cool completely first. Then, wrap the brownies tightly in plastic wrap and place them in an airtight container. This way, they maintain their fabulous flavors and textures. When you’re ready to indulge, simply thaw them in the refrigerator overnight!
What should I do if the brownies are too gooey after baking?
If your Cherry Cheesecake Brownies turn out too gooey, they might need a little more baking time. Make sure to check towards the end of the baking time; the edges should be set, and the center should be slightly giggly but not overly wet. If they need it, bake for an additional 5-10 minutes, watching closely to prevent overbaking.
Are Cherry Cheesecake Brownies suitable for gluten-free diets?
Yes, these brownies are gluten-free! By using a gluten-free brownie mix, you can enjoy this dessert without worrying about gluten. However, always double-check the labels of your ingredients to ensure they are gluten-free, particularly if you have sensitivities or allergies.
Can I use a dairy-free alternative for the cream cheese?
While the recipe has not been tested with dairy-free alternatives, you can certainly try using a plant-based cream cheese. Be aware that it may alter the flavor slightly, but many brands offer excellent options that can give you the creamy texture you desire in your cheesecake layer.
Irresistible Cherry Cheesecake Brownies You’ll Love to Make
Ingredients
Equipment
Method
- Preheat your oven to 350°F (175°C) and line an 8x8-inch baking dish with parchment paper.
- In a medium saucepan over low heat, combine the frozen cherries and coconut sugar. Simmer gently for about 3-5 minutes, stirring occasionally until the cherries begin to soften.
- Using a potato masher, break down the cherries into a chunky sauce. Stir in the arrowroot starch and continue simmering for another 3 minutes until the mixture thickens.
- Prepare the brownie mix according to package instructions. Pour the batter into the lined baking dish, pressing evenly into the corners and smoothing the top.
- In a stand mixer, combine the softened cream cheese, coconut sugar, egg, and vanilla extract. Beat until smooth and creamy.
- Spread the cheesecake mixture evenly over the brownie base. Spoon the cooled cherry filling on top and use a butter knife to swirl together.
- Bake for 45-50 minutes. The edges should be set, while the center will have a slight jiggle.
- Cool at room temperature for about 1 hour. Refrigerate for at least 4 hours before slicing.
Leave a Reply