
As I stirred the pot, the comforting aroma of marinara mingled with sizzling garlic wafted through my kitchen, instantly whisking me away to my favorite Italian bistro. I’m excited to share my quick and easy One-Pot Chicken Parmesan Pasta recipe, designed for those who crave hearty Italian-American flavors without the fuss. This dish not only comes together in just 30 minutes but also means fewer pots to wash—a true lifesaver for any busy weeknight! With perfectly cooked pasta, crispy chicken, and gooey cheese all in one skillet, it’s sure to win over even the pickiest eaters. Are you ready to elevate your home-cooking game with this delicious twist? Let’s dive in!
Why is One-Pot Chicken Parm Pasta Perfect?
Quick, Simple Cooking: This recipe requires minimal prep and just one pot, making clean-up a breeze!
Rich, Satisfying Flavor: With savory marinara and gooey cheese, each bite is packed with comforting taste that everyone loves.
Picky Eater Approved: Even the fussiest eaters will fall for this creamy dish! Add in a side of fresh salad or garlic knots for the ultimate family meal.
Versatile Ingredients: Feel free to mix up the pasta and cheese types according to your preference; it’s a customizable delight!
Perfect for Busy Nights: In just 30 minutes, you can whip up a hearty dinner that feels special without the stress.
Chicken Parm Pasta Ingredients
For the Pasta
• Cavatappi – A fun, spiral shape that holds sauce beautifully; you can swap it with penne for a different texture.
• Kosher Salt – Crucial for flavor; don’t skimp while cooking the pasta!
For the Sauce
• Store-bought or Homemade Marinara Sauce – Forms the base of your chicken parm pasta; choose your favorite brand for convenience.
• Small Yellow Onion (finely chopped) – Adds a sweet depth to the sauce; substitute with white onion if desired.
• Garlic Cloves (finely chopped) – Infuses the dish with aromatic richness; use fresh for the best flavor!
For the Chicken
• Store-bought Cooked Frozen Breaded Chicken Cutlets – Quick and crispy; just follow package instructions to prepare.
For Toppings
• Parmesan (finely grated, about 1 cup, divided) – Essential for that nutty flavor; save some for sprinkling on top!
• Shredded Mozzarella – Provides that delicious gooeyness; feel free to swap it with fontina for a twist.
• Freshly Ground Black Pepper – A must for seasoning; adjust to your taste preference.
• Torn Fresh Basil – Adds a pop of color and fresh flavor; parsley can be used if basil isn’t available.
For Cooking
• Extra-Virgin Olive Oil – Necessary for sautéing; can replace with canola oil if needed.
Embrace the delightful chaos of flavors in this Chicken Parm Pasta—let’s get cooking!
Step‑by‑Step Instructions for One-Pot Chicken Parmesan Pasta
Step 1: Prepare the Chicken
Start by cooking the frozen breaded chicken cutlets according to package instructions, typically oven baking them at 400°F (200°C) for 20 minutes until golden and crispy. Once cooked, remove them from the oven, let them cool for a moment, and then slice them into bite-sized pieces, ready to crown the Chicken Parm Pasta.
Step 2: Boil the Pasta
In a large pot, bring heavily salted water to a rolling boil. Add the cavatappi pasta and cook until al dente, usually around 8-10 minutes. Keep an eye on it, as you want it perfectly tender but still firm. Once done, drain the pasta, then set it aside for later incorporation into your one-pot creation.
Step 3: Sauté the Aromatics
Using the same pot, heat a generous drizzle of extra-virgin olive oil over medium-high heat. Add the finely chopped onion and sauté for about 7 minutes until it becomes translucent and fragrant. Next, toss in the minced garlic and cook for an additional minute, ensuring it doesn’t burn, which will give the Chicken Parm Pasta its lovely base flavor.
Step 4: Create the Sauce
Pour in the marinara sauce and add a pinch of kosher salt to elevate the flavor. Stir everything together and bring it to a gentle simmer for about 3 minutes, allowing the flavors to meld beautifully. The vivid red sauce should bubble slightly, indicating it’s heating up and ready to combine with the pasta.
Step 5: Combine Pasta and Sauce
Once the sauce is ready, return the drained cavatappi pasta to the pot. Toss it together with half of the finely grated Parmesan, allowing it to melt and coat the pasta evenly. The Chicken Parm Pasta should look creamy and inviting, with the pasta beautifully bathed in sauce.
Step 6: Add Chicken and Cheese Toppings
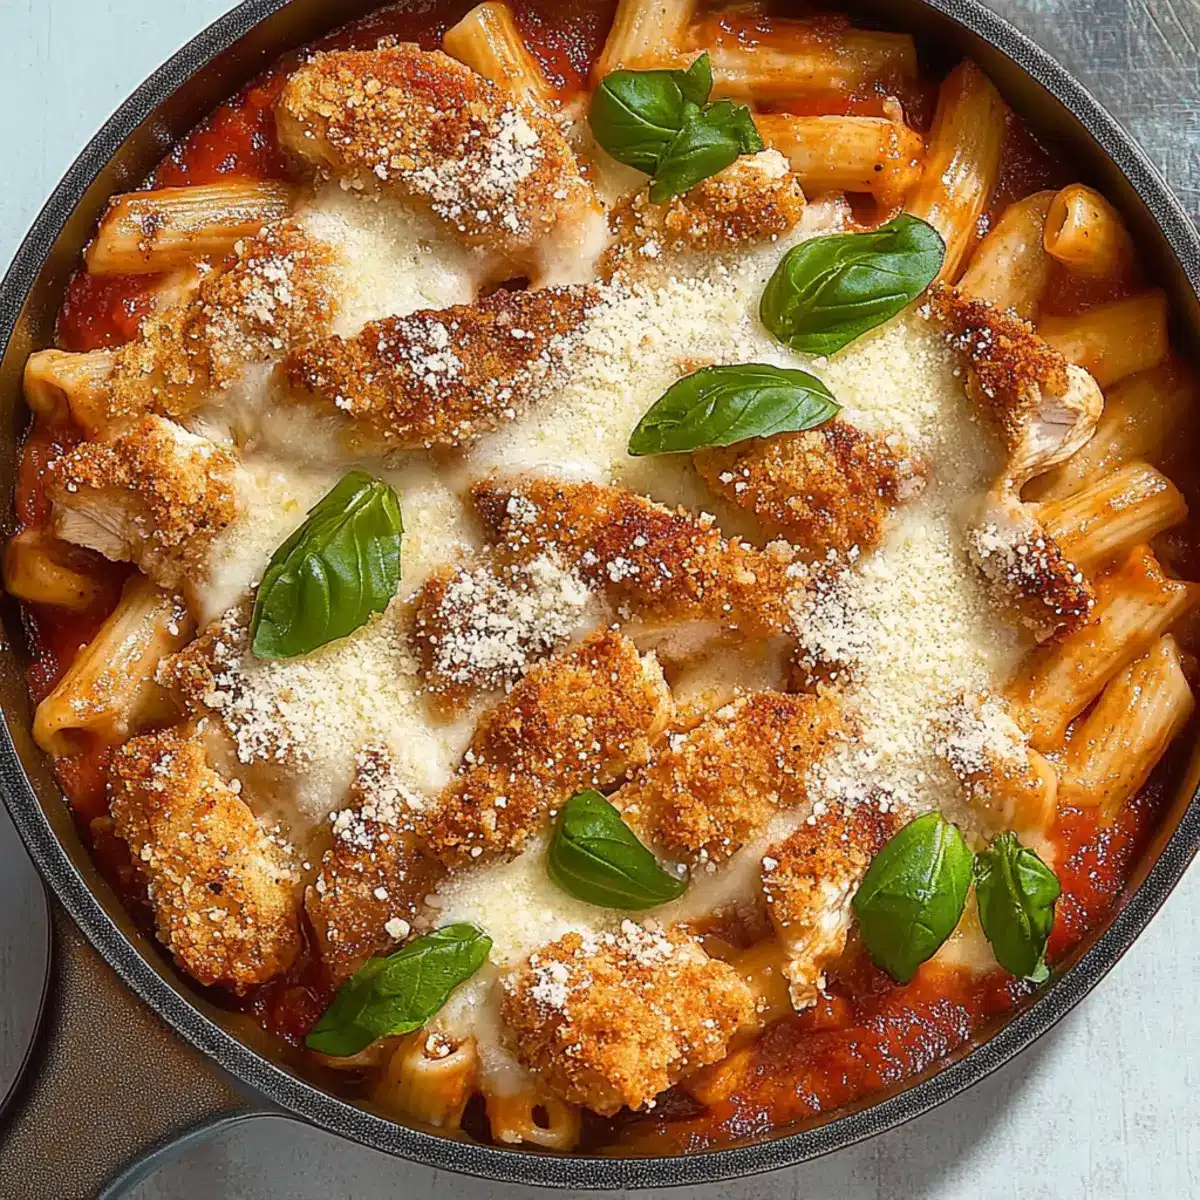
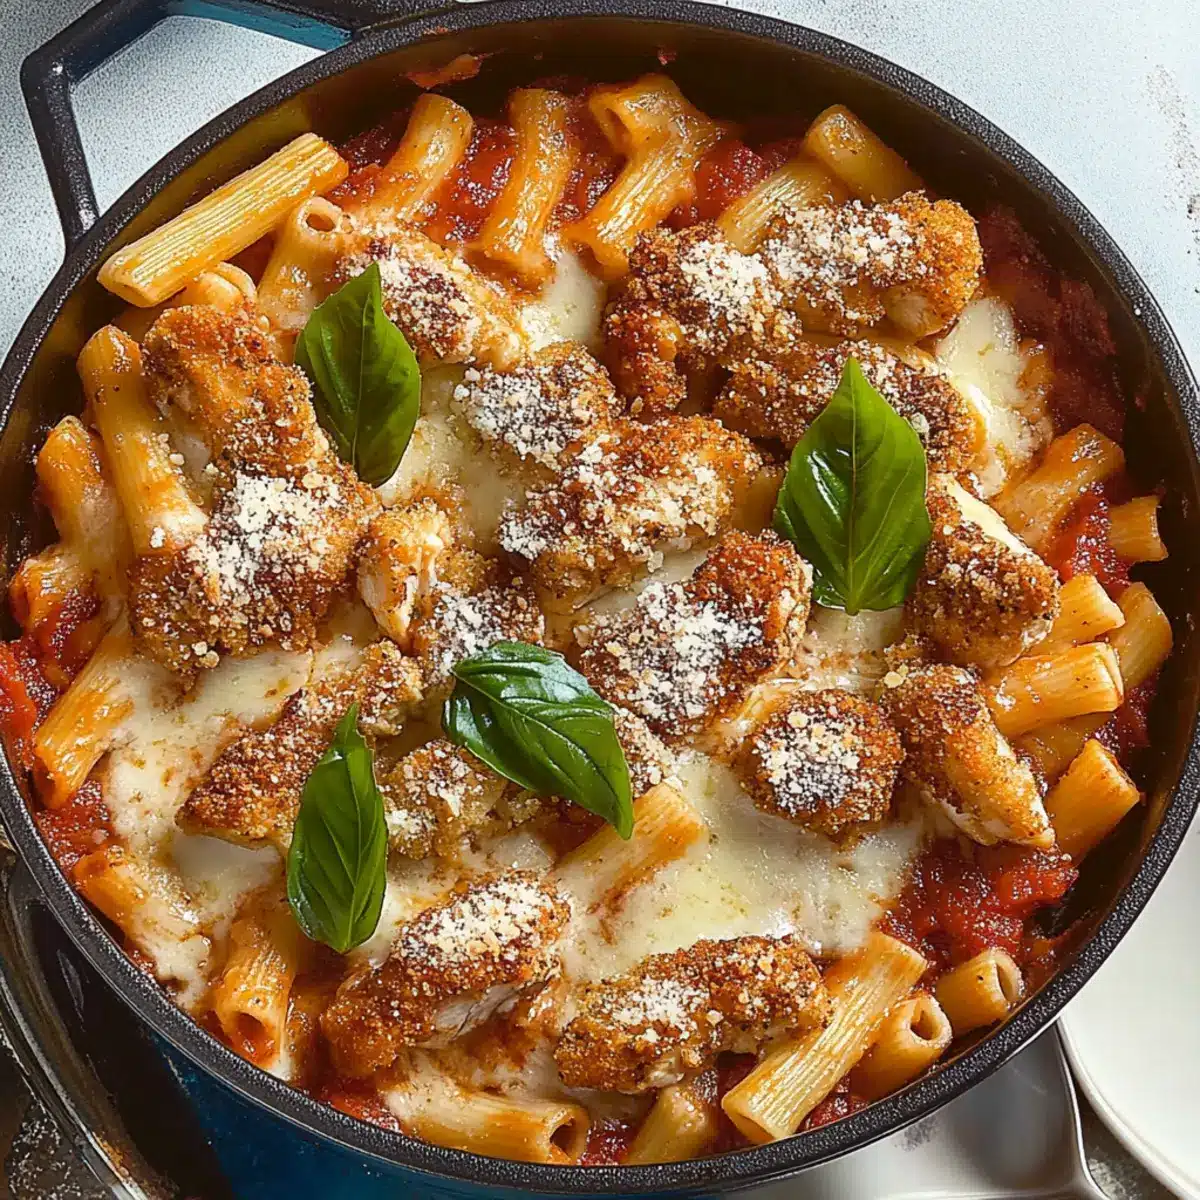
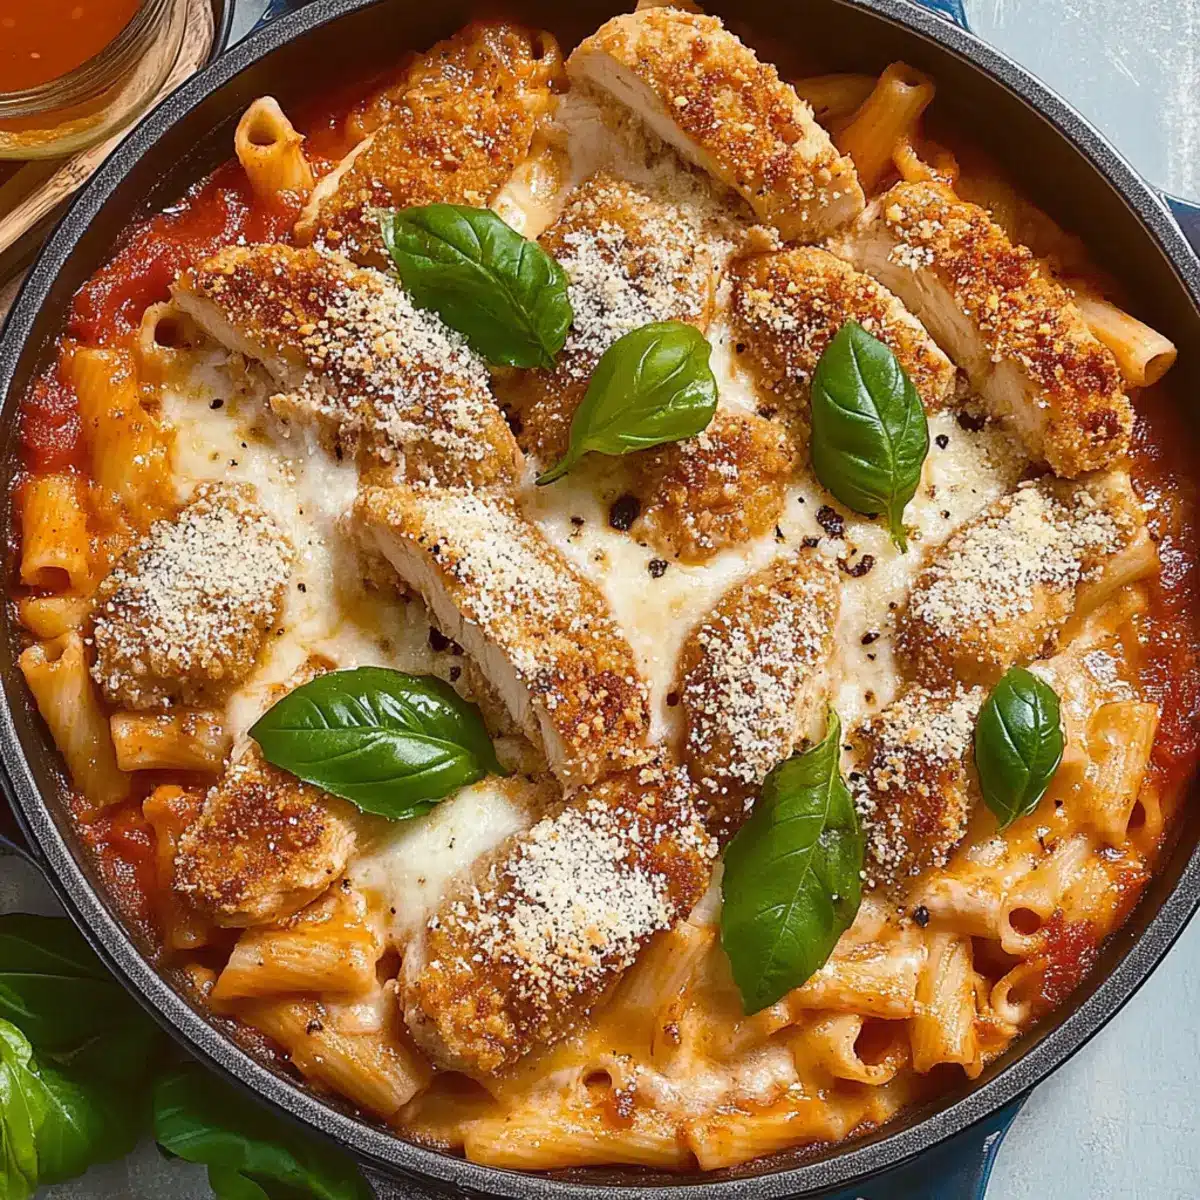
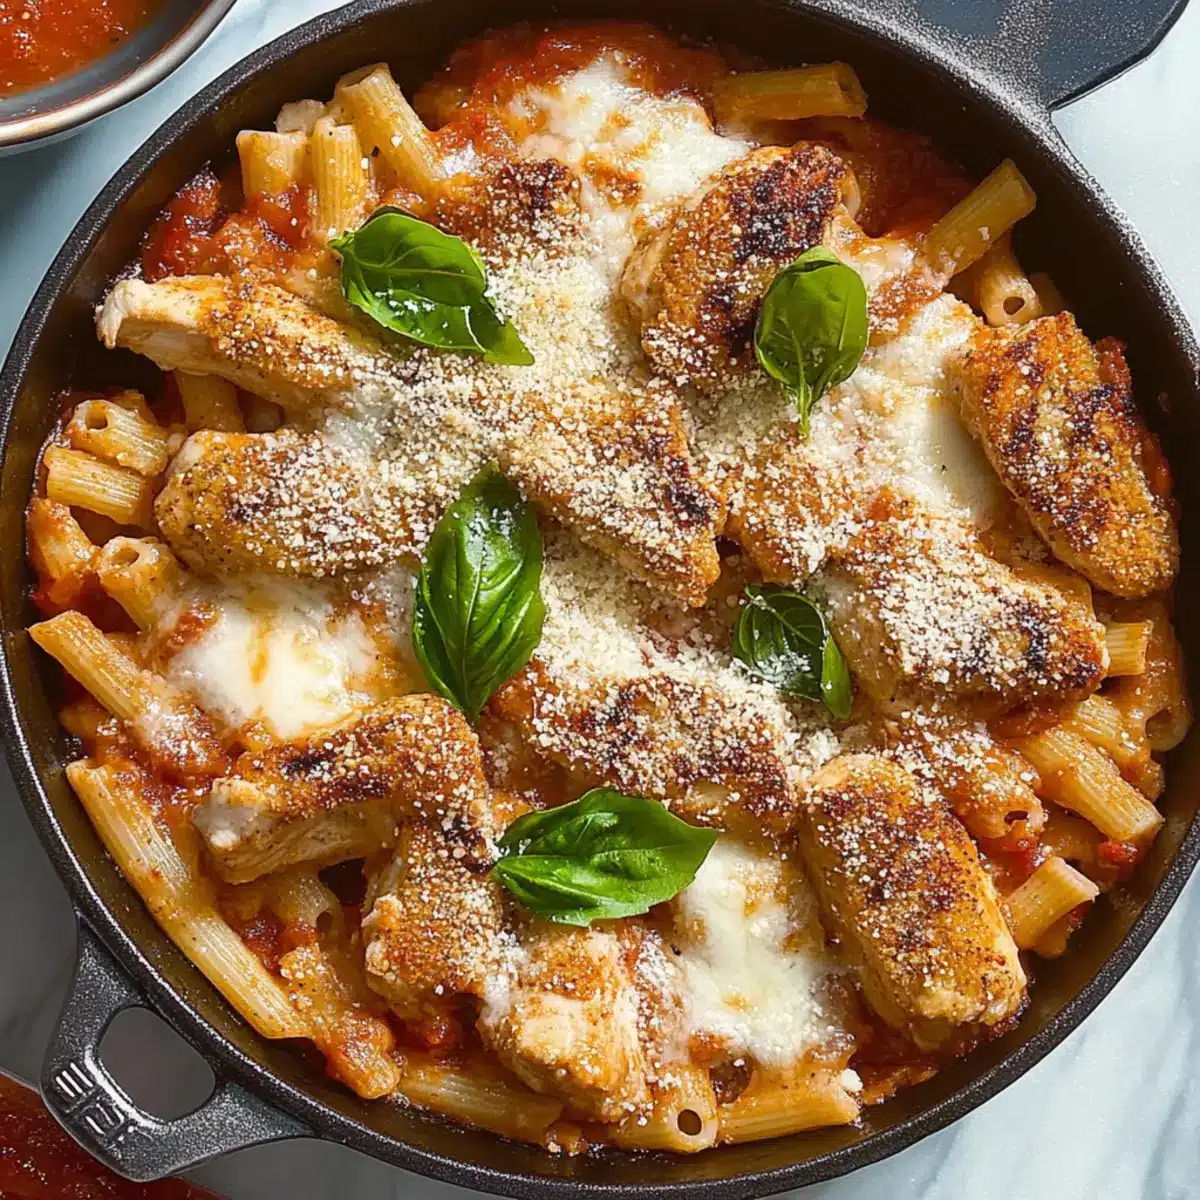
Gently fold in the sliced cooked chicken, ensuring each piece is nestled among the pasta. Then, sprinkle the remaining Parmesan and the shredded mozzarella over the top. The mixture should look cheesy and delicious, practically begging to be baked to form a bubbly, golden topping.
Step 7: Bake to Perfection
Now, transfer the entire pot to the preheated oven at 400°F (200°C). Bake for 10-12 minutes, or until the cheese is melted, bubbly, and slightly golden. Keep an eye on it, and once the toppings reach that irresistible gooeyness, it’s time to pull it out and let the aroma of Chicken Parm Pasta fill your kitchen.
Step 8: Final Touches and Serve
After removing it from the oven, let the dish rest for a few minutes. Then, sprinkle freshly ground black pepper and torn basil on top for a burst of flavor and color. Serve your hearty Chicken Parm Pasta warm, perhaps alongside a crisp salad or garlic knots, for a delightful family meal that everyone will love!
Expert Tips for One-Pot Chicken Parm Pasta
-
Pasta Precision: Cook your cavatappi al dente to retain texture after baking; mushy pasta won’t give you the desired creamy consistency in Chicken Parm Pasta.
-
Non-Stick Essential: Use a non-stick skillet to make cooking and cleaning easier; it prevents the pasta from sticking and creates a perfect golden crust.
-
Herb Enhancements: Don’t skimp on fresh basil! It brightens the dish remarkably; add at the end to preserve its flavor.
-
Sauce Secrets: If the dish seems dry before baking, add a bit more marinara sauce. A little extra sauce ensures your Chicken Parm Pasta is rich and luscious.
-
Cheese Variations: Experiment with different cheeses like fontina or provolone for a fun twist. Each type brings a unique flavor and texture to your pasta.
What to Serve with One-Pot Chicken Parmesan Pasta
As the warm, cheesy goodness of your Chicken Parm Pasta fills the air, it’s time to think about the perfect accompaniments that will elevate your meal to new heights.
-
Garlic Knots: Soft and buttery, these fluffy bites are perfect for sopping up extra marinara and enhancing the Italian feast vibe.
-
Crisp Green Salad: A refreshing side of mixed greens, tomatoes, and a light vinaigrette adds a crunch that beautifully contrasts the creamy pasta.
-
Roasted Vegetables: Seasoned with olive oil, these colorful bites bring essential nutrients and a caramelized sweetness that pairs well with your rich dish.
-
Cheesy Breadsticks: Warm and gooey, these stick-to-your-fingers treats are ideal for sharing and ensure every last morsel of sauce is happily wiped clean.
-
Limoncello Spritzers: A bright, bubbly drink with lemon and Italian flair is the perfect way to cut through the richness of the pasta and awaken the palate!
-
Italian Tiramisu: For dessert, this coffee-flavored treat wraps up the Italian meal on a sweet note, creating a delightful ending to a hearty experience.
Make Ahead Options
These One-Pot Chicken Parmesan Pasta preparations are fantastic for busy weeknights! You can prepare the pasta and marinara sauce up to 24 hours in advance; simply cook the cavatappi al dente, drain it, and toss it with a bit of olive oil to prevent sticking. Store the cooked pasta and sauce separately in airtight containers in the refrigerator, ensuring they retain their quality. When you’re ready to serve, combine the chilled pasta and sauce in an ovenproof skillet, fold in the chicken, sprinkle with cheese, and bake at 400°F (200°C) for about 12-15 minutes. This way, you’ll enjoy a comforting, home-cooked meal with minimal effort!
Storage Tips for Chicken Parm Pasta
Fridge: Store leftover Chicken Parm Pasta in an airtight container for up to 3 days. Be sure it has cooled to room temperature before sealing to prevent condensation.
Freezer: For longer storage, freeze Chicken Parm Pasta in a freezer-safe container for up to 2 months. Divide into portions for convenient reheating later.
Reheating: When ready to enjoy, thaw overnight in the refrigerator if frozen. Reheat in a preheated oven at 350°F (175°C) for about 20 minutes until warmed through, adding a splash of marinara if it’s dry.
Room Temperature: Whether served warm or leftover, do not leave Chicken Parm Pasta out at room temperature for more than 2 hours to ensure food safety.
Chicken Parm Pasta Variations & Substitutions
Feel free to make this One-Pot Chicken Parmesan Pasta your own through these fun and delicious variations!
-
Gluten-Free: Swap in gluten-free pasta or chickpea pasta to accommodate dietary needs without sacrificing flavor.
-
Vegetarian Delight: Replace the cooked chicken with sautéed vegetables, such as zucchini or mushrooms, creating a hearty vegetarian meal.
-
Creamier Sauce: Stir in a dollop of cream cheese or ricotta for an even richer, creamier sauce that elevates every bite.
-
Extra Flavor: Sprinkle in Italian seasoning or crushed red pepper flakes for a punch of flavor and a touch of heat.
-
Cheese Swap: Try using different cheeses like fontina or gouda for a unique twist. Each cheese brings its own flavor profile that can transform your dish!
-
Pasta Variety: Mix things up by using different pasta shapes, such as penne or fusilli, to change the texture while still retaining the delicious meal.
-
Herb Up: Incorporate fresh herbs like oregano or parsley in place of basil for a slightly different refreshing flavor touch.
-
Side Pairing: Serve alongside fresh garlic knots or a simple green salad with lemon vinaigrette, like in this Grilled Chicken Pasta to balance the meal beautifully.
Each of these variations lets you tailor the Chicken Parm Pasta to your taste, ensuring it remains a family favorite any night of the week!
One-Pot Chicken Parmesan Pasta Recipe FAQs
How do I choose the right pasta for Chicken Parm Pasta?
Absolutely! For Chicken Parm Pasta, I often suggest using cavatappi because its spiral shape holds the sauce beautifully. However, you can easily swap it with penne or fusilli if you prefer a different texture. Just ensure your pasta is short to blend perfectly with the chicken and sauce.
How should I store leftover Chicken Parm Pasta?
Store any leftover Chicken Parm Pasta in an airtight container in the refrigerator for up to 3 days. Make sure it has cooled to room temperature before sealing to prevent condensation, which could make it soggy. When reheating, simply pop it in the oven for a crispy finish!
Can I freeze Chicken Parm Pasta?
Very! To freeze Chicken Parm Pasta, I recommend dividing it into portions and placing it in a freezer-safe container. It’ll keep well for up to 2 months. When you’re ready to enjoy it, thaw overnight in the refrigerator and reheat in a preheated oven at 350°F (175°C) for about 20 minutes, adding a splash of marinara if it seems dry.
What should I do if my pasta becomes mushy after baking?
If your pasta turns mushy, it’s important to follow the cooking instructions carefully and ensure it’s al dente before adding it to the sauce. Overcooking in the boiling water is often the culprit. If you ever find yourself in this situation, consider using less sauce next time or even reducing the oven bake time slightly to preserve that firm texture.
Are there any dietary considerations I should be aware of when making Chicken Parm Pasta?
Definitely! If making this dish for those with dietary restrictions, you can substitute gluten-free pasta for a gluten-free option. Additionally, you could swap the chicken for sautéed vegetables like zucchini or mushrooms for a vegetarian version of Chicken Parm Pasta. Always check labels on packaged foods for allergens, especially in store-bought marinara and chicken cutlets.
Creamy Chicken Parm Pasta in One Pot—Dinner Made Easy
Ingredients
Equipment
Method
- Prepare the Chicken: Cook the frozen breaded chicken cutlets according to package instructions, typically oven baking them at 400°F (200°C) for 20 minutes until golden and crispy. Once cooked, remove them from the oven, let them cool, and then slice into bite-sized pieces.
- Boil the Pasta: In a large pot, bring heavily salted water to a rolling boil. Add the cavatappi pasta and cook until al dente, usually around 8-10 minutes. Drain and set aside.
- Sauté the Aromatics: Heat extra-virgin olive oil over medium-high heat. Add the finely chopped onion and sauté for about 7 minutes until translucent. Toss in minced garlic and cook for an additional minute.
- Create the Sauce: Pour in the marinara sauce and add a pinch of kosher salt. Stir and bring to a gentle simmer for about 3 minutes.
- Combine Pasta and Sauce: Return the drained cavatappi pasta to the pot and toss with half of the Parmesan until melted and combined.
- Add Chicken and Cheese Toppings: Fold in the sliced chicken and sprinkle the remaining Parmesan and mozzarella on top.
- Bake to Perfection: Transfer to a preheated oven at 400°F (200°C) and bake for 10-12 minutes until the cheese is melted and bubbly.
- Final Touches and Serve: After baking, let the dish rest for a few minutes and then sprinkle with black pepper and torn basil. Serve warm.
Leave a Reply