
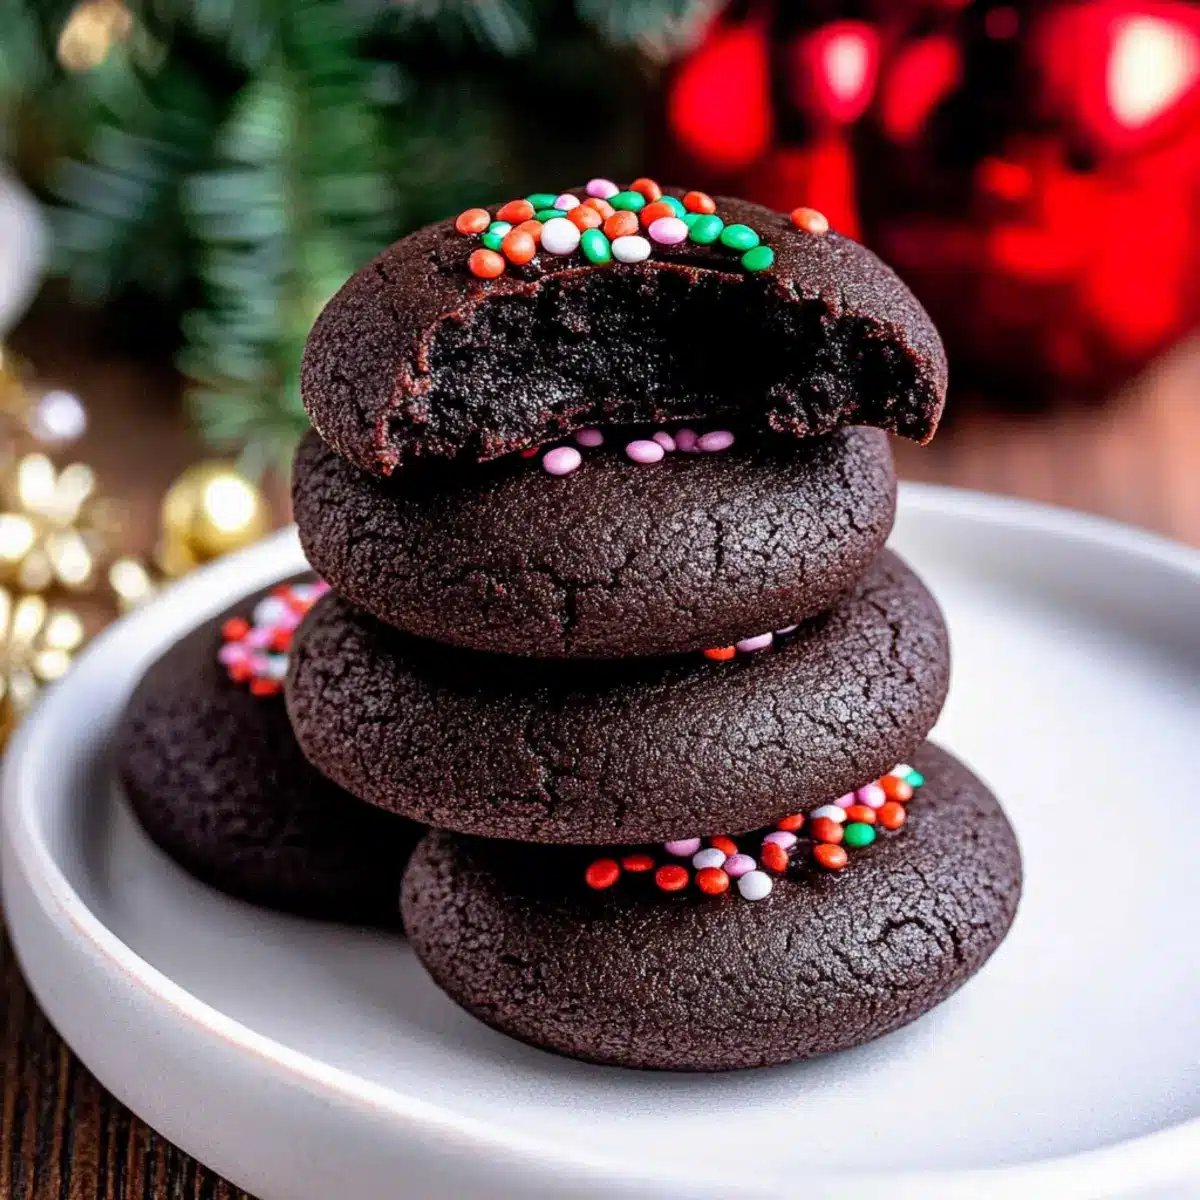
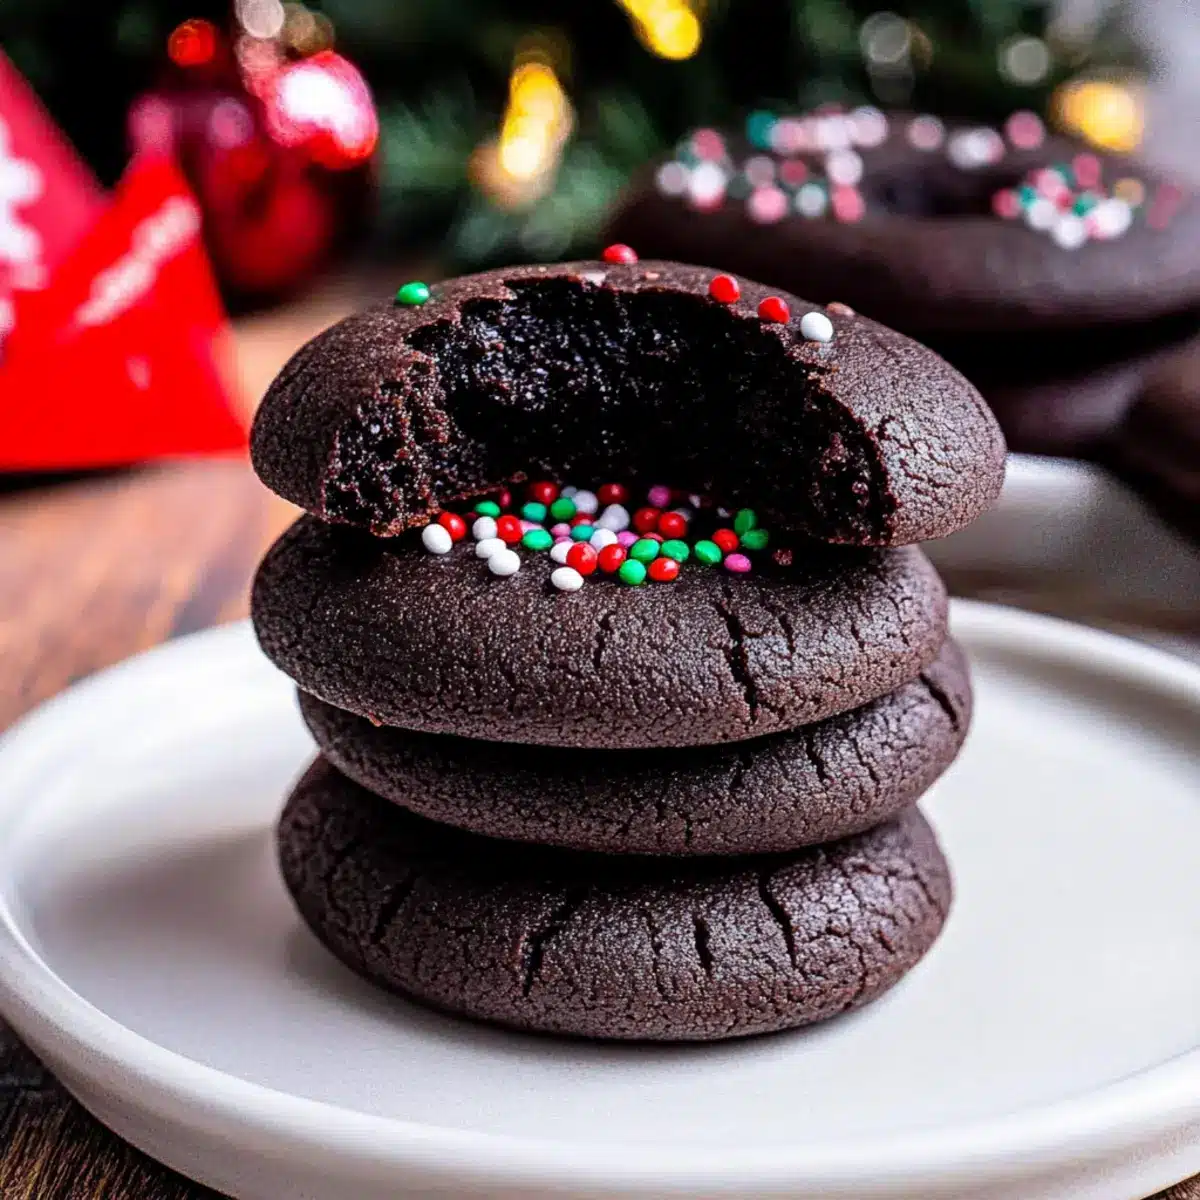
If you’ve ever felt the warmth of a cozy kitchen on a chilly day, you’re bound to adore these Rich Chocolate Thumbprint Cookies with Velvety Ganache. The first bite reveals a softness that melts into a rich, chocolatey delight, leaving you dreaming of sweet moments spent with loved ones. These cookies not only capture the essence of comfort but are also surprisingly simple to make, calling for just a handful of ingredients and minimal prep time. Whether you’re baking for a holiday gathering or simply treating yourself, these crowd-pleasing gems bring joy and nostalgia into every bite. What’s your favorite twist to make these cookies uniquely yours?
Why Are Chocolate Thumbprint Cookies Irresistible?
Decadent Flavor: Rich chocolate blends seamlessly with a creamy ganache center, creating a luxurious experience for any chocolate lover.
Effortless Preparation: With just a few key ingredients and simple steps, these cookies can be whipped up in no time, perfect for those busy weeknights or holiday baking marathons.
Versatile Variations: Feel free to get creative with flavors—try adding almond extract or topping with crushed nuts for a unique touch that personalizes each batch.
Crowd-Pleaser: Ideal for gatherings, these cookies are sure to impress family and friends, whether as a gift or a part of your festive cookie tray.
Comforting Texture: Soft and chewy with a gooey ganache, each bite delivers that wonderful home-baked goodness, reminiscent of special moments shared in the kitchen.
Don’t forget to explore more delightful recipes like Chewy Oreo Chocolate Cookies and Salted Caramel Chocolate Chip Cookie Bars to keep your cookie game strong!
Chocolate Thumbprint Cookies Ingredients
• Discover the essentials needed for these Chocolate Thumbprint Cookies!
For the Cookies
- All-Purpose Flour – Provides structure to the cookies; measure carefully to avoid excess.
- Dutch Process Cocoa Powder – Delivers a deep chocolate flavor; you can substitute with regular cocoa powder if needed.
- Salt – Enhances flavor and balances sweetness; it’s essential for taste.
- Baking Powder – Acts as a leavening agent; ensure it’s fresh for the best results.
- Unsalted Butter – Adds richness and moisture; you can use salted butter if you reduce the added salt.
- Light Brown Sugar – Contributes moisture and a caramel-like flavor; can swap with dark brown sugar for a stronger flavor.
- Granulated White Sugar – Sweetens and adds crispness to the cookies.
- Egg Yolks – Provides richness and helps emulsify the dough; make sure they’re at room temperature for easy incorporation.
- Vanilla Bean Paste/Extract – Infuses depth of flavor; substitute with pure vanilla extract if needed.
For the Ganache
- Semi-Sweet Chocolate Chips – Create a luscious ganache filling; dark chocolate can be used for a deeper flavor.
- Heavy Whipping Cream – Combines with chocolate chips for a smooth ganache; substitute with full-fat coconut milk for a dairy-free option.
For Decoration
- Nonpareils (optional) – Adds a decorative touch for visual appeal; they can be skipped if you prefer a simpler finish.
Step‑by‑Step Instructions for Chocolate Thumbprint Cookies
Step 1: Prepare Baking Sheets
Preheat your oven to 350°F (175°C) and line two baking sheets with parchment paper. This will prevent sticking and help your Chocolate Thumbprint Cookies bake evenly. Make sure you press the parchment flat against the sheets so it doesn’t wrinkle, allowing for a more uniform baking surface.
Step 2: Mix Dry Ingredients
In a medium bowl, whisk together 1 ¾ cups of all-purpose flour, ½ cup of Dutch process cocoa powder, ½ teaspoon of salt, and 1 teaspoon of baking powder until thoroughly combined. This vital step ensures even distribution of dry ingredients, ultimately leading to that perfect texture you’re looking for in your Chocolate Thumbprint Cookies. Set the bowl aside for later use.
Step 3: Cream Butter and Sugars
In a large mixing bowl, beat ½ cup of softened unsalted butter, ½ cup of light brown sugar, and ¼ cup of granulated sugar using an electric mixer on medium speed. Beat for about 2-3 minutes until the mixture is light and fluffy. This process introduces air into the batter, which is essential for achieving the delightful texture of your cookies.
Step 4: Incorporate Egg Yolks and Vanilla
Add 2 room temperature egg yolks and 1 teaspoon of vanilla bean paste or extract to the butter-sugar mixture. Beat on low speed until fully combined, about 1 minute. The egg yolks not only enrich the flavor but also help bind the ingredients together. You’ll notice the mixture becoming creamier and more cohesive.
Step 5: Combine Ingredients
Slowly add the dry mixture into the wet ingredients in three additions, mixing on low speed until just combined after each addition. Be careful not to overmix; this step helps maintain the tender texture of your Chocolate Thumbprint Cookies. The dough should start to form and look a bit crumbly but should hold together when pressed.
Step 6: Form Cookies
Using a cookie scoop or spoon, portion out the dough into 34 equal pieces and roll each into smooth balls. Place them on the prepared baking sheets, spaced about 2 inches apart. With a ¼ teaspoon measuring spoon, gently press into the center of each ball to create an indent, which will hold the ganache later.
Step 7: Chill Dough
Cover the baking sheets with plastic wrap or a clean kitchen towel and refrigerate the indented cookie dough for at least 1 hour. Chilling the dough firms it up, making it easier to handle and helping the cookies retain their shape during baking. This is a crucial step for achieving that perfect textural balance.
Step 8: Bake
Remove the cookies from the refrigerator and place them in the preheated oven. Bake for 9-11 minutes, or until the edges are set but the centers remain soft. A visual cue is to look for slight puffiness around the edges. Once baked, remove them from the oven and let them cool on the baking sheets for a few minutes.
Step 9: Re-Indent and Cool
After a few minutes, use the measuring spoon again to gently press the centers of the still-warm cookies to restore the indent. Then, allow the Chocolate Thumbprint Cookies to cool on the baking sheets for 5 minutes before transferring them to a wire rack to cool completely. This prevents them from becoming too firm as they cool down.
Step 10: Make Ganache
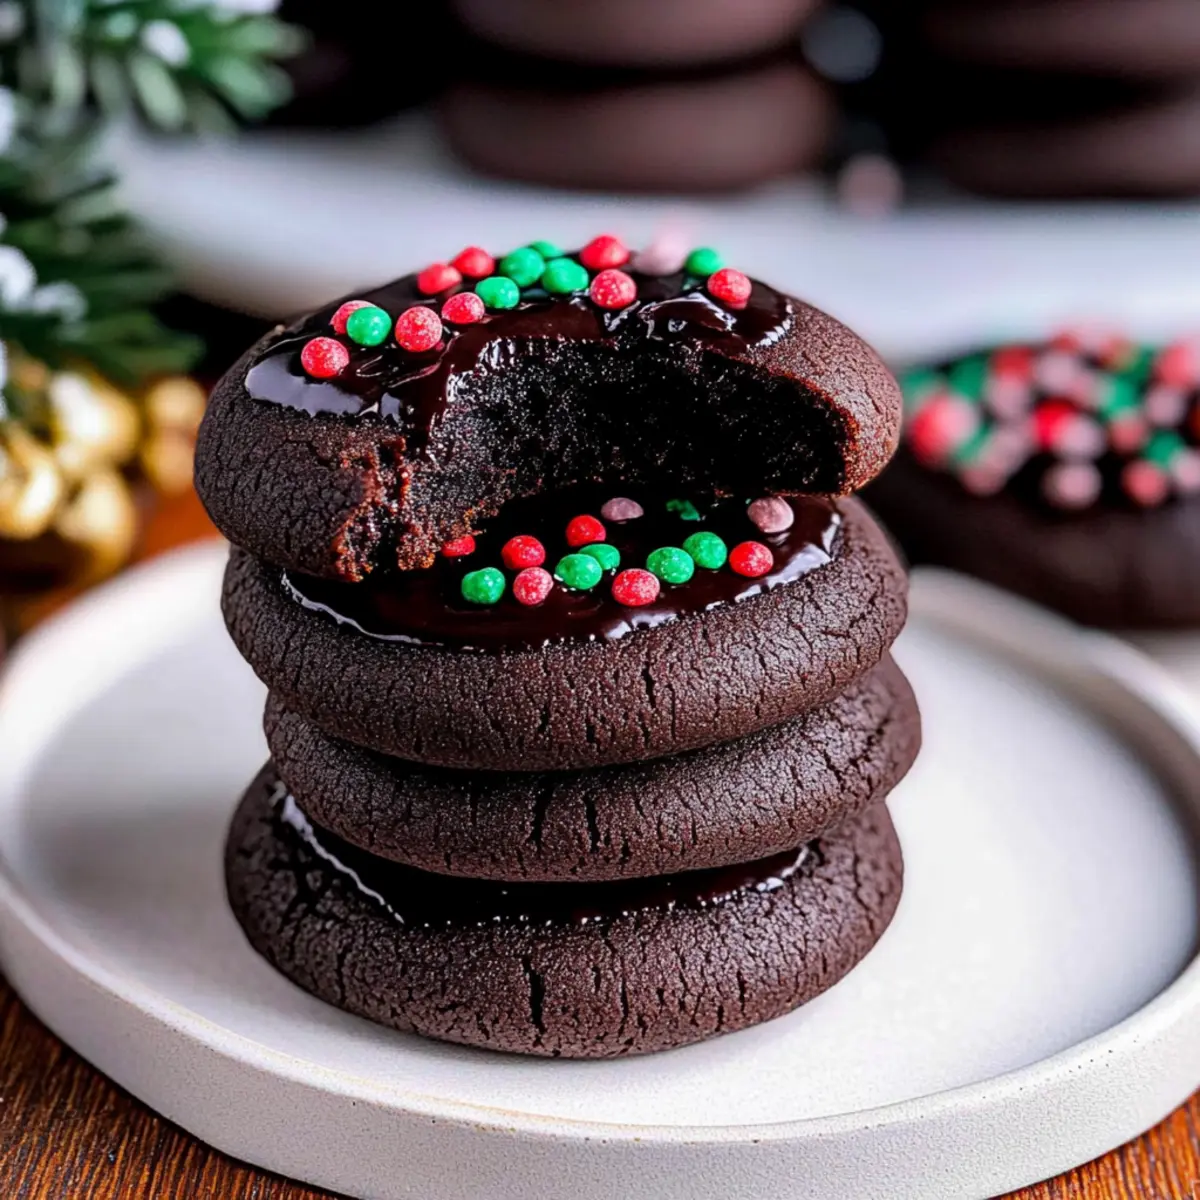
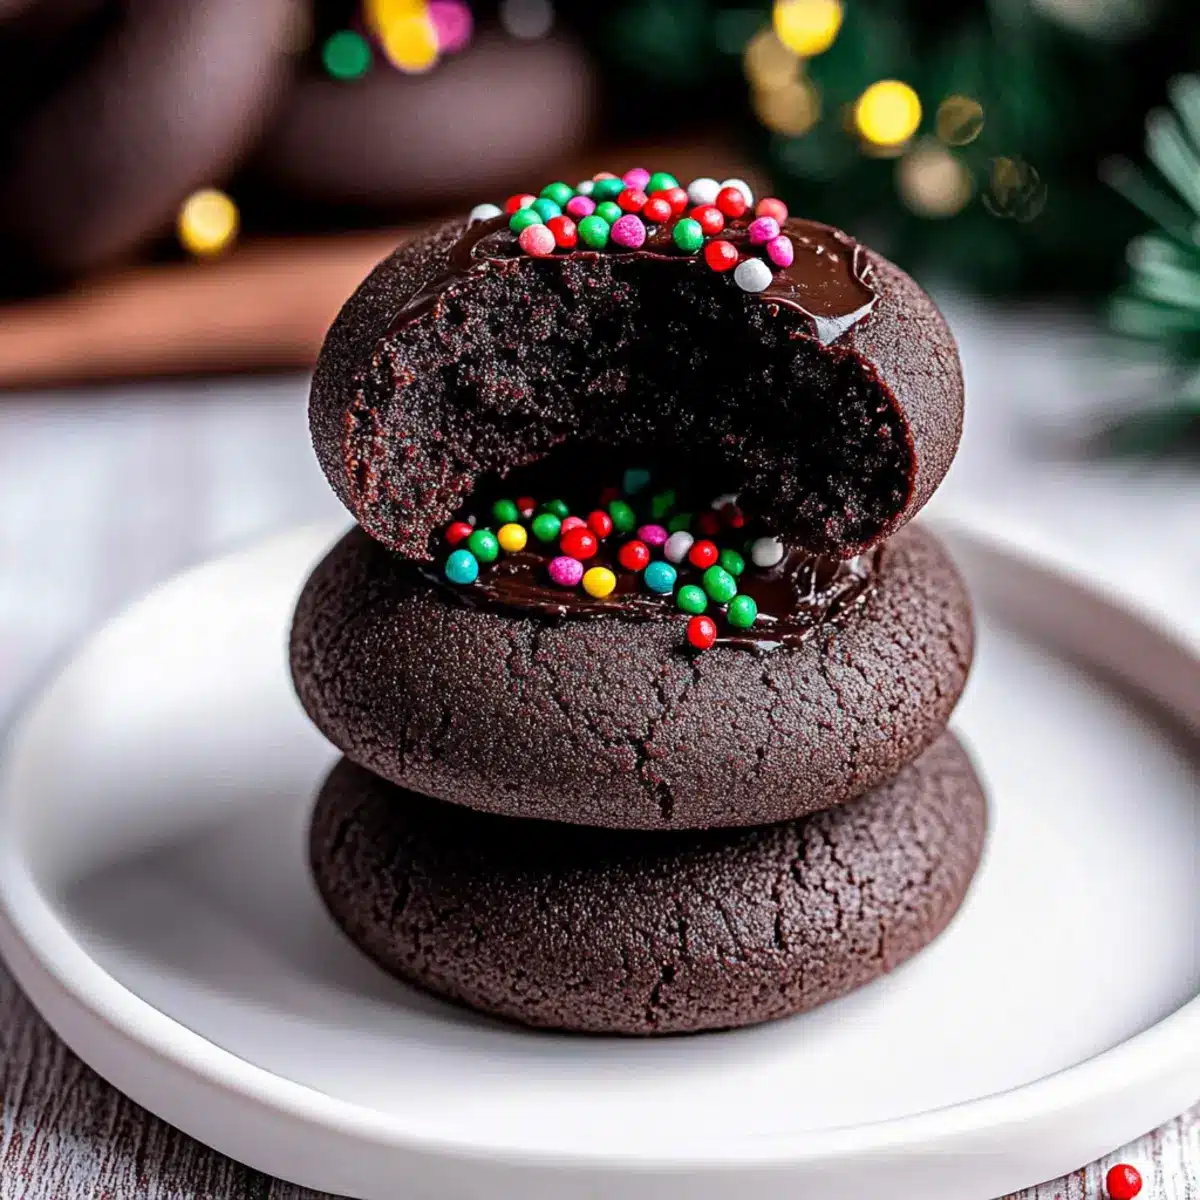
In a small saucepan, heat ½ cup of heavy whipping cream over medium heat until it just begins to boil. Remove from heat and pour it over 1 cup of semi-sweet chocolate chips in a heat-safe bowl. Stir vigorously until the ganache is smooth and glossy, showing off a luxurious texture ready to fill your cookies.
Step 11: Fill Cookies
Once the cookies have fully cooled, carefully spoon the chocolate ganache into the indents of each cookie, filling them generously. If desired, sprinkle the tops with nonpareils for a festive touch. Allow the ganache to set at room temperature for a little while before serving, creating that irresistible creamy center for your Chocolate Thumbprint Cookies.
Make Ahead Options
These Chocolate Thumbprint Cookies are perfect for busy bakers looking to streamline their time in the kitchen! You can prepare the cookie dough up to 24 hours in advance; simply form the dough balls, create indents, and then refrigerate them on the baking sheets until ready to bake. If you’d like to make the cookies even further ahead, you can bake and cool them, then freeze for up to 3 months—just ensure they’re stored in an airtight container to maintain their delicious texture. When you’re ready to enjoy, thaw the cookies at room temperature and fill them with freshly made ganache, which only takes a few minutes to whip up. You’ll have delectable Chocolate Thumbprint Cookies ready to impress with minimal effort!
How to Store and Freeze Chocolate Thumbprint Cookies
Room Temperature: Store cookies in an airtight container at room temperature for up to 3 days to keep them fresh and soft.
Fridge: If you want to extend their shelf life, you can refrigerate the cookies for up to a week, ensuring they’re covered to prevent drying out.
Freezer: For longer storage, freeze unfilled cookies in a single layer on a baking sheet, then transfer to an airtight container for up to 2 weeks. Add ganache after thawing.
Reheating: To bring cookies back to life, warm them briefly in the microwave for about 10-15 seconds, which enhances the gooey texture of your Chocolate Thumbprint Cookies.
Tips for the Best Chocolate Thumbprint Cookies
• Correct Measurements: Always measure flour correctly by spooning it into the cup and leveling off with a knife to avoid dense cookies.
• Chill for Success: Don’t skip the chilling step. Chilling the dough helps the cookies maintain their shape and prevents excessive spreading.
• Gentle Indents: When creating the indents, use a light touch. Press down gently to avoid cracking the cookie surface while keeping a good cavity for the ganache.
• Monitor Baking Time: Keep an eye on the cookies as they bake. They should be set around the edges but still soft in the center, ensuring that melt-in-your-mouth texture.
• Customize Flavors: Feel free to experiment with different extracts or fillings in your Chocolate Thumbprint Cookies to personalize them for any occasion.
Chocolate Thumbprint Cookies Variations & Substitutions
Feel free to unleash your creativity and make these delicious cookies uniquely yours with just a few simple changes!
-
Flavor Boost: Add almond or peppermint extract to the dough for a delightful twist that enhances the chocolate flavor beautifully. Both options can add a festive touch perfect for holiday baking!
-
Nutty Delight: Substitute part of the flour with ground nuts like almonds or hazelnuts for added texture and flavor. This substitution not only enriches the taste but also brings a lovely crunch to each bite.
-
Zesty Surprise: Incorporate citrus zest into the ganache, such as orange or lemon, for a refreshing brightness against the rich chocolate. It creates a wonderful balance and unexpected flavor layer that’ll have your friends asking for the recipe.
-
Dairy-Free Option: Swap out heavy whipping cream for full-fat coconut milk in the ganache if you’re looking to keep this treat dairy-free. The rich coconut flavor pairs surprisingly well with the chocolate, making a delicious alternative!
-
Texture Variation: Use chopped nuts or cookie crumbles as toppings instead of nonpareils for delightful crunch and depth. This change offers not just visual appeal but also an exciting mix of textures that will keep everyone coming back for more.
-
Healthier Sweetener: Try substituting granulated sugar with coconut sugar or maple syrup for a lower-glycemic option that still satisfies your sweet tooth. This switch adds a subtle caramel flavor complementing the chocolate beautifully.
-
Spicy Kick: For those who enjoy a bit of heat, mix in cayenne pepper or cinnamon to the dough. Just a pinch keeps it interesting and adds a warm complexity that chocolate lovers will adore.
Be sure to check out some of my favorite variations for a delightful twist, including Pistachio Cream Chocolate Cookies for a nutty explosion or White Chocolate Halloween Oreo Bark for a fun festive treat! With all these options, your Chocolate Thumbprint Cookies will never be boring!
What to Serve with Rich Chocolate Thumbprint Cookies
Pair these rich chocolate delights with complementary flavors and textures to create a delightful dessert spread.
- Brewed Coffee: The bitterness of coffee enhances chocolate’s richness, making each cookie taste even better.
- Vanilla Ice Cream: A scoop of creamy vanilla provides a cool contrast, elevating the cookie’s intense chocolate aroma.
- Fresh Berries: Juicy strawberries or raspberries add a zesty note, balancing the cookie’s sweetness with their natural tartness.
- Chocolate Sauce Drizzle: For truly decadent lovers, a warm chocolate sauce elevates the experience, amplifying the cookie’s rich flavor.
- Toasted Nuts: Sprinkle crushed hazelnuts or almonds for a delightful crunch; the nuttiness pairs beautifully with chocolate.
- Mint Tea: A refreshing breath of mint ends the sweet journey nicely, cleansing the palate after indulging in chocolate.
- Caramel Sauce: Drizzling warm caramel over the cookies adds a luxurious touch, enhancing the overall dessert experience.
- Dark Chocolate Truffles: For double the chocolate, serve a side of rich truffles that will leave chocoholics in bliss.
- Red Wine: A sparkling red wine can lift the flavors and offer an elegant twist while making the dessert feel extra special.
- Whipped Cream: A dollop of lightly sweetened whipped cream adds airy richness that beautifully balances the cookies’ dense texture.
Chocolate Thumbprint Cookies Recipe FAQs
What kind of chocolate should I use for the ganache?
For the ganache, I recommend using semi-sweet chocolate chips for a balanced sweetness. If you’re a fan of richer chocolate flavors, opting for dark chocolate can elevate the taste even more. Just remember that higher cocoa content will create a more intense flavor!
How should I store my Chocolate Thumbprint Cookies?
To keep your cookies fresh, store them in an airtight container at room temperature for up to 3 days. If you want to extend their shelf life, they can be refrigerated for up to a week. Just ensure they are covered to prevent them from drying out, keeping those soft and chewy textures intact!
Can I freeze Chocolate Thumbprint Cookies?
Absolutely! You can freeze unfilled cookies for up to 2 weeks. To do this, lay them out in a single layer on a baking sheet to freeze, then transfer them to an airtight container. When you’re ready to enjoy, simply thaw and add the ganache afterward for that delightful gooey center.
What if my cookies spread too much while baking?
If your Chocolate Thumbprint Cookies spread too much, it may be due to overly warm dough or incorrect flour measurement. Make sure to chill the dough before baking and measure flour accurately by spooning and leveling it off. You might also consider using a bit more flour to help maintain structure.
Are there any dietary considerations for these cookies?
If you’re concerned about allergies, these cookies contain common allergens such as gluten (from flour) and dairy (from butter and cream). For a gluten-free option, consider using a gluten-free 1:1 baking flour. You can also replace the heavy cream with full-fat coconut milk for a dairy-free alternative, ensuring everyone can enjoy these delicious Chocolate Thumbprint Cookies!
Irresistibly Rich Chocolate Thumbprint Cookies You’ll Love
Ingredients
Equipment
Method
- Preheat your oven to 350°F (175°C) and line two baking sheets with parchment paper.
- In a medium bowl, whisk together the flour, cocoa powder, salt, and baking powder until combined.
- In a large mixing bowl, beat the butter, light brown sugar, and granulated sugar until light and fluffy.
- Add the egg yolks and vanilla to the mixture, and beat on low speed until fully combined.
- Slowly add the dry mixture into the wet ingredients in three additions, mixing until just combined.
- Portion out the dough into 34 equal pieces and roll each into balls. Press a spoon gently into the center of each ball.
- Cover with plastic wrap and refrigerate the dough for at least 1 hour.
- Bake the cookies for 9-11 minutes until edges are set and centers are soft.
- Re-indent the cookies after a few minutes and let them cool on the baking sheets.
- Heat the cream until boiling, then pour it over the chocolate chips and stir until smooth.
- Spoon the ganache into the indents of each cookie and allow it to set before serving.
Leave a Reply