
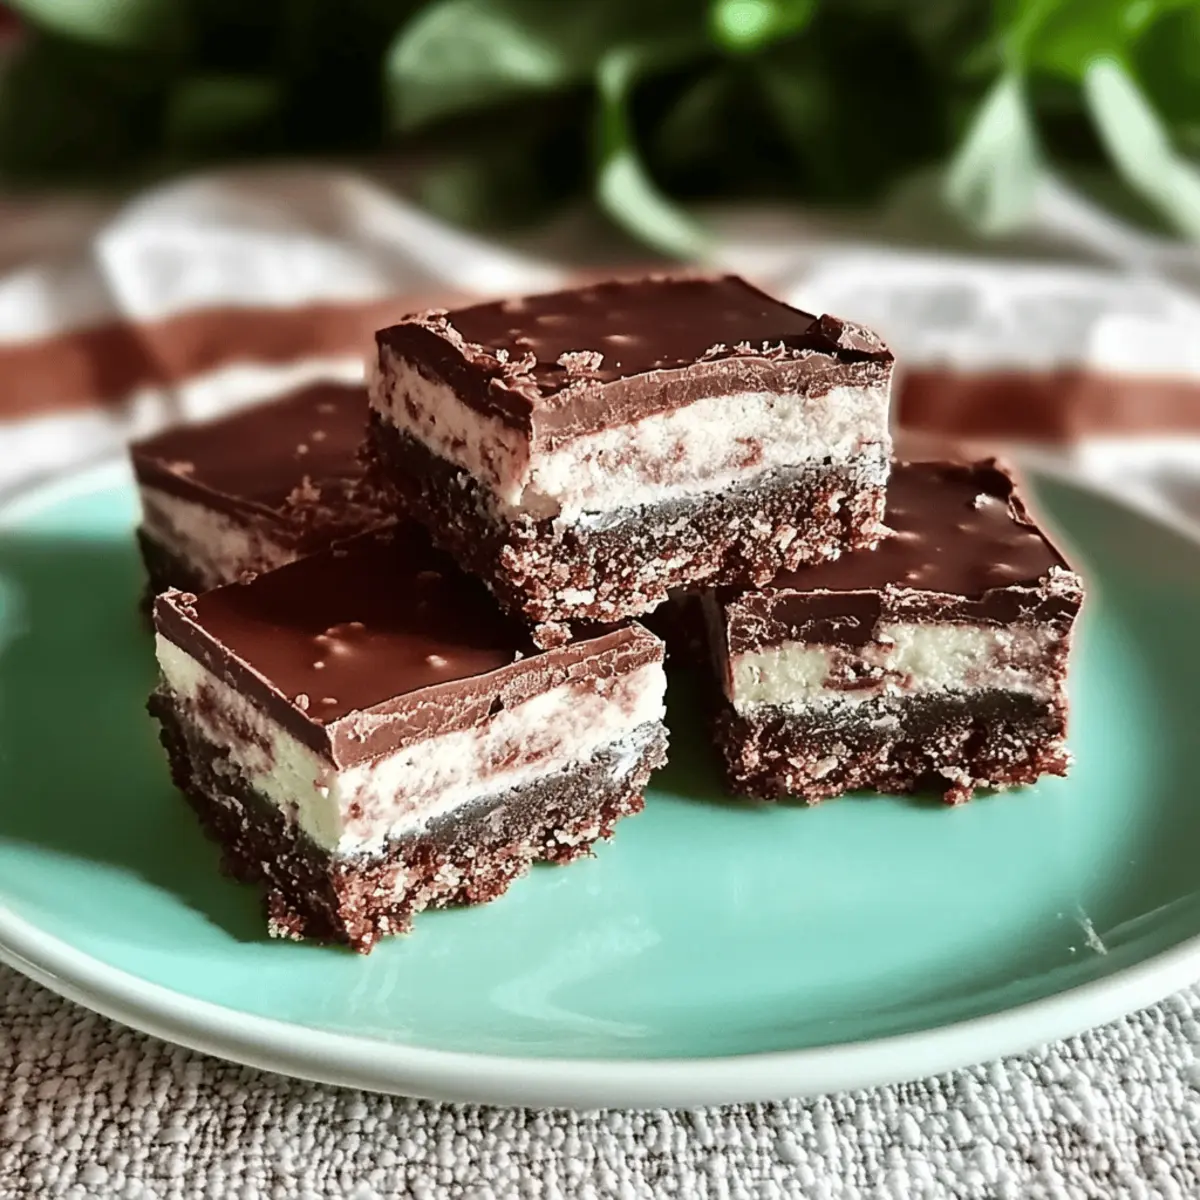
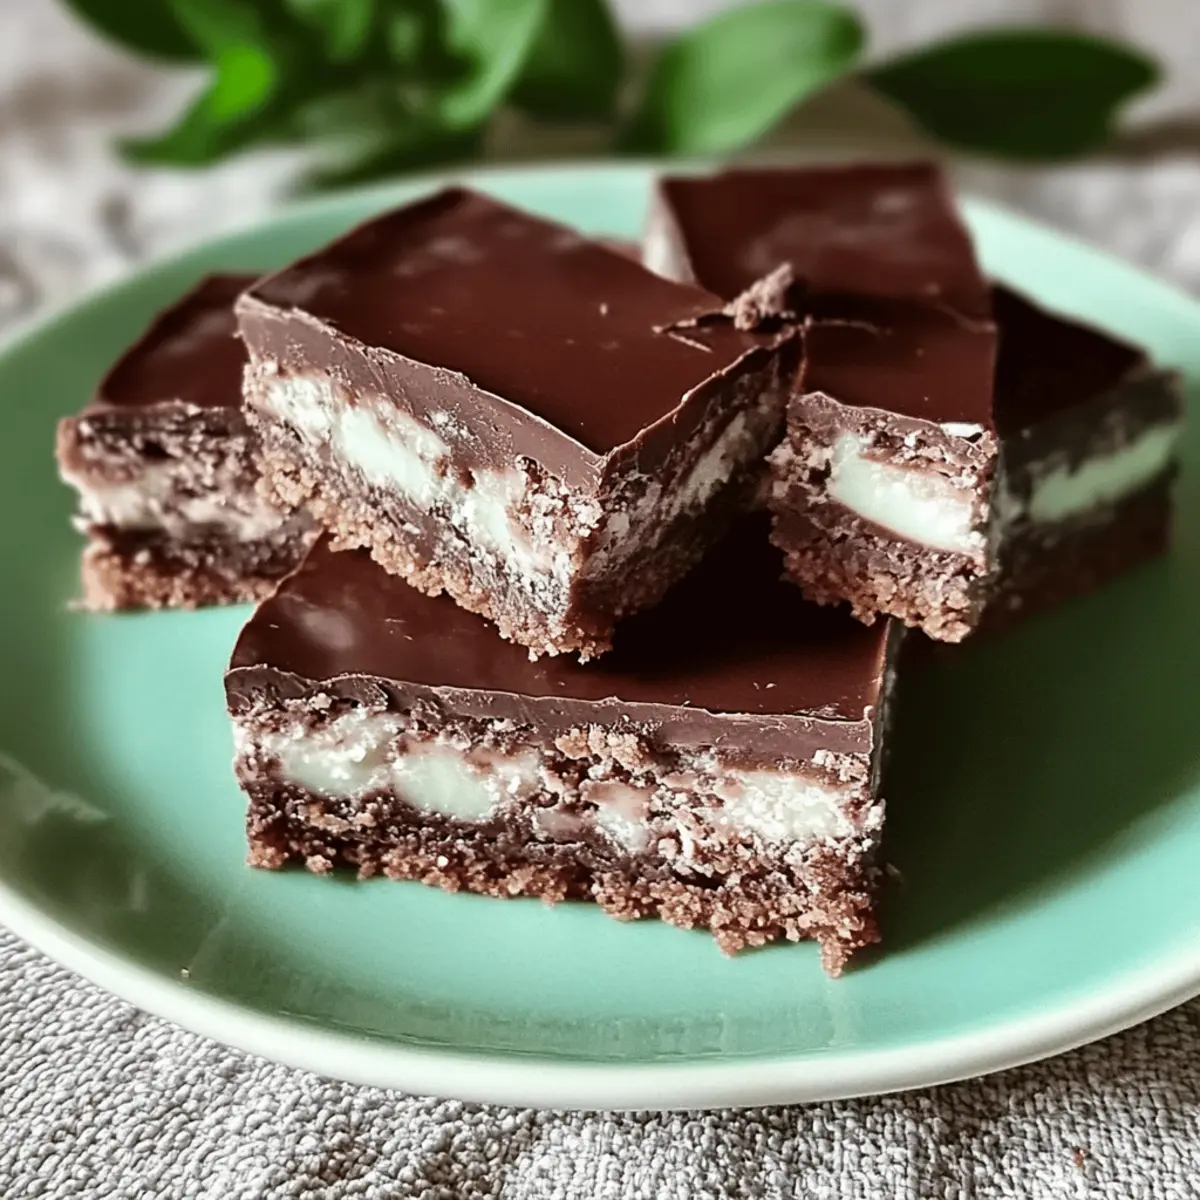
As I took a bite of the velvety slice, the smooth dark chocolate melded perfectly with a refreshing hint of peppermint, transporting me to a winter wonderland in just one blissful moment. This No-Bake Dark Chocolate Peppermint Slice is not only a breeze to whip up in just 20 minutes, but it also brings delight to any gathering or quiet evening at home. Whether you’re new to baking or short on time, this quick dessert removes all the fuss while delivering an indulgent treat that will impress friends and family alike. Plus, with customizable flavors like zesty orange or nutty crunch, it’s the perfect canvas for your culinary creativity. Are you ready to elevate your dessert game effortlessly?
Why is This Slice So Irresistible?
Simplicity: This No-Bake Dark Chocolate Peppermint Slice can be prepared in just 20 minutes, making it a fuss-free option for both novice cooks and busy chefs alike.
Luxurious Flavor: The rich dark chocolate paired with refreshing peppermint creates a gourmet experience that feels indulgent without overwhelming prep work.
Customizable: Want to shake things up? Swap out peppermint for orange essence or add your favorite nuts and dried fruits to personalize your slice!
Crowd-Pleaser: It’s a show-stopper for parties, perfect for sharing with friends or enjoying on a cozy night in. Imagine serving this alongside a scoop of vanilla ice cream or a warm cup of mint tea!
Storage-Friendly: This dessert keeps well in the fridge for a week or can be frozen for up to three months, ensuring your indulgent treat is always on hand.
For more sweet inspiration, check out my Salted Caramel Chocolate or indulge yourself with a slice of Cinnamon Swirl Banana.
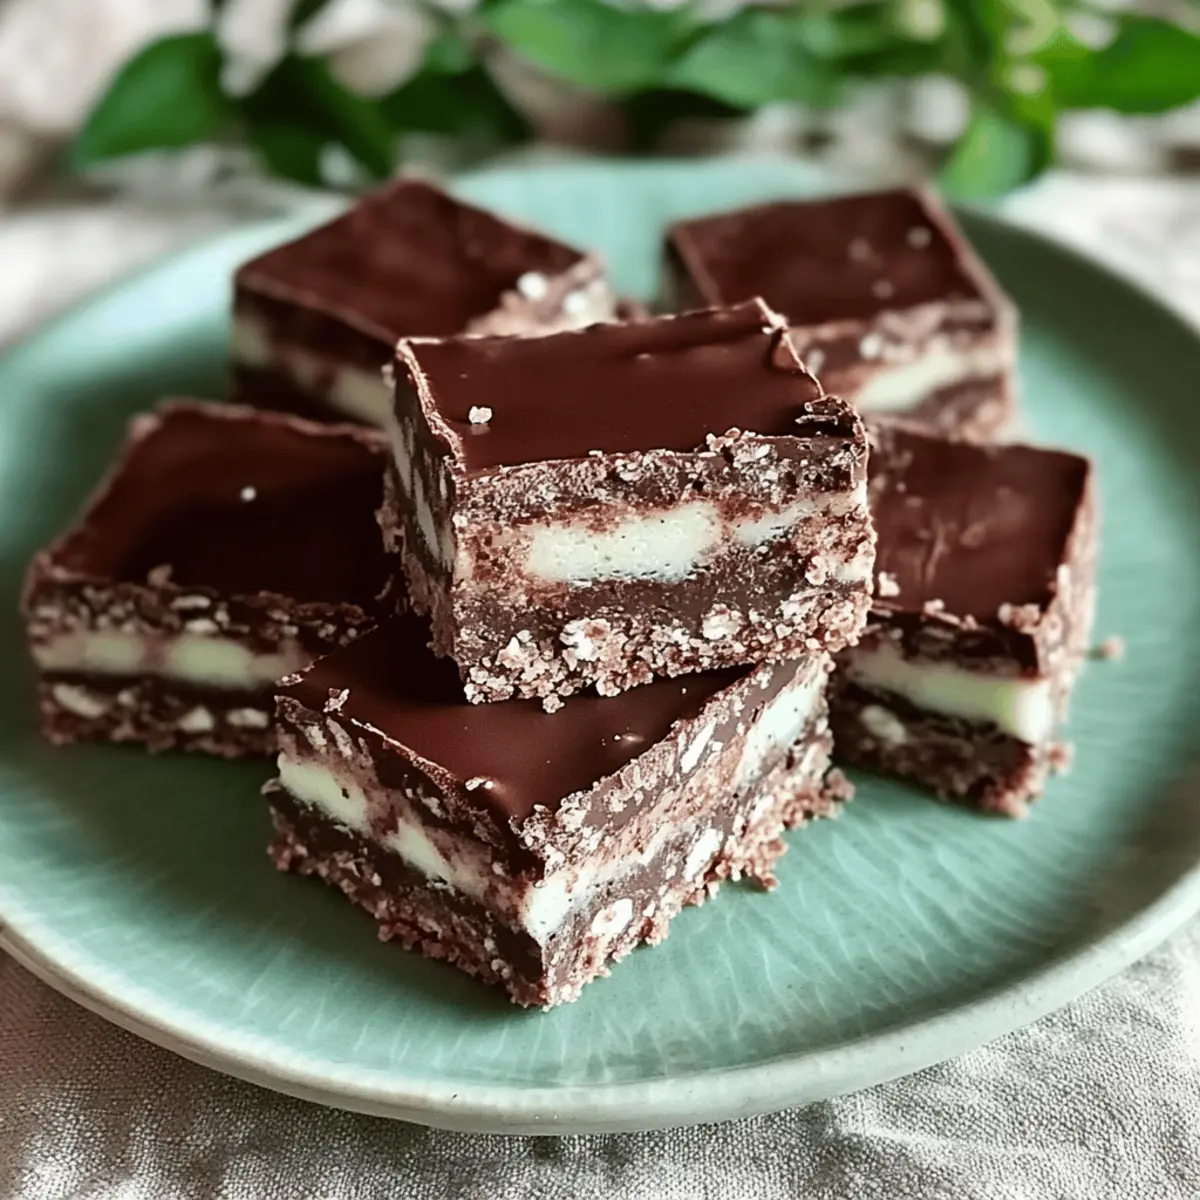
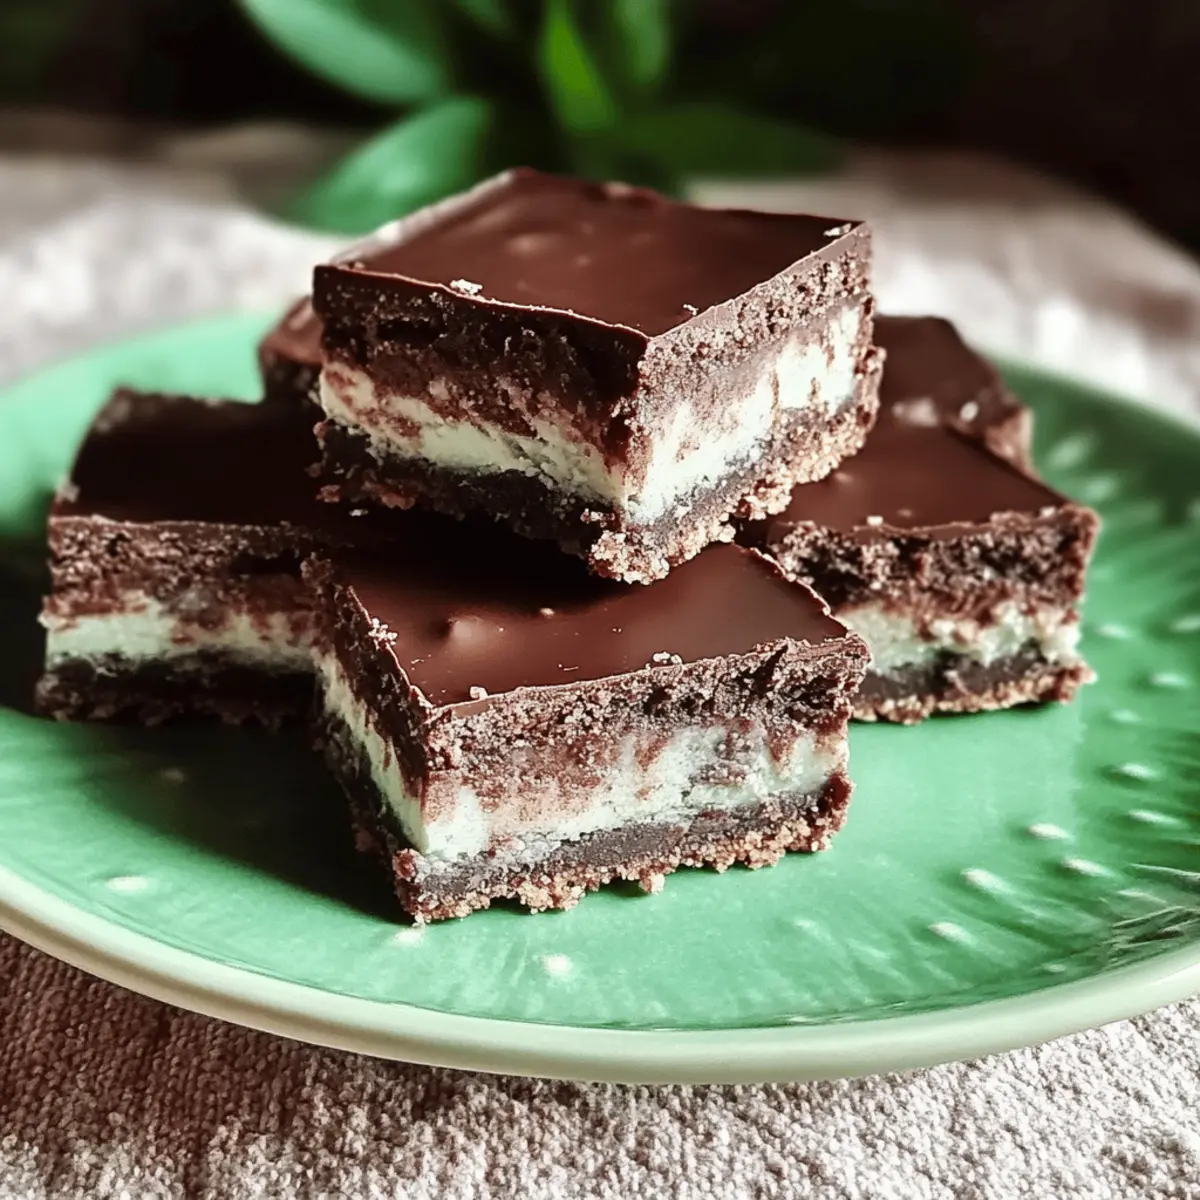
Dark Chocolate Peppermint Slice Ingredients
For the Base
- 125 g Dark Chocolate – Provides a rich, chocolatey flavor; use 70% cocoa for optimum taste.
- 200 g Condensed Milk – Adds sweetness and creaminess; no direct substitutions suggested.
- 150 g Butter – Acts as a binding agent; can be replaced with margarine for a dairy-free option.
- 1 packet Arrowroot Biscuits – Establishes a crunchy base; can swap for plain biscuits like Graham crackers if unavailable.
- 1 cup Rice Bubbles – Contributes to texture and crunch; substitute with similar cereals like Krispies if needed.
For the Topping
- 190 g Dark Chocolate – Ensures a smooth and rich chocolate layer; milk chocolate can be used for a sweeter alternative.
- 1.5 Tbsp Vegetable Oil – Helps in melting the chocolate topping; no substitutes necessary.
- 1 tsp Peppermint Essence – Infuses a refreshing flavor; orange essence can be substituted for a zesty twist.
This delightful Dark Chocolate Peppermint Slice is not just a treat for your tastebuds but also a canvas for your culinary creativity!
Step‑by‑Step Instructions for Dark Chocolate Peppermint Slice
Step 1: Prepare the Tin
Start by lining your 18 x 27 cm slice tin with baking paper, ensuring it hangs over the edges for easy lifting later. Press the paper down firmly in the corners to prevent it from moving while you work. This will be the foundation for your delicious Dark Chocolate Peppermint Slice.
Step 2: Melt Base Ingredients
In a large, microwave-safe bowl, combine 125 g of dark chocolate, 200 g of condensed milk, and 150 g of butter. Heat the mixture in the microwave in 30-second intervals, stirring well after each burst until everything is melted and smooth. This should take about 2 minutes total. Once melted, let it cool slightly before proceeding.
Step 3: Combine Mixtures
Carefully crush the arrowroot biscuits in a ziplock bag until fine, then add them along with 1 cup of rice bubbles to the melted chocolate mixture. Stir the ingredients thoroughly until everything is well combined and coated. Once mixed, transfer the mixture into the prepared tin and press it down firmly with a spatula or your hands to create an even layer for your slice.
Step 4: Create Topping
For the topping, place the remaining 190 g of dark chocolate and 1.5 tbsp of vegetable oil in a separate microwave-safe bowl. Melt this in the microwave in 30-second bursts, stirring well until silky and smooth. Finally, add 1 tsp of peppermint essence to the chocolate, mixing well to infuse that refreshing flavor into your topping.
Step 5: Chill and Serve
Pour the melted chocolate mixture over the pressed base in the tin, spreading it evenly with a spatula. Place the tin in the refrigerator and chill for a minimum of 2 hours, or until the slice is firm to the touch. Once set, lift the slice out using the overhanging paper, slice it into squares, and get ready to enjoy your delightful Dark Chocolate Peppermint Slice!
Dark Chocolate Peppermint Slice Variations
Customize this easy dessert to suit your taste buds, enhancing its richness and delightfully engaging textures.
- Orange Essence: Swap peppermint for orange essence for a vibrant citrus flavor. This burst of freshness can brighten your slice beautifully.
- Nutty Crunch: Add chopped almonds or walnuts to the base for an extra layer of crunch, giving each bite a satisfying texture contrast.
- Dried Fruits: Incorporate dried cranberries or cherries into the mix to provide a delightful fruity twist that complements the dark chocolate.
- Spicy Kick: Introduce a pinch of cayenne pepper for a surprising but subtle heat that adds depth to the rich chocolate flavor.
- Coconut Flakes: Mix in shredded coconut for a tropical flair that pairs wonderfully with the chocolate and peppermint.
- Peanut Butter Layer: Spread a thin layer of creamy peanut butter beneath the topping to create a decadent contrast that is both rich and nutty.
- Mint Chocolate Chip: Stir in mini chocolate chips along with the peppermint essence for an extra dash of indulgence, enhancing the chocolate experience.
For more delectable ideas, consider pairing your slice with a scoop of vanilla ice cream or exploring my Strawberry Chocolate Decadent treat for a delightful dessert duo!
Expert Tips for Dark Chocolate Peppermint Slice
-
Melt Chocolate Slowly: Always melt dark chocolate in short bursts to prevent burning; this ensures a silky smooth topping.
-
Chill Properly: Allow the slice to chill for at least 2 hours for the best texture; rushing this step may result in a soft slice.
-
Crush Biscuits Finely: Ensure biscuits are crushed well to create a cohesive base; large pieces can lead to an unstable slice.
-
Adjust Chocolate Consistency: If the melted topping is too thick, add small amounts of vegetable oil to achieve your desired smoothness.
-
Experiment with Flavors: Don’t hesitate to swap peppermint essence for orange essence or add nuts for a personalized twist in your Dark Chocolate Peppermint Slice!
Make Ahead Options
These No-Bake Dark Chocolate Peppermint Slices are ideal for meal prep enthusiasts! You can prepare the base mixture and refrigerate it up to 24 hours before adding the topping, ensuring a hassle-free dessert for your busy days. Simply follow the first three steps of the recipe, then cover the tin and store it in the refrigerator. When you’re ready to serve, melt the chocolate topping, pour it over the chilled base, and let it set for at least 2 hours. This way, you’ll have a delicious dessert at your fingertips, just as indulgent and fresh, saving you time and effort while impressing your friends and family!
Storage Tips for Dark Chocolate Peppermint Slice
-
Room Temperature: Store in an airtight container at room temperature for up to 3 days. This helps retain its soft texture and flavor.
-
Fridge: Keep the Dark Chocolate Peppermint Slice in the refrigerator for up to 1 week in an airtight container to maintain freshness while chilling the dessert.
-
Freezer: For longer storage, wrap the slice tightly in plastic wrap and aluminum foil, then freeze for up to 3 months. Thaw in the fridge overnight before serving.
-
Reheating: There’s no need to reheat this no-bake slice; enjoy it straight from the fridge for a refreshing treat!
What to Serve with No-Bake Dark Chocolate Peppermint Slice
Elevate your dessert spread with these delightful pairings that enhance the creamy chocolate and refreshing peppermint flavors.
- Fresh Berries: The tartness of strawberries or raspberries adds a bright, juicy contrast to the rich chocolate.
- Vanilla Ice Cream: A scoop of smooth vanilla ice cream is the perfect complement, bringing creamy texture and mellow sweetness.
- Mint Tea: A warm cup of mint tea provides a calming herbal note, harmonizing beautifully with the peppermint essence in your slice.
- Chocolate Sauce: Drizzle with rich chocolate sauce for an indulgent touch that enhances the dessert’s decadent nature.
- Whipped Cream: Light and airy whipped cream balances the dense slice and offers a pleasing mouthfeel that invites savoring every bite.
- Coconut Macaroons: These chewy, sweet treats echo the tropical vibe while providing a delightful texture contrast with each slice.
- Nutty Biscotti: The crunchy, nutty biscotti offers a satisfying crunch that complements the creamy chocolate base.
- Coffee: A medium roasted coffee enhances the chocolate flavors, making every bite of the slice even more luxurious.
- Orange Segments: Slices of fresh orange can brighten the plate, and their citrus notes pair well if you’re using orange essence in your slice.
Dark Chocolate Peppermint Slice Recipe FAQs
How can I choose the right dark chocolate?
Absolutely! For the best flavor in your Dark Chocolate Peppermint Slice, opt for chocolate with at least 70% cocoa content. This ensures a rich, intense chocolate taste that perfectly complements the creamy sweetness of the condensed milk. Look for bars without artificial additives for the purest flavor.
How should I store the Dark Chocolate Peppermint Slice?
To keep your slice fresh, store it in an airtight container. It can last in the refrigerator for up to one week. If you prefer to keep it longer, wrap it tightly in plastic wrap and then in aluminum foil, freezing for up to three months. Just remember to thaw it overnight in the fridge before enjoying!
Can I freeze the Dark Chocolate Peppermint Slice?
Yes, you can absolutely freeze the slice! Wrap it tightly as mentioned above to prevent freezer burn. When you’re ready to enjoy, simply transfer it to the refrigerator the night before serving. This method preserves the delightful texture and flavor.
What can I do if my chocolate topping is too thick?
Very! If you find that the melted chocolate topping is too thick to spread, don’t worry! Just add a small amount of vegetable oil—about a teaspoon at a time—and stir until you reach your desired consistency. This will help you achieve a smooth, spreadable topping, ensuring a beautiful finish.
Are there any dietary restrictions I should consider?
Great question! This Dark Chocolate Peppermint Slice contains dairy due to the butter and condensed milk. If you’re looking for dairy-free options, you can use margarine instead of butter. Always double-check the ingredients on the chocolate and biscuits you choose, as some may contain allergens like nuts or gluten.
What should I do if my biscuit base is crumbly?
If your biscuit base turns out too crumbly, it’s likely that the biscuits weren’t crushed finely enough or didn’t get enough moisture from the melted chocolate mixture. For a firmer base, consider adding a touch more melted butter or condensed milk to the mixture before pressing it into the tin.
Irresistible Dark Chocolate Peppermint Slice in 20 Minutes
Ingredients
Equipment
Method
- Line your 18 x 27 cm slice tin with baking paper, ensuring it hangs over the edges for easy lifting later.
- In a large microwave-safe bowl, combine 125 g of dark chocolate, 200 g of condensed milk, and 150 g of butter. Heat in the microwave in 30-second intervals, stirring well until melted and smooth.
- Crush the arrowroot biscuits in a ziplock bag until fine, then add them along with 1 cup of rice bubbles to the melted chocolate mixture. Stir until well combined and transfer into the prepared tin, pressing down firmly.
- Melt the remaining 190 g of dark chocolate and 1.5 Tbsp of vegetable oil in a separate bowl in the microwave until silky and smooth. Add 1 tsp of peppermint essence and mix well.
- Pour the melted chocolate mixture over the base in the tin, spreading evenly. Chill in the refrigerator for a minimum of 2 hours or until firm. Once set, lift out using the overhanging paper and slice into squares.
Leave a Reply