
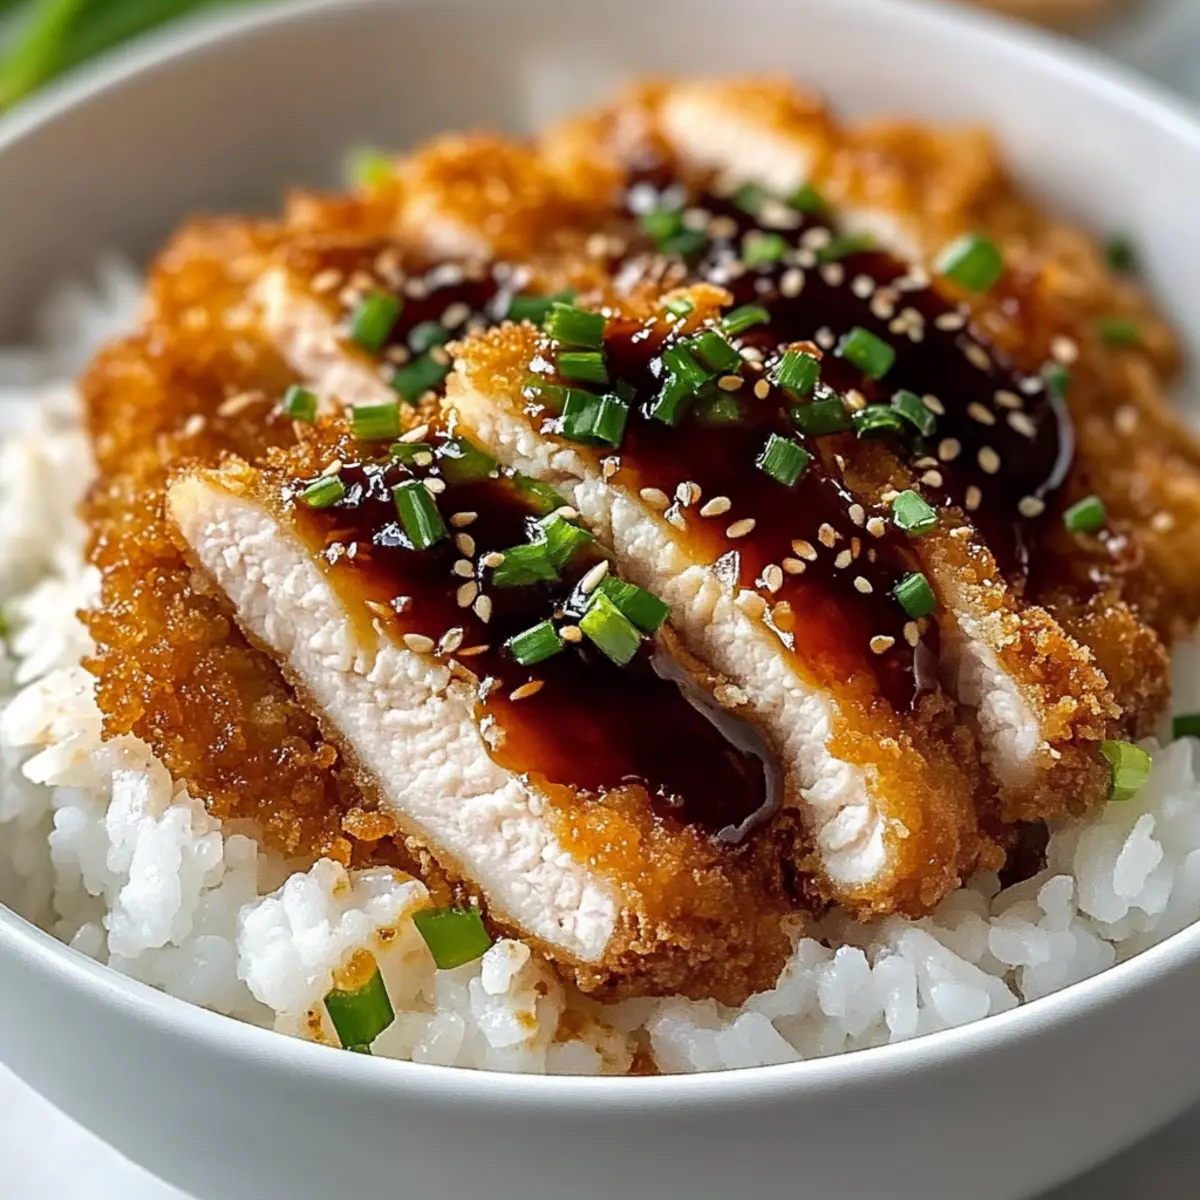
As I hustled through my busy week, I stumbled upon a little culinary treasure that changed everything—a Japanese Katsu Bowl with Tonkatsu Sauce. Just when I thought I’d have to settle for tired takeout, this dish offered an enticing blend of crispy, juicy chicken (or your choice of pork or tofu) piled atop fluffy white rice, all drizzled with a sweet and tangy sauce that sings comfort. Not only is this a quick weeknight dinner that the whole family will gobble up, but it’s also incredibly customizable, making it easy to cater to everyone’s tastes. The straightforward ingredients come together effortlessly, allowing you to whip this up in no time at all. Want to dive into the delightful world of katsu? Let’s get cooking!
Why Choose Japanese Katsu Bowls?
Quick and Easy: With minimal prep, you can have a delicious dinner ready in just 30 minutes!
Customizable Options: Whether you prefer chicken, pork, or tofu, this recipe adapts to your tastes effortlessly.
Crowd-Pleaser: Perfect for family dinners, everyone from kids to adults will enjoy this delightful dish.
Savory and Sweet: The balance of crispy protein and sweet tonkatsu sauce creates an unforgettable flavor experience, reminiscent of your favorite takeout.
Perfect with Sides: Pair it with pickled vegetables or a light salad; you’ll feel like you’re dining at a restaurant!
Give this Crispy Japanese Katsu Bowl with Sweet Tonkatsu Sauce a try and transform your weeknight meals into something special!
Japanese Katsu Bowl Ingredients
• For the Katsu
- Boneless, skinless chicken breasts (2 pieces) – Main protein; substitute with pork chops or tofu for variations.
- All-purpose flour (1 cup) – Coating base for a crispy texture; use gluten-free flour for a GF option.
- Large eggs, beaten (2) – Binds the flour and panko together.
- Panko breadcrumbs (2 cups) – Provides a light, crispy coating; fresh panko works best.
- Salt (1 tsp) – Essential seasoning for flavor.
- Black pepper (½ tsp) – Enhances the flavor profile.
- Garlic powder (½ tsp) – Adds a depth of flavor to the katsu.
- Vegetable oil (½ cup) – Used for frying; oils with a high smoke point like canola are best.
• For Serving
- Cooked white rice (2 cups) – The perfect base; can substitute with brown rice or cauliflower rice for a lower carb option.
- Tonkatsu sauce (¼ cup) – The sweet and tangy sauce that defines the dish; use store-bought or homemade.
- Japanese mayo (2 tbsp, optional) – Adds creaminess and richness to the bowl.
- Chopped parsley or green onions – For a fresh, vibrant garnish.
Elevate your weeknight dinner with these Japanese Katsu Bowl ingredients! Enjoy a meal that your family will love.
Step‑by‑Step Instructions for Japanese Katsu Bowls with Tonkatsu Sauce
Step 1: Prepare the Chicken
Begin by placing the boneless, skinless chicken breasts between two sheets of plastic wrap and gently pound them to about ½ inch thickness using a meat mallet. Once flattened, season the chicken on both sides with salt, black pepper, and garlic powder to enhance the flavor.
Step 2: Coat the Chicken
Set up a dredging station with three shallow bowls: one for all-purpose flour, another for beaten eggs, and the last for panko breadcrumbs. Take each seasoned chicken breast and coat it first in flour, shaking off the excess, then dip it into the egg, and finally press it firmly into the panko, ensuring an even coating for optimum crispiness.
Step 3: Fry to Perfection
In a large, shallow pan, heat ½ cup of vegetable oil over medium heat until it reaches about 350°F. Gently place the coated chicken breasts into the hot oil, frying each for 3-4 minutes per side, or until golden brown and cooked through. The chicken should be crispy on the outside while remaining juicy inside; use a meat thermometer to ensure it reaches 165°F.
Step 4: Drain and Rest the Chicken
Once perfectly fried, remove the katsu from the oil and let it drain on a wire rack placed over a baking sheet. This allows air circulation that keeps the crust crisp. Let the chicken rest for a few minutes, which helps to retain juices before slicing.
Step 5: Assemble the Bowls
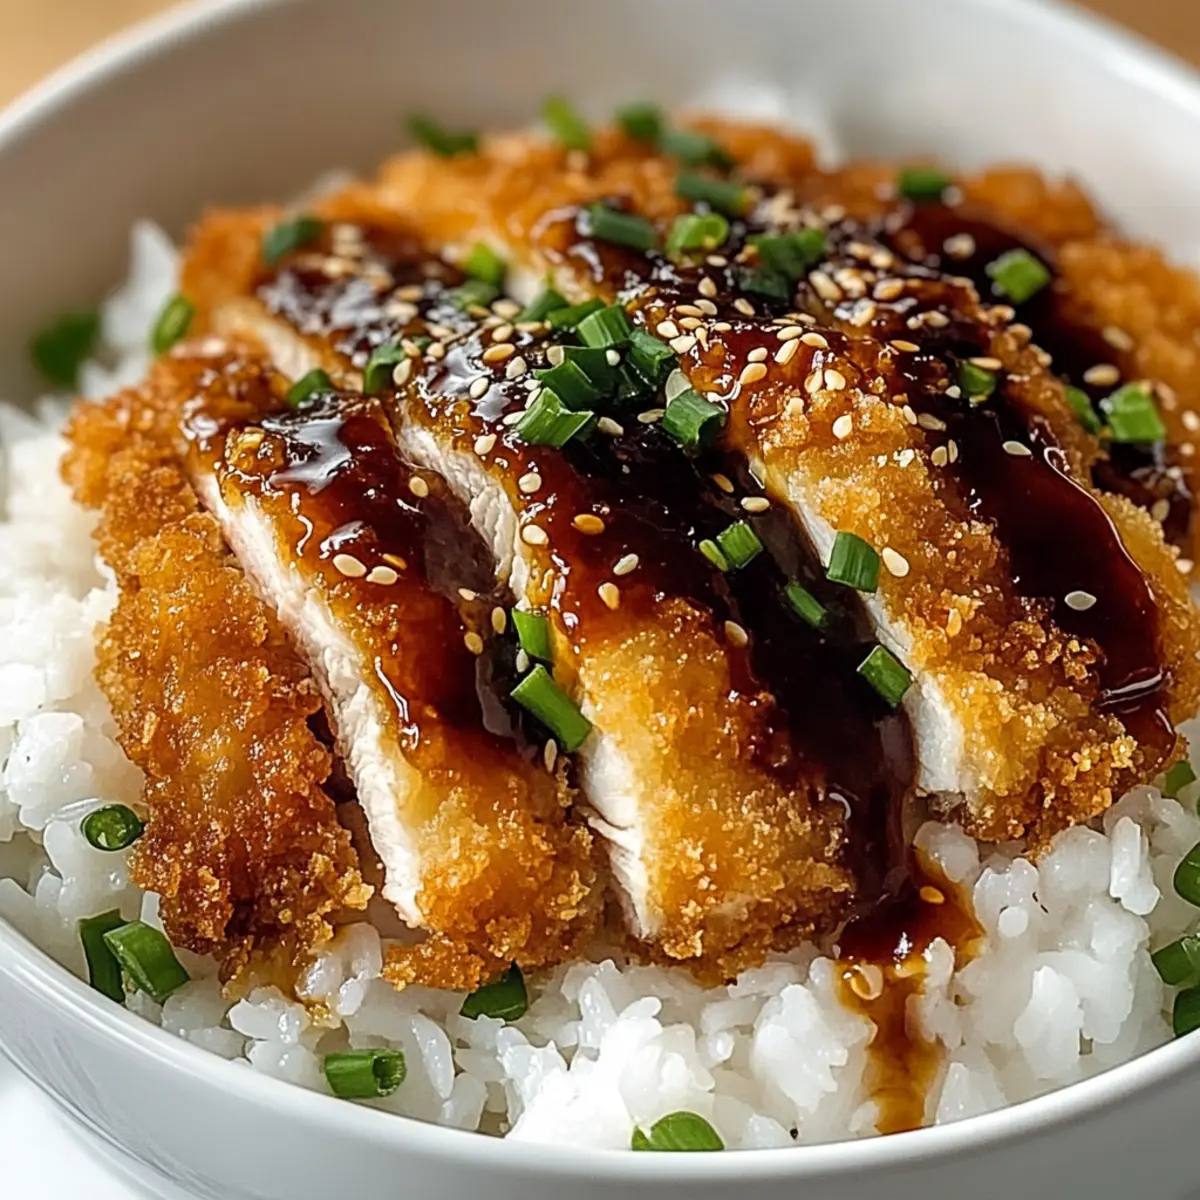
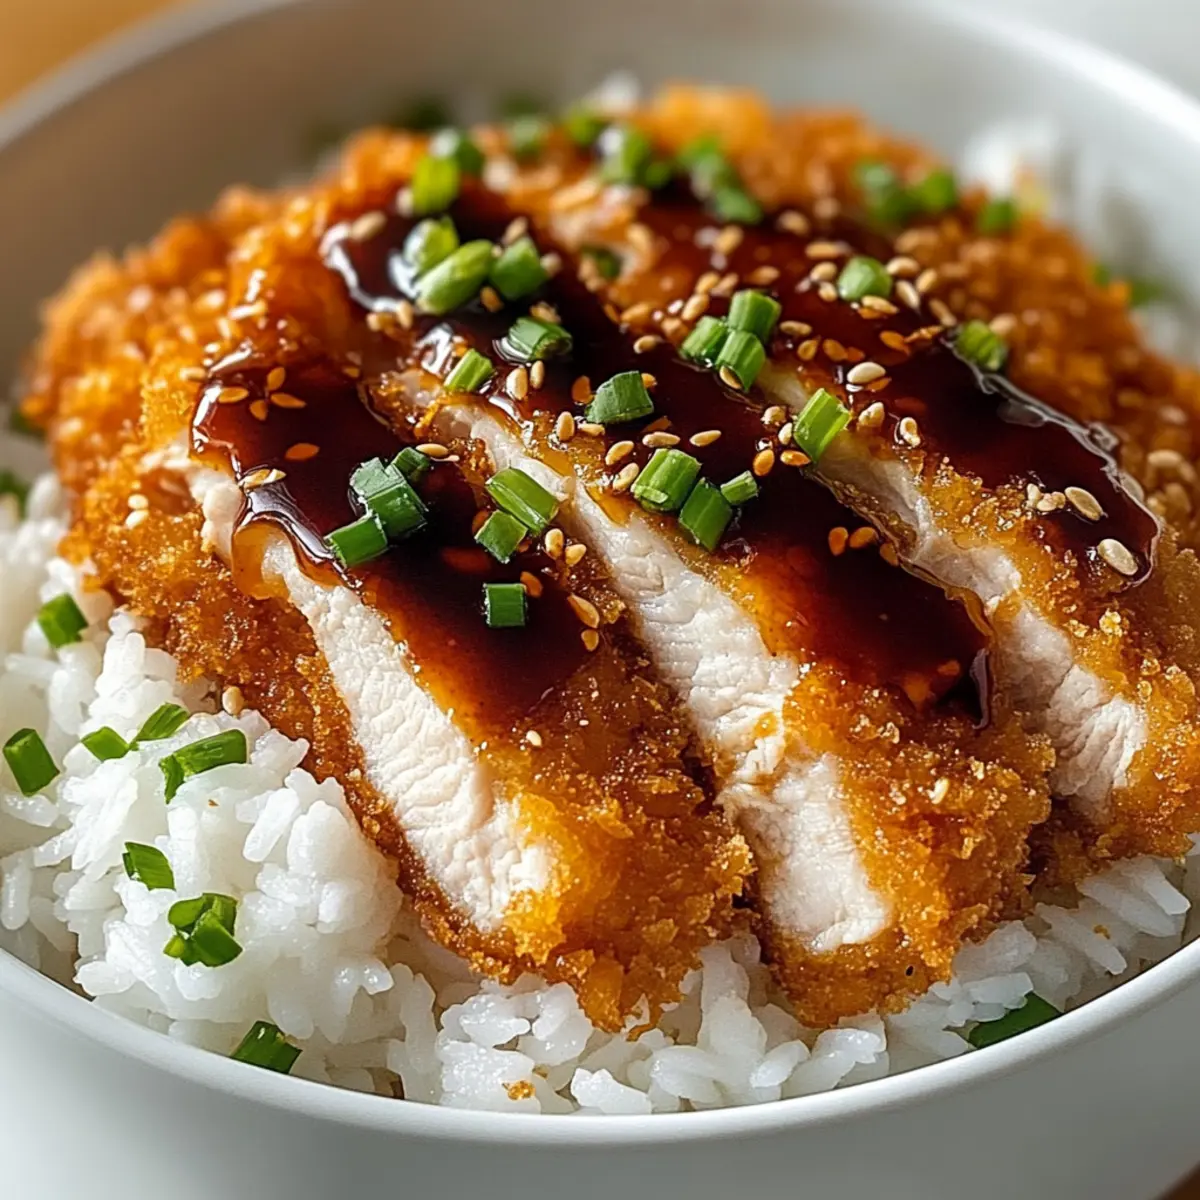
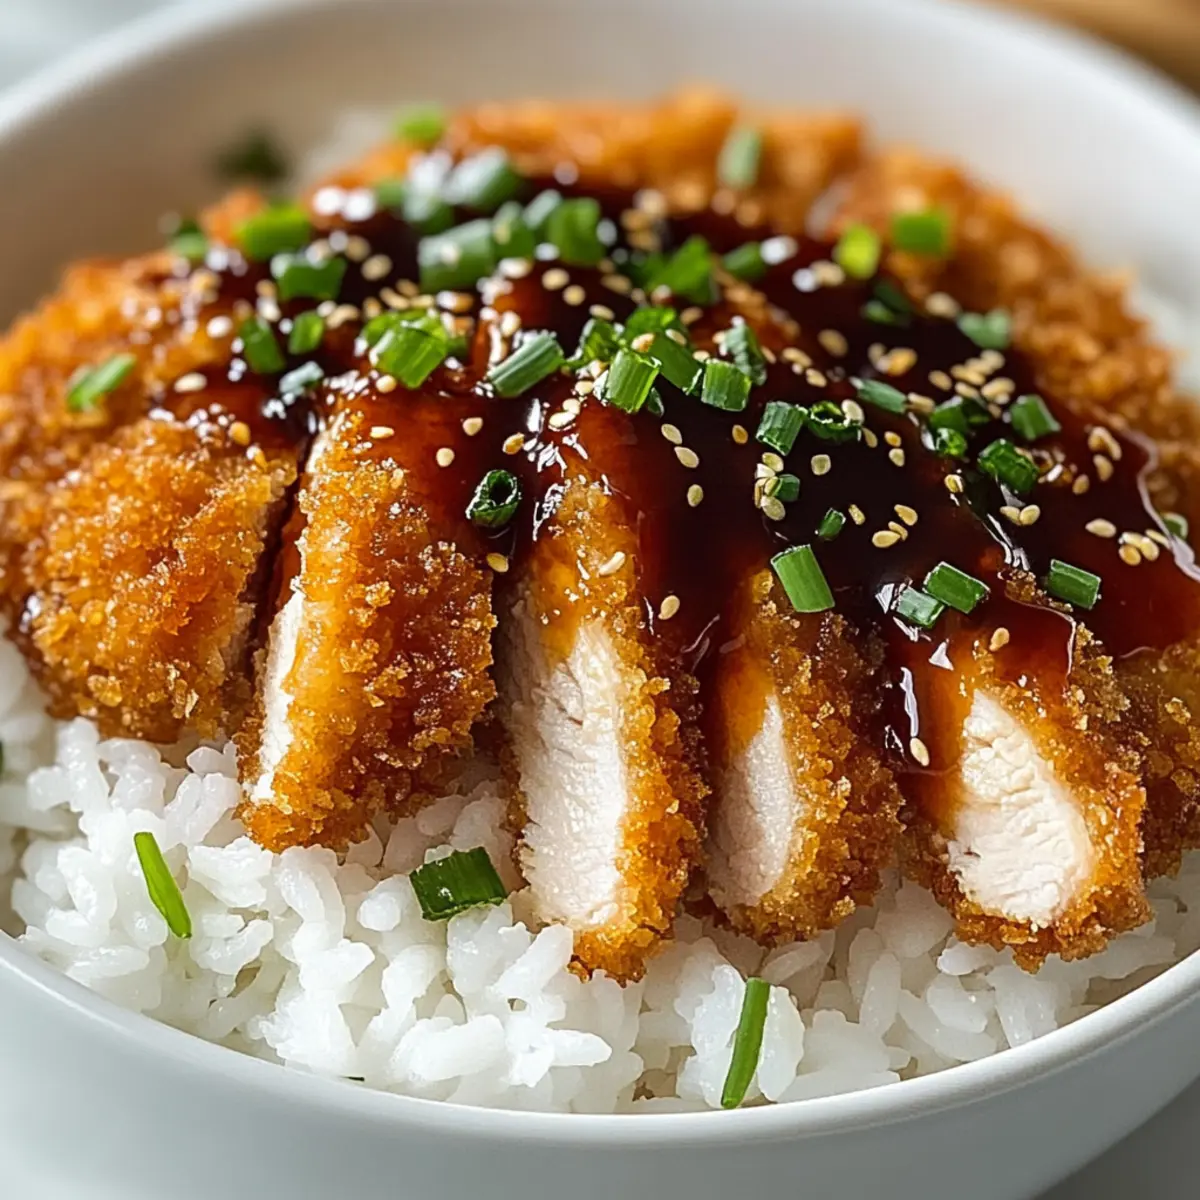
To assemble the Japanese Katsu Bowls, divide 2 cups of cooked white rice into serving bowls. Slice the fried katsu into strips and lay them over the rice in a visually appealing manner, ensuring every bite is packed with flavor.
Step 6: Top with Sauce and Garnish
Drizzle the sweet tonkatsu sauce generously over the sliced katsu, allowing it to soak into the rice subtly. Optionally, add a layer of creamy Japanese mayo for richness, and finish with a sprinkle of chopped parsley or green onions for color and freshness.
Step 7: Serve Immediately
Serve the Japanese Katsu Bowls while still warm, ensuring each bite of crispy katsu contrasts with the fluffy rice beneath. Enjoy this delightful meal right away for the best texture and flavor, as the katsu remains crispy before it meets the sauce.
Expert Tips for Japanese Katsu Bowls
-
Double-Coat for Crispiness: Coat your chicken twice in panko to achieve an extra crunchy texture that keeps well even after saucing.
-
Perfect Frying Temperature: Maintain your oil at around 350°F. Use a thermometer to ensure the katsu cooks thoroughly without burning.
-
Avoid Overcrowding: Fry only a few pieces at a time to prevent temperature drops, ensuring each katsu remains crispy and evenly cooked.
-
Proper Drainage: Place fried katsu on a wire rack instead of paper towels to keep the bottom from steaming and losing that delightful crispy texture.
-
Customize Your Protein: Feel free to substitute chicken with pork or tofu for versatile Japanese Katsu Bowls that cater to everyone’s tastes.
How to Store and Freeze Japanese Katsu Bowls
-
Fridge: Store leftover katsu in an airtight container for up to 3 days. Make sure to separate the sauce to maintain the crispiness of the chicken.
-
Freezer: For longer storage, freeze katsu in a single layer, then transfer to a freezer-safe container for up to 3 months. Thaw in the fridge before reheating.
-
Reheating: To reheat, place the katsu in an oven at 375°F for about 10-15 minutes until crispy again. Avoid the microwave, as it can make the coating soggy.
-
Sauce Storage: Keep tonkatsu sauce in the fridge for up to 2 weeks in a sealed container. It enhances the flavor of any leftover Japanese Katsu Bowls you prepare!
Make Ahead Options
Planning ahead with your Japanese Katsu Bowl with Tonkatsu Sauce is a game changer for busy weeknights! You can coat the chicken breasts in panko and store them in the refrigerator for up to 24 hours; this allows the flavors to meld beautifully. Alternatively, prepare the sauce and refrigerate it in an airtight container for up to 3 days. Just remember to keep the katsu separate from the rice and sauce until you’re ready to serve, as this will maintain the crispiness of the chicken. When it’s time to enjoy your meal, simply fry the katsu and assemble the bowls—dinner is ready with minimal effort and the same delicious taste!
Japanese Katsu Bowls Variations & Substitutions
Feel free to personalize your Japanese Katsu Bowl to match your taste and dietary needs!
- Pork Substitute: Swap chicken for pork loin or chops for a deeper flavor. The juiciness of pork complements the tonkatsu sauce beautifully.
- Vegetarian Tofu: Use firm or extra-firm tofu instead of chicken for a delightful vegetarian option. Just be sure to press the tofu to remove excess moisture.
- Gluten-Free Option: Substitute all-purpose flour with a gluten-free blend and choose gluten-free panko to enjoy the same crispy texture.
- Brown Rice Base: Swap white rice for fiber-rich brown rice or cauliflower rice for a healthier alternative that also adds a unique taste.
- Spice it Up: Add a sprinkle of chili flakes or a dash of sriracha to the tonkatsu sauce for a spicy kick. This twist adds an exciting heat to the sweetness.
- Crunchy Cabbage: Top your bowl with shredded cabbage or carrot ribbons for a fresh, crunchy contrast. It’s a great way to add color and texture!
- Extra Sauce: For katsu lovers, increase the tonkatsu sauce to your liking—more sauce means more flavor soaking into the rice. It can make the dish even more inviting!
- Japanese Mayo Upgrade: Use spicy Japanese mayo instead of regular mayo for an extra layer of creaminess and a delightful punch of flavor.
Explore these variations, and don’t forget to try this dish with a side of pickled vegetables or a fresh salad for a well-rounded meal. If you’re intrigued, check out this recipe on Perfectly Pillowy Japanese pancakes, as they pair well for a delightful dessert after your katsu! Happy cooking!
What to Serve with Crispy Japanese Katsu Bowls with Tonkatsu Sauce
Savor the delightful moment of crafting a complete meal that envelops your senses in comforting flavors and textures.
-
Crispy Cabbage Slaw: The fresh crunch of cabbage slaw adds a refreshing contrast to the crispy katsu, enhancing the dining experience with its bright, zesty flavor.
-
Pickled Vegetables: A traditional side, pickled veggies provide a tangy snap that balances the richness of the katsu, elevating the overall taste profile. It’s a quintessential Japanese touch you’ll adore!
-
Miso Soup: This warm, savory soup envelops you with umami goodness, creating a cozy prelude to your meal. A gentle contrast, it complements the katsu perfectly.
-
Japanese Potato Salad: Creamy and slightly sweet, this dish introduces a comforting element that pairs beautifully with the crispy textures of the katsu. Each bite feels like a warm hug!
-
Sesame Green Beans: Lightly sautéed green beans tossed in sesame oil offer a crunchy, nutty side that brightens your plate while providing a burst of color and flavor.
-
Cold Sake or Green Tea: Embrace a classic beverage that rounds out your meal. Sake warms the soul, while green tea refreshes your palate after each delicious bite.
Dive into these pairings and create a serene Japanese dining experience right at home, celebrating the crispy Japanese Katsu Bowls with Tonkatsu Sauce you’ve lovingly prepared!
Japanese Katsu Bowl with Tonkatsu Sauce Recipe FAQs
How do I choose the right chicken for Katsu?
Absolutely! When selecting chicken breasts, look for boneless and skinless pieces that are plump and fresh. Choose organic chicken if possible for better flavor. For variations, you can use pork chops with the same preparation or firm tofu for a vegetarian option. Ensure any protein looks free from discoloration and has a pleasant smell.
How should I store leftover Katsu?
Very simply! Store any leftover Katsu in an airtight container in the fridge for up to 3 days. To maintain the crispiness of the chicken, I recommend separating it from the tonkatsu sauce. This way, you can reheat the chicken on its own while keeping it crunchy.
Can I freeze Katsu, and how do I do it?
Of course! To freeze Katsu, first, let it cool completely after frying. Arrange the pieces in a single layer on a baking sheet and place it in the freezer for about 1-2 hours until solid. Afterward, transfer the Katsu to a freezer-safe container with parchment paper between layers to avoid sticking. It will stay good for up to 3 months. When ready to enjoy, simply thaw in the fridge overnight and reheat in the oven at 375°F for 10-15 minutes until crispy.
What should I do if my Katsu isn’t crispy?
Don’t worry; it can happen to the best of us! If your Katsu isn’t crispy, ensure that you’re frying at the correct temperature—about 350°F. If the oil is too cool, the coating can absorb oil and become soggy. Also, avoid overcrowding the pan, which can drop the oil temperature too much for proper frying. Lastly, make sure to drain the Katsu on a wire rack to keep air circulating around it instead of on paper towels, which can trap moisture.
Is there a gluten-free option for this recipe?
Absolutely! To make a gluten-free Katsu Bowl, simply substitute all-purpose flour with a gluten-free flour blend, and use gluten-free panko breadcrumbs. Many brands offer excellent alternatives that still provide that satisfying crunch. Just ensure that any sauces used are also gluten-free, including the tonkatsu sauce.
Can my pet eat Katsu?
Generally, it’s best to keep Katsu away from your pets. The breading often contains spices and salt that aren’t ideal for them. It’s also essential to avoid sharing any fried food as it can upset their stomach. If you want to treat them, consider offering plain cooked chicken without the spices instead!
Crispy Japanese Katsu Bowls with Tonkatsu Sauce Made Easy
Ingredients
Equipment
Method
- Prepare the chicken by placing the boneless, skinless chicken breasts between two sheets of plastic wrap and gently pound to about ½ inch thickness.
- Season the chicken on both sides with salt, black pepper, and garlic powder.
- Set up a dredging station with three shallow bowls: one for all-purpose flour, one for beaten eggs, and one for panko breadcrumbs.
- Coat each seasoned chicken breast in flour, dip into the egg, and then press into the panko for an even coating.
- Heat ½ cup of vegetable oil in a large pan until 350°F, then fry the chicken for 3-4 minutes per side until golden brown.
- Remove the fried katsu from the oil and let it drain on a wire rack.
- Divide cooked white rice into serving bowls, slice the fried katsu, and lay it over the rice.
- Drizzle tonkatsu sauce over the sliced katsu, optionally add Japanese mayo, and garnish with parsley or green onions.
- Serve immediately while warm for the best texture and flavor.
Leave a Reply