
There’s something incredibly nostalgic about the aroma of freshly baked apple pie wafting through the kitchen. In this cozy moment, I’m thrilled to share my recipe for Mini Apple Pies, perfect for satisfying individual cravings while adding a charming touch to your dessert table. The beauty of these delightful miniatures lies not just in their flaky crusts and sweet apple fillings but in their customizable nature—feel free to swap in your favorite fruits! Ideal for a quick dessert or a crowd-pleaser at gatherings, these pies are easy to prepare and bring joy to every bite. So, why not grab some apples and treat yourself to a slice of homemade happiness? Ready to dive into the world of mini desserts?
Why Are Mini Apple Pies So Beloved?
Nostalgic Comfort: There’s something heartwarming about mini apple pies that invokes fond memories of family gatherings and cozy moments.
Easily Customizable: Want to switch things up? These pies are versatile and can be made with pears, berries, or even cherries to suit your cravings.
Perfect Portion Sizes: Each individual pie is a delightful serving, making them ideal for sharing or for when you just want a sweet escape without overindulging.
Quick and Simple: With easy instructions, you don’t need to be a baking pro to create these adorable treats. They come together with minimal fuss!
Crowd-Pleasing Treat: Be prepared for compliments! Whether at a dinner party or family get-togethers, these mini desserts are sure to impress and satisfy.
Pair them with a scoop of vanilla ice cream for the ultimate indulgence. If you’re curious about other delightful recipes, check out our Custard Apple Rice for a fresh twist on traditional treats!
Mini Apple Pies Ingredients
For the Crust
• All-purpose flour – Essential for dusting and prevents sticking when rolling out dough.
• Homemade pie dough or store-bought crusts – Recommended from Pillsbury for a flaky, sturdy base; two batches advised.
For the Filling
• Medium baking apples (e.g., Jonagold, Honeycrisp, or Braeburn) – About 1 lb. peeled, cored, and finely chopped for the signature taste; any tart apple works as a substitution.
• Brown sugar – 1/4 cup (55 g.), adds richness and depth of sweetness to the filling.
• Granulated sugar – 1/4 cup (50 g.), balances the flavors perfectly in your mini apple pies.
• Cornstarch – 1 Tbsp., thickens the filling to prevent any sogginess.
• Ground cinnamon – 1 1/2 tsp., infuses a warm, spiced flavor characteristic of comforting apple desserts.
• Kosher salt – 1/2 tsp., elevates the overall flavor profile of the filling.
• Pure vanilla extract – 1/2 tsp., adds a touch of aromatic sweetness to the mix.
For Assembly
• Large egg – 1, beaten for the egg wash that gives your lattice crust a beautiful golden finish.
• Coarse sugar or sanding sugar – 2 tsp., for sprinkling on top of the crust, adding a delightful crunch and sweetness.
For Serving
• Vanilla ice cream – Recommend serving warm mini pies with a scoop for the perfect cozy dessert experience.
Step‑by‑Step Instructions for Mini Apple Pies
Step 1: Prepare the Dough
Start by rolling out your homemade pie dough or store-bought crusts on a floured surface until it’s about 1/8 inch thick. Use a round cutter to cut out circles that fit your mini pie pans. Aim for a size that allows for some overhang. As you cut, collect the scraps for later use, and ensure the dough is chilled for about 20 minutes before proceeding.
Step 2: Line the Mini Pans
Once your dough is chilled, gently press the circles into the mini pie pans, ensuring there’s no air trapped underneath. Tuck the edges into the pan and crimp for a decorative touch. This will help the crust hold its shape during baking. Place the lined pans back in the fridge while you prepare the filling.
Step 3: Make the Apple Filling
In a large mixing bowl, combine your finely chopped baking apples, brown sugar, granulated sugar, cornstarch, ground cinnamon, kosher salt, and vanilla extract. Toss everything together until the apple pieces are well coated. Allow the mixture to sit for about 10 minutes to let the flavors meld and the apples release some juices.
Step 4: Fill the Pies
After your filling is ready, remove the pie crusts from the fridge. Evenly divide the apple mixture among each pie shell, filling them generously but being careful not to overfill. This will allow the apples to cook down without spilling over. Use a spoon to gently pack the filling if necessary for an even distribution.
Step 5: Create the Lattice Top
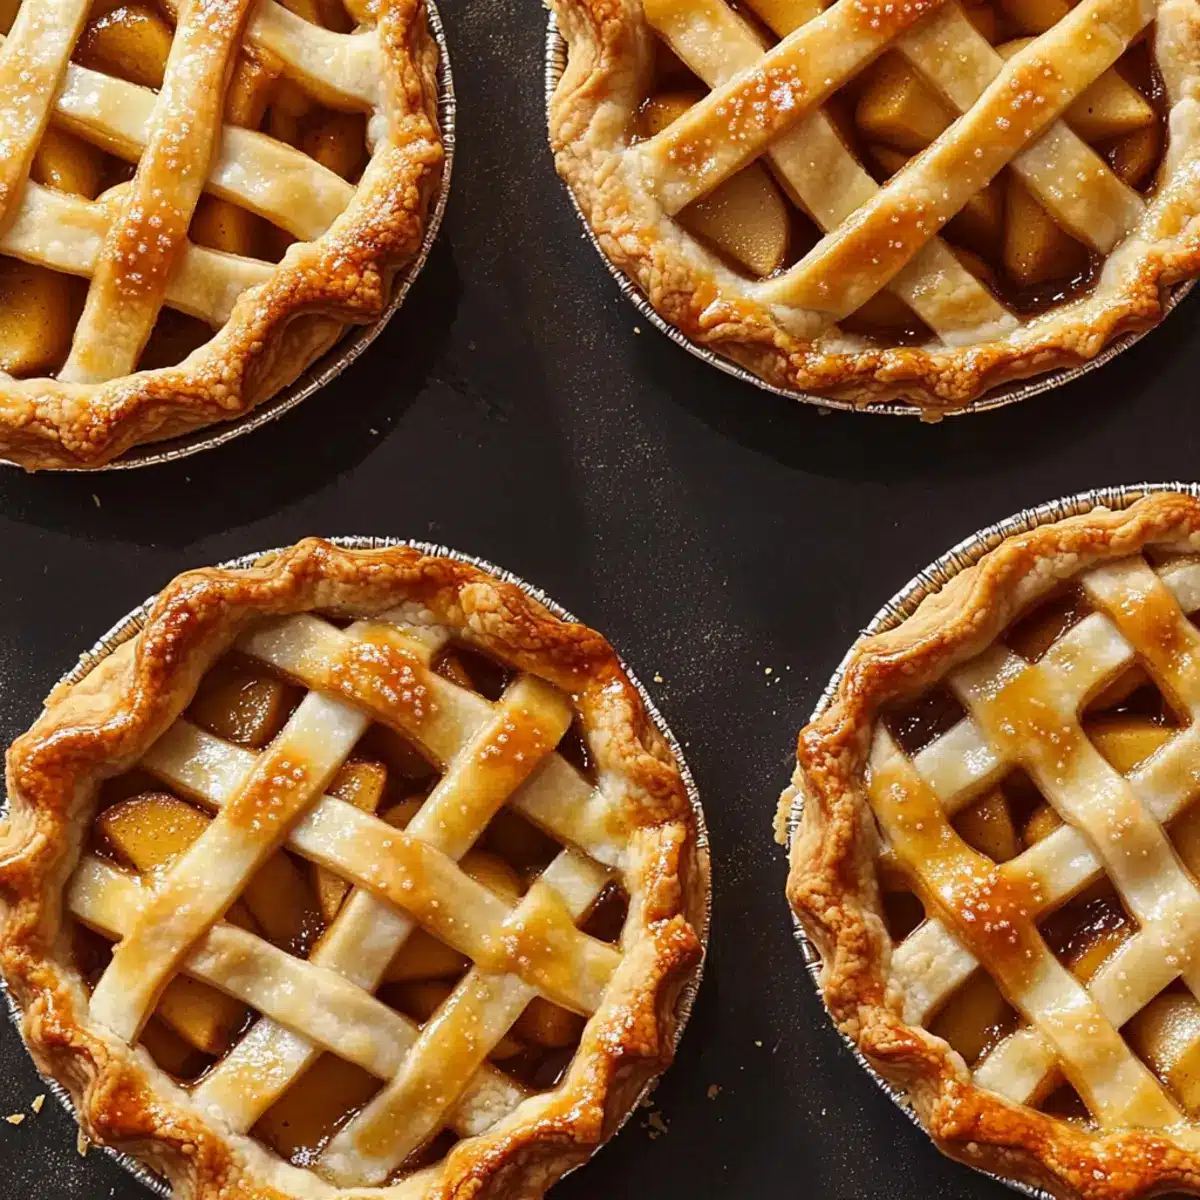
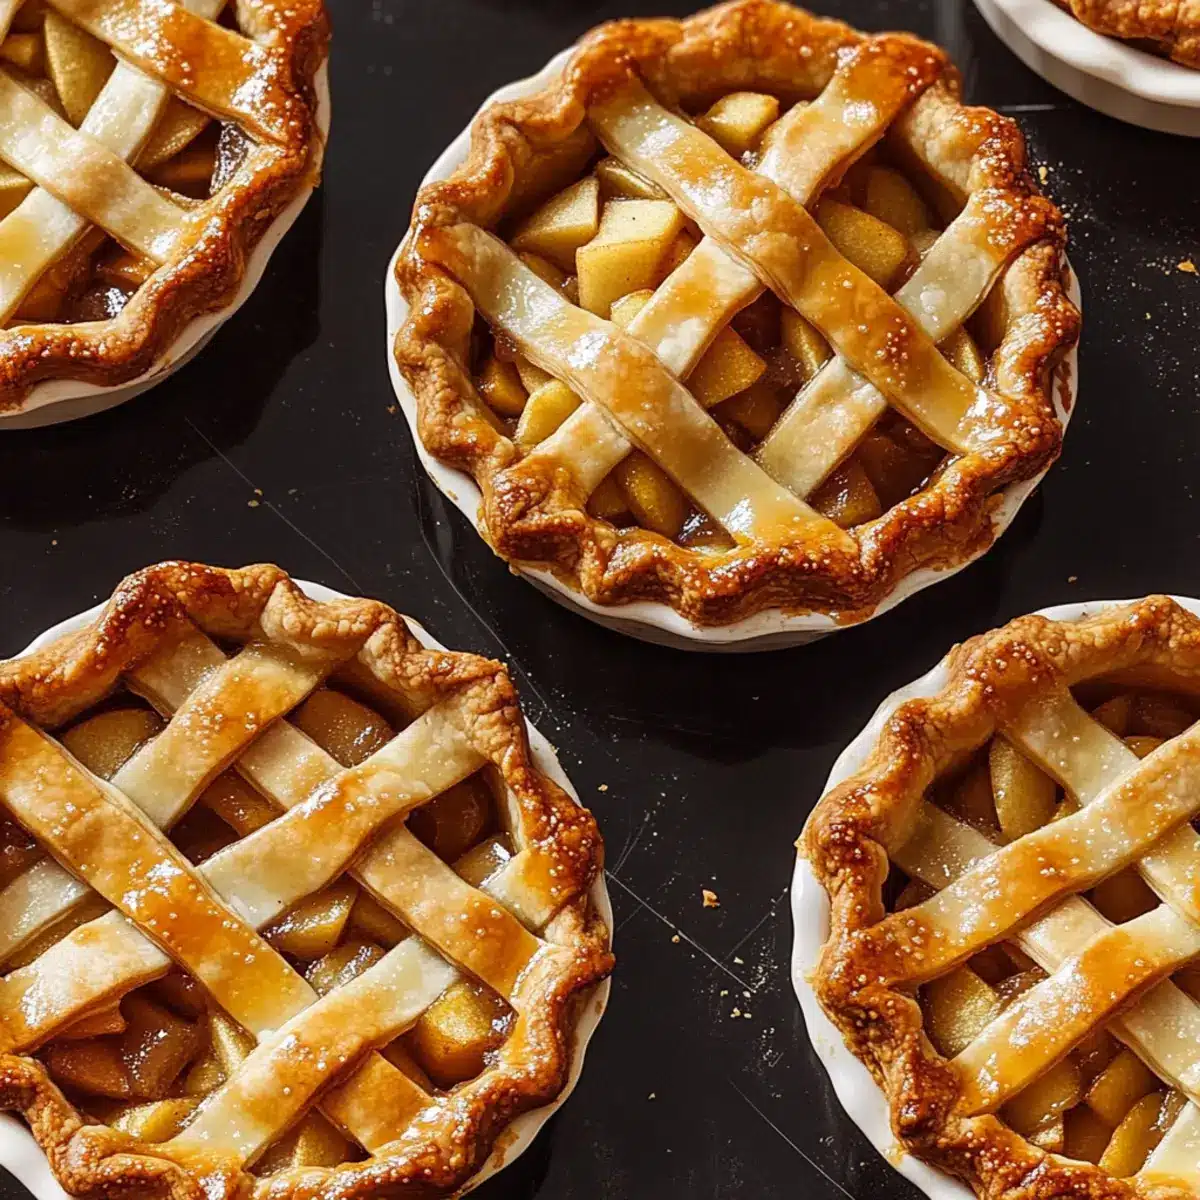
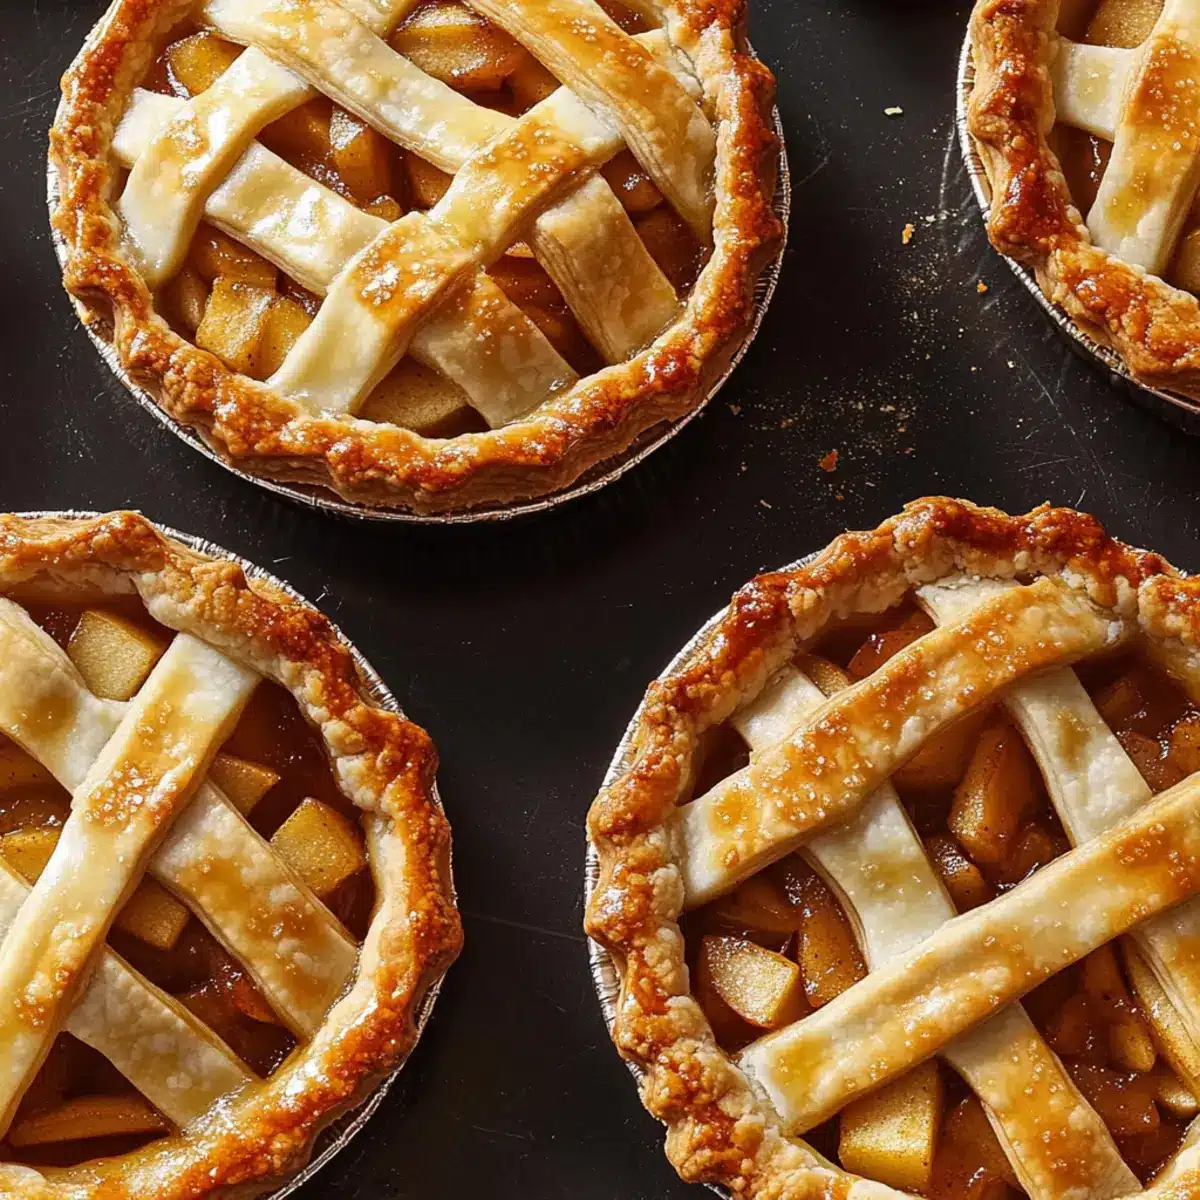
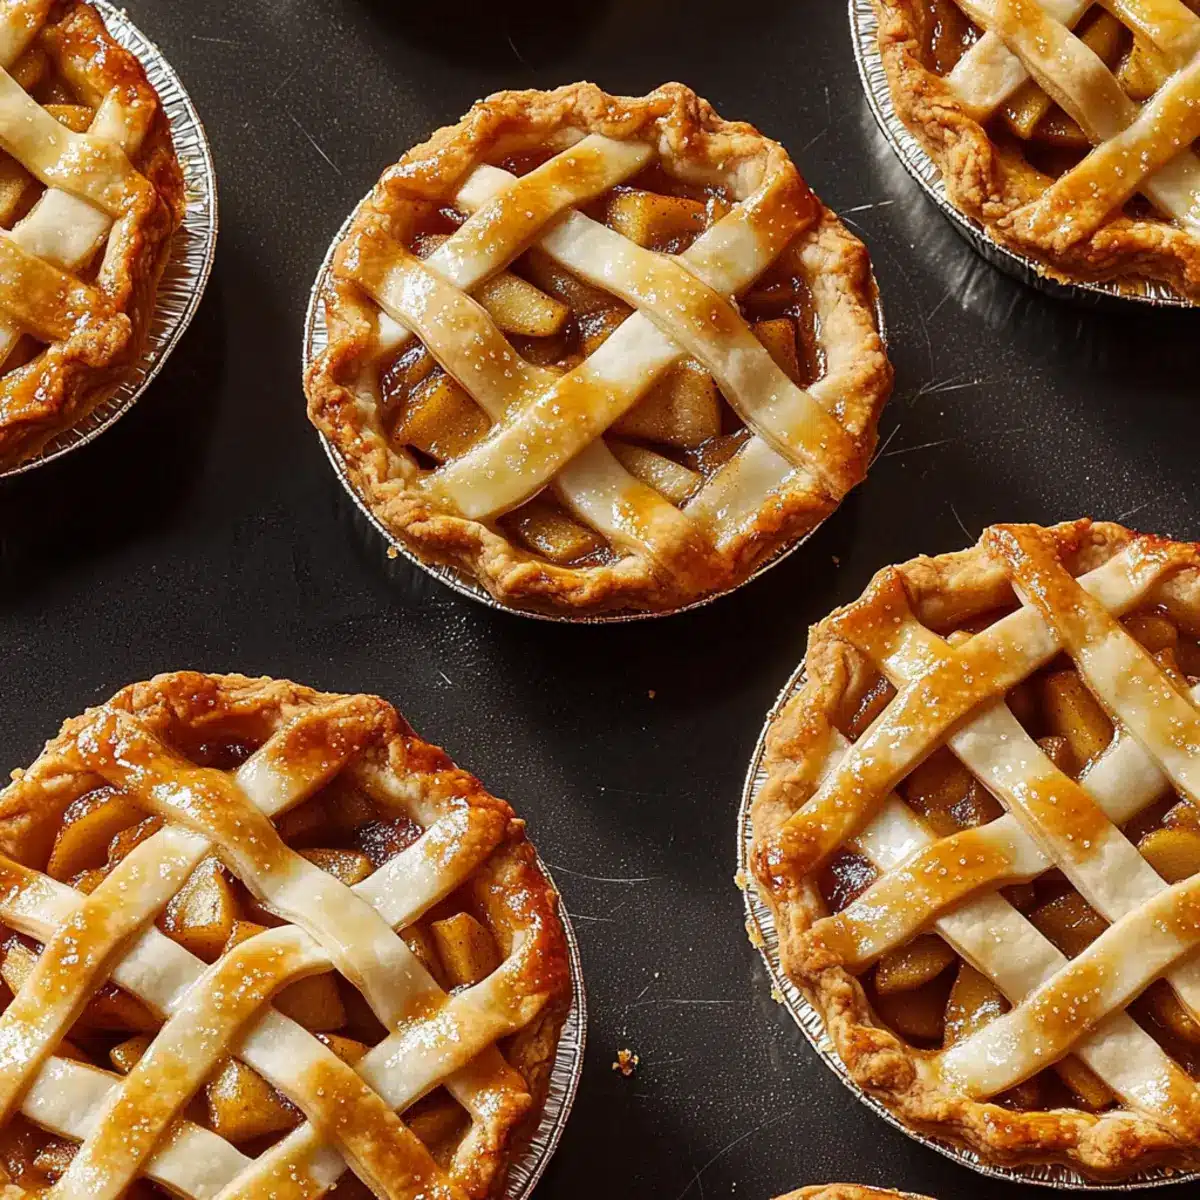
Roll out any remaining dough and cut it into strips to create a lattice design over the apple filling. Lay the strips across the pies in a crisscross pattern, trimming any excess dough as needed. After assembling the lattice, crimp the edges to seal the pies and ensure they hold together as they bake.
Step 6: Add the Finishing Touches
Brush the lattice crust with a beaten egg to achieve a beautiful golden finish, and sprinkle coarse sugar over the top for a delightful crunch. This step will enhance both the flavor and presentation of your mini apple pies as they bake.
Step 7: Bake in the Oven
Preheat your oven to 375°F (190°C). Once ready, place the mini apple pies on a baking sheet to catch any drips and bake for 35-40 minutes. You’re looking for a bubbly filling and a golden-brown crust, so keep an eye on them during the last few minutes for perfect doneness.
Step 8: Serve and Enjoy
Remove the mini apple pies from the oven and let them cool for about 10 minutes on a wire rack. This cooling period helps set the filling. Serve them warm with a scoop of vanilla ice cream for an indulgent treat that showcases the cozy essences of your Mini Apple Pies!
Expert Tips for Mini Apple Pies
-
Chill the Dough Longer: Allow your pie crust to chill for at least an hour. This prevents shrinkage during baking and ensures a flaky, tender crust.
-
Thinly Roll Out Dough: For the best results, keep your dough thin—around 1/8 inch thick. This achieves the perfect crust-to-filling ratio and avoids sogginess.
-
Use Tart Apples: Stick to tart varieties like Honeycrisp or Granny Smith for a balanced filling. Sweet apples may require adjusting the sugar levels to prevent overly sweet pies.
-
Don’t Overfill: Be cautious not to overfill the mini pans. Leave a small gap to allow the filling to bubble without spilling over, keeping your pies neat and intact.
-
Customize the Filling: Remember, these Mini Apple Pies are versatile! Feel free to swap apples with your favorite fruits like pears or cherries, adjusting the sweetness as needed.
How to Store and Freeze Mini Apple Pies
Room Temperature: Keep your mini apple pies at room temperature for up to 2 days, covered loosely with plastic wrap to maintain freshness.
Fridge: For longer storage, place your pies in the fridge, where they will stay fresh for up to 5 days. Ensure they are in an airtight container to prevent drying out.
Freezer: Freeze your mini apple pies after cooling completely by wrapping them tightly in plastic wrap and then in aluminum foil. They can last for up to 3 months in the freezer.
Reheating: To reheat, preheat your oven to 300ºF (150ºC), unwrap the pies, and heat them for about 15-20 minutes until warmed through. Enjoy your delightful mini apple pies fresh from the oven!
What to Serve with Mini Apple Pies
Indulging in warm, flaky mini apple pies invites the perfect opportunity to create a memorable meal experience.
- Vanilla Ice Cream: The classic pairing! Creamy vanilla melts into the warm pie, enhancing the sweet and tart flavors.
- Whipped Cream: Light and airy, whipped cream adds a luscious touch that elevates the overall dessert experience.
- Caramel Sauce: Drizzling warm caramel over the pies creates a delightful contrast, complementing the apples with buttery richness.
- Cinnamon Sugar Dusting: A sprinkle of cinnamon sugar on top adds a sweet, spiced finish that harmonizes with the apple filling.
- Fresh Berries: Serve alongside mixed berries for a refreshing counterbalance to the sweetness, enhancing the flavor profile beautifully.
- Coffee or Tea: A warm beverage, such as coffee or spiced chai tea, creates an inviting atmosphere that pairs perfectly with the pies.
- Nutty Crumble Topping: Consider serving a nutty crumble on the side as an alternative topping, adding texture and flavor complexity.
- Pecan Pie Bars: For an indulgent dessert platter, pair with pecan pie bars that offer a different twist on classic flavors.
- Apple Cider: A glass of warm apple cider brings an added layer of apple goodness, making it a comforting bonus alongside the pies.
Mini Apple Pies Variations & Substitutions
Feel free to let your creativity shine by customizing these mini apple pies with delightful twists and flavor combinations!
- Berry Bliss: Substitute apples with a mix of blueberries and raspberries, adding a splash of lemon for brightness.
- Pear Perfection: Swap out apples for ripe, juicy pears. They provide a sweeter filling that pairs beautifully with cinnamon.
- Caramel Kick: Add a swirl of caramel sauce to the apple filling for a rich, decadent treat. The sweet and gooey goodness elevates each bite!
- Nutty Crunch: Incorporate chopped walnuts or pecans into the filling to add a delightful crunch and contrasting texture.
- Spiced Ginger: For a warm twist, include a teaspoon of grated fresh ginger or a sprinkle of ground ginger in the apple mixture.
- Chocolate Drizzle: Once baked, drizzle melted chocolate over the cooled pies for an indulgent finish that elevates the dessert experience.
- Peachy Keen: Combine fresh peaches with your apples in summer for a juicy, fragrant variation that embraces seasonal flavors.
- Vegan Swap: Use vegan butter for the crust and coconut sugar in the filling for a plant-based version of this beloved classic.
For more possible variations, explore our sweet Custard Apple Rice or try whipping up another favorite dessert! Embrace the joy of experimenting with flavors and creating mini masterpieces in your kitchen!
Make Ahead Options
These Mini Apple Pies are perfect for meal prep lovers! You can prepare the pie crust and filling up to 24 hours in advance, saving you precious time on busy days. Simply roll out your homemade or store-bought dough, line the mini pie pans, and refrigerate them, covered with plastic wrap to prevent drying. For the filling, mix the chopped apples with sugars, cornstarch, and spices, then store it in an airtight container in the fridge. When you’re ready to enjoy these delightful treats, fill the crusts with the prepared filling, create the lattice top, and bake as instructed for delicious, fresh-out-of-the-oven Mini Apple Pies that taste just as delectable!
Mini Apple Pies Recipe FAQs
What type of apples work best for mini apple pies?
Absolutely! For the best flavor and texture in your mini apple pies, I recommend using tart apples like Honeycrisp, Jonagold, or Granny Smith. These varieties offer a beautiful balance of sweet and tart, ensuring your filling isn’t overly sugary. If you want to experiment, feel free to substitute with other fruits like pears or berries, just remember to adjust the sugar levels accordingly to match their sweetness.
How should I store mini apple pies?
Very easily! Keep your mini apple pies at room temperature for up to 2 days by covering them loosely with plastic wrap. If you want to keep them fresher longer, store them in the fridge for up to 5 days in an airtight container. They stay delicious this way, but if you’re saving them for later, freezing is the best option!
Can I freeze mini apple pies, and how?
Absolutely! After your mini apple pies have cooled completely, wrap each pie tightly in plastic wrap and then in aluminum foil to prevent freezer burn. You can freeze them for up to 3 months. When you’re ready to enjoy, simply preheat your oven to 300ºF (150ºC), unwrap the pies, and warm them for about 15-20 minutes until heated through. Perfect homemade goodness whenever you want!
What can I do if my pie crust is too thick?
Not a problem! If you find your crust a bit thick, use a rolling pin to flatten it out further, aiming for about 1/8 inch thickness. A thinner crust helps achieve that perfect flaky texture and a delightful crust-to-filling ratio. If you’re in the baking zone, remember to keep the dough chilled while working to maintain its elasticity!
Are there any dietary considerations for these mini apple pies?
Certainly! If you’re baking for individuals with allergies, keep an eye on ingredients like eggs and gluten from the all-purpose flour. You can substitute the pie dough with gluten-free options available. For vegan variations, consider using plant-based butter and a flax egg instead of a regular egg. These adjustments allow everyone to enjoy the delightful taste of mini apple pies!
Irresistible Mini Apple Pies: The Perfect Cozy Dessert
Ingredients
Equipment
Method
- Start by rolling out your homemade pie dough or store-bought crusts on a floured surface until it's about 1/8 inch thick.
- Gently press the circles into the mini pie pans, ensuring there’s no air trapped underneath.
- In a large mixing bowl, combine your finely chopped baking apples, brown sugar, granulated sugar, cornstarch, ground cinnamon, kosher salt, and vanilla extract.
- After your filling is ready, remove the pie crusts from the fridge and fill each pie shell with the apple mixture.
- Roll out any remaining dough and cut it into strips to create a lattice design over the apple filling.
- Brush the lattice crust with a beaten egg and sprinkle coarse sugar over the top.
- Preheat your oven to 375°F (190°C) and bake for 35-40 minutes.
- Remove the mini apple pies from the oven and let them cool for about 10 minutes before serving.
Leave a Reply