
As the first rays of spring sunlight cascade through the window, I’m hit with an overwhelming urge to create something beautiful in the kitchen. Enter the Mini Lemon Tart with Lilac Meringue—these little wonders are not only refreshingly zesty but also a feast for the eyes. With just a handful of ingredients, you can whip up a dessert that feels luxurious yet is surprisingly easy to make. Perfect for spring picnics or cozy brunches, these mini tarts offer the best of both worlds: they’re eye-catching enough to impress your guests and light enough to leave room for seconds. Plus, with gluten-free options available, everyone can indulge. What tantalizing variations will you dream up? Let’s dive into this delightful recipe!
Why Is This Mini Tart So Irresistible?
Zesty Delight: The bright, tangy lemon curd is a refreshing burst of flavor that instantly uplifts your spirits.
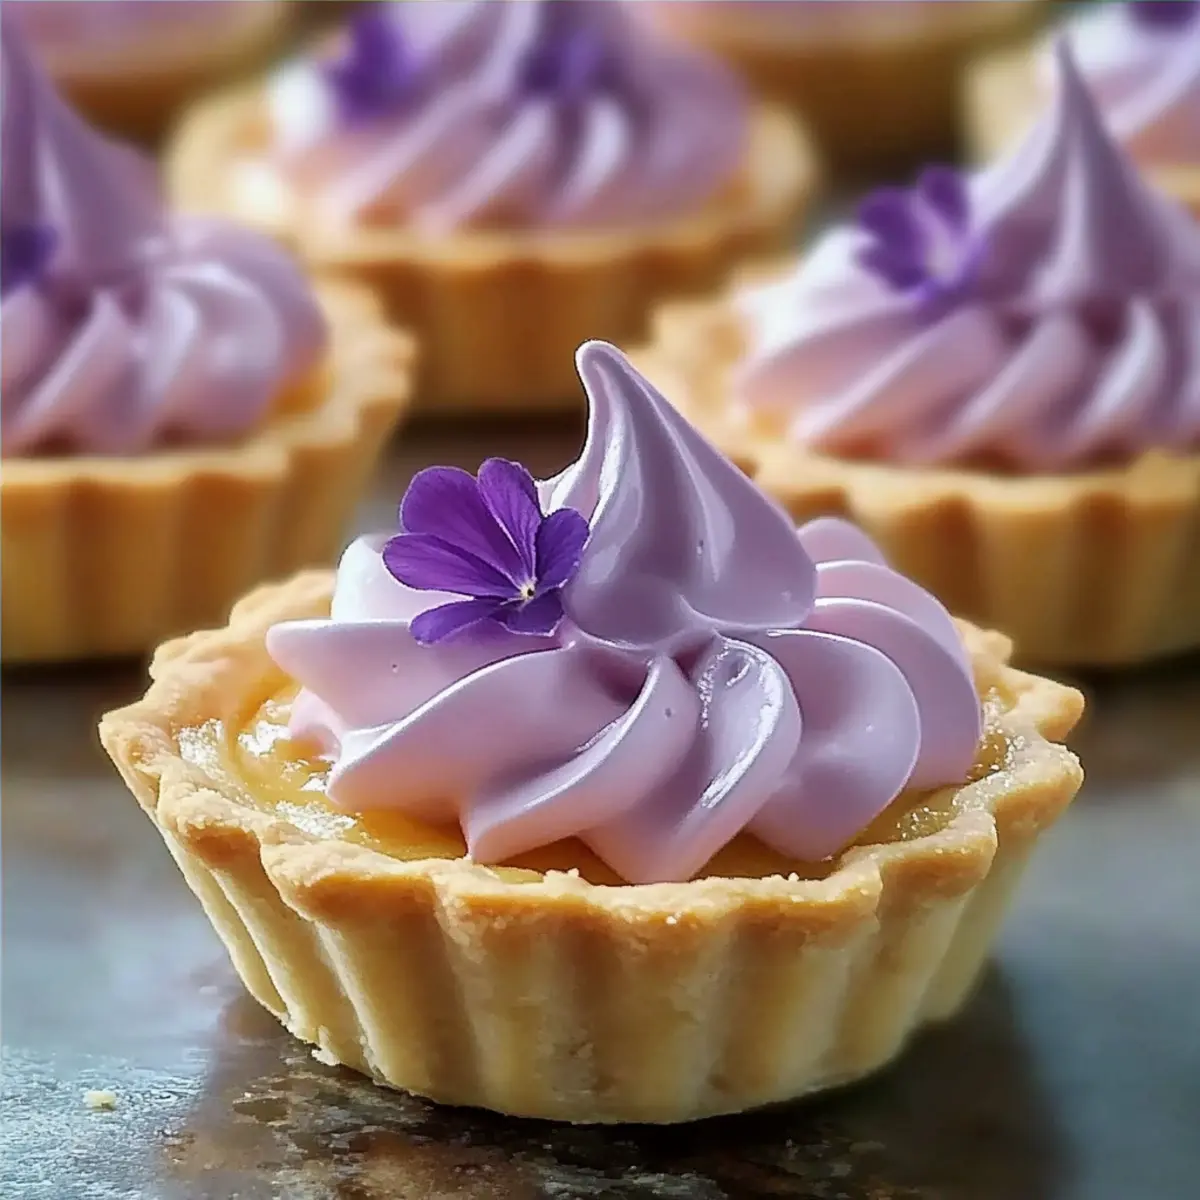
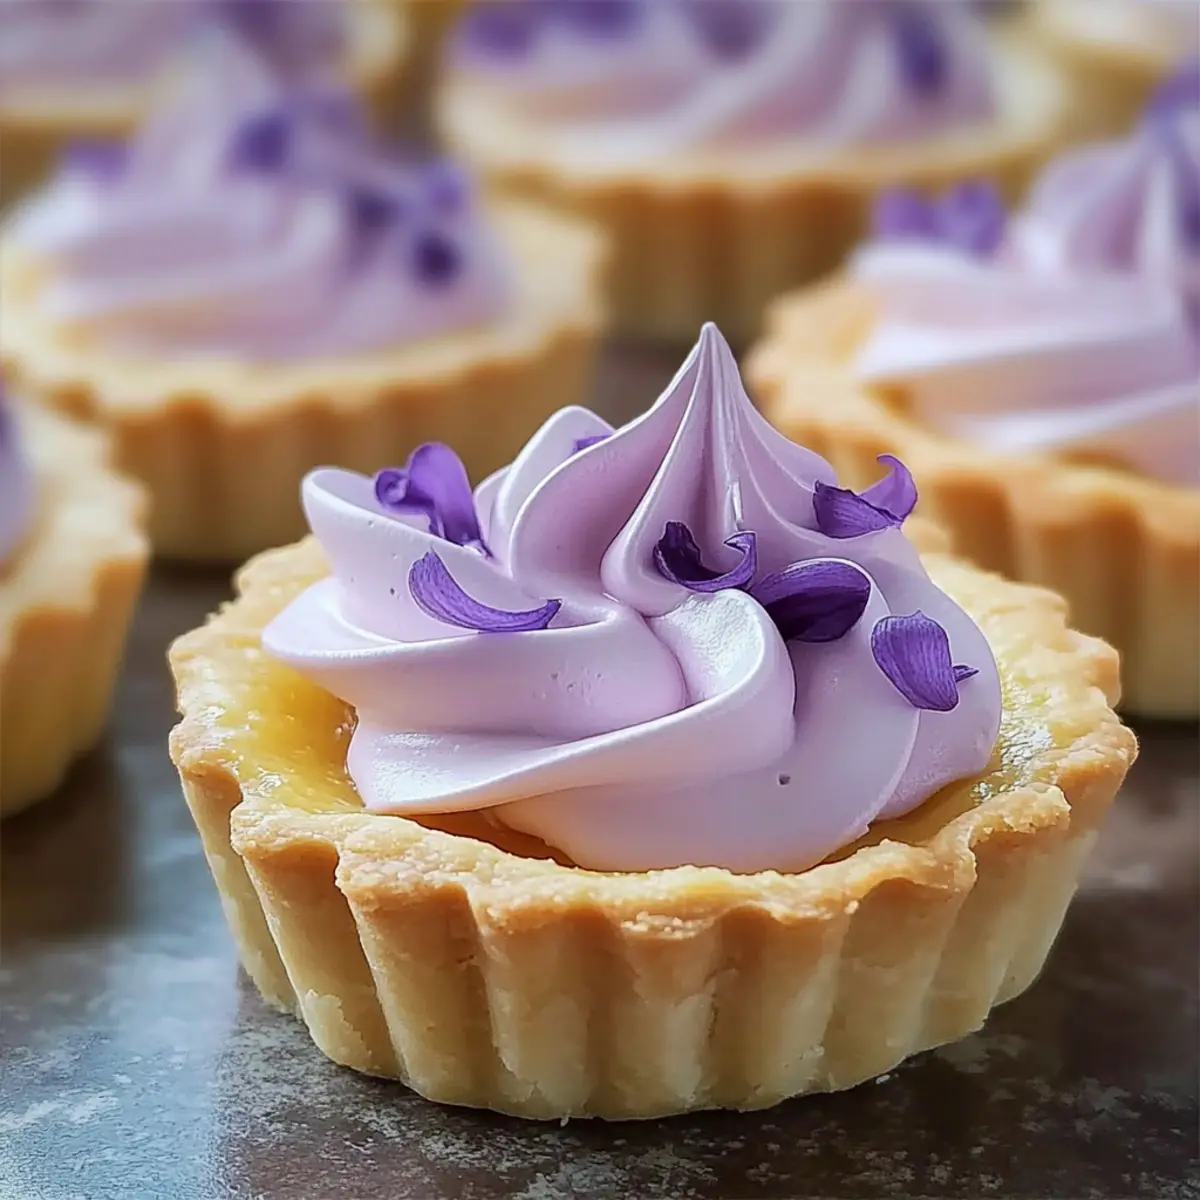
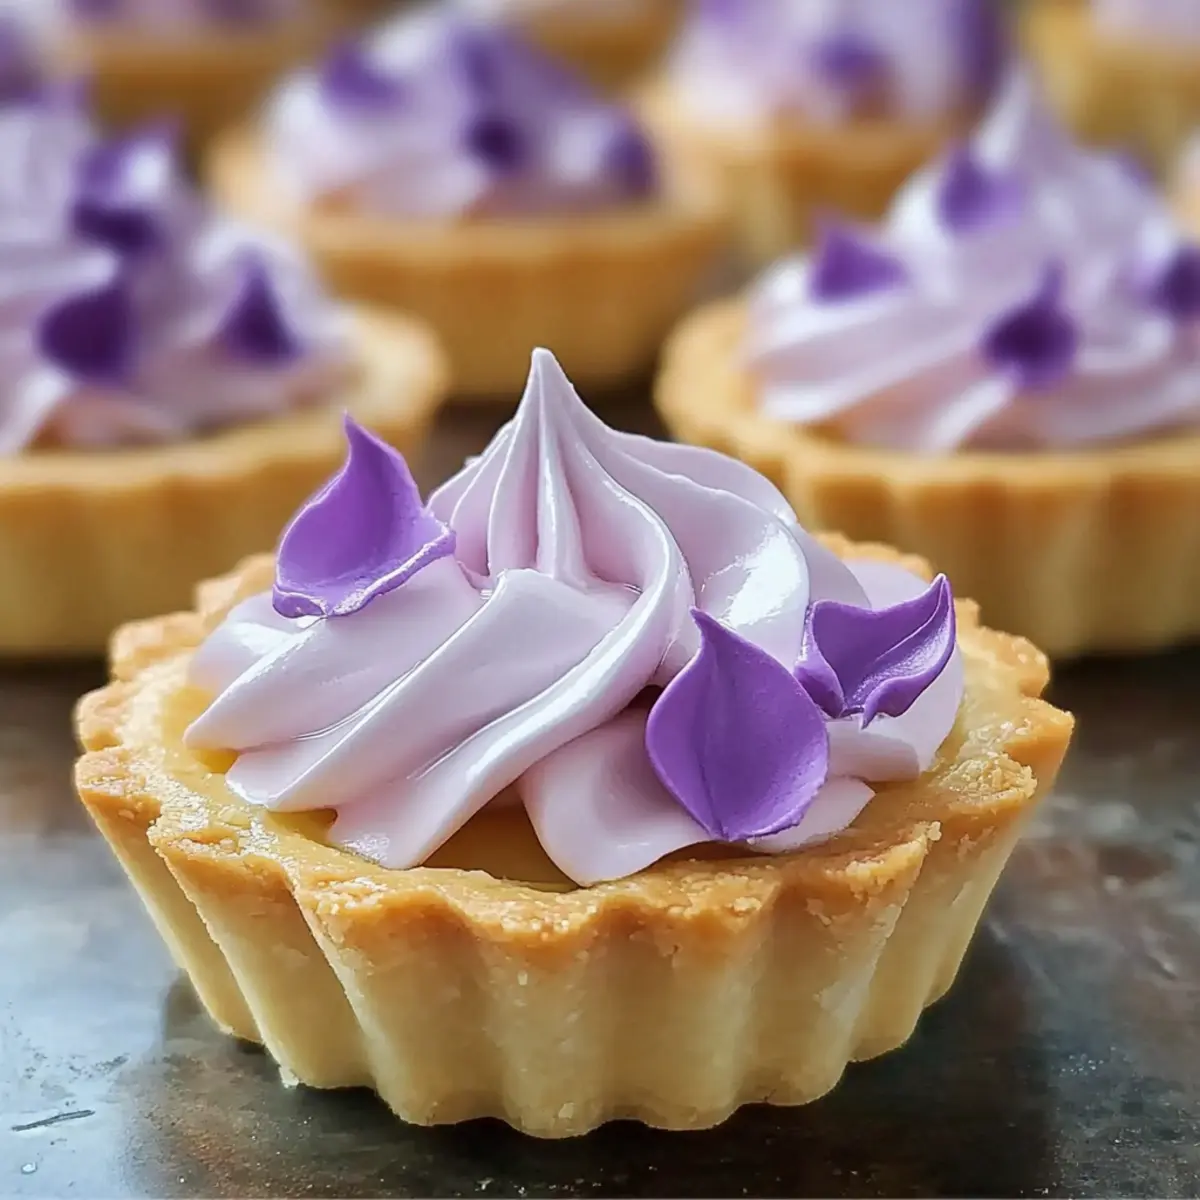
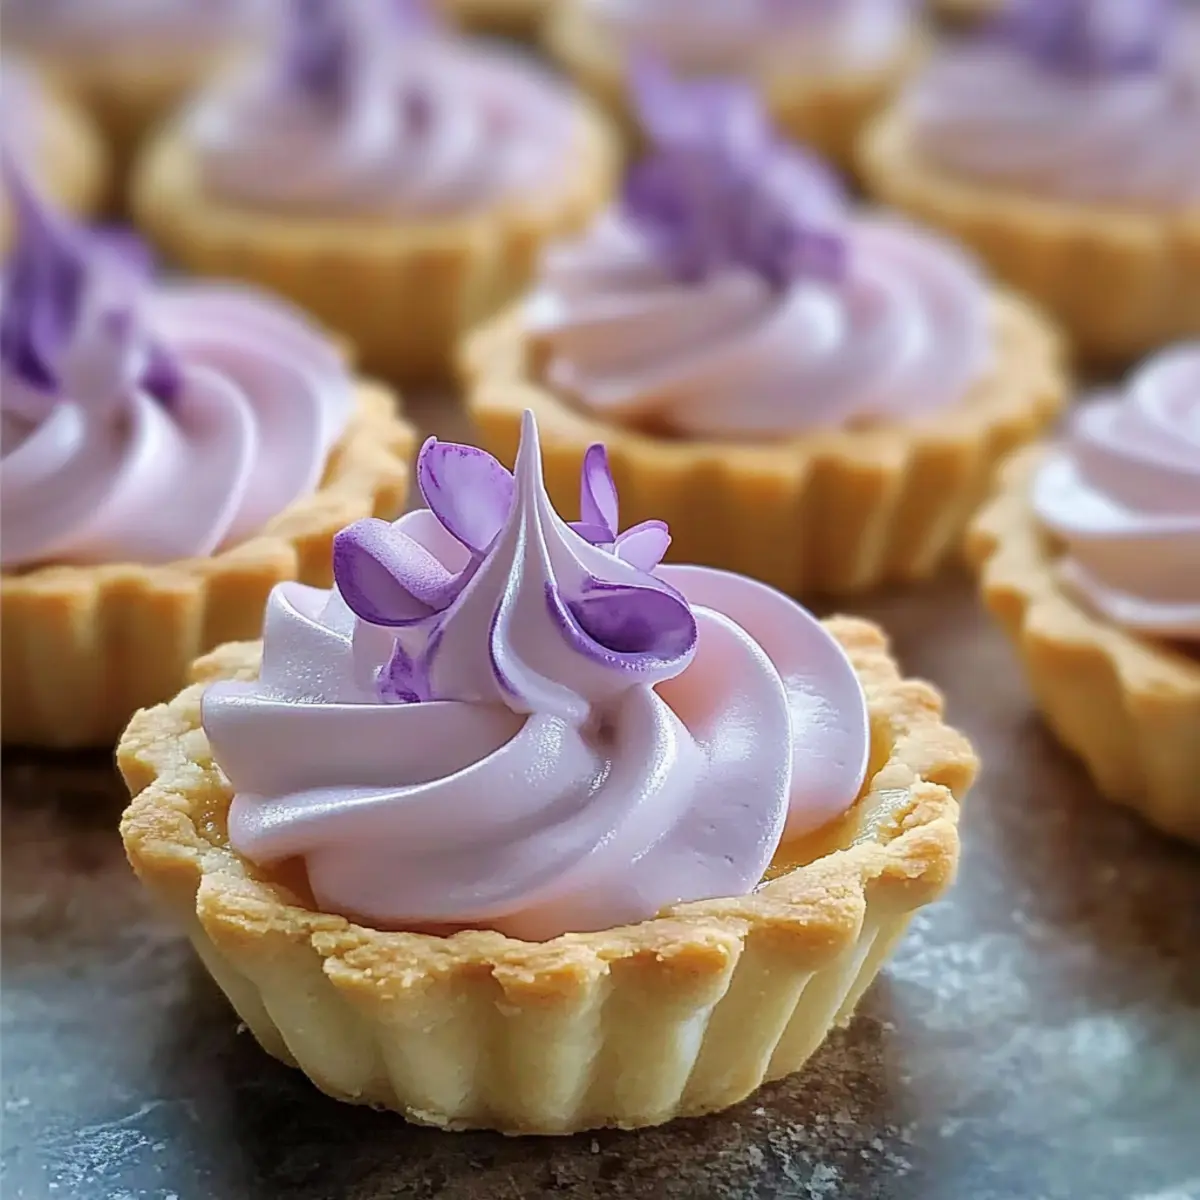
Artful Elegance: Topped with delicate lilac meringue, these tarts not only taste exceptional but also serve as stunning centerpieces for your table.
Versatile Options: Want variety? Try swapping in a luscious Lime-Lavender Curd or a fragrant Rose Meringue for a different twist!
Simple Process: With easy-to-follow steps, you’ll feel like a pastry chef in no time, impressing family and friends with minimal effort.
Crowd Pleaser: Whether at spring gatherings or cozy brunches, these mini tarts are sure to please all palates, making them a hit at any event!
Gluten-Free Friendly: Customizable for dietary needs, so everyone can savor this delightful treat without compromise.
Mini Lemon Tart with Lilac Meringue Ingredients
For the Tart Shells
- All-Purpose Flour – Provides the structure for the tart shells; substitute with gluten-free all-purpose flour for a gluten-free option.
- Powdered Sugar – Adds sweetness to the tart shell; can use granulated sugar in a pinch (will affect texture).
- Cold Butter – Ensures flakiness in the crust; must be cold for the right texture—do not use margarine.
- Egg Yolk – Acts as a binder for the dough; a flax egg could be a vegan alternative.
- Cold Water – Helps bring the dough together; essential for hydration but omit if using a moister ingredient.
For the Lemon Curd
- Lemon Juice & Zest – Provides the tart flavor in the lemon curd; you can substitute with lime juice for a lime-flavored twist.
- Granulated Sugar – Sweetens the curd; feel free to reduce for a less sweet taste.
- Eggs – Necessary for thickening the curd; consider a commercial egg replacer for a vegan version.
- Butter – Adds richness to the curd; coconut oil can serve as a dairy-free substitute.
For the Lilac Meringue
- Egg Whites – Bases the meringue; ensure freshness is key—aquafaba can be used for a vegan option.
- Cream of Tartar – Stabilizes the meringue; can be omitted but this may affect the texture.
- Granulated Sugar – Sweetens the meringue and contributes to its stiffness; no alternatives recommended.
- Vanilla Extract – Enhances meringue’s flavor; almond extract can be a delightful substitute.
- Violet Food Coloring – Creates the lilac hue for visual appeal; consider natural alternatives like butterfly pea flower extract.
Step‑by‑Step Instructions for Mini Lemon Tart with Lilac Meringue
Step 1: Make Tart Shells
In a food processor, combine all-purpose flour and powdered sugar, pulsing until well blended. Add cold butter in chunks, mixing until the mixture resembles coarse crumbs. Then, incorporate the egg yolk and cold water, processing until the dough holds together, about 1-2 minutes. Wrap the dough in plastic wrap and chill in the refrigerator for 30 minutes.
Step 2: Bake Tart Shells
Preheat your oven to 350°F (175°C). Roll out the chilled dough on a lightly floured surface, then carefully press it into mini tart pans. Prick the bottoms with a fork to prevent bubbling, then line with parchment paper and fill with pie weights. Bake for 10-12 minutes until golden brown, then remove from the oven and let them cool completely.
Step 3: Prepare Lemon Curd
In a medium saucepan, whisk together lemon juice, zest, sugar, and eggs over medium heat until the mixture thickens, stirring constantly for about 8-10 minutes. Once thickened, remove from heat and whisk in butter until completely smooth. Pour this luscious lemon curd into the cooled tart shells, smoothing the tops with a spatula, and then refrigerate for at least 1 hour to set.
Step 4: Make Lilac Meringue
Prepare the lilac meringue by placing egg whites, granulated sugar, and cream of tartar in a heatproof bowl over simmering water. Whisk continuously until the mixture is warm and sugar is dissolved. Remove from heat and beat with an electric mixer for about 5-7 minutes until stiff peaks form. Gently fold in vanilla extract and violet food coloring to achieve a beautiful lilac hue.
Step 5: Toast Meringue and Garnish
Once the meringue is ready, pipe it onto the chilled mini lemon tarts in whimsical swirls. Use a kitchen torch to carefully toast the tips of the meringue until they reach a golden hue, creating a stunning visual appeal. Finally, garnish with edible lilac petals or dried lavender for a delightful touch that complements the flavor of your Mini Lemon Tart with Lilac Meringue.
Expert Tips for Mini Lemon Tart Success
-
Chill Your Dough: Ensure the tart dough is properly chilled before baking to maintain a flaky texture and prevent shrinking during baking.
-
Fresh Ingredients: Use the freshest eggs and lemons you can find for both the curd and meringue. Freshness makes a significant difference in flavor.
-
Avoid Overbeating: When whipping the egg whites for the meringue, be careful not to overbeat. Stop once you reach stiff peaks; this ensures a light and airy texture.
-
Monitor the Heat: When toasting the meringue, hold the torch a safe distance away and move it continuously to avoid burning. A gentle touch will yield beautifully toasted peaks.
-
Assemble Before Serving: For best results, assemble the Mini Lemon Tart with Lilac Meringue shortly before serving to maintain the freshness of the meringue and curd.
Mini Lemon Tart with Lilac Meringue Variations
Feel free to let your creativity shine as you adapt this delightful recipe to suit your taste!
-
Rose Meringue: Swap vanilla for rose water and tint with pink coloring for a floral twist that’s simply enchanting. Imagine the fragrant aroma wafting through your kitchen!
-
Lime-Lavender Curd: Replace lemon juice with fresh lime juice while infusing it with culinary lavender for a sophisticated flavor combination. Your guests will be pleasantly surprised by this unique take!
-
Gluten-Free Shell: Use almond flour mixed with a gluten-free baking mix instead of all-purpose flour to craft a delectable gluten-free tart that everyone can enjoy without missing out.
-
Lavender Lemon Curd: Add a hint of dried lavender buds to your lemon curd for an aromatic flair that elevates your tart. The delicate floral notes blend beautifully with the tangy lemon, creating a memorable dessert.
-
Blackberry Meringue: Toss in some pureed blackberries into your meringue mixture for a stunning berry-hued topping that adds a touch of sweetness and vibrant color.
-
Passion Fruit Curd: Substitute lemon juice with pure passion fruit juice to create an exotic, tropical version of your mini tarts. The bold tang will transport you straight to a sunny getaway!
-
Chocolate Tart Shell: Replace the traditional tart shell with a cocoa-infused chocolate shell for a rich and indulgent twist. Pairing chocolate with zesty lemon is simply divine!
For even more flavor inspiration, why not pair your Mini Lemon Tart with a refreshing drink like lavender lemonade or a tasteful floral-infused tea? Each version invites conversation and complements these charming desserts perfectly!
Make Ahead Options
These Mini Lemon Tarts with Lilac Meringue are perfect for busy home cooks eager to save time! You can conveniently prepare the tart shells and lemon curd up to 24 hours in advance. Simply bake the tart shells and allow them to cool completely before refrigerating. For the lemon curd, whisk together the ingredients, and once cooked, store it in an airtight container in the fridge. When you’re ready to serve, prepare the lilac meringue fresh since it’s best served immediately for that delightful texture. By utilizing these make-ahead steps, you’ll enjoy a stress-free dessert that’s just as delicious as if made fresh that day!
How to Store and Freeze Mini Lemon Tart with Lilac Meringue
Room Temperature: Enjoy the mini tarts fresh within the first few hours of making them for optimal flavor and texture.
Fridge: Store any leftover tarts in an airtight container for up to 2 days. This keeps the lemon curd vibrant and the meringue fluffy.
Freezer: For best results, freeze the unfilled tart shells, wrapped tightly, for up to 1 month. Fill with lemon curd and meringue just before serving.
Reheating: If refrigerated, allow the tarts to sit at room temperature for about 10-15 minutes before serving to enhance the flavor profile of the Mini Lemon Tart with Lilac Meringue.
What to Serve with Mini Lemon Tart with Lilac Meringue
These enchanting mini lemon tarts are perfect for elevating any gathering, inviting lively flavors and visual appeal to your table.
- Lavender Lemonade: A refreshing floral twist to complement the tart’s zestiness and enhance its spring vibes.
- Fresh Berry Salad: Juicy berries add a burst of sweetness that balances the tartness of the lemon curd beautifully.
- Herbed Quinoa Salad: A light and nutty dish that offers a wholesome balance to the rich flavors of the tarts.
- Chamomile Tea: This soothing tea pairs wonderfully, calming the palate and adding a gentle floral note to each bite.
- Vanilla Ice Cream: A scoop of creamy vanilla delights your taste buds and melts harmoniously alongside the tart’s bright flavors.
- Coconut Whipped Cream: Adds a luscious, dairy-free option that enhances the tarts’ floral meringue with a tropical touch.
With these tempting pairings, you can create a memorable dining experience that celebrates the essence of spring.
Mini Lemon Tart with Lilac Meringue Recipe FAQs
How do I select ripe lemons for the lemon curd?
Absolutely! When choosing lemons, look for those that are firm and heavy for their size, with a vibrant yellow skin free of dark spots or blemishes. The more fragrant the lemon, the better the juice will taste. If they’re slightly soft, they might be overripe, so go for the firmer ones for a zesty curd.
How should I store leftover mini tarts?
Very important! Store any leftover Mini Lemon Tarts in an airtight container in the refrigerator for up to 2 days. This will help keep the lemon curd vibrant and the meringue light and fluffy. Just remember, it’s best to consume them fresh for the ultimate experience!
Can I freeze mini tart shells?
Yes! To freeze the unfilled tart shells, wrap them tightly in plastic wrap and then aluminum foil to prevent freezer burn. They can be stored for up to 1 month. When you’re ready to enjoy, simply thaw the shells at room temperature and fill them with lemon curd and meringue just before serving.
What if my meringue doesn’t form stiff peaks?
No worries! If your meringue isn’t reaching stiff peaks, review your mixing technique. Ensure that your bowl and whisk are completely clean and grease-free, as any fat can interfere. If you’re incorporating sugar gradually, do it slowly, allowing it to dissolve completely. If you’re struggling, continue whisking for a bit longer, as patience is key!
Are there any allergies to be aware of with this recipe?
Absolutely! This recipe contains eggs, gluten (if using regular flour), and dairy (in the butter and optional milk-based ingredients). For a gluten-free option, simply use a gluten-free all-purpose flour. For those with egg allergies, try using a commercial egg replacer in the curd and aquafaba in the meringue. Always double-check with your guests to ensure everyone can enjoy this delightful spring treat without concern!
How long will the meringue hold its shape?
Meringue can start to lose its texture over time, so try to use it within a few hours of making it, especially if it’s warm and humid. If stored properly in the refrigerator, it can hold its shape for about 1-2 days, but it’s best to assemble the tarts shortly before serving for a beautiful presentation and maximum fluffiness.
Mini Lemon Tart with Lilac Meringue for Springtime Bliss
Ingredients
Equipment
Method
- In a food processor, combine all-purpose flour and powdered sugar, pulsing until well blended. Add cold butter in chunks, mixing until the mixture resembles coarse crumbs. Then, incorporate the egg yolk and cold water, processing until the dough holds together, about 1-2 minutes. Wrap the dough in plastic wrap and chill in the refrigerator for 30 minutes.
- Preheat your oven to 350°F (175°C). Roll out the chilled dough on a lightly floured surface, then carefully press it into mini tart pans. Prick the bottoms with a fork to prevent bubbling, then line with parchment paper and fill with pie weights. Bake for 10-12 minutes until golden brown, then remove from the oven and let them cool completely.
- In a medium saucepan, whisk together lemon juice, zest, sugar, and eggs over medium heat until the mixture thickens, stirring constantly for about 8-10 minutes. Once thickened, remove from heat and whisk in butter until completely smooth. Pour this luscious lemon curd into the cooled tart shells, smoothing the tops with a spatula, and then refrigerate for at least 1 hour to set.
- Prepare the lilac meringue by placing egg whites, granulated sugar, and cream of tartar in a heatproof bowl over simmering water. Whisk continuously until the mixture is warm and sugar is dissolved. Remove from heat and beat with an electric mixer for about 5-7 minutes until stiff peaks form. Gently fold in vanilla extract and violet food coloring to achieve a beautiful lilac hue.
- Once the meringue is ready, pipe it onto the chilled mini lemon tarts in whimsical swirls. Use a kitchen torch to carefully toast the tips of the meringue until they reach a golden hue, creating a stunning visual appeal. Finally, garnish with edible lilac petals or dried lavender for a delightful touch that complements the flavor of your Mini Lemon Tart with Lilac Meringue.
Leave a Reply