
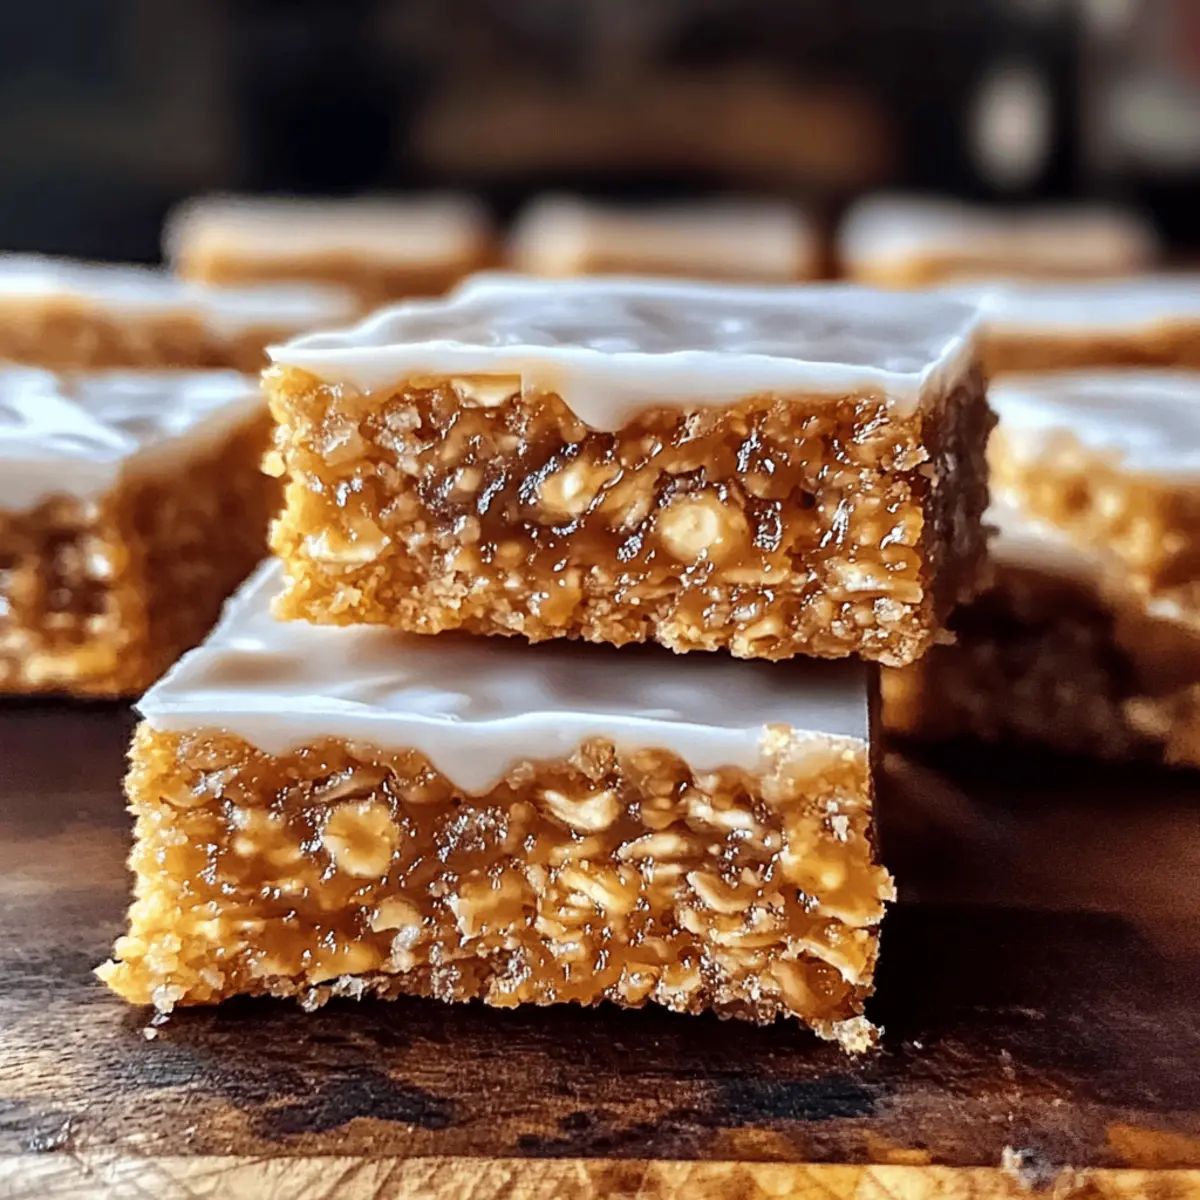
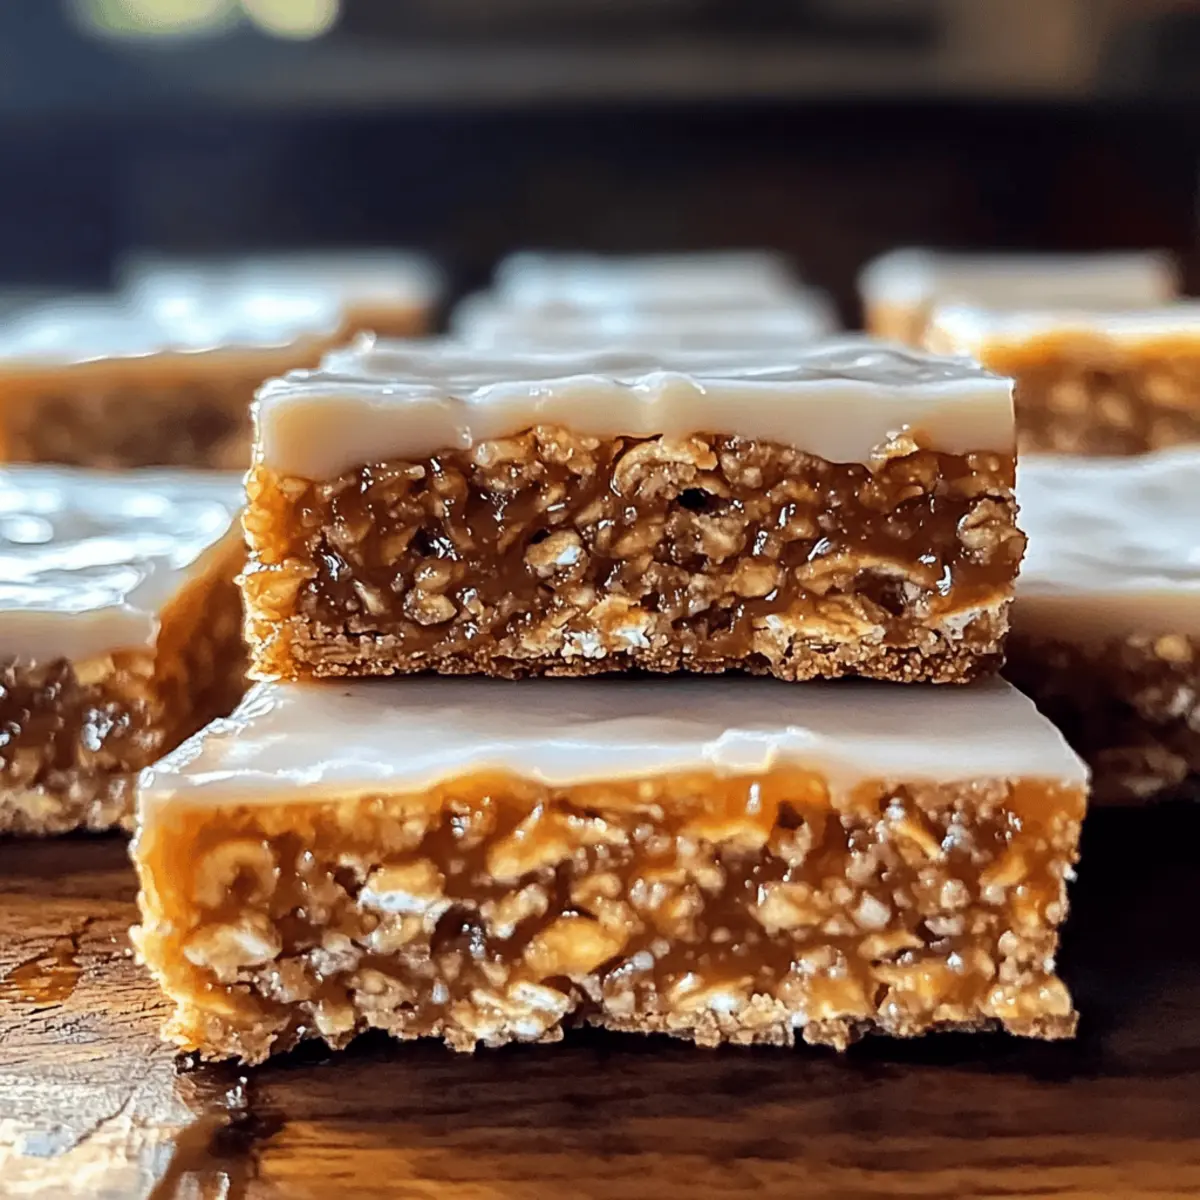
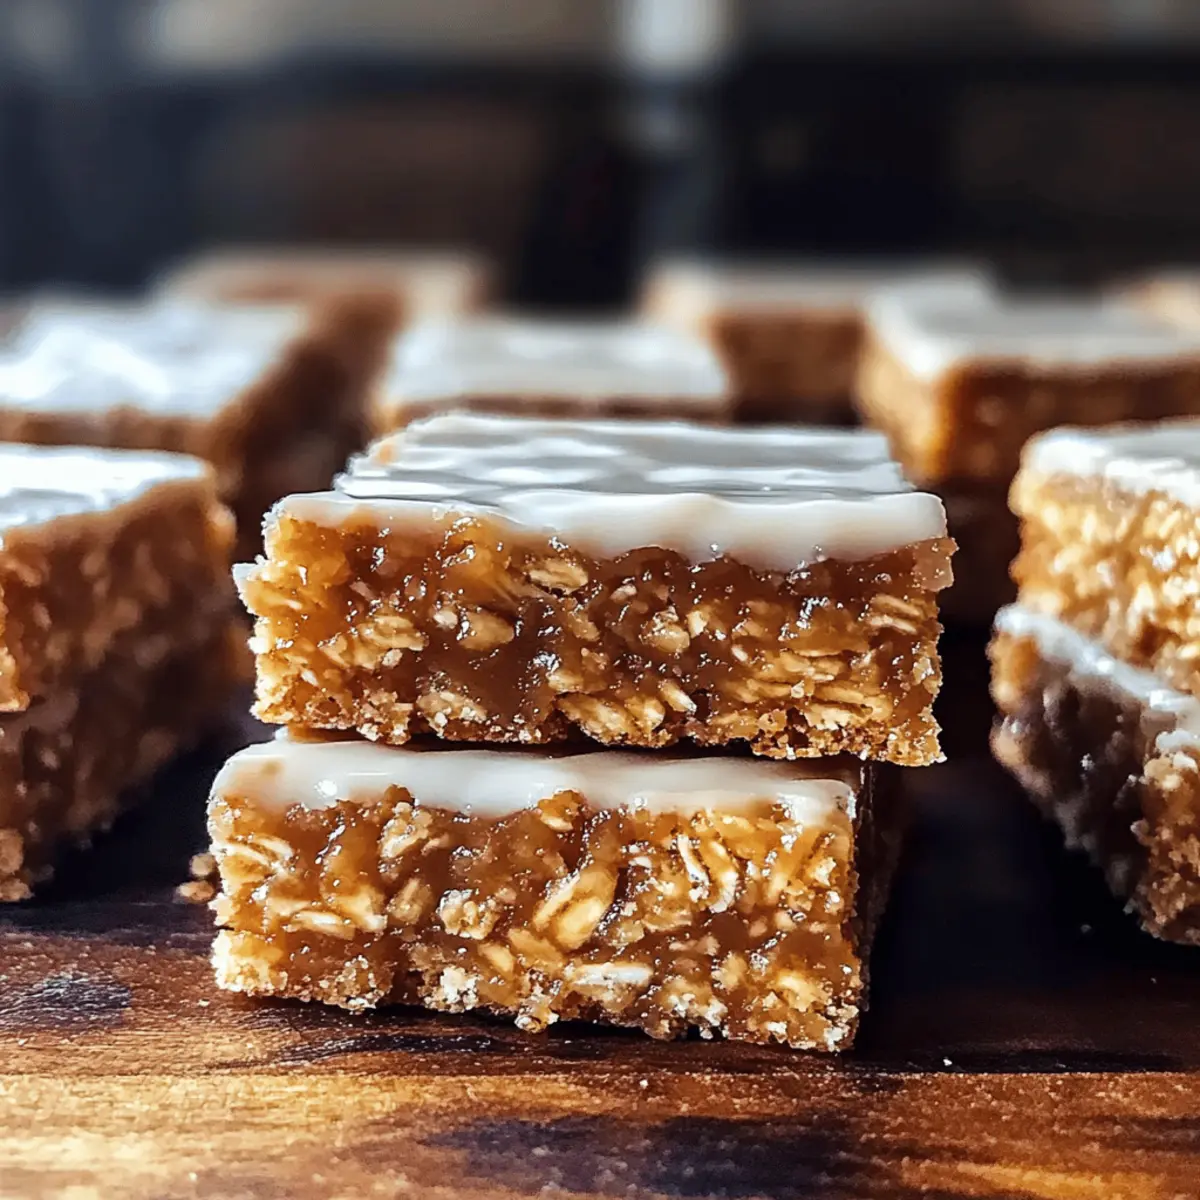
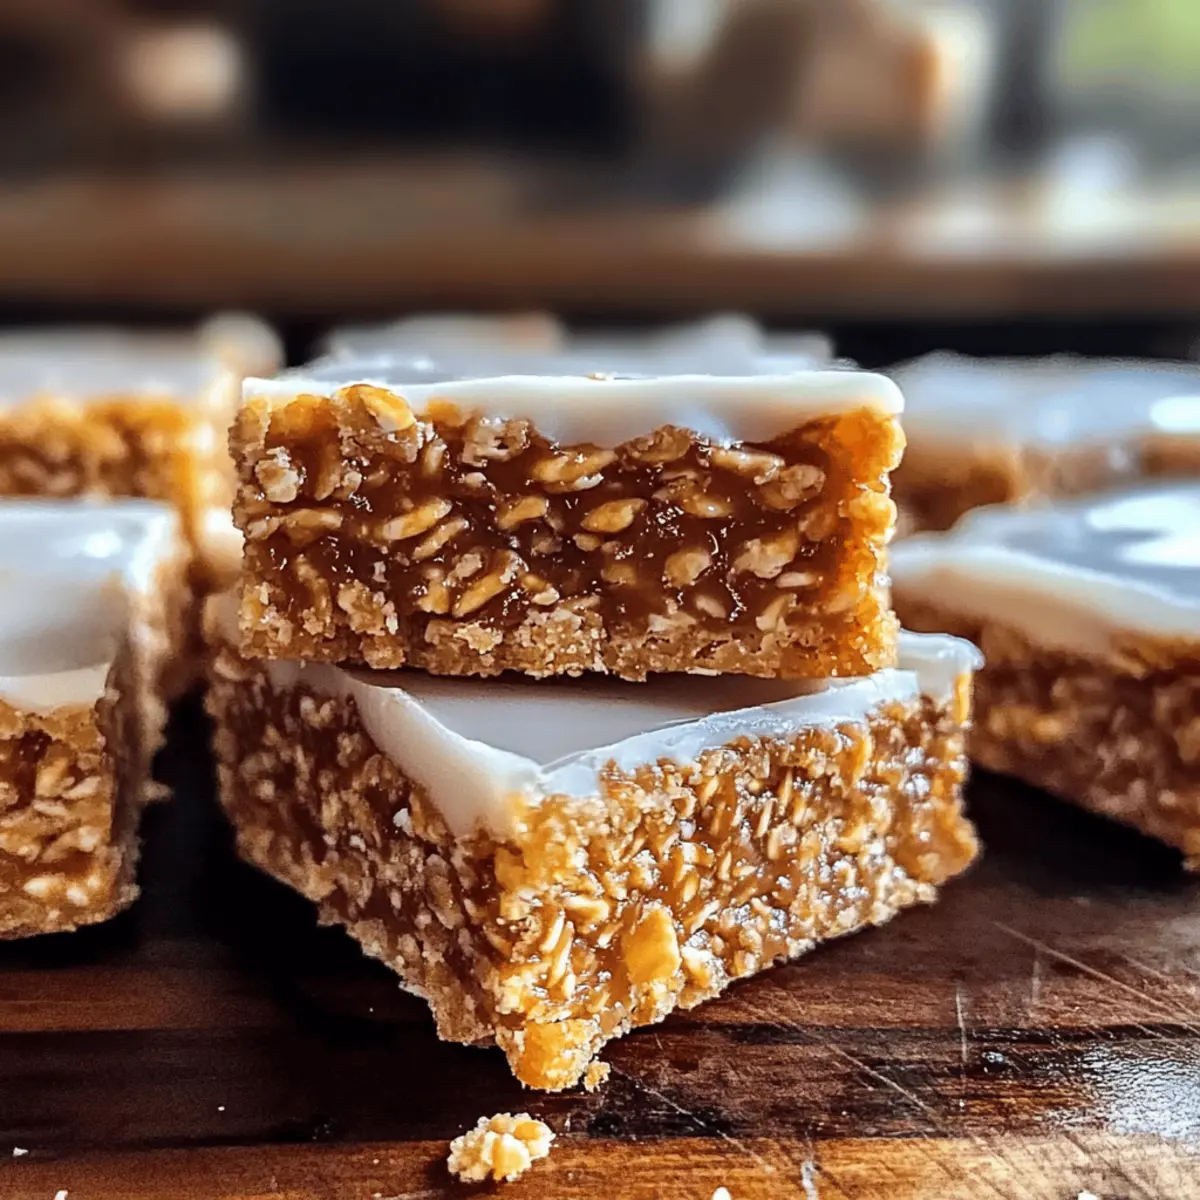
As I arranged a platter of these delightful no-bake chocolate peanut butter bars, the mixture of scents whisked me back to my childhood days of easy afternoons filled with sweet treats. The rich, creamy chocolate melds beautifully with the nutty essence of peanut butter, creating a dessert that’s not only satisfying but also wrapped in nostalgia. This recipe is a quick and gluten-free solution for those times when you crave something sweet but don’t want to spend hours in the kitchen. Plus, it’s incredibly versatile—you can swap ingredients like almond butter or use different sweeteners to suit your taste. Ready to create a new favorite treat that your friends and family will love? Dive in, and let’s uncover the magic behind these scrumptious bars!
Why Try No-Bake Chocolate Peanut Butter Bars?
Indulgent Flavor: The rich combination of chocolate and peanut butter makes every bite a delightful experience, transporting you back to sweet childhood memories.
Quick & Easy: With just a few simple steps, you can whip up these bars in no time—perfect for busy days when a craving strikes.
Gluten-Free Goodness: Using gluten-free oats ensures that everyone can enjoy these treats, regardless of dietary needs.
Versatile Ingredient Swaps: Want to customize? Try almond butter or different sweeteners like honey for a twist.
Crowd-Pleasing Delight: These bars are a surefire hit at parties or family gatherings, making them an ideal addition to your dessert spread alongside options like Custard Apple Rice or Pioneer Woman Chicken Rice Casserole.
Elevate your snacking game and enjoy these delicious bars today!
No-Bake Chocolate Peanut Butter Bars Ingredients
For the Base
• Rolled Oats – Adds structure and fiber; opt for gluten-free oats to keep it safe for everyone.
• Natural Peanut Butter – Provides creaminess and healthy fats, but feel free to use almond butter for a different flavor.
• Maple Syrup – Acts as a natural sweetener and binding agent; honey makes a lovely substitute if preferred.
• Cocoa Powder – Infuses the bars with rich chocolate flavor; dark chocolate or carob powder can vary the taste.
For the Topping
• Dark Chocolate Chips – Adds a sweet, luscious layer; go for dairy-free chocolate to keep it vegan-friendly.
Elevate your dessert experience with these enticing no-bake chocolate peanut butter bars, perfect for satisfying those sweet cravings!
Step‑by‑Step Instructions for No-Bake Chocolate Peanut Butter Bars
Step 1: Combine Ingredients
In a large mixing bowl, add rolled oats, natural peanut butter, maple syrup, and cocoa powder. Using a spatula, stir these ingredients together until fully blended, ensuring there are no dry clumps. This process should take about 2-3 minutes. You want a thick, sticky mixture that holds together nicely, signaling that it’s ready for the next step.
Step 2: Press Mixture into Dish
Line an 8×8-inch baking dish with parchment paper, leaving some overhang for easy removal later. Transfer the oat mixture into the dish and press it down firmly using your hands or the back of a spatula. Aim for an even layer that’s tightly packed, which helps the bars hold their shape once set. This should take about 5 minutes of firm pressing.
Step 3: Melt Chocolate Chips
In a microwave-safe bowl, add the dark chocolate chips. Microwave in 30-second intervals, stirring in between, until smooth and completely melted—this should take around 1-2 minutes. Alternatively, you can use a double boiler on low heat. Watch closely until the chocolate is silky but avoid overheating, as this can cause separation in your chocolate topping.
Step 4: Spread the Chocolate
Once melted, carefully pour the chocolate over the compressed oat layer in the baking dish. Use a spatula to spread it evenly across the surface, ensuring every corner is covered. The smooth, glossy finish of the chocolate not only looks inviting but will also set to create a delicious outer layer for your No-Bake Chocolate Peanut Butter Bars.
Step 5: Refrigerate to Set
Place the baking dish in the refrigerator and let it chill for about 2 hours. This step is crucial as it allows the bars to firm up. Check for doneness by gently pressing the sides—if they feel solid and hold together well, they’re ready to slice. The chocolate topping should also be firm to the touch at this point.
Step 6: Cut and Serve
Once set, remove the bars from the dish using the parchment overhang. Place them on a cutting board and slice into rectangular bars with a sharp knife. If cutting proves tricky, warm the knife under hot water for cleaner cuts. Serve chilled, and consider drizzling with a bit of extra peanut butter for an indulgent touch that enhances the peanut flavor of your No-Bake Chocolate Peanut Butter Bars.
Variations & Substitutions for No-Bake Chocolate Peanut Butter Bars
Feel free to get creative and make these bars your own with delightful twists and swaps!
- Nut-Free: Swap out peanut butter for sunbutter or tahini to create a nut-free version that’s just as delicious.
- Sweetener Swap: Use agave nectar instead of maple syrup for a different flavor profile, making it lighter and just as sweet.
- Oat-Free: Replace rolled oats with puffed rice or quinoa for a lighter version that’s still fun and crunchy.
- Crunchy Twist: Add crushed pretzels or popcorn for an unexpected salty crunch that complements the sweet flavors beautifully.
- Spiced Up: Mix in a dash of cinnamon or ginger for warmth, evoking the cozy vibes of holiday treats. This twist can elevate your bars to a festive delight.
- Fruit Infusion: Incorporate mini chocolate-covered raisins or dried cranberries for a burst of flavor and chewiness that enhances the overall experience.
- Chocolate Variation: Replace cocoa powder with carob powder for a naturally sweeter alternative or even drizzle with white chocolate for a contrasting flavor.
While you’re experimenting, consider pairing these bars with easy Mexican rice for a complete meal or enjoy them as part of your dessert spread with a scoop of custard apple rice pudding. There’s no limit to the sweet creativity you can unleash in your kitchen!
Make Ahead Options
These No-Bake Chocolate Peanut Butter Bars are perfect for meal prep enthusiasts! You can prepare the oat mixture and press it into the dish up to 24 hours in advance. Just cover the pressed layer with plastic wrap and refrigerate to maintain freshness. The chocolate topping can be melted and spread right before serving or added within 3 days for best results—just ensure it’s set in the fridge until firm. When you’re ready to serve, simply slice the bars into portions and enjoy the rich flavors just as delicious as when freshly made! This way, you ensure you always have a tasty treat on hand for busy days!
What to Serve with No-Bake Chocolate Peanut Butter Bars?
As you savor each bite of these deliciously creamy bars, let’s explore delightful pairings that will elevate your snack into a full-fledged culinary experience.
-
Creamy Greek Yogurt: Served alongside, it adds a tart contrast that perfectly balances the richness of the bars.
-
Fresh Berries: Juicy strawberries or raspberries bring a burst of freshness and acidity, making every bite more vibrant.
-
Nutty Trail Mix: For a crunchy texture and added nutrients, a handful of trail mix can elevate your snack game.
-
Whipped Cream: A dollop of whipped cream transforms these bars into a decadent dessert, perfect for sharing after dinner.
-
Iced Coffee: The bold flavors of chilled coffee provide an energizing contrast and compliments the creamy peanut butter.
-
Chocolate Almond Milk: Smooth and rich, this drink enhances the chocolatey flavors while keeping things refreshing.
-
Coconut Macaroons: Their chewiness and subtle coconut flavor make a delightful companion to the chocolatey, nutty bars.
-
Vanilla Ice Cream: The creamy, cold indulgence of vanilla ice cream pairs beautifully, creating a deliciously sweet harmony.
-
Homemade Hot Cocoa: A warm mug of cocoa can create a cozy experience, wrapping you in warmth and reminiscent holiday flavors.
These pairings will not only enrich your experience but also leave everyone licking their fingers and asking for more!
Expert Tips for No-Bake Chocolate Peanut Butter Bars
Coat Your Hands: When pressing the mixture into the dish, dampening your hands slightly can prevent sticking and make it easier to achieve a smooth, even texture.
Compact the Mixture: Ensure the mixture is firmly pressed into the dish; a solid base keeps the bars from crumbling when cut and served.
Melt Chocolate Gently: Avoid overheating the chocolate; melting in short intervals ensures it stays smooth and prevents separation, giving you a perfect topping.
Use a Sharp Knife: If you have trouble slicing the bars, warm your knife under hot water for clean cuts, making it easier to enjoy these delicious no-bake treats.
Storage Matters: Store your bars in an airtight container in the refrigerator to maintain freshness. They can last up to a week, perfect for snacking anytime!
How to Store and Freeze No-Bake Chocolate Peanut Butter Bars
Fridge: Keep the bars in an airtight container for up to 1 week to maintain their delightful texture and flavor.
Freezer: For longer storage, wrap individual bars tightly in plastic wrap and place them in a freezer-safe container. They’ll stay fresh for up to 3 months!
Thawing: When you’re ready to enjoy a bar, simply remove it from the freezer and let it thaw in the fridge for a couple of hours. Perfect for a quick, sweet treat!
Room Temperature: If serving immediately, place the bars in a cool, dry place, but be mindful that they may soften if left out for too long.
No-Bake Chocolate Peanut Butter Bars Recipe FAQs
How do I choose the right ingredients for these bars?
Absolutely! When selecting your ingredients, opt for gluten-free rolled oats to cater to any dietary restrictions. Make sure to choose natural peanut butter without added sugars or oils for the best flavor and texture. If you’re looking for alternatives, almond butter can also bring a unique twist, and don’t forget to check for dark chocolate chips that suit your dietary needs—dairy-free options are widely available!
How should I store and keep these bars fresh?
Very! To store your No-Bake Chocolate Peanut Butter Bars, place them in an airtight container in the refrigerator where they will stay fresh for up to 1 week. This will preserve their chewy texture and tasty flavor. If you want to make them ahead, freeze individual bars wrapped tightly in plastic wrap, then place them in a freezer-safe container. They can be kept for up to 3 months—a lifesaver for those sweet cravings!
Can I freeze these bars, and how do I do it?
Absolutely! For freezing, wrap each bar individually in plastic wrap to prevent freezer burn, ensuring maximum freshness. Then, transfer the wrapped bars into a freezer-safe container or a heavy-duty freezer bag. They will keep quite well for up to 3 months. When you’re ready to have one, simply take it out and let it thaw in the refrigerator for about 2 hours. Enjoy a delightful treat whenever you desire!
What if the bars crumble when I try to cut them?
Oh, it happens sometimes! If your bars crumble while cutting, it could be due to under-pressing the mixture into the dish. Make sure to press down firmly for an even, compact layer. If you find cutting tricky, try warming your knife under hot water to ensure smooth slicing. Us chefs often run into this, so don’t feel discouraged—just use a bit of patience, and you’ll achieve slice-perfect bars!
Are these bars suitable for kids or those with allergies?
Definitely! These No-Bake Chocolate Peanut Butter Bars are generally kid-friendly; just be mindful of any nut allergies present. You can easily swap peanut butter with sunflower seed butter for a nut-free option. Always double-check the ingredient labels, especially for items like chocolate chips, as some brands may contain allergens or different traces. Always better to play it safe and ensure everyone enjoys!
Can I customize the ingredients to suit my taste?
Very! One of the beautiful things about these bars is their versatility. Feel free to experiment with different nut butters or sweeteners. Swap the maple syrup for agave nectar if you prefer a different sweetness profile. You can also add in extras like chopped nuts, seeds, or even dried fruits for added nutrition and flavor. The more, the merrier—creating something uniquely yours adds a lovely personal touch!
Gingerbread Rice Krispie Treats for Cozy Holiday Snacking
Ingredients
Equipment
Method
- In a large mixing bowl, combine rolled oats, natural peanut butter, maple syrup, and cocoa powder. Stir until fully blended, about 2-3 minutes.
- Line an 8x8-inch baking dish with parchment paper. Transfer the mixture and press it down firmly to create an even layer, approximately 5 minutes.
- Melt the dark chocolate chips in a microwave-safe bowl, microwaving in 30-second intervals until smooth, about 1-2 minutes.
- Pour the melted chocolate over the mixture in the baking dish and spread it evenly.
- Refrigerate for about 2 hours or until firm. Test by pressing sides for solidness.
- Remove from dish using parchment overhang, slice into bars with a sharp knife, and serve chilled.
Leave a Reply