
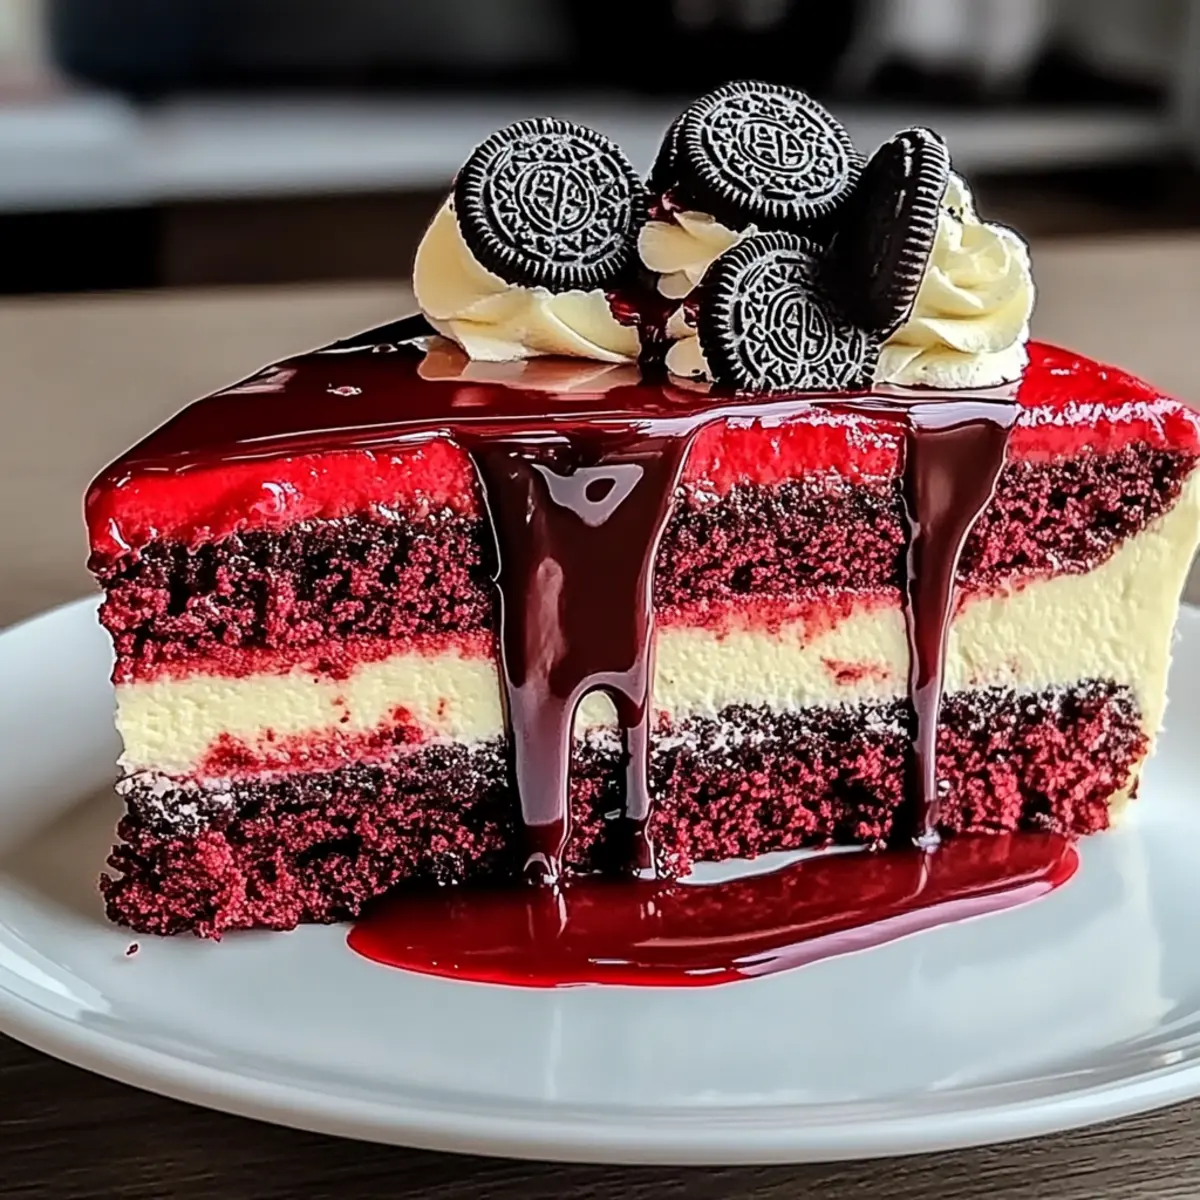
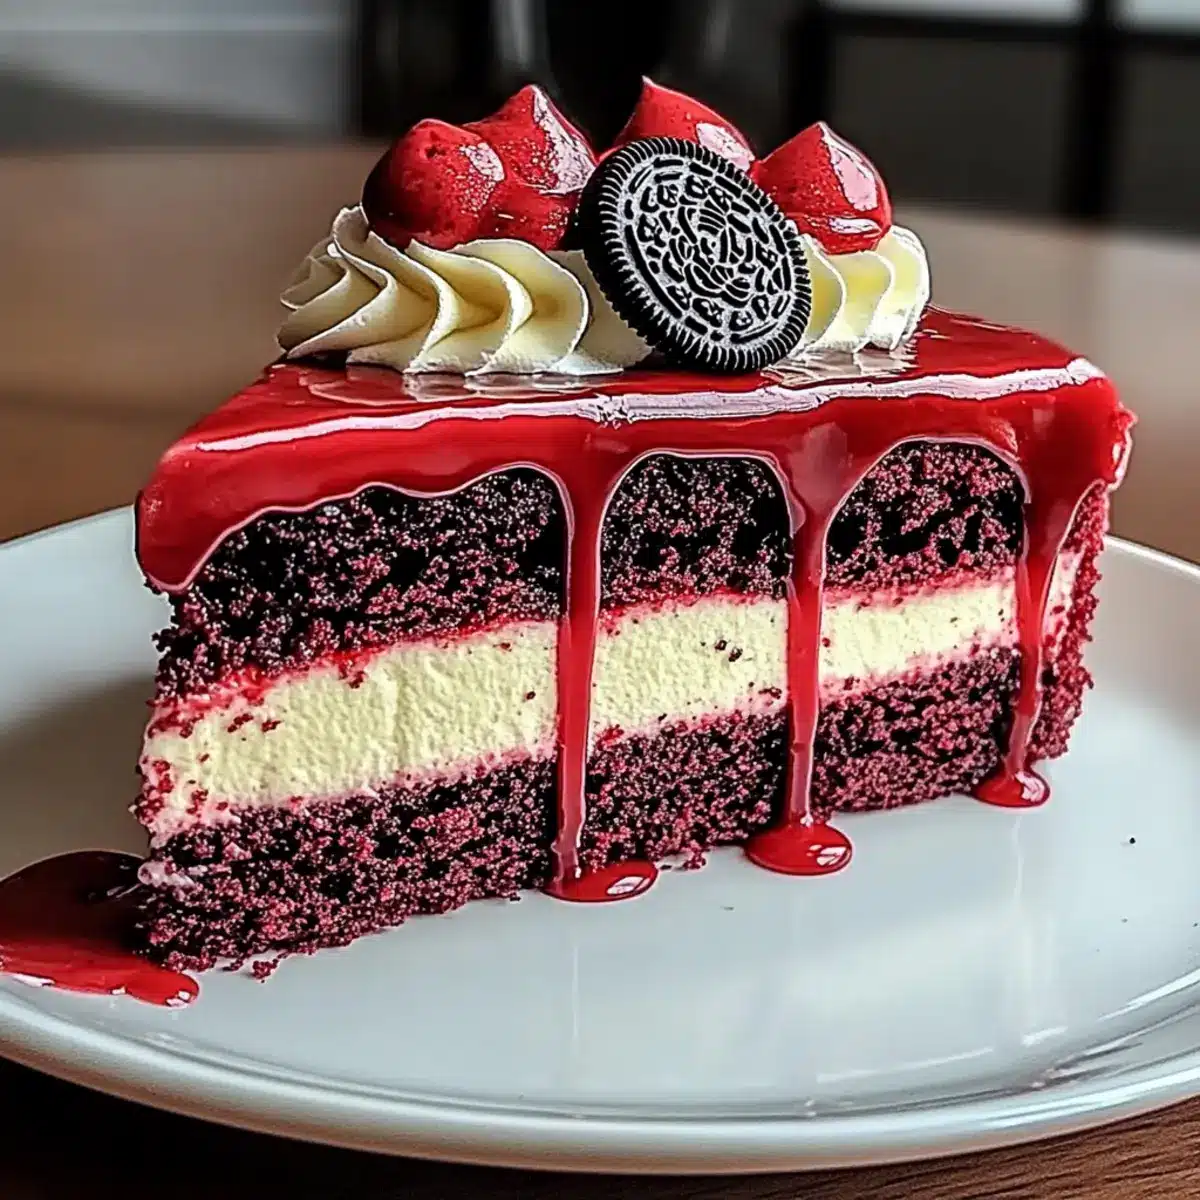
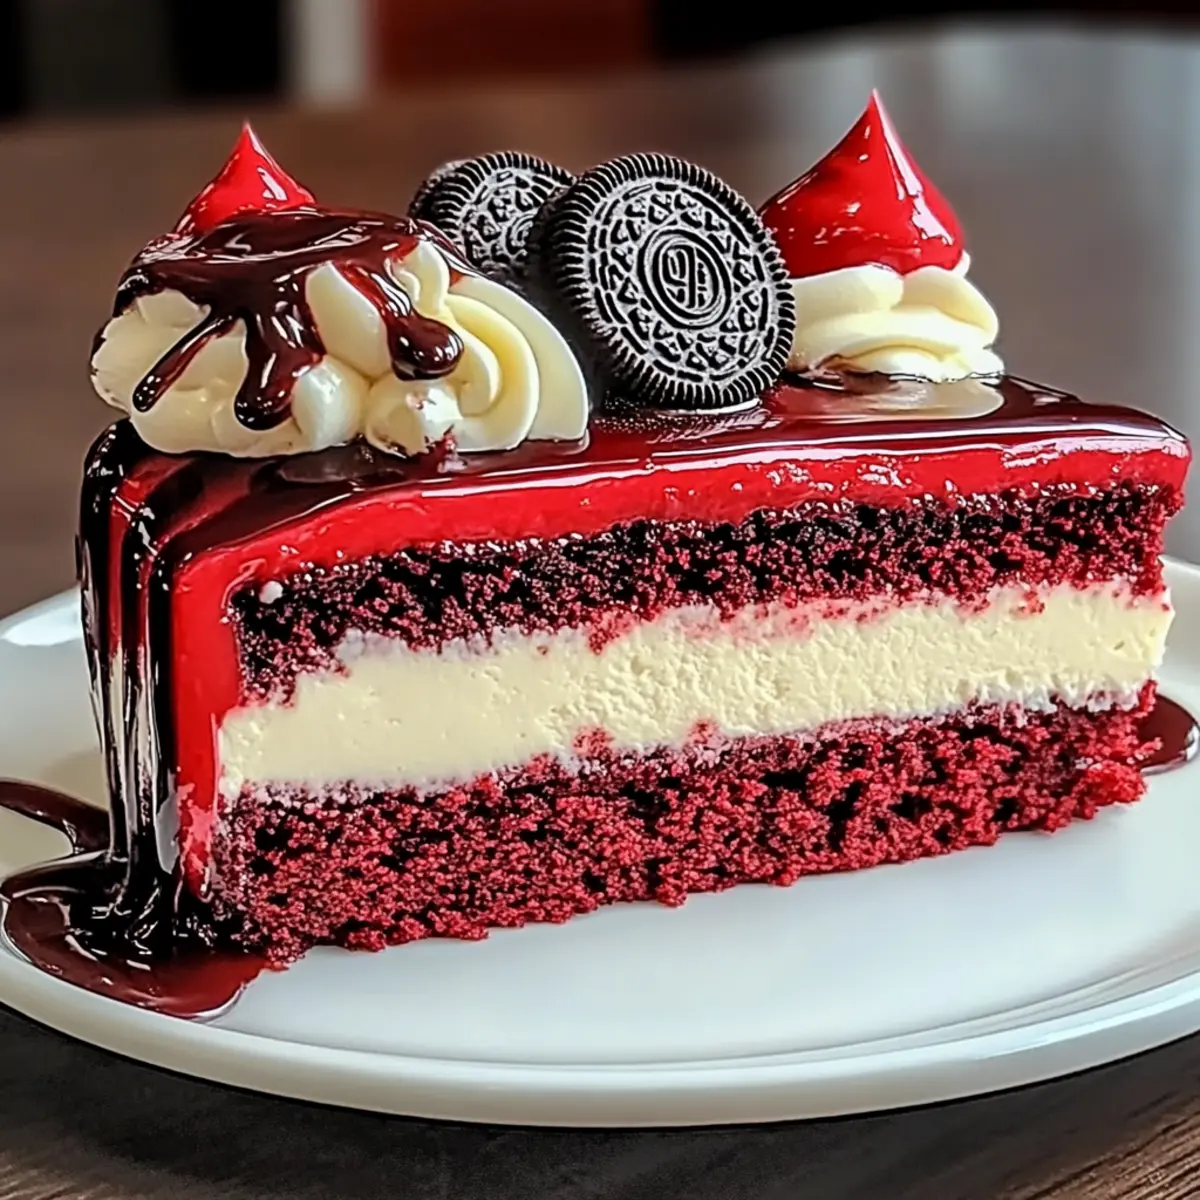
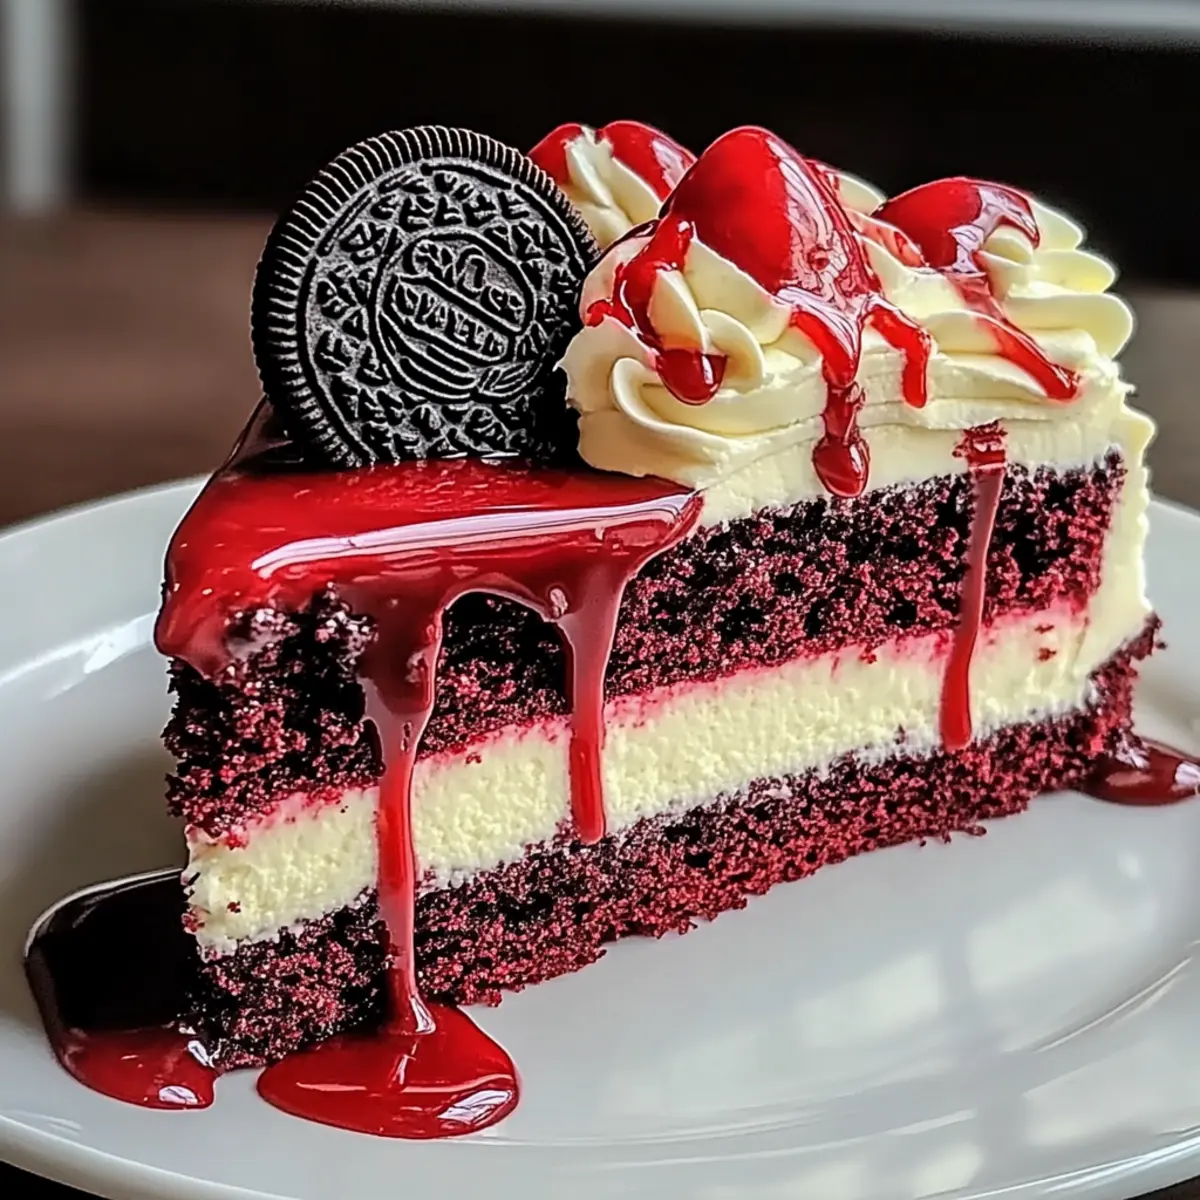
As I stood in my kitchen, the sweet aroma of red velvet cake mingling with the indulgent scent of creamy cheesecake danced through the air, igniting my excitement. This isn’t just any dessert; the Oreo Red Velvet Cheesecake Drip Cake is a showstopper that will captivate your guests and elevate any gathering. With a luscious layer of crunchy Oreo crust, moist red velvet cake, and a velvety cheesecake filling, every slice is a symphony of textures and flavors. What makes this recipe even better? It’s make-ahead, so you can savor the moment rather than sweat in the kitchen at the last minute. Plus, with options for gluten-free and dairy-free variations, everyone can join in on the deliciousness. Curiosity piqued? Let’s dive into the layers of delight that await!
Why is this cake a must-try?
Showstopper Appeal: The stunning layers of this cake don’t just look incredible; they taste divine, making it the perfect centerpiece for celebrations.
Make-Ahead Wonder: Prepare this dessert in advance, allowing you to enjoy your company without the last-minute rush of baking.
Versatility: With options for gluten-free and dairy-free, this cake can cater to various dietary needs, ensuring no one misses out on the indulgence!
Decadent Flavor: The rich cheesecake filling combined with refreshing red velvet and the crunch of Oreo makes every bite an unforgettable experience.
Crowd-Pleaser: Whether for a birthday party or a cozy gathering, this cake impresses guests of all ages, creating lasting memories.
Pair it with a scoop of ice cream, as suggested for the ultimate treat! If you love unique flavors, don’t forget to check out my other recipes like this delicious Oreo Icebox Cake for more inspiration.
Oreo Red Velvet Cheesecake Drip Cake Ingredients
For the Crust
- Oreo cookie crumbs – The crunchy base of this cake; opt for gluten-free Oreo crumbs to stay true to dietary needs.
- Melted butter – Binds everything together; substitute it with dairy-free butter for a vegan version.
For the Cake Layer
- Red velvet cake batter – This provides the luscious, moist cake layer; feel free to use a boxed mix for simplicity.
- Large eggs – They add structure and moisture; flax eggs can be a perfect egg replacer for a vegan alternative.
For the Cheesecake Filling
- Cream cheese – The heart of the cheesecake filling for richness; Neufchâtel cheese can cut calories without sacrificing flavor.
- Granulated sugar – Sweetens the filling nicely; consider using a sugar substitute if desired.
- Vanilla extract – A flavor enhancer; almond extract can offer an intriguing twist.
- Sour cream – Adds creaminess; Greek yogurt can function well as a substitute here.
For the Drip and Decoration
- White chocolate chips – Perfect for a sweet chocolate drip; dark chocolate can provide a richer taste.
- Red gel food coloring – This gives vibrant color to your cake; if you don’t have gel, liquid food coloring will do.
- Whipped topping or buttercream – Ideal for decoration; store-bought options save precious time.
- Whole Oreo cookies – Great for garnish, adding texture and an extra layer of Oreo delight.
This Oreo Red Velvet Cheesecake Drip Cake is more than just a dessert; it’s a delightful experience waiting to be shared and savored!
Step‑by‑Step Instructions for Oreo Red Velvet Cheesecake Drip Cake
Step 1: Prepare the Crust
Preheat your oven to 350°F (175°C). In a mixing bowl, combine Oreo cookie crumbs with melted butter until fully moistened. Press this mixture firmly into the bottom of a 9-inch springform pan to create an even crust. Bake for 10 minutes, then remove from the oven and let it cool completely while you prepare the cake layer.
Step 2: Bake Red Velvet Layer
In a separate bowl, prepare the red velvet cake batter according to package instructions or your preferred recipe. Once the crust has cooled, carefully pour the vibrant batter over it, ensuring it spreads evenly across the surface. Bake for about 25-30 minutes, or until a toothpick inserted in the center comes out clean. Allow this cake layer to cool completely.
Step 3: Make Cheesecake Filling
In a large mixing bowl, beat the cream cheese with an electric mixer until smooth and creamy. Gradually add granulated sugar, vanilla extract, and eggs, beating well after each addition. Stir in sour cream until fully combined, creating a rich filling. Pour this cheesecake mixture over the cooled red velvet cake layer in the springform pan, smoothing the top for an even surface.
Step 4: Bake Cheesecake
Create a water bath by wrapping the bottom of your springform pan with aluminum foil and placing it in a larger baking dish filled with about an inch of hot water. Bake the cheesecake at 325°F (163°C) for 50-60 minutes, or until the edges are set and the center slightly jiggles. Remove from the oven and cool at room temperature for one hour before chilling in the refrigerator.
Step 5: Chill and Set
Cover the springform pan with plastic wrap and refrigerate the Oreo Red Velvet Cheesecake for at least 4 hours, or overnight if you prefer. This chilling step allows the flavors to meld and the cheesecake to firm up perfectly for slicing.
Step 6: Prepare the Drip
In a microwave-safe bowl, melt white chocolate chips in 20-second intervals, stirring in between until fully melted and smooth. Mix in a few drops of red gel food coloring until you achieve your desired hue. Allow the mixture to cool slightly until it’s pourable but not hot, then it’s ready to drizzle over the cheesecake.
Step 7: Decorate Cake
Once the chocolate drip is set, revive its appearance by adding whipped topping or buttercream around the edges of the cake. Carefully place whole Oreo cookies on top for a delightful garnish that enhances both the look and flavor of your Oreo Red Velvet Cheesecake Drip Cake.
Step 8: Slice and Serve
To release your beautiful creation from the springform pan, gently run a knife around the edges. For clean slices, dip your knife in hot water before cutting each piece; serve the cake chilled and watch your guests delight in the layers of flavor and texture.
Make Ahead Options
These Oreo Red Velvet Cheesecake Drip Cake layers are perfect for meal prep enthusiasts! You can prepare the crust and the red velvet cake layer up to 24 hours in advance, simply refrigerating them separately to keep them fresh. The cheesecake filling can also be made the day before and chilled overnight to enhance the flavors. When you’re ready to serve, just assemble the layers, add your delightful chocolate drip, and decorate with whipped topping and whole Oreo cookies. By prepping these components ahead of time, you’ll save precious hours on the day of your gathering and ensure your cake is just as delicious and decadent!
Oreo Red Velvet Cheesecake Drip Cake Variations
Feel free to let your creativity flow by customizing this delicious cake to match your taste preferences and dietary needs!
-
Dairy-Free: Use vegan cream cheese and coconut milk for the cheesecake filling, making it suitable for lactose-intolerant friends.
-
Gluten-Free: Substitute gluten-free Oreo cookie crumbs for the crust, ensuring all other ingredients are gluten-free too.
-
Chocolate Lovers: Mix chocolate chips into the cheesecake filling for a decadent twist that tickles every chocolate lover’s taste buds.
-
Nutty Delight: Incorporate crushed nuts like pecans or walnuts into the crust for added texture and a delightful nutty flavor.
-
Fruit Infusion: Add a layer of fresh berries or fruit puree between the cake and cheesecake layers for a refreshing burst of flavor.
-
Spicy Twist: Sprinkle a pinch of cinnamon or even cayenne pepper into the batter for a surprising zing that complements the creaminess.
-
Vegan Option: Replace eggs with flax or chia eggs, and use non-dairy milk in the cake batter for a fully plant-based version.
-
Caramel Drizzle: Top with a drizzle of caramel sauce alongside the chocolate drip for an indulgent sweet treat that elevates the dessert further.
Don’t forget to pair your creation with other delightful recipes like the scrumptious Choco Cheesecake Cookie or the classic Blueberry Crumble Cheesecake for a full dessert spread!
What to Serve with Oreo Red Velvet Cheesecake Drip Cake
A delicious slice of this cake calls for equally delightful companions to complete your dessert experience.
- Vanilla Ice Cream: The creamy sweetness of vanilla ice cream pairs perfectly with the layers of cheesecake, enhancing each bite.
- Fresh Berries: Juicy raspberries or strawberries add a tart contrast to the rich flavors, balancing the dessert beautifully.
- Chocolate Sauce: A drizzle of warm chocolate sauce can intensify the dessert’s decadence, satisfying any sweet tooth.
- Whipped Cream: Light and airy, whipped cream adds an extra layer of creaminess, beautifully complementing the dense cheesecake filling.
- Espresso or Coffee: A cup of hot espresso or a latte provides a fantastic contrast, brightening up the sweeter notes of the cake.
- Mint Tea: The refreshing notes of mint tea cleanse the palate, making for a refreshing finish post cake indulgence.
Pair your Oreo Red Velvet Cheesecake Drip Cake with these delightful options for a well-rounded treat that your guests will remember!
Storage Tips for Oreo Red Velvet Cheesecake Drip Cake
Fridge: Store covered in the refrigerator for up to 5 days. Ensure it’s wrapped tightly to prevent drying out or absorbing other odors.
Freezer: For longer storage, wrap individual slices in plastic wrap and then aluminum foil or place in an airtight container; freeze for up to 3 months.
Thawing: To enjoy your frozen Oreo Red Velvet Cheesecake Drip Cake, transfer slices to the fridge and let them thaw overnight before serving.
Reheating: This cake is best served chilled; however, if desired, gently warm individual slices in the microwave for 10-15 seconds for a soft bite.
Expert Tips for Oreo Red Velvet Cheesecake Drip Cake
- Layer Chilling: Allow each layer to chill before adding the next for clean separations; this prevents any mixing of colors and flavors.
- Water Bath Wisdom: Using a water bath while baking the cheesecake minimizes the risk of cracks forming on the surface, ensuring a smooth texture.
- Knife Care: For perfectly clean slices, heat your knife in hot water between cuts. This technique is invaluable when serving your Oreo Red Velvet Cheesecake Drip Cake.
- Color Caution: When adding red gel food coloring, start with a small amount and gradually increase it to achieve your desired shade without overpowering the cake’s flavor.
- Room Temperature Ingredients: Ensure that your cream cheese and eggs are at room temperature before mixing; this creates a smoother cheesecake filling.
- Keep it Cool: Remember, chilling the entire cake overnight makes the flavors develop fully and the cake easier to slice.
Oreo Red Velvet Cheesecake Drip Cake Recipe FAQs
How do I choose the best Oreo cookie crumbs for the crust?
Absolutely! For the best Oreo cookie crust, look for packages labeled “Oreo cookie crumbs” as they provide the finest texture and flavor. To keep it gluten-free, ensure you select gluten-free Oreo crumbs, which are easier to find these days. If you’re feeling adventurous, you can even use different flavored Oreo cookies, like mint or peanut butter, to create a unique twist!
What is the best way to store the Oreo Red Velvet Cheesecake Drip Cake?
Very good question! Store your cheesecake covered in the refrigerator for up to 5 days. It’s essential to wrap it tightly to avoid it drying out or absorbing other fridge odors. If you want to keep the cake fresh for a longer period, it’s best to freeze individual slices. Wrap each slice in plastic wrap and aluminum foil, or place them in an airtight container and freeze for up to 3 months. This way, you can savor a piece whenever those sweet cravings hit!
Can I freeze the Oreo Red Velvet Cheesecake Drip Cake?
Yes, you can! To freeze, first, chill your cheesecake until fully set. Once cooled, slice it into individual portions. Wrap each piece tightly in plastic wrap, followed by aluminum foil to prevent freezer burn. Place the wrapped slices in an airtight container and store in the freezer for up to 3 months. When you’re ready to enjoy, simply transfer a slice to the fridge and let it thaw overnight. The flavors intensify beautifully during freezing!
What should I do if my cheesecake cracks while baking?
This happens to the best of us! If your cheesecake cracks, don’t worry—it can still taste amazing. To avoid this in the future, bake your cheesecake in a water bath; this will maintain moisture around the cake and help it bake uniformly. If you already have a crack, try covering it with whipped topping or a layer of your chocolate drip once it’s cooled. This can not only hide imperfections but also add extra deliciousness!
Can I make this cake dairy-free?
Absolutely! To make a dairy-free version of the Oreo Red Velvet Cheesecake Drip Cake, you can substitute regular cream cheese with a vegan cream cheese alternative. Also, replace the sour cream with coconut yogurt or another nondairy yogurt, and use dairy-free butter when making the crust. For the white chocolate drip, opt for vegan white chocolate chips. Everyone can enjoy this decadent dessert without compromising on taste!
Can pets eat any leftovers from this cake?
No, it’s best to keep this cake far away from your furry friends. The ingredients in this cheesecake, especially chocolate and certain sweeteners, can be harmful to pets. Always remember to dispose of any leftovers properly so your pets don’t sneak a bite!
Oreo Red Velvet Cheesecake Drip Cake that Steals the Show
Ingredients
Equipment
Method
- Preheat your oven to 350°F (175°C). In a mixing bowl, combine Oreo cookie crumbs with melted butter until fully moistened. Press this mixture firmly into the bottom of a 9-inch springform pan to create an even crust. Bake for 10 minutes, then remove from the oven and let it cool completely while you prepare the cake layer.
- In a separate bowl, prepare the red velvet cake batter according to package instructions or your preferred recipe. Once the crust has cooled, carefully pour the vibrant batter over it, ensuring it spreads evenly. Bake for about 25-30 minutes, or until a toothpick inserted comes out clean. Allow this cake layer to cool completely.
- In a large mixing bowl, beat the cream cheese until smooth and creamy. Gradually add sugar, vanilla extract, and eggs, beating well. Stir in sour cream until fully combined, then pour this cheesecake mixture over the cooled red velvet layer, smoothing the top.
- Create a water bath by wrapping the bottom of your springform pan with aluminum foil and placing it in a larger dish filled with an inch of hot water. Bake the cheesecake at 325°F (163°C) for 50-60 minutes, or until the edges are set and the center slightly jiggles. Cool at room temperature for one hour before refrigerating.
- Cover the springform pan with plastic wrap and refrigerate the cheesecake for at least 4 hours, or overnight. This chilling allows the flavors to meld.
- In a microwave-safe bowl, melt white chocolate chips in 20-second intervals, stirring until smooth. Mix in red gel food coloring to achieve desired hue. Allow to cool slightly until pourable.
- Once the chocolate drip is set, add whipped topping or buttercream around the edges. Place whole Oreo cookies on top for garnish.
- To release the cake from the springform pan, gently run a knife around the edges. For clean slices, dip the knife in hot water before cutting. Serve the cake chilled.
Leave a Reply