
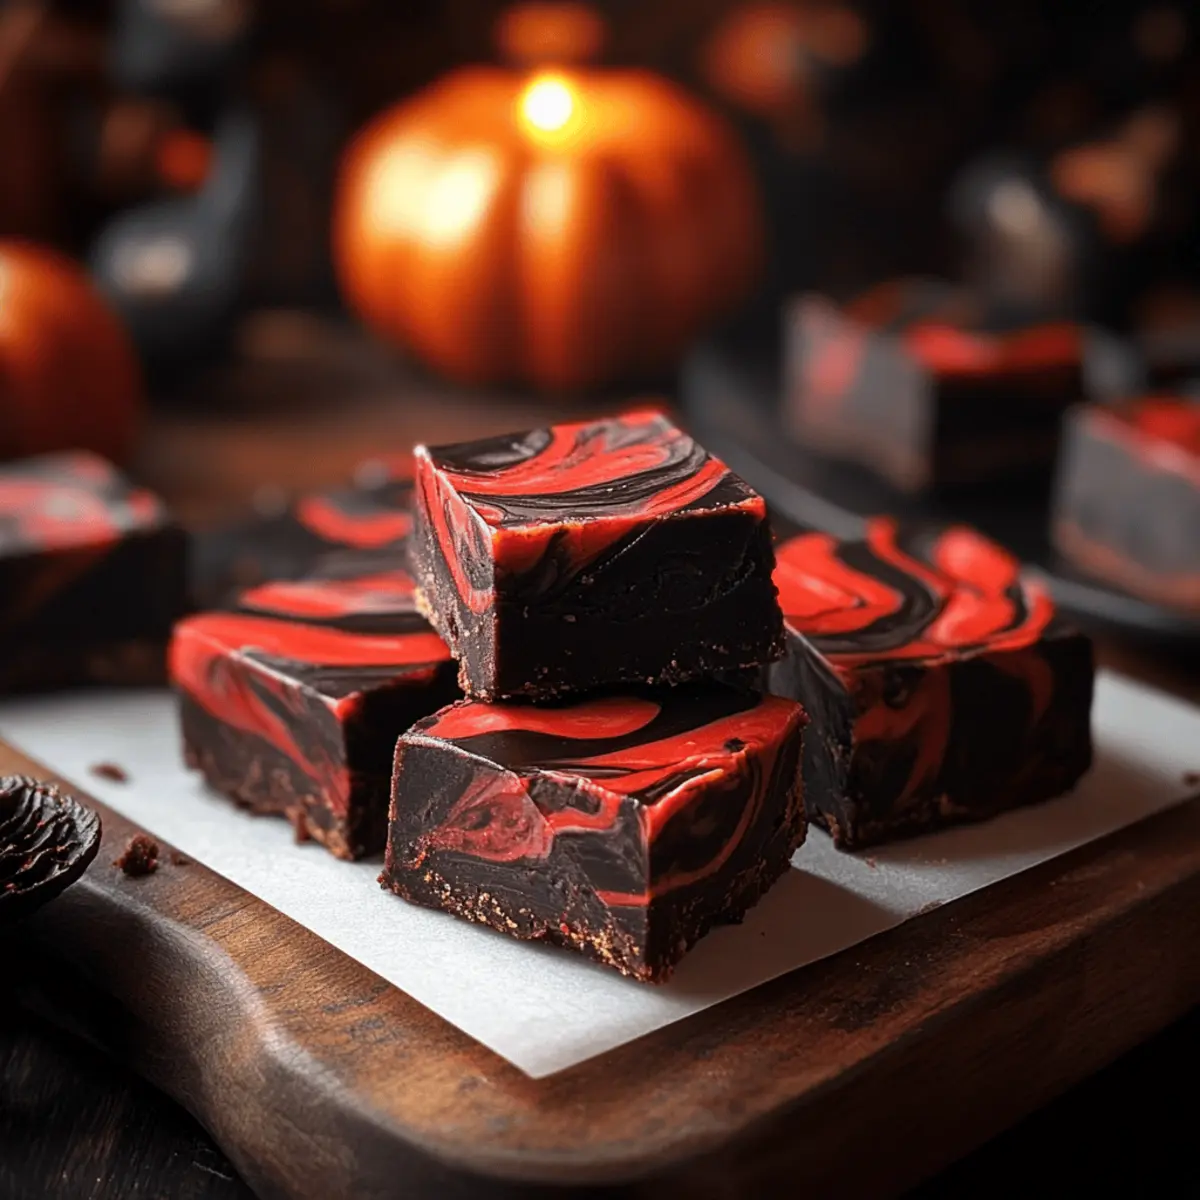
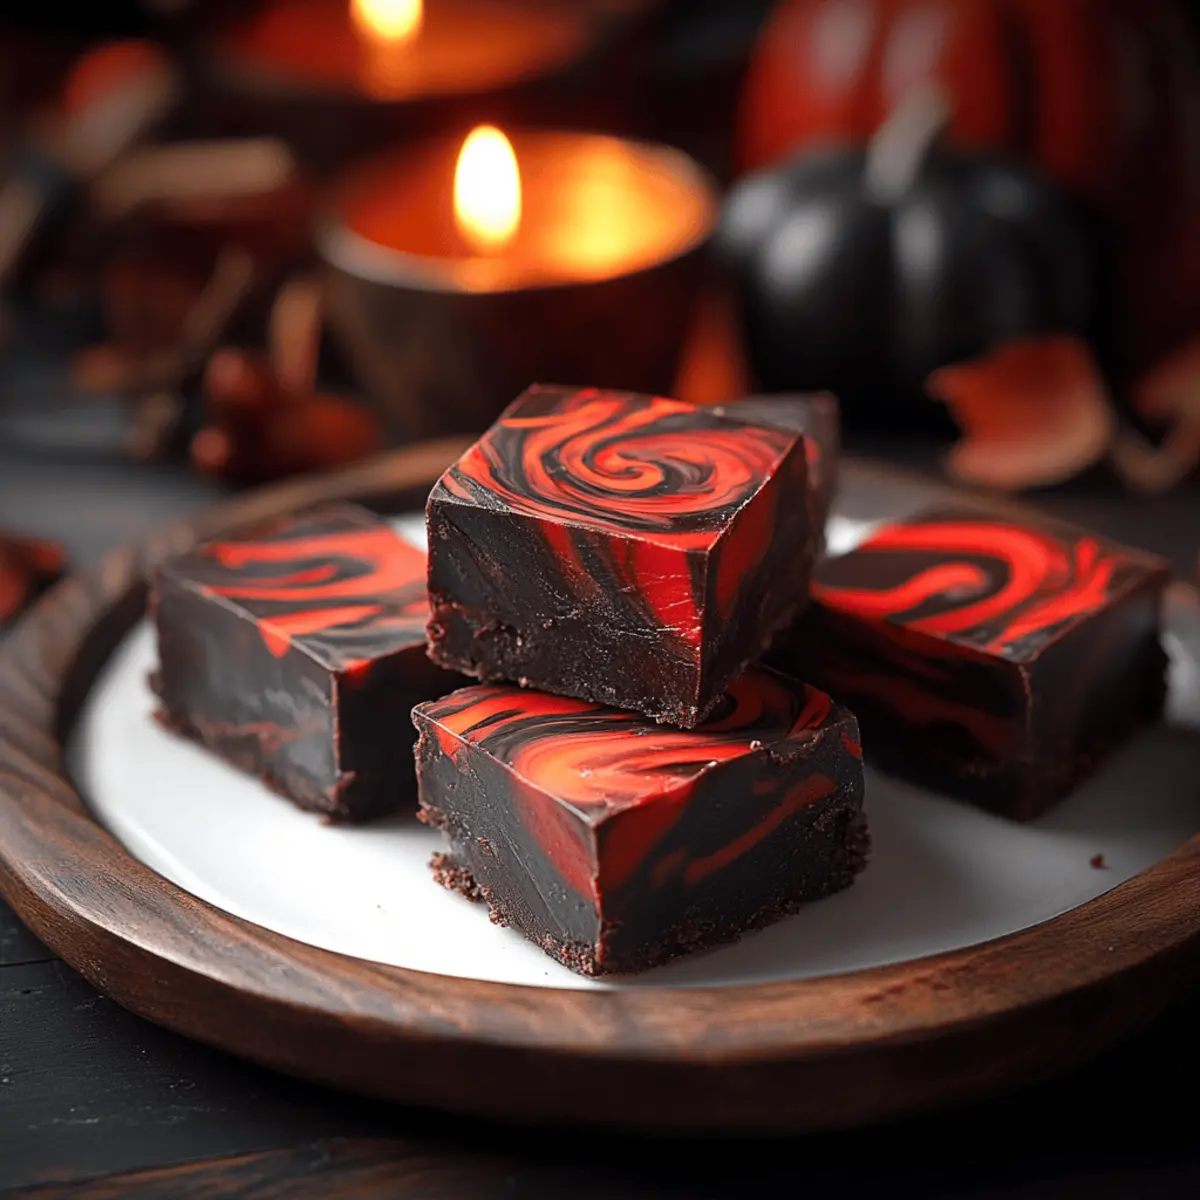
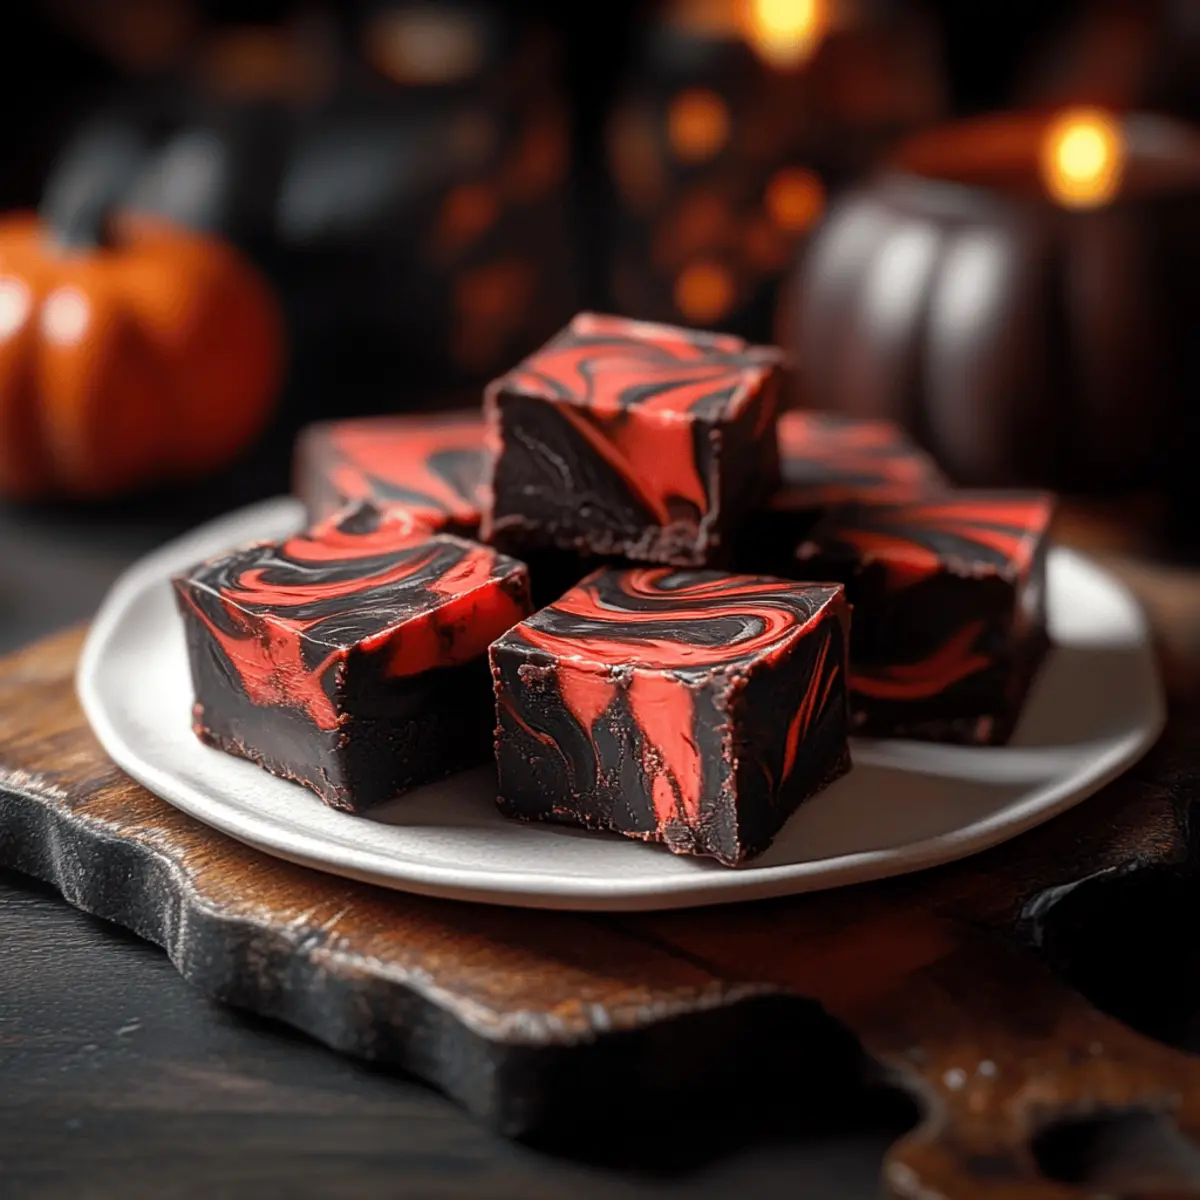
As the crisp autumn air settles in, I find myself enchanted by the magic of Halloween treats. Enter Vampire Fudge, a delightful concoction that turns ordinary sweets into a festive spectacle. This quick and easy recipe not only dazzles the eyes with its striking deep black and vibrant red swirls, but it also delivers a rich, creamy texture that taunts your taste buds. Whether you’re hosting a spooktacular party or simply looking to indulge your sweet tooth this season, this gluten-free and vegetarian treat is a total crowd-pleaser. With minimal ingredients and a few simple steps, you can conjure up a batch of vampire-approved fudge that kids and adults alike won’t be able to resist. Are you ready to craft your cauldron of deliciousness?
Why is Vampire Fudge a Must-Make?
Irresistible Appeal: Vampire Fudge brings the perfect balance of spooky and delicious, making it a must-have for your Halloween festivities.
Quick and Easy: You’ll love how this recipe requires minimal ingredients and time, allowing for spontaneous sweet-making adventures.
Customizable Fun: With options to swap colors or add toppings, you can let your creativity run wild with every batch.
Gluten-Free & Vegetarian: This treat caters to various dietary preferences, ensuring everyone can join in on the indulgence.
Visual Delight: The enchanting deep black and vibrant red swirls create a stunning presentation that will impress your guests at any gathering.
Vampire Fudge Recipe Ingredients
For the Fudge Base
- Black Candy Melts – Essential for creating the spooky deep dark color of the fudge.
- Red Candy Melts – Provides the vibrant color for striking red swirls that enhance visual appeal.
- Cream Cheese Frosting – Adds creaminess and sweetness; can be substituted with thick vanilla or buttercream frosting for a different flavor profile.
For Optional Toppings
- Sprinkles or Crushed Nuts – For added texture and flair, you can top the fudge with these to make it even more festive.
- Salted Caramel or Melted Chocolate – Drizzle for a richer flavor that elevates the indulgence of this Vampire Fudge recipe.
Embrace the spirit of Halloween with this delightful Vampire Fudge that not only captivates the eye but also tempts the taste buds!
Step‑by‑Step Instructions for Vampire Fudge Recipe
Step 1: Prepare the Pan
Begin by lightly greasing an 8″ x 8″ cake pan and lining it with parchment paper. This step not only prevents sticking but makes it easier to lift the fudge out once it’s set. Ensure the parchment paper overlaps the edges for easy removal later.
Step 2: Melt Black Candy Melts
In a microwave-safe bowl, combine the black candy melts and heat them in the microwave for 2 minutes. Stir every 30 seconds until the melts are completely smooth and glossy, avoiding overheating. This rich, dark mixture will form the base of your Vampire Fudge.
Step 3: Melt Red Candy Melts
Following the same method, take another microwave-safe bowl and place your red candy melts inside. Heat them in the microwave for approximately 2 minutes, stirring at 30-second intervals until fully melted. The vibrant red color will create striking swirls in your fudge.
Step 4: Warm the Cream Cheese Frosting
In a separate bowl, warm the cream cheese frosting in the microwave for about 45 seconds. This softening will make it easier to mix with your melted candy melts. Once warmed, ensure the frosting is smooth and creamy to achieve the perfect consistency for your fudge.
Step 5: Mix the Fudge Colors
Divide the warmed cream cheese frosting equally between the bowls of melted black and red candy melts. Stir each bowl until the frosting is completely combined with the melts, creating a rich and colorful batter. The contrasting colors will contribute to the dramatic appearance of your Vampire Fudge.
Step 6: Layer the Mixtures
Carefully alternate pouring the black and red mixtures into the prepared pan, letting the colors flow into one another to create layers. Don’t worry about making it perfect—allow the colors to swirl together naturally to enhance the spooky aesthetic of your Vampire Fudge.
Step 7: Smooth the Mixture
Once all the mixtures have been poured into the pan, gently tap the pan on the counter to even the fudge mixture and eliminate any air bubbles. You want a smooth and flat surface that will help the fudge set perfectly, providing that shiny finish.
Step 8: Chill to Set
Refrigerate the fudge for approximately 4 hours, allowing it to set thoroughly. This chilling time is crucial for achieving the right texture— your fudge will firm up beautifully and be perfect for slicing once it has chilled completely.
Step 9: Cut and Serve
Once the fudge is fully set, use the parchment paper to lift it out of the pan and place it on a cutting board. Cut into squares with a sharp knife, revealing the delightful red and black swirls. Your Vampire Fudge is now ready to impress!
Step 10: Store Leftovers
If you have any leftovers, store them in an airtight container in the fridge for up to a week. The Vampire Fudge holds its flavor and texture well but is best enjoyed fresh for the ultimate treat during your Halloween festivities.

Expert Tips for Vampire Fudge
-
Perfect Melting: Make sure to melt candy in short intervals to avoid burning, which can lead to an unappetizing texture in your Vampire Fudge.
-
Allow for Chilling: It’s crucial to let the fudge chill completely for at least 4 hours. This ensures the proper creamy texture and helps the flavors meld beautifully.
-
Creative Additions: For a unique twist, consider adding a dash of pumpkin spice or even crushed nuts. This adds depth to your Vampire Fudge while keeping it customizable.
-
Layering Technique: When pouring in the colored mixtures, allow them to swirl together naturally for a more visually appealing presentation. Don’t stress about perfection—embrace the spooky fun!
-
Storage Tips: Keep your fudge in an airtight container in the fridge for freshness, or freeze it for longer storage. Just remember to thaw in the fridge before serving.
Make Ahead Options
These Vampire Fudge squares are ideal for busy cooks looking to save time during the Halloween season! You can prepare the fudge base up to 24 hours in advance by following all the steps except for the final chilling in the refrigerator. Simply melt the black and red candy melts, mix them with cream cheese frosting, and layer them in the pan. Instead of chilling right away, cover the layered fudge tightly with plastic wrap and refrigerate. When you’re ready to serve, let it set for about 4 hours until firm, then cut into squares. This make-ahead method allows you to enjoy deliciously spooky treats without the last-minute rush!
Vampire Fudge Recipe Variations
Feel free to unleash your creativity and customize this delicious fudge into a treat that’s uniquely yours!
-
Color Swap: Change the black and red candy melts to purple and green for a witchy twist that’s just as fun.
-
Topping Twist: Sprinkle crushed nuts or colorful sprinkles on top before chilling for an added crunch and festive flair. Kids will love helping with this step!
-
Flavor Fusion: Mix in a dash of pumpkin spice or cinnamon to give your fudge a cozy fall flavor that complements the spooky vibe.
-
Drizzle Delight: Add a drizzle of salted caramel or melted chocolate over the top for an indulgent touch that enhances the overall taste experience.
-
Nutty Addition: Fold in finely chopped nuts like walnuts or pecans into the fudge mixture before it sets for extra texture and heartiness.
-
Minty Fudge: Stir in a few drops of peppermint extract to create a cool, refreshing variation perfect for after-dinner treats during Halloween parties.
-
Vampire Bite: Incorporate mini gummy candies, like vampire teeth or blood capsules, into the top layer for a playful and unexpected bite!
-
Spicy Kick: Add a pinch of cayenne pepper for those who love a bit of heat in their sweets—this daring flavor contrast makes for a memorable treat.
Get inspired and mix and match these ideas to create a Vampire Fudge that reflects your personal taste! And if you’re looking for other spooky treats, check out our Caramel Pumpkin Brownies or think about trying Halloween Cookie Pops for more festive fun.
How to Store and Freeze Vampire Fudge
Fridge: Store Vampire Fudge in an airtight container for up to 1 week. This helps maintain its rich, creamy texture while keeping it fresh for nightly Halloween treats.
Freezer: For longer storage, wrap the fudge tightly in plastic wrap and place it in a freezer-safe container. It can be frozen for up to 3 months—just remember to thaw it in the fridge before serving for the best texture!
Room Temperature: If you plan to enjoy the fudge within a day or two, it can sit at room temperature, covered, for up to 24 hours. Keep it out of direct sunlight to maintain its vibrant colors.
Reheating: There’s no need to reheat your Vampire Fudge; simply slice and enjoy straight from the fridge!
What to Serve with Vampire Fudge
As you prepare to indulge in this sweet treat, consider these delightful pairings to create a memorable Halloween feast.
-
Crispy Apple Slices: The tartness of fresh apples complements the rich fudge beautifully, offering a refreshing crunch.
-
Pumpkin Spice Latte: A warm, spiced drink that echoes the flavors of fall, enhancing the cozy Halloween vibes of your dessert.
-
Spooky Cheese Platter: Add some sharp cheddar and creamy brie to balance the sweetness, creating a perfect contrasting flavor experience.
-
Ghostly Marshmallow Treats: These fluffy, sweet bites add a whimsical touch to your spread and are always a kid favorite.
-
Hot Chocolate with Whipped Cream: This classic pairing wraps you in warmth while the creamy hot chocolate enhances the fudge’s richness.
-
Candy Corn Medley: A vibrant, crunchy sweet that echoes Halloween festivities, adding bright colors to your dessert table.
-
Chocolate-Covered Strawberries: Juicy and sweet, these fruits provide a delightful textural contrast with smooth fudge, creating a treat that feels indulgent.
-
Red Wine or Sparkling Cider: A subtle tang from your drink enhances the fudge’s sweetness while keeping your gathering festive and fun.
-
Chilling Halloween Punch: A spooky-themed punch with fruity flavors offers a festive vibe and refreshes the palate between bites of fudge.
-
Ghost-shaped Cookies: These delightful cookies add fun to the table, perfect for tying your Halloween theme together while satisfying those cookie cravings!
Vampire Fudge Recipe FAQs
How can I select the best candy melts for my Vampire Fudge?
Absolutely! When choosing candy melts, look for those that have a glossy appearance and make sure to check the expiration date. Fresh candy melts have a smooth texture and vibrant color, ensuring that your fudge looks impressive. If you notice any clumping or an off odor, it’s best to opt for fresh ones instead.
How should I store leftover Vampire Fudge?
I recommend storing your Vampire Fudge in an airtight container in the fridge for up to one week. This helps maintain its creamy texture while keeping it fresh. Just make sure it’s tightly sealed to prevent it from picking up any residual odors from your refrigerator.
Can I freeze Vampire Fudge for later?
Yes, you can definitely freeze your Vampire Fudge! Just wrap it tightly in plastic wrap and place it in a freezer-safe container. It will remain delicious for up to three months. When you’re ready to enjoy it, simply thaw it in the refrigerator for several hours before serving to ensure the best texture.
What should I do if my fudge doesn’t set properly?
If you find that your fudge hasn’t set after chilling for the recommended 4 hours, it might need a little more time in the fridge—sometimes 5 or 6 hours can do the trick. Also, make sure that you’ve used the right ratio of frosting to candy melts; if there’s too much frosting, the fudge may not firm up as expected. If it’s a recurring issue, consider slightly reducing the frosting next time.
Is Vampire Fudge safe for pets?
While Vampire Fudge is a delightful treat for humans, be cautious with pets. The ingredients, particularly chocolate (if used), can be toxic to dogs and some other pets. Always ensure that any leftovers are stored where pets cannot access them and opt for pet-safe treats to share with your furry friends instead.
Can I make Vampire Fudge dairy-free or vegan?
Absolutely! You can customize the recipe by using dairy-free cream cheese frosting and vegan candy melts. Most brands offer great dairy-free options nowadays. Just check the labels to ensure they fit your dietary needs, and you’ll have a spooky treat that everyone can enjoy!
Vampire Fudge Recipe: Indulge in Spooky Creamy Delights
Ingredients
Equipment
Method
- Prepare the pan by lightly greasing an 8" x 8" cake pan and lining it with parchment paper.
- In a microwave-safe bowl, combine the black candy melts and heat them in the microwave for 2 minutes, stirring every 30 seconds until smooth.
- In another bowl, place your red candy melts and heat them in the microwave for approximately 2 minutes, stirring until fully melted.
- Warm the cream cheese frosting in the microwave for about 45 seconds until smooth and creamy.
- Divide the warmed cream cheese frosting equally between the bowls of melted black and red candy melts and stir until combined.
- Carefully alternate pouring the black and red mixtures into the prepared pan, letting the colors swirl together.
- Gently tap the pan on the counter to even the fudge mixture and eliminate any air bubbles.
- Refrigerate the fudge for approximately 4 hours to set thoroughly.
- Use the parchment paper to lift the fudge out of the pan and cut it into squares.
- Store any leftovers in an airtight container in the fridge for up to a week.
Leave a Reply