
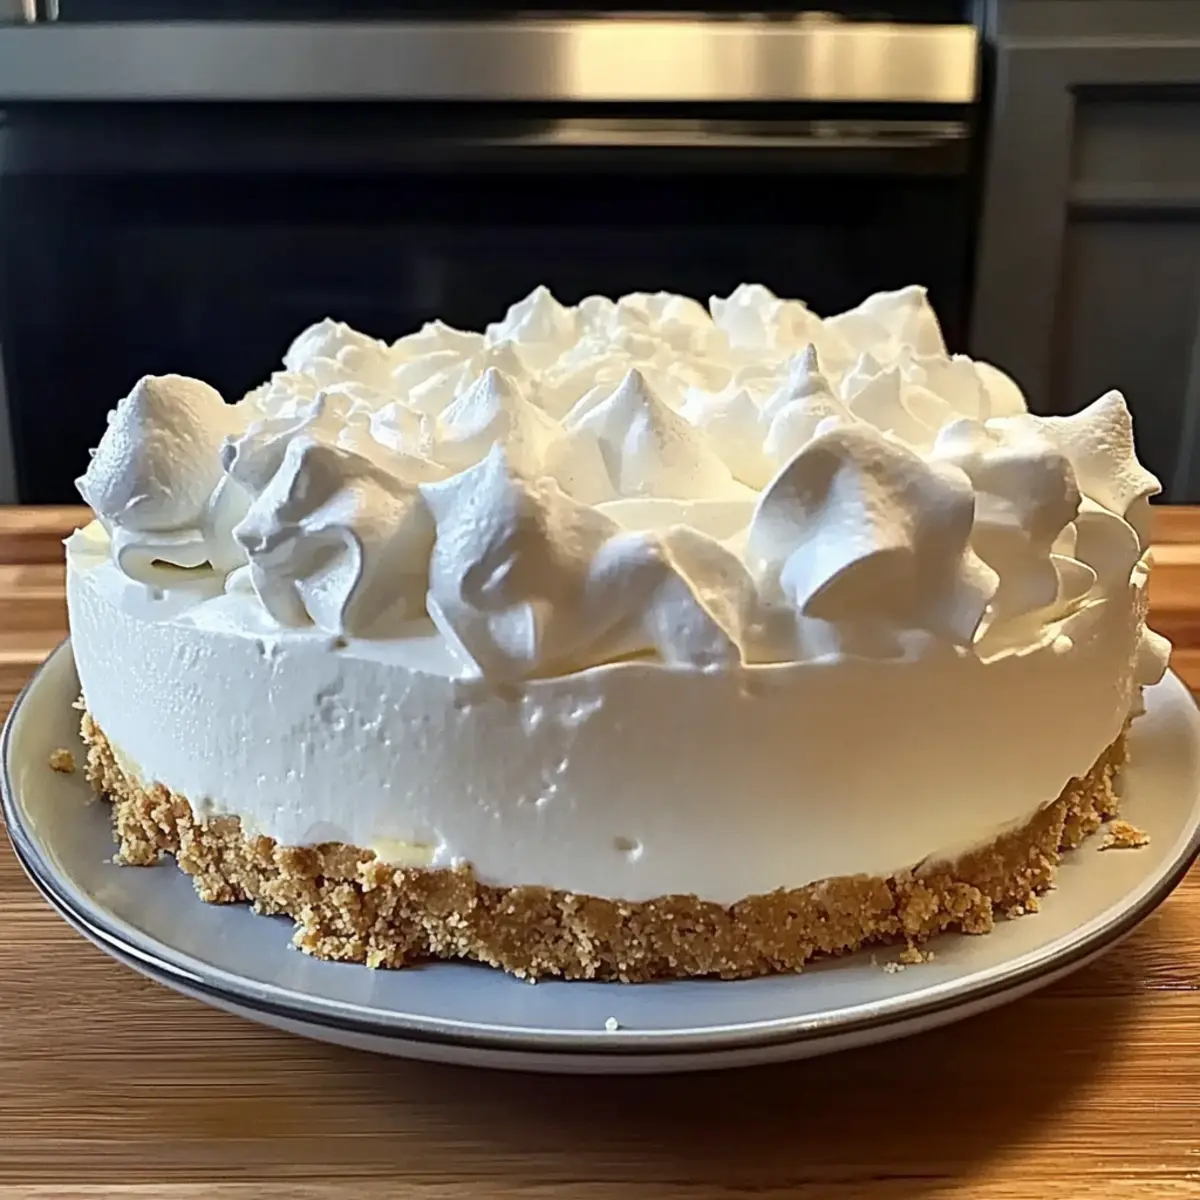
As I was rummaging through my pantry one warm afternoon, I stumbled upon a treasure trove of ingredients begging to be transformed into something magical. That’s when I decided to whip up a No-Bake Marshmallow Whip Cheesecake—an effortless, heavenly dessert that requires no oven at all! With its light and creamy texture, it’s not just easy to make; it’s also a delightful crowd-pleaser perfect for any gathering or a refreshing treat on a sunny day. The buttery graham cracker crust adds the ideal crunch that effortlessly balances the sweet and tangy filling. Plus, you can easily adjust this recipe to be gluten-free if needed! So, are you ready to elevate your dessert game and impress your friends with this simple yet scrumptious cheesecake? Let’s dive into the recipe!

Why is This Cheesecake a Must-Try?
Simplicity at its Finest: This no-bake cheesecake is incredibly easy to whip up, making it perfect for kitchen novices and busy cooks alike.
Light and Luscious: With its fluffy marshmallow filling and a buttery graham cracker crust, each bite delivers a symphony of flavors and textures that melt in your mouth.
Versatile Flavor Options: Feel free to add your favorite toppings like seasonal fruits or a drizzle of chocolate sauce, allowing you to customize the cheesecake to your personal taste. Want something more indulgent? Try incorporating elements from Oreo Cheesecake Cookie or Strawberry Crunch Cheesecake.
Perfect for Any Occasion: This dessert shines at summer barbecues or festive gatherings, making it an ideal choice for bringing smiles to your friends and family.
Make-Ahead Marvel: You can prepare this cheesecake a day or two in advance, leaving you plenty of time to enjoy the event without stress!
Marshmallow Whip Cheesecake Ingredients
For the Graham Cracker Crust
• Graham Crackers – 12 full sheets, crushed into fine crumbs for that perfect crunch.
• Butter – ½ cup, melted to bind the crumb mixture together.
• Sugar – 2 tablespoons, optional for a touch of sweetness in the crust.
For the Cheesecake Filling
• Cream Cheese – 8 oz, softened to room temperature for easy mixing.
• Marshmallow Creme – 1 cup, the star ingredient that adds sweetness and lightness to your Marshmallow Whip Cheesecake.
• Cool Whip – 1 cup, or substitute with homemade whipped cream for a fresher taste.
• Vanilla Extract – 1 teaspoon, to elevate the flavor profile.
For Garnishing
• Whipped Cream – For topping, adds an extra layer of creaminess.
• Berries or Chocolate Sauce – Optional, perfect for a beautiful presentation and additional flavors.
Feel free to mix things up or customize as you go!
Step‑by‑Step Instructions for Marshmallow Whip Cheesecake
Step 1: Prepare the Graham Cracker Crust
Begin by preheating your oven to 350°F (175°C) if you’re opting for a baked crust. In a medium bowl, combine the crushed graham crackers, melted butter, and sugar until well mixed. Press this mixture firmly into the bottom of a 9-inch springform pan to create an even layer. Bake for 8-10 minutes, then remove and allow to cool completely while you prepare the filling.
Step 2: Beat the Cream Cheese
In a mixing bowl, beat the softened cream cheese using an electric mixer on medium speed until it’s smooth and fluffy, about 2-3 minutes. The cream cheese should have no lumps and have a creamy consistency. This step ensures a rich texture in your Marshmallow Whip Cheesecake, setting the foundation for the perfect filling.
Step 3: Mix in Marshmallow Creme
Add the marshmallow creme and vanilla extract to the whipped cream cheese and continue mixing on medium speed until combined. This should take about 1-2 minutes, creating a thick, sweet filling. The airiness of the cream cheese, mixed with the sweetness of the marshmallow creme, is what makes this cheesecake so delightful.
Step 4: Fold in the Whipped Topping
Gently fold in the cool whip or homemade whipped cream into the cheesecake mixture using a spatula. Make sure to keep the mixture light and airy by folding carefully until no streaks remain. This step is crucial for achieving the light and creamy texture that the Marshmallow Whip Cheesecake is known for.
Step 5: Fill the Crust
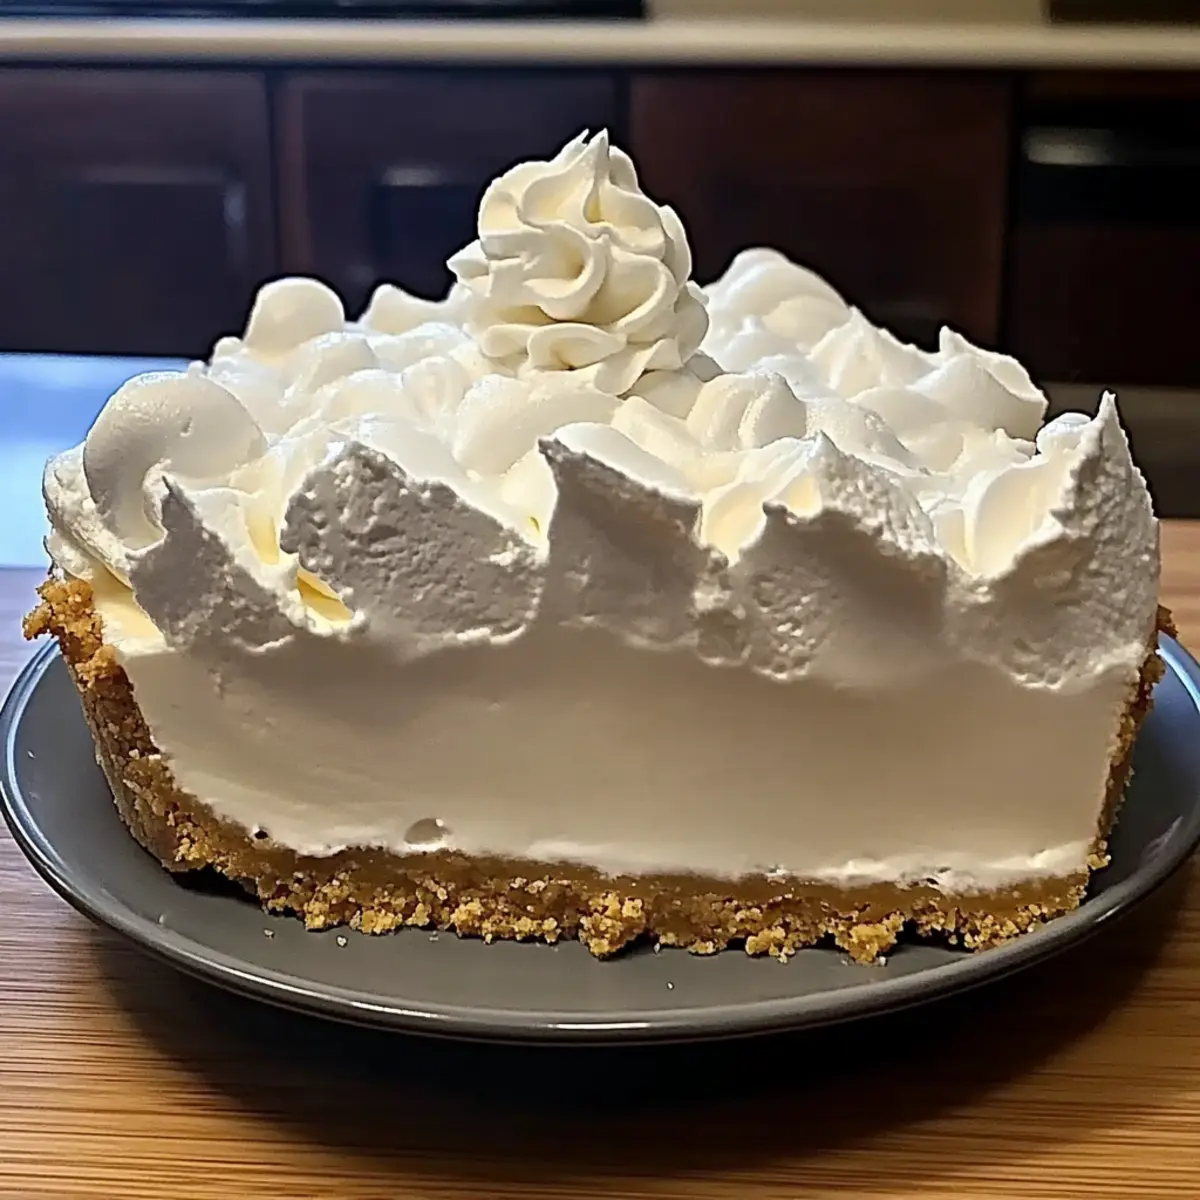
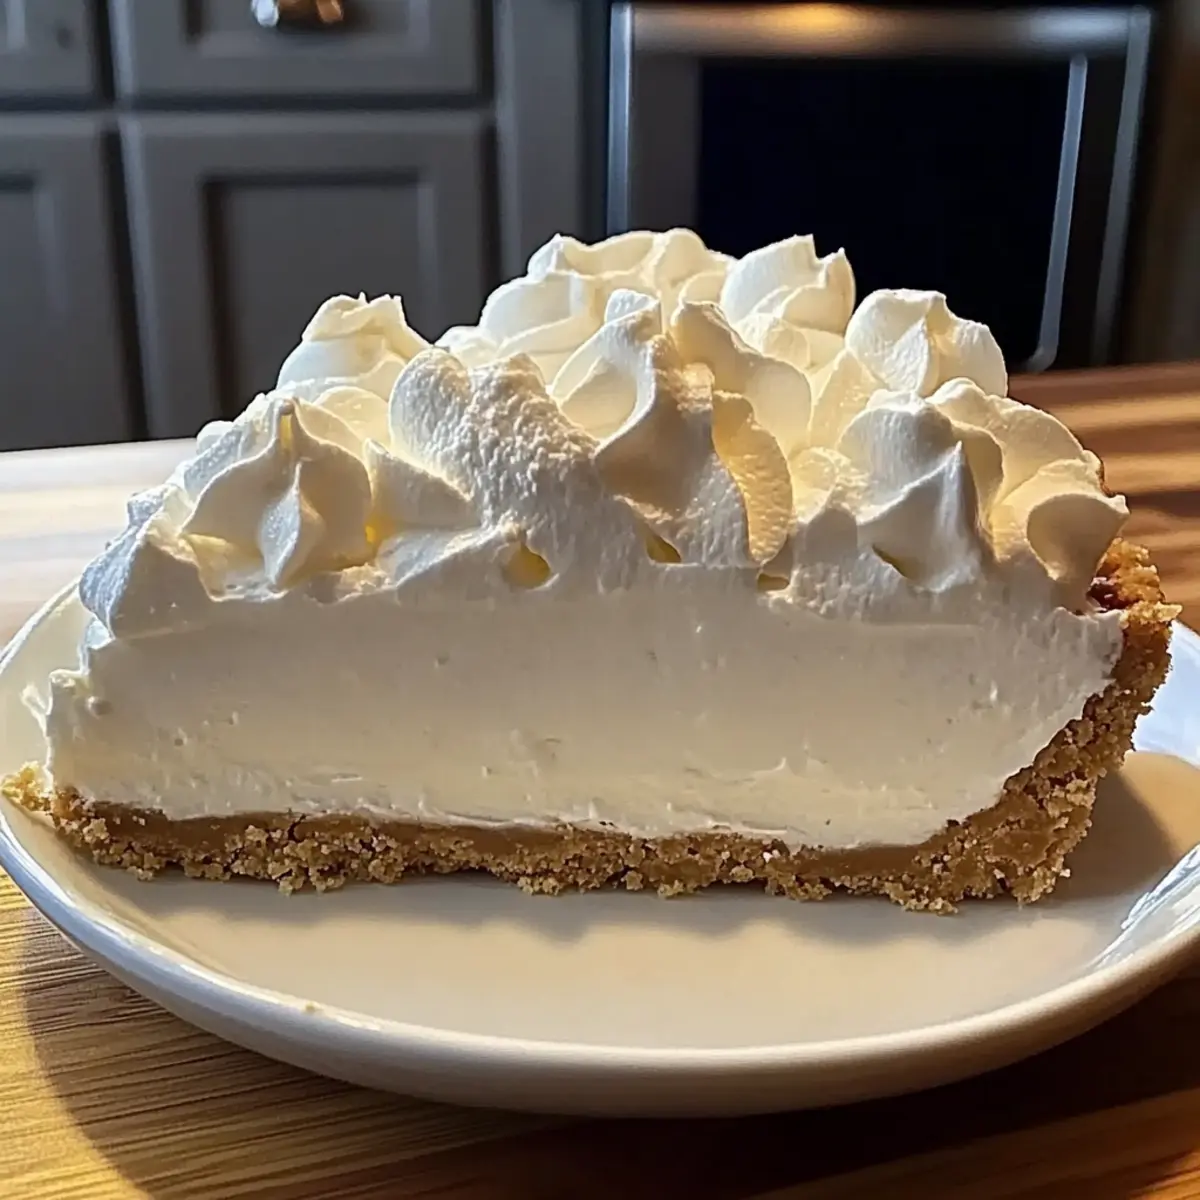
Once the crust is completely cool, pour the cheesecake mixture into the prepared graham cracker crust. Spread it evenly to ensure consistent texture throughout the cheesecake. Using an offset spatula, smooth out the top to create a beautiful finish. Now it’s time to let this dessert set!
Step 6: Chill the Cheesecake
Cover the springform pan with plastic wrap, and place it in the refrigerator to chill for at least 4 hours, or overnight for the best results. The cheesecake needs this time to firm up and develop its flavors. When ready, the filling should feel set but still have a creamy texture.
Step 7: Garnish and Serve
Before serving, remove the cheesecake from the springform pan and transfer it to a serving platter. Top with whipped cream, fresh berries, or a drizzle of chocolate sauce for an indulgent touch. Slice into portions and enjoy the delightful layers of your homemade Marshmallow Whip Cheesecake!
Expert Tips for Marshmallow Whip Cheesecake
-
Chill Time Matters: Allow your cheesecake to chill overnight if possible. This enhances the flavors and ensures a perfectly set texture that’s simply irresistible.
-
Stiff Peaks Essential: Be sure to whip your cream to stiff peaks before folding it into the filling. This step is key for achieving the light and airy consistency of your Marshmallow Whip Cheesecake.
-
Graham Cracker Substitutes: To make a gluten-free version, use gluten-free graham crackers for the crust. Ensure all ingredients used align with gluten-free dietary needs for optimal enjoyment.
-
Whip Cream Carefully: When folding in the whipped topping, use a gentle motion. Overmixing can deflate the airiness you worked hard to create, leading to a denser cheesecake.
-
Customize Your Toppings: Don’t hold back on garnishes! Experiment with different fruits, sauces, or crushed candies to make each cheesecake uniquely delightful.
How to Store and Freeze Marshmallow Whip Cheesecake
Fridge: The cheesecake can be kept in the refrigerator for up to 3 days. Cover it tightly with plastic wrap or aluminum foil to maintain its freshness and prevent it from absorbing any odors.
Freezer: If you want to freeze the cheesecake, wrap individual slices or the whole cheesecake in plastic wrap followed by aluminum foil. This will keep it protected for up to 2 months.
Thawing: To thaw frozen cheesecake, transfer it to the fridge for about 6-8 hours before serving. This gradual thawing helps retain its creamy texture.
Reheating: This is a no-bake dessert, so reheating isn’t necessary. Just serve chilled, and you’re ready to enjoy your delightful Marshmallow Whip Cheesecake!
What to Serve with Marshmallow Whip Cheesecake
Indulging in a slice of creamy cheesecake can be even more rewarding when paired with delightful accompaniments that enhance the experience.
-
Fresh Berries: Their juicy sweetness and tartness balance the cheesecake’s richness, adding a refreshing pop with every bite. Strawberries, blueberries, or raspberries are especially vibrant choices to bring color and zest.
-
Chocolate Drizzle: A rich, velvety chocolate sauce creates an exquisite contrast to the airy cheesecake. It transforms each mouthful into a chocolate lover’s dream, adding depth and luxurious sweetness.
-
Whipped Cream: Topping your cheesecake with a dollop of freshly whipped cream elevates indulgence to new heights. Its airy consistency mirrors the cheesecake’s lightness while adding a smooth, creamy layer.
-
Lemon Sorbet: This zesty and refreshing dessert juxtaposes the sweet flavors wonderfully while cleansing the palate. The citrus notes brighten the experience, making each bite feel lighter.
-
Nutty Granola: A sprinkling of granola introduces a satisfying crunch that complements the soft creaminess. Its wholesome flavors create a delightful texture that both contrasts and complements the cheesecake.
-
Iced Tea or Lemonade: A chilled glass of sweet iced tea or citrusy lemonade serves as the perfect refreshing refreshment. These beverages enhance the celebratory feel of enjoying your cheesecake on a warm day.
Marshmallow Whip Cheesecake Variations
Feel free to explore these delightful twists on your Marshmallow Whip Cheesecake for a personal touch!
-
Gluten-Free Crust: Use gluten-free graham crackers for the crust to make this dessert suitable for those with gluten sensitivities. Everyone deserves a slice of this creamy delight!
-
Citrusy Zest: Add a squeeze of fresh lemon juice to the filling for a refreshing twist that beautifully balances the sweetness. This zesty touch awakens your taste buds!
-
Chocolate Love: Swirl in melted chocolate into the cheesecake filling for a chocolate lover’s dream. Not only does it enhance flavor, but it also creates a visually stunning marbled effect.
-
Berry Bliss: Top your cheesecake with fresh seasonal fruits like strawberries or blueberries for a pop of color and a burst of freshness. This fruity addition makes for a delightful presentation!
-
Nutty Crunch: Incorporate chopped nuts like pecans or walnuts into the filling for added texture and flavor. The crunch provides a lovely contrast to the smooth filling.
-
Caramel Drizzle: Drizzle homemade or store-bought caramel sauce over the cheesecake before serving for a rich, sweet finish. It’s an indulgent treat that elevates the dessert!
-
Minty Fresh: Add a few drops of peppermint extract to the filling for a cool, minty flavor. This refreshing variation is perfect for summer gatherings!
-
Peanut Butter Swirl: Mix in smooth peanut butter into the cheesecake filling for a creamy, nutty flavor explosion. Peanut butter and marshmallow creme are a match made in dessert heaven!
Have fun experimenting with these variations, and don’t forget to check out our other delicious desserts like Oreo Cheesecake Cookie and Blueberry Crumble Cheesecake!
Make Ahead Options
These Marshmallow Whip Cheesecakes are a lifesaver for busy home cooks looking to save time while still impressing guests! You can prepare the crust and the cheesecake filling up to 24 hours in advance, allowing flavors to develop and making your special occasion stress-free. To do this, make the graham cracker crust and press it into your pan, then prepare the cheesecake filling but refrain from adding the whipped cream until you’re ready to serve. Cover and refrigerate the crust and filling separately; this prevents the crust from becoming soggy. When it’s time to serve, gently fold the whipped topping into the filling, pour it into the crust, and refrigerate for an additional 30 minutes to set—ensuring your dessert is just as delicious as if made fresh!
Marshmallow Whip Cheesecake Recipe FAQs
How do I select ripe ingredients for my cheesecake?
Absolutely! For the best flavor and texture, choose fresh ingredients. Ensure your cream cheese is softened for about 30 minutes at room temperature before mixing. If opting for fresh toppings, select berries that are vibrant and plump, avoiding any with dark spots.
What is the best way to store my cheesecake?
Very good question! Store your Marshmallow Whip Cheesecake in the refrigerator, covered with plastic wrap or aluminum foil, for up to 3 days. This keeps it fresh and prevents it from absorbing any unwanted odors from the fridge.
Can I freeze Marshmallow Whip Cheesecake?
Absolutely! You can freeze the cheesecake for up to 2 months. Wrap individual slices or the entire cheesecake in plastic wrap, then place it into a freezer bag or cover it in aluminum foil to prevent freezer burn. When you’re ready to enjoy it, thaw in the fridge for 6-8 hours before serving.
Why is my cheesecake not setting properly?
If your cheesecake isn’t setting, it might need more chill time. Aim for at least 4 hours in the refrigerator, but overnight is best for optimal firmness. Ensure you’ve folded the whipped topping in gently but thoroughly to maintain that light and airy texture; overmixing can deflate the filling.
Is this cheesecake suitable for those with gluten allergies?
The recipe can be tailored to be gluten-free! Simply substitute regular graham crackers with gluten-free ones. Always double-check your ingredients, especially the whipped topping, as some brands may contain gluten.
Marshmallow Whip Cheesecake: Your Go-To No-Bake Delight
Ingredients
Equipment
Method
- Prepare the Graham Cracker Crust: Combine the crushed graham crackers, melted butter, and sugar in a bowl. Press into a 9-inch springform pan. Bake at 350°F for 8-10 minutes. Cool completely.
- Beat the Cream Cheese: In a bowl, beat the cream cheese with an electric mixer until smooth and fluffy, about 2-3 minutes.
- Mix in Marshmallow Creme: Add marshmallow creme and vanilla extract to the cream cheese and mix until combined, about 1-2 minutes.
- Fold in the Whipped Topping: Gently fold in cool whip or homemade whipped cream until no streaks remain.
- Fill the Crust: Pour the cheesecake mixture into the cooled crust and smooth the top.
- Chill the Cheesecake: Cover with plastic wrap and refrigerate for at least 4 hours or overnight.
- Garnish and Serve: Remove from the springform pan, top with whipped cream, and serve with berries or chocolate sauce.
Leave a Reply