
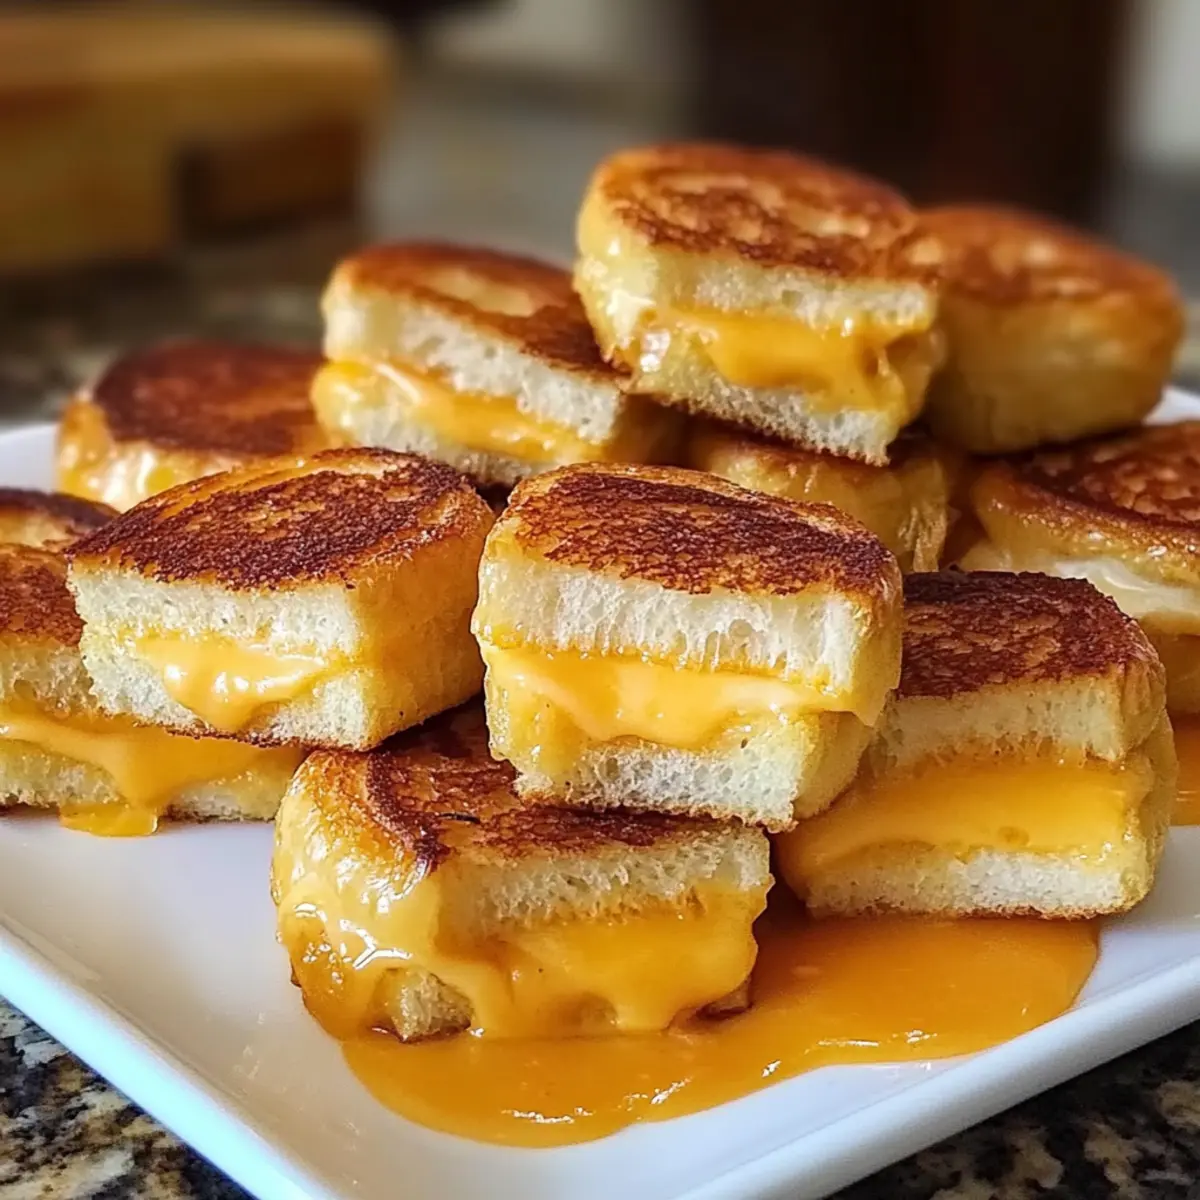
It all started when I was craving a cozy snack that didn’t require hours of cooking—something simple yet satisfying. Enter the Mini Grilled Cheese Hawaiian Rolls! These delightful bites combine the familiar comfort of grilled cheese with the soft, slightly sweet goodness of Hawaiian rolls, making them a hit at any gathering. Not only are they incredibly easy to whip up, but they also make for a charming crowd-pleaser that everyone will adore. With just one pan and a handful of ingredients, you can create a delicious appetizer or snack that turns any occasion into a cozy feast. Are you ready to discover how to elevate your cheese game? Let’s dive into this tasty recipe that’s bound to become a favorite!

Why are these rolls a must-try?
Simplicity at its finest: With minimal prep and a single pan, these Mini Grilled Cheese Hawaiian Rolls are a breeze to make, perfect for even the busiest cooks.
Irresistible flavor: The blend of creamy cheeses paired with the sweet softness of Hawaiian rolls makes for an unforgettable bite that will have everyone coming back for seconds.
Versatile fillings: Customize them to your heart’s content! From rich, gooey cheese to tantalizing bacon or even grilled chicken, you can easily adapt this recipe to suit any taste.
Great for gatherings: These rolls are not just a snack; they transform into a delightful appetizer for parties, game days, or family dinners. Pair them with a warm bowl of tomato soup for ultimate comfort!
Make-ahead option: Prep them in advance and bake right before serving, so you can spend more time enjoying time with loved ones rather than in the kitchen.
Dive into more delicious creations like these Savory Ham Cheese puffs or make a complete meal with a Grilled Chicken Pasta salad!
Mini Grilled Cheese Hawaiian Rolls Ingredients
For the Rolls
- Hawaiian Rolls – These soft rolls provide a subtly sweet base that assures each bite is moist and delicious.
- Butter – Adds richness and creates a golden, crisp top; consider mixing in some garlic powder for extra flavor.
For the Filling
- Cheese Blend – A combination of cheeses like cheddar, mozzarella, Swiss, or provolone ensures a gooey, comforting filling that everyone will love.
- Bacon (optional) – Introduces savory richness; substitute with turkey bacon or chicken bacon if desired.
For Seasoning
- Seasonings (garlic powder, onion powder, herbs) – Elevate the flavor profile; customize to your liking, as these elements make the Mini Grilled Cheese Hawaiian Rolls even more irresistible!
Step‑by‑Step Instructions for Mini Grilled Cheese Hawaiian Rolls
Step 1: Preheat the Oven
Begin by preheating your oven to 350°F (175°C). This temperature is essential for achieving that perfect golden-brown finish on your Mini Grilled Cheese Hawaiian Rolls. While the oven warms up, gather your ingredients and prepare your baking dish, ensuring everything is ready for the next steps.
Step 2: Prepare the Rolls
Carefully slice the Hawaiian rolls horizontally, keeping them connected at the seams. This will create a top and bottom layer, allowing you to fill them easily. Place the bottom half in your prepared baking dish, ensuring it’s even and flat for the delicious fillings that will follow.
Step 3: Add the Cheese
Layer your chosen cheese blend evenly across the bottom half of the Hawaiian rolls. Choose a generous amount to ensure gooeyness in every bite, mixing cheeses such as cheddar and mozzarella for a delightful melty texture. This is where the heart of your Mini Grilled Cheese Hawaiian Rolls begins to take shape!
Step 4: Incorporate Bacon (Optional)
If you’re using bacon, crumble or layer it over the cheese for added flavor and richness. Press it gently into the cheese to ensure it adheres well. This savory touch will elevate your rolls and make them even more irresistible. Remember, it’s optional, so feel free to skip it if you prefer a vegetarian version!
Step 5: Close the Sandwiches
Place the top half of the Hawaiian rolls back onto the cheese and bacon layer. Make sure they align properly, creating a complete sandwich. This step is crucial in keeping all your gooey goodness contained while baking, ensuring a delightful bite of melted cheese in every mouthful.
Step 6: Butter and Season
Melt butter in a small bowl and mix in garlic powder and any other herbs/seasonings you like. Brush this flavorful mixture generously over the top of the assembled rolls. This adds rich flavor and helps develop a beautifully crispy crust as they bake, enticing everyone with the tantalizing aroma.
Step 7: Bake the Rolls
Cover your baking dish with aluminum foil and place it in the oven. Bake for 12 minutes to allow the cheese to melt thoroughly. After this time, remove the foil and continue baking for an additional 6-8 minutes. You’ll know they’re done when the tops are golden brown and bubbling, creating a mouthwatering sight!
Step 8: Let Cool and Slice
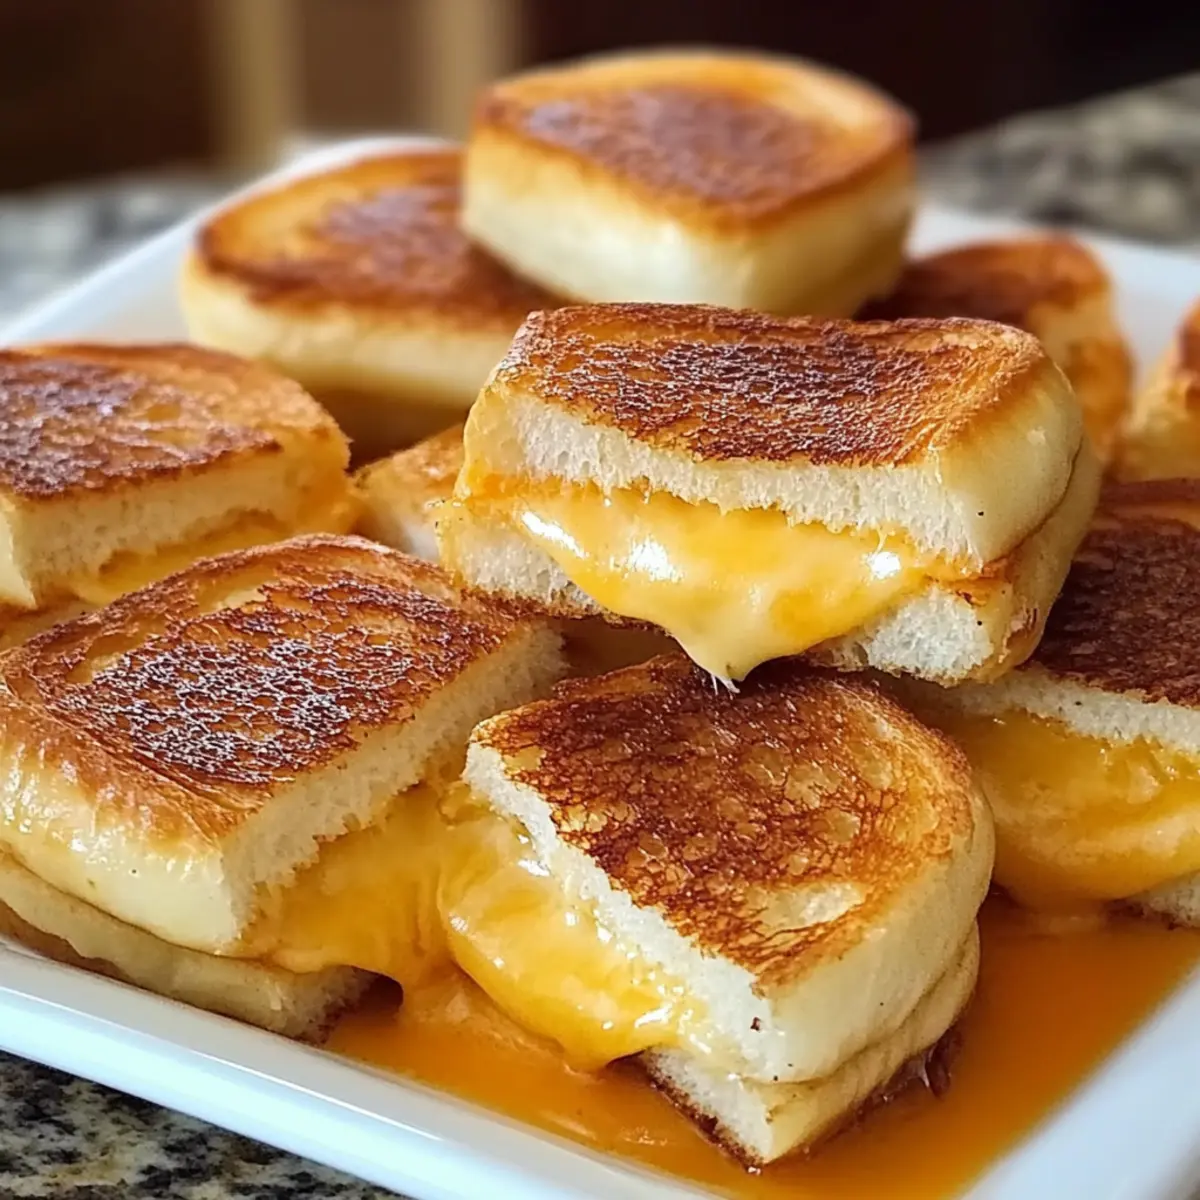
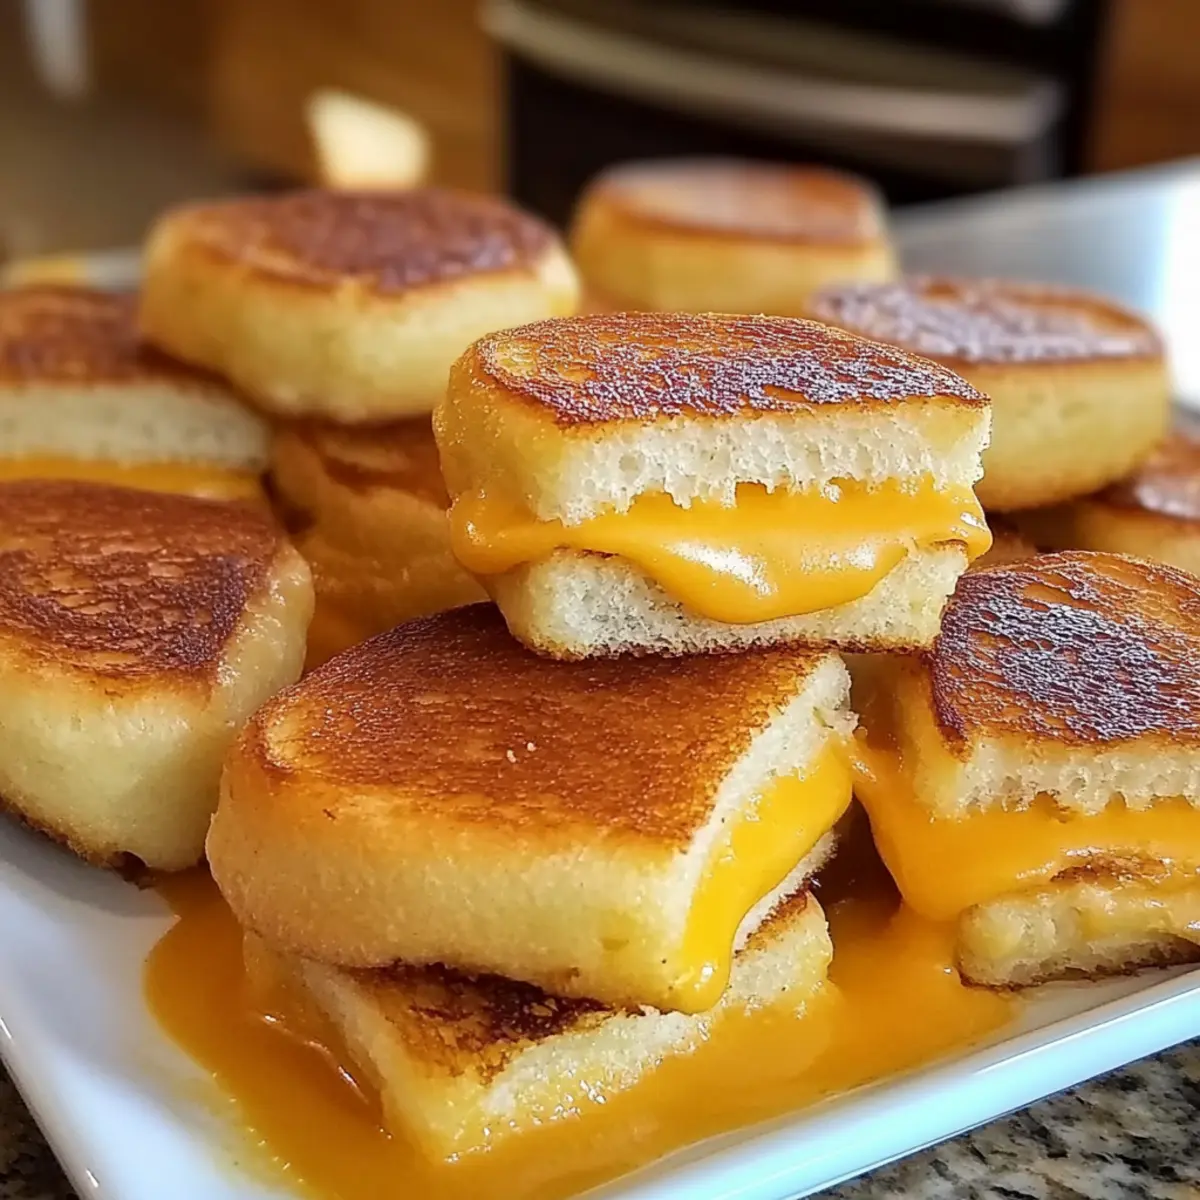
Once baked, take the Mini Grilled Cheese Hawaiian Rolls out of the oven and let them cool for a couple of minutes. This cooling period makes them easier to slice for serving. Cut them into individual portions to share the warmth and cheesy goodness, ready to be enjoyed by all.
Expert Tips for Mini Grilled Cheese Hawaiian Rolls
-
Press Lightly: Lightly pressing on the rolls before baking prevents cheese from pooling out, keeping your rolls neat and tidy.
-
Foil Coverage: Covering with foil for the first half of the baking process ensures even melting; uncover for the last few minutes for that perfect crisp top.
-
Flavor Boost: Don’t shy away from using flavored butter; mix in garlic powder or herbs to enhance taste, adding a delicious touch to your Mini Grilled Cheese Hawaiian Rolls.
-
Storage Essentials: If you have leftovers, store them in an airtight container. Rewarm in the oven wrapped in foil to maintain softness and crispy texture.
-
Cheese Combos: Feel free to experiment with cheese blends! Mixing spicy pepper jack or creamy goat cheese can add a delightful twist to the traditional flavor.
Make Ahead Options
These Mini Grilled Cheese Hawaiian Rolls are perfect for meal prep enthusiasts! You can assemble the rolls and refrigerate them unbaked for up to 24 hours before popping them in the oven. Just follow the initial steps of slicing and layering the cheese (and bacon, if desired), then cover the dish tightly with plastic wrap to maintain moisture. When ready to enjoy, simply bake them straight from the fridge, adding a few extra minutes to the baking time if needed. This way, you’ll have a comforting and delicious appetizer with minimal effort, allowing you to spend more quality time with loved ones instead of slaving in the kitchen.
What to Serve with Mini Grilled Cheese Hawaiian Rolls
Whether you’re hosting friends or enjoying a cozy family dinner, these little bites can be paired with delightful accompaniments for a full experience.
-
Creamy Tomato Soup: This classic pairing adds a warm and comforting dip, enhancing the gooeyness of the rolls. The bright acidity of the soup perfectly balances the rich cheeses.
-
Fresh Garden Salad: A crunchy salad with mixed greens and a tangy vinaigrette provides a light contrast to the savory rolls. The freshness revitalizes each bite, making for a well-rounded meal.
-
Crispy Potato Wedges: These golden, crispy wedges bring texture and heartiness to the table. Their mild flavor complements the sweetness of the Hawaiian rolls, making every mouthful scrumptious.
-
Spicy Pickles: For those who love a kick, tangy, spicy pickles offer a zesty crunch. They cut through the richness of the cheese, bringing a burst of flavor that keeps your taste buds dancing.
-
Sweet Chili Dipping Sauce: This delightful sauce adds a sweet heat that pairs beautifully with the cheesy goodness. Perfect for drizzling or dipping, it’s a fun twist to enhance the experience.
-
Herb-Infused Sparkling Water: Refreshing and bubbly, a glass of this beverage cleanses the palate between bites. Infuse it with hints of lemon or mint, creating a vibrant pairing that feels festive.
-
Chocolate Chip Cookies: For dessert, these warm, gooey cookies add a sweet finish to the meal. The classic flavors of chocolate and vanilla echo the nostalgic charm of the grilled cheese rolls.
Transform your meal with these delightful sides, and watch as everyone enjoys the cozy warmth of home-cooked goodness!
Storage Tips for Mini Grilled Cheese Hawaiian Rolls
- Room Temperature: These rolls are best enjoyed fresh, but if left out, consume them within 2 hours to ensure optimal flavor and safety.
- Fridge: Store leftovers in an airtight container for up to 3 days. To maintain their delightful texture, reheat gently in the oven.
- Freezer: For longer storage, freeze assembled rolls before baking for up to 1 month. Thaw in the fridge overnight before baking for the best results.
- Reheating: When ready to enjoy leftovers, reheat in the oven at 350°F (175°C) for about 10 minutes, covered with foil to keep them soft.
Mini Grilled Cheese Hawaiian Rolls Variations
Feel free to get creative with these delightful rolls, and let your taste buds lead the way to new flavor horizons!
-
Bold Cheese: Swap out the standard cheeses for pepper jack to add a spicy kick that will awaken your senses.
-
Savory Bacon: Use turkey bacon or chicken bacon if you’re aiming for a lighter option, adding heartiness without sacrificing flavor.
-
Load with Veggies: Incorporate sautéed bell peppers or caramelized onions for an extra layer of sweetness and crunch.
-
Herb-Infused Butter: Mix fresh herbs like basil or thyme into your butter for a fragrant touch that elevates the rolls.
-
BBQ Twist: Brush the tops with BBQ sauce before baking for a smoky, tangy flavor that pairs beautifully with cheese.
-
Meaty Goodness: Add thinly sliced grilled chicken or shredded beef brisket for added protein and a more robust snack.
-
Nutty Crunch: Sprinkle chopped nuts, such as walnuts or pecans, over the cheese for an unexpected texture and added richness.
Looking for a satisfying side? Why not pair these rolls with a comforting bowl of Cozy Southern Cheese casserole or some delightful Grilled Gremolata Prawns? The combinations are endless!
Mini Grilled Cheese Hawaiian Rolls Recipe FAQs
What type of Hawaiian rolls should I use?
Absolutely use soft, fresh Hawaiian rolls for the best results! These rolls offer that subtle sweetness paired with fluffy texture that makes your Mini Grilled Cheese Hawaiian Rolls so delightful. Avoid any rolls that have dark spots or feel stale!
How should I store leftover Mini Grilled Cheese Hawaiian Rolls?
Store any leftovers in an airtight container in the refrigerator for up to 3 days. When you’re ready to enjoy them again, I recommend reheating them in the oven at 350°F (175°C) for about 10 minutes. This method helps maintain their soft texture and delightful crispy top.
Can I freeze Mini Grilled Cheese Hawaiian Rolls?
Certainly! You can freeze assembled, unbaked rolls for up to 1 month. To do this, prepare the rolls following the instructions, but do not bake. Wrap them tightly in plastic wrap and place them in a freezer-safe bag. When ready to bake, thaw them in the refrigerator overnight before following the baking steps.
What if my cheese doesn’t melt well?
No worries! If your cheese seems to be pooling or not melting evenly, lightly pressing the rolls before baking can help. Additionally, cover the rolls with foil for the first half of baking to promote even melting. Uncover them for the last few minutes to achieve that golden, crispy top.
Are there any dietary considerations I should be aware of?
Yes, it’s important to take note of allergies! Always check the specific cheese and seasoning ingredients you use, as many cheese varieties and seasoning mixes can contain allergens. If you have pets, keep in mind that certain ingredients like garlic are toxic to dogs, so remove any leftovers out of their reach.
Melt-in-Your-Mouth Mini Grilled Cheese Hawaiian Rolls
Ingredients
Equipment
Method
- Preheat the oven to 350°F (175°C) and prepare your baking dish.
- Carefully slice the Hawaiian rolls horizontally, keeping them connected at the seams.
- Layer the cheese blend evenly across the bottom half of the Hawaiian rolls.
- If using bacon, add it over the cheese and press gently to adhere.
- Place the top half of the rolls back onto the cheese and bacon layer.
- Melt the butter, mix with garlic powder and brush it over the top of the rolls.
- Cover with foil and bake for 12 minutes, then uncover and bake for an additional 6-8 minutes.
- Let cool for a couple of minutes before slicing and serving.
Leave a Reply