
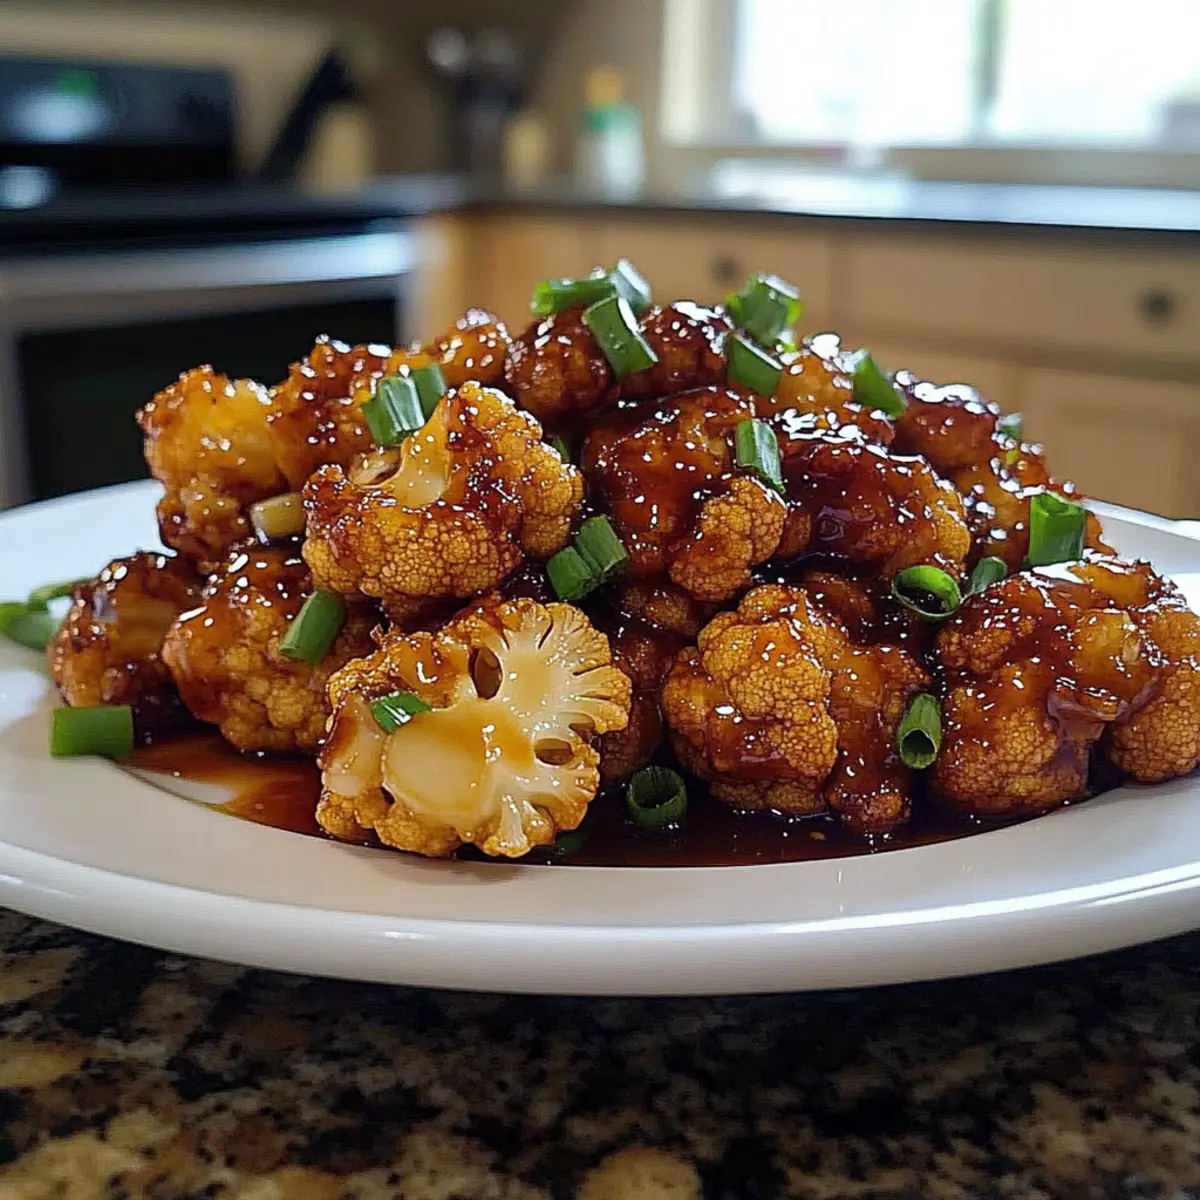
The aroma wafting through my kitchen reminds me of an unforgettable night spent in a bustling eatery, where each bite brought pure joy. Meet my Sticky Honey Garlic Cauliflower, a delightful dish that transforms humble cauliflower into a savory, sticky wonder. This vegetarian gem is not only packed with flavor but also incredibly easy to whip up, making it a perfect solution for busy weeknights. With a sweet glaze that rivals any takeout, it’s sure to satisfy your cravings while keeping your meals fresh and wholesome. Plus, it’s gluten-free if you opt for tamari! Are you ready to elevate your dinner game with this mouthwatering recipe?
Why is this recipe a must-try?
Irresistible flavor: The delectable blend of honey, garlic, and sesame oil creates a rich, sticky glaze that will have everyone coming back for seconds.
Healthier takeout alternative: Satisfy your cravings without the guilt—this dish is plant-based and can be easily customized to fit gluten-free diets by using tamari instead of soy sauce.
Quick preparation: You can whip this up in under 30 minutes, making it perfect for busy weeknights or last-minute guests.
Flexibility galore: Enjoy it as a main course or as a colorful side, and for an extra crunch, check out my Pan Fried Garlic Tofu to pair alongside it!
Mouthwatering texture: Each bite offers a delightful contrast—crispy cauliflower on the outside, tender on the inside, all enveloped in that luscious glaze.
Get ready to impress your family and friends with this show-stopping dish!
Sticky Honey Garlic Cauliflower Ingredients
For the Cauliflower
• Cauliflower – A large head gives the dish its hearty structure, cut into bite-sized florets for easy handling.
For the Glaze
• Olive oil – Two tablespoons are essential for roasting; it adds flavor and helps achieve that golden-brown finish.
• Honey – Adds delightful sweetness to the glaze; feel free to adjust the amount based on your preference.
• Soy sauce – Brings savory depth to the dish; swap for tamari to make it gluten-free.
• Rice vinegar – About 1/4 cup helps balance the flavors with a touch of acidity.
• Sesame oil – Two tablespoons enrich the dish with a nutty flavor that enhances the overall taste.
• Garlic – Three cloves, freshly minced, provide the essential punch in the glaze.
• Ginger – One teaspoon of freshly grated ginger elevates the flavor profile with warmth and depth.
• Red pepper flakes – Optional addition for heat; adjust according to your spice tolerance.
Get ready to dive into the sweet and savory world of Sticky Honey Garlic Cauliflower with these simple ingredients!
Step‑by‑Step Instructions for Sticky Honey Garlic Cauliflower
Step 1: Preheat the Oven
Start by preheating your oven to 400°F (200°C). While the oven heats, line a large baking sheet with parchment paper to prevent sticking and ensure easy cleanup. This step is essential for achieving that perfect golden brown color and crispy texture for your Sticky Honey Garlic Cauliflower.
Step 2: Prepare the Cauliflower
Cut one large head of cauliflower into bite-sized florets. In a mixing bowl, toss these florets with 2 tablespoons of olive oil until well-coated. Spread the seasoned cauliflower evenly on the prepared baking sheet in a single layer, allowing for proper roasting and maximizing the golden crispiness.
Step 3: Roast the Cauliflower
Place the baking sheet in the preheated oven and roast the cauliflower for 20-25 minutes. Halfway through, take the sheet out and gently flip the florets to ensure even browning. You’ll know they’re ready when the cauliflower is tender and has a beautiful golden hue.
Step 4: Make the Glaze
While the cauliflower is roasting, prepare the sticky glaze. In a small saucepan over medium heat, combine 1/4 cup honey, 1/4 cup soy sauce (or tamari for a gluten-free option), 1/4 cup rice vinegar, and 2 tablespoons of sesame oil. Add 3 minced garlic cloves, 1 teaspoon of grated ginger, and optional red pepper flakes for a kick. Stir occasionally and let it simmer for 3-5 minutes until slightly thickened.
Step 5: Toss Cauliflower in Sauce
Once the cauliflower is roasted to perfection, carefully transfer it to a mixing bowl. Pour the sticky glaze over the hot cauliflower while it’s still warm, tossing gently to ensure each floret is fully coated. This step is crucial for infusing all the flavors of the Sticky Honey Garlic Cauliflower into the crisp pieces.
Step 6: Serve and Enjoy
Your Sticky Honey Garlic Cauliflower is now ready to be served! You can dish it up immediately while it’s hot and glossy. Pair it with steamed rice or noodles for a delightful meal, and watch your friends and family savor every sticky, flavorful bite of this vegetarian treat.
What to Serve with Sticky Honey Garlic Cauliflower
Elevate your meal with delightful pairings that make every bite a celebration of flavor and texture.
-
Steamed Broccoli: A vibrant side that adds a fresh crunch, balancing the sweet and sticky notes of the cauliflower.
-
Jasmine Rice: Its subtle fragrance and fluffy texture provide a perfect canvas for the savory glaze, soaking up all those delicious flavors.
-
Creamy Avocado Salad: The cool, creamy avocado offers a rich contrast to the crispy cauliflower while adding a refreshing element to your plate.
-
Sesame Noodles: These savory, nutty noodles complement the dish’s Asian-inspired flavors, making for a harmonious and satisfying pairing.
-
Crispy Spring Rolls: Filled with fresh vegetables, these crunchy rolls add a delightful textural contrast, enhancing the meal experience.
-
Chilled Cucumber Soup: A light and refreshing addition that perfectly contrasts the warmth of the sticky roasted cauliflower, providing a soothing balance.
-
Lemongrass Iced Tea: This fragrant drink offers a refreshing boost, cutting through the richness of the dish while adding a zesty flair.
Make Ahead Options
These Sticky Honey Garlic Cauliflower are perfect for busy home cooks looking to save time on meal prep! You can prep the cauliflower florets and toss them in olive oil up to 24 hours in advance; simply store them in an airtight container in the refrigerator to maintain their freshness. For the sticky glaze, prepare it up to 3 days ahead, allowing the flavors to meld beautifully. Store it in the fridge in a sealed jar. When you’re ready to roast, simply bake the cauliflower and toss with the reheated glaze for delicious results—just like freshly made! Enjoy the ease of having a flavorful meal ready to go that’s just as delightful as if made that day!
Sticky Honey Garlic Cauliflower Variations
Ready to make your Sticky Honey Garlic Cauliflower even more delightful? Let your creativity shine with these tasty twists!
- Dairy-Free: Swap any dairy-based ingredients with plant-based alternatives to keep it creamy without the dairy.
- Spicy Kick: Add 1 tablespoon of sriracha or chili paste to the glaze for an extra layer of heat that tantalizes the taste buds.
- Add Crunch: Toss in some chopped toasted nuts, like cashews or almonds, right before serving for a satisfying crunch and nutty flavor.
- Zesty Flavor: Stir in the zest of one lime into the glaze for a bright twist that elevates the dish.
- Vegetable Medley: Mix in other veggies like bell peppers or broccoli when roasting for a colorful and nutritious side dish.
- Must-Try Pairing: Serve the cauliflower with a side of creamy Cauliflower Soup to enjoy a contrasting texture that’s equally delicious!
- Herb Infusion: Add fresh herbs like cilantro or basil just before serving to bring a fragrant lift that complements the sticky glaze.
- Simple Sides: Pair this dish with a side of steamed broccoli or simple noodles to create a satisfying, well-rounded meal.
Customize and enjoy every bite of your Sticky Honey Garlic Cauliflower in a way that makes it uniquely yours!
Expert Tips for Sticky Honey Garlic Cauliflower
Crispier Florets: Tossing cauliflower with cornstarch before adding olive oil increases its crispiness when roasted, enhancing your dish’s texture.
Taste the Sauce: Always taste the glaze before mixing it with the cauliflower. You can adjust sweetness and saltiness according to your preference for the perfect sticky honey garlic cauliflower.
Thicker Glaze: If you want a thicker coating, simply mix 1 teaspoon of cornstarch with cold water, and stir it into the simmering sauce for a luscious finish.
Oven Time: Keep an eye on your cauliflower while roasting; cooking times may vary depending on your oven and the size of florets. Rotate them for even browning.
Storage Secrets: To maintain freshness, refrigerate leftovers in an airtight container for up to three days and reheat gently in a skillet for best texture.
How to Store and Freeze Sticky Honey Garlic Cauliflower
Fridge: Store cooled leftovers in an airtight container for up to 3 days. This helps keep the flavor intact while storing the delicious sticky honey garlic cauliflower.
Freezer: If you’d like to freeze it, place the cooled cauliflower in a single layer on a baking sheet until firm, then transfer to a freezer-safe bag. It can be frozen for up to 2 months.
Reheating: To reheat, thaw in the fridge overnight and warm in a skillet over medium heat, stirring occasionally. This will help retain that crispy texture while enjoying the rich flavors once more.
Avoid sogginess: When reheating, avoid the microwave if possible, as it can make the cauliflower soggy. Stick to the skillet method for the best results!
Sticky Honey Garlic Cauliflower Recipe FAQs
How do I choose the right cauliflower?
Absolutely! When selecting cauliflower, look for a large head that is firm and dense, with tightly packed florets. Avoid any with dark spots or signs of spoilage, as these indicate overripeness. Fresh cauliflower should have a pure, white color and vibrant green leaves.
How should I store leftovers?
Very! To keep your Sticky Honey Garlic Cauliflower fresh, refrigerate cooled leftovers in an airtight container for up to 3 days. Make sure it is completely cooled before sealing it to reduce moisture buildup, which can lead to sogginess.
Can I freeze Sticky Honey Garlic Cauliflower?
Absolutely! To freeze, first allow the cooked cauliflower to cool completely. Then, lay it in a single layer on a baking sheet and freeze until solid. This prevents clumping. Once frozen, transfer to a freezer-safe bag, and it can be stored for up to 2 months.
What’s the best way to reheat it?
For the best texture, thaw the frozen cauliflower in the fridge overnight. Then, reheat it in a skillet over medium heat, stirring occasionally until warmed through. This method helps retain that delightful crispiness. Avoid using the microwave, as it can lead to a soggy texture.
Is this recipe suitable for those with allergies?
Yes! This recipe can be tailored to fit various dietary needs. For a gluten-free option, simply substitute regular soy sauce with tamari. As always, check with your guests for any specific allergies or dietary restrictions to ensure everyone can enjoy this tasty dish.
Sticky Honey Garlic Cauliflower: Your New Favorite Veggie Dish
Ingredients
Equipment
Method
- Preheat your oven to 400°F (200°C) and line a large baking sheet with parchment paper.
- Cut the cauliflower into bite-sized florets and toss with olive oil in a mixing bowl. Spread on the prepared baking sheet.
- Roast the cauliflower for 20-25 minutes, flipping halfway through, until tender and golden.
- In a saucepan, combine honey, soy sauce, rice vinegar, sesame oil, garlic, ginger, and red pepper flakes; simmer for 3-5 minutes until thickened.
- Transfer the roasted cauliflower to a mixing bowl and toss with the sticky glaze until coated.
- Serve hot, optionally with steamed rice or noodles.
Leave a Reply