
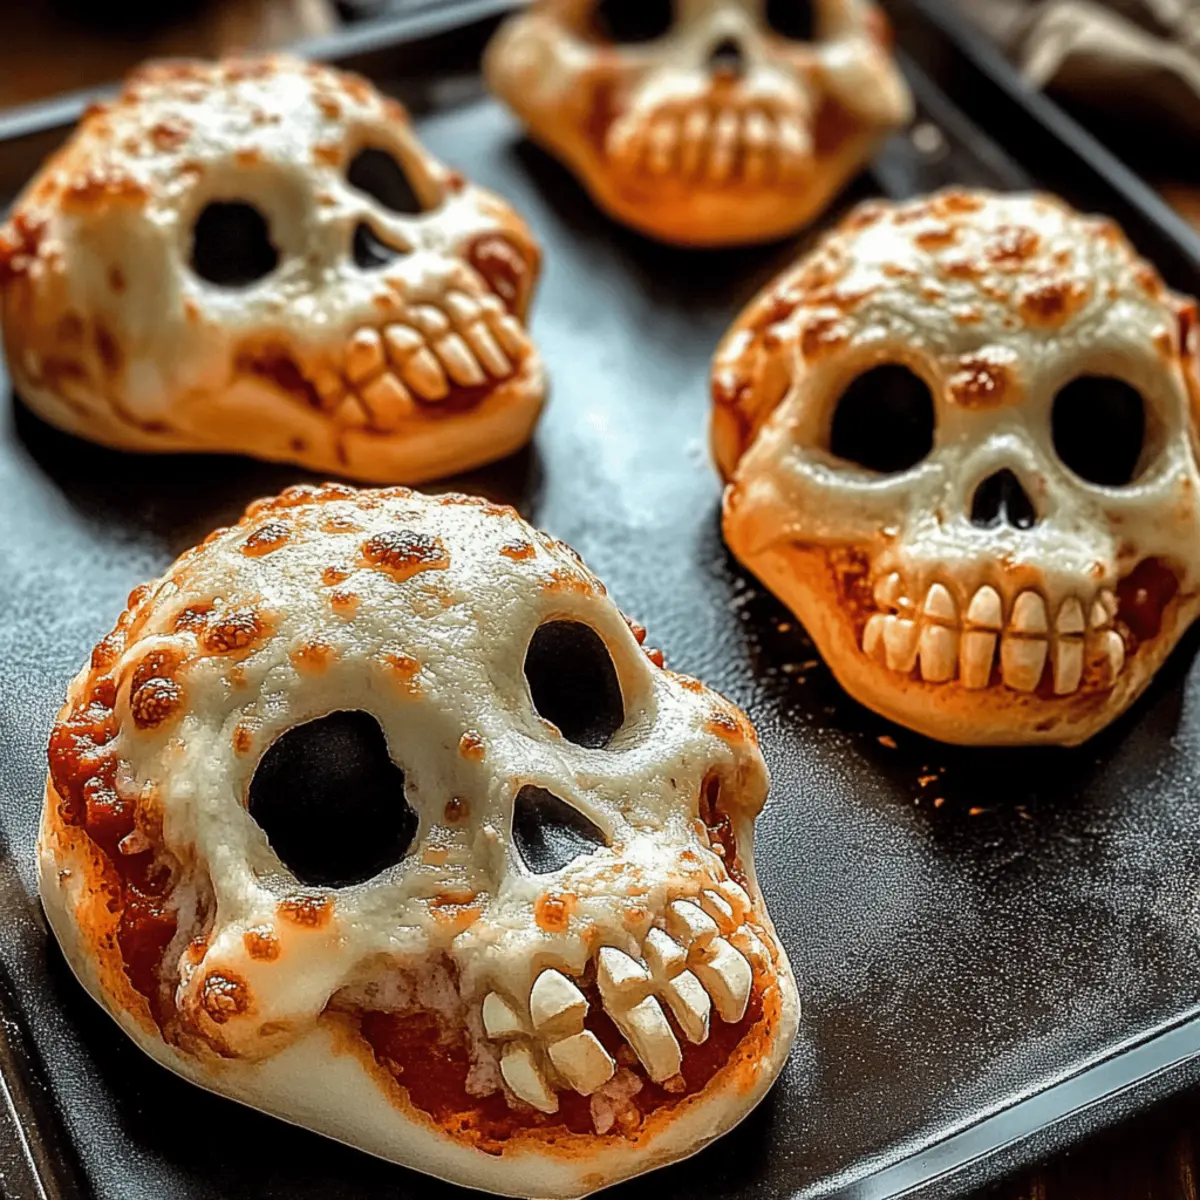
As the leaves start to change and jack-o’-lanterns line the streets, I find myself longing for a kitchen adventure that matches the spirit of Halloween. Enter my Easy Cheesy Halloween Pizza Skulls—a playful twist on a classic favorite that’s bound to bring giggles and smiles at your spooky gatherings. With gooey cheese nestled in a fun skull shape, these delightful snacks are not only mesmerizing for kids and adults alike, but they also require minimal prep, making them a perfect last-minute treat. Plus, the customizable fillings let you unleash your culinary creativity, ensuring everyone’s taste buds will be satisfied. Will you fill yours with pepperoni, veggies, or a surprise ingredient? Get ready to dive into this Halloween-inspired cooking project that’s as delicious as it is festive!
Why are These Pizza Skulls So Fun?
Ghoulishly Fun: These Easy Cheesy Halloween Pizza Skulls are not only adorable but also make for an exciting project that kids will love to help make.
Customizable Joy: With endless filling possibilities—from pepperoni to veggies—everyone can create their perfect flavor combination.
Quick and Simple: Even novice cooks can whip these up in under 30 minutes, making them an ideal choice for spontaneous Halloween parties.
Perfect for Sharing: These spooky snacks are guaranteed to impress at any gathering, bringing everyone together over a tasty treat.
Delightfully Melty: With gooey, melted cheese enveloped in a crispy crust, every bite delivers a delightful texture and flavor experience, reminiscent of classic pizza.
Pair these delightful snacks with our White Chocolate Halloween Oreo Bark for an irresistible Halloween dessert combo!
Easy Cheesy Halloween Pizza Skulls Ingredients
For the Dough
- Pizza Dough – This forms the delightful crust; feel free to opt for store-bought for ease or make your own for that homemade touch!
For the Sauce
- Pizza Sauce – Adds essential flavor and moisture; choose your favorite, whether it’s homemade or from a jar!
For the Cheese
- Mozzarella Cheese – Offers that classic stretch; you can substitute with other melty cheeses like gouda or provolone.
- Parmesan Cheese – Delivers a sharp, rich flavor; replace it with pecorino or omit for a dairy-free version.
For the Fillings
- Custom Fillings – Get creative with meats like pepperoni or ham, and load up with veggies like bell peppers and mushrooms to match everyone’s preferences!
Enhance your spooky gatherings with these Easy Cheesy Halloween Pizza Skulls and indulge in the fun of creating together!
Step‑by‑Step Instructions for Easy Cheesy Halloween Pizza Skulls
Step 1: Preheat the Oven
Begin your spooky cooking adventure by preheating your oven to 400°F (200°C). This ensures your Easy Cheesy Halloween Pizza Skulls will bake evenly and turn delightfully golden brown. Gather your baking tray and get it ready for those ghoulish goodies.
Step 2: Prepare the Baking Tray
Lightly spray a mini skull baking tin with cooking spray, ensuring each cavity is well-coated for easy removal later. Dust a clean, flat surface with flour to keep the pizza dough from sticking and make your rolling smoother, setting the stage for those fun skull shapes.
Step 3: Roll Out the Dough
Take your pizza dough and roll it out on the prepared floured surface to about 1/4-inch thickness. Use a sharp knife or a pizza cutter to slice the dough into six rectangles, which will fit perfectly into your skull cavities, bringing your Easy Cheesy Halloween Pizza Skulls to life!
Step 4: Fit the Dough into the Tin
Gently press each rectangle of dough into the skull-shaped cavities of your baking tin. Make sure to press them down well, ensuring they hold their shape when filled. This step is crucial as it will create the beautiful skull pockets that will hold all the cheesy goodness inside.
Step 5: Add the Fillings
Now comes the fun part! Fill each dough cavity with pizza sauce, followed by a generous amount of mozzarella cheese and a sprinkle of Parmesan. Feel free to get creative with your custom fillings—pepperoni, veggies, or extra cheeses—making each skull unique and delicious.
Step 6: Seal the Skulls
Before sealing, add a small dollop of pizza sauce on top of the cheese-filled pockets to keep them moist during baking. Fold the dough over the fillings, carefully pinching the edges to create a sealed pocket for your Easy Cheesy Halloween Pizza Skulls, ensuring no deliciousness escapes.
Step 7: Chill Before Baking
Place the filled baking tray in the refrigerator while your oven finishes preheating. This little chill session helps firm up the dough and prevent the skulls from losing their shape during baking, making sure they rise perfectly.
Step 8: Bake the Pizza Skulls
Once the oven is hot and ready, take the tray out of the refrigerator and pop it into the oven. Bake the Easy Cheesy Halloween Pizza Skulls for 16-20 minutes, keeping an eye on them until they turn a lovely golden brown on top—this means they’re ready to come out!
Step 9: Cool and Serve
After baking, allow your spooky treats to cool for about 5 minutes. Gently unmold the Easy Cheesy Halloween Pizza Skulls from their tin, and serve them warm with a side of marinara sauce for dipping. Garnish with fresh herbs if desired, and get ready to enjoy these festive delights!
Easy Cheesy Halloween Pizza Skulls Variations
Feel free to get creative and customize your pizza skulls with these fun variations that will add excitement to your spooky snack!
-
Meat Lovers: Fill your skulls with a mix of pepperoni, sausage, and ham for a meaty delight that carnivores will adore.
The combination of rich flavors ensures each bite is a flavor explosion—perfect for hefty appetites! -
Veggie Delight: Load your pizza skulls with a medley of your favorite vegetables, like spinach, bell peppers, and mushrooms, for a wholesome twist.
This option is not only colorful but also satisfying, providing a burst of flavor and nutrition in every cheesy bite. -
Spicy Kick: Add jalapeños or crushed red pepper flakes to bring the heat.
Spice lovers will appreciate the added zing, making these skulls not only festive but also excitingly fiery! -
BBQ Twist: Swap out traditional pizza sauce for BBQ sauce and fill with shredded chicken or pulled pork for a unique flavor.
The smoky, tangy taste will be surprising and delicious—ideal for those looking for something out of the ordinary! -
Cheesy Trio: Use a blend of mozzarella, cheddar, and gouda for an extra cheesy treat that melts beautifully.
The mix of flavors enhances the cheesy goodness, turning each skull into a decadent little pillow of delight. -
Sweet Surprise: For a twist on tradition, create dessert skulls filled with chocolate and marshmallows or fruit jams.
These sweet treats can be a fun end to your spooky gathering, delighting guests with their unexpected flavors! -
Dairy-Free: Opt for dairy-free cheese and skip the parmesan to make this recipe suitable for lactose-intolerant friends.
They’ll be thrilled to enjoy a delicious version without missing out on the fun!
Pair your creative pizza skulls with our Doritos Cheesy Chicken for a complete Halloween feast that everyone will love!
What to Serve with Easy Cheesy Halloween Pizza Skulls
Create a spooktacular feast that brings your Halloween gathering to life with delightful dishes alongside these eerie snacks.
-
Garlicky Breadsticks: Perfect for dipping, these buttery, garlicky sticks add a crunchy contrast to the cheesy skulls and invite everyone to dig in.
-
Crispy Side Salad: A fresh salad with a tangy vinaigrette balances the richness of the pizza skulls, providing a refreshing crunch to each bite.
-
Pumpkin Soup: Silky, spiced pumpkin soup offers a warm, seasonal comfort that pairs beautifully with the playful pizza treats, perfect for chilly autumn evenings.
-
Marinara Dipping Sauce: A side of classic marinara not only enhances the flavor but also creates a fun dipping experience, making every bite a delicious adventure.
-
Roasted Veggie Platter: Colorful roasted vegetables introduce a healthy and festive touch, adding depth and nutrition that complements the cheesy indulgence.
-
Sangria or Apple Cider: A glass of spiced apple cider or fruity sangria provides a refreshing and festive drink option that elevates your Halloween meal effortlessly.
-
Chocolate-Dipped Strawberries: For a sweet ending, chocolate-dipped strawberries bring a fun, spooky flair that brightens up the dessert table after all that cheesy goodness.
-
Ghostly Cupcakes: Celebrate the occasion with cupcakes topped with ghostly meringue frosting—sweet, whimsical, and sure to charm your guests!
These pairings will make your gathering unforgettable, turning simple snacks into a complete Halloween feast!
Make Ahead Options
These Easy Cheesy Halloween Pizza Skulls are fantastic for meal prep, allowing you to save time on busy days! You can assemble the skulls with your chosen fillings and then refrigerate them up to 24 hours in advance before baking. Just ensure they are well-sealed to prevent the dough from drying out. On the day you plan to serve them, simply preheat your oven and bake those delightful treats straight from the fridge, adjusting the baking time if needed to ensure they are cooked perfectly. With this make-ahead option, you’ll have a delicious Halloween snack ready with minimal effort—perfect for spontaneous gatherings or cozy family nights!
Expert Tips for Easy Cheesy Halloween Pizza Skulls
-
Chill the Dough: Ensure the filled dough is chilled before baking. This helps maintain the skull shape and prevents any unwanted puffing.
-
Mind the Fillings: Don’t overstuff your skulls! A little filling goes a long way—too much can cause them to burst during baking.
-
Customize with Care: While the Easy Cheesy Halloween Pizza Skulls are highly customizable, make sure your fillings are pre-cooked to avoid sogginess and ensure even cooking.
-
Watch the Time: Keep an eye on baking time. Ovens vary, so your skulls may need a few extra minutes or less; look for that golden brown finish!
-
Serve Warm: These tasty treats are best served warm with marinara sauce on the side, enhancing that cheesy goodness with a delicious dip.
Storage Tips for Easy Cheesy Halloween Pizza Skulls
Room Temperature: Store leftover Easy Cheesy Halloween Pizza Skulls in an airtight container at room temperature for up to 1 day for best flavor and texture.
Fridge: Keep them in an airtight container for up to 3 days in the fridge. Reheat in the oven or microwave when ready to enjoy again.
Freezer: Freeze the skulls in a safe container or bag for up to 2 months. Ensure they are fully cooled before packaging to avoid freezer burn.
Reheating: For best results, reheat in the oven at 350°F for 10-15 minutes or microwave on medium for 30-60 seconds until warm throughout.
Easy Cheesy Halloween Pizza Skulls Recipe FAQs
How do I choose the best pizza dough for my Pizza Skulls?
Absolutely! For the best results, use fresh pizza dough. If possible, opt for a brand that has no artificial preservatives to ensure a delightful taste and texture. You can certainly make your own, but store-bought dough is perfectly fine for ease! Just check that it has a slightly elastic texture without any dark spots.
How should I store leftover Easy Cheesy Halloween Pizza Skulls?
To keep them fresh, store your leftover Easy Cheesy Halloween Pizza Skulls in an airtight container at room temperature for up to 1 day. For longer storage, place them in the fridge where they’ll stay good for up to 3 days. Just make sure to reheat them before enjoying again!
Can I freeze my Pizza Skulls? If so, how?
Yes! You can freeze your Easy Cheesy Halloween Pizza Skulls for up to 2 months. Here’s how: Allow them to cool completely first, then place the skulls in a freezer-safe container or bag, making sure they are spaced out to avoid sticking. When you’re ready to enjoy them, just thaw in the fridge overnight before reheating.
What should I do if my Pizza Skulls burst while baking?
Very frustrating, but don’t worry! If your Easy Cheesy Halloween Pizza Skulls burst, it’s usually due to overstuffing. Next time, be sure to fill each skull cavity with a moderate amount of cheese and toppings. Remember to pinch the edges securely to seal them as well, as this will help maintain their shape and prevent spills.
Are the Pizza Skulls suitable for my kids with dairy allergies?
Absolutely! You can easily adapt these Easy Cheesy Halloween Pizza Skulls for dairy-free diets. Simply replace mozzarella and Parmesan with dairy-free cheese alternatives. There are many varieties available that melt beautifully, ensuring that everyone can enjoy these festive treats without worry!
How do I reheat my Pizza Skulls to keep them tasting fresh?
For the best flavor and texture, I recommend reheating your Easy Cheesy Halloween Pizza Skulls in the oven. Preheat to 350°F (175°C), place them on a baking tray, and bake for about 10-15 minutes until warmed through. Alternatively, you can microwave them for 30-60 seconds on medium power, but you may lose a bit of that delightful crispy texture. Enjoy!
Easy Cheesy Halloween Pizza Skulls for Spooky Parties
Ingredients
Equipment
Method
- Preheat your oven to 400°F (200°C).
- Lightly spray the mini skull baking tin with cooking spray.
- Roll out the pizza dough to about 1/4-inch thickness.
- Fit the dough into the skull-shaped cavities of your baking tin.
- Fill each cavity with pizza sauce, mozzarella cheese, and Parmesan.
- Seal the filled dough by folding it over and pinching the edges.
- Chill the filled tray in the refrigerator while the oven preheats.
- Bake for 16-20 minutes until golden brown.
- Allow to cool for 5 minutes, then serve with marinara sauce.
Leave a Reply