
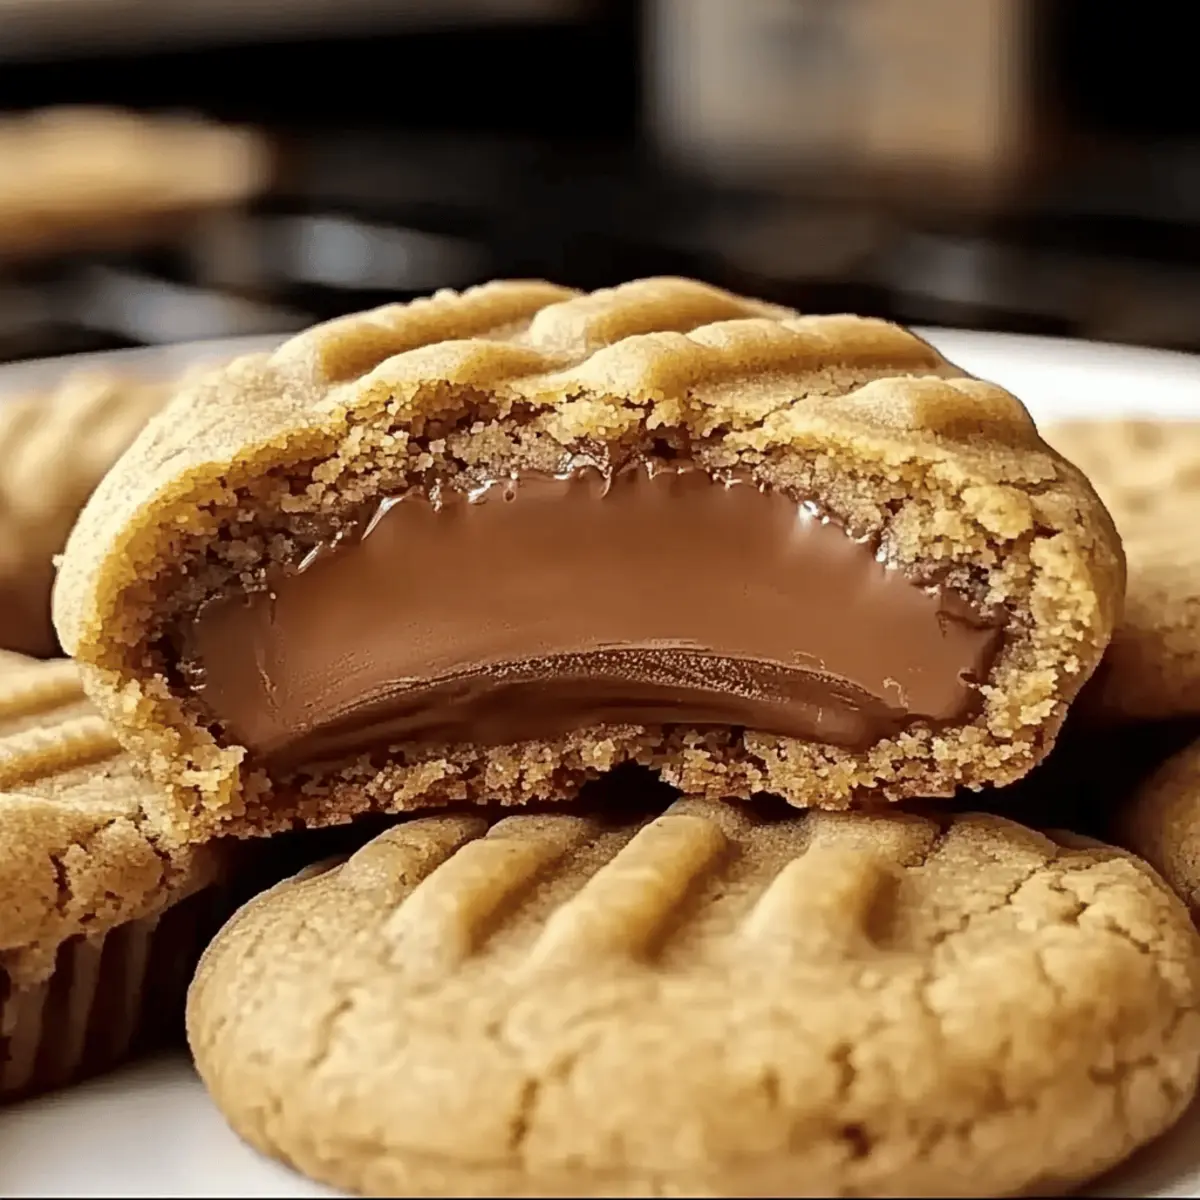
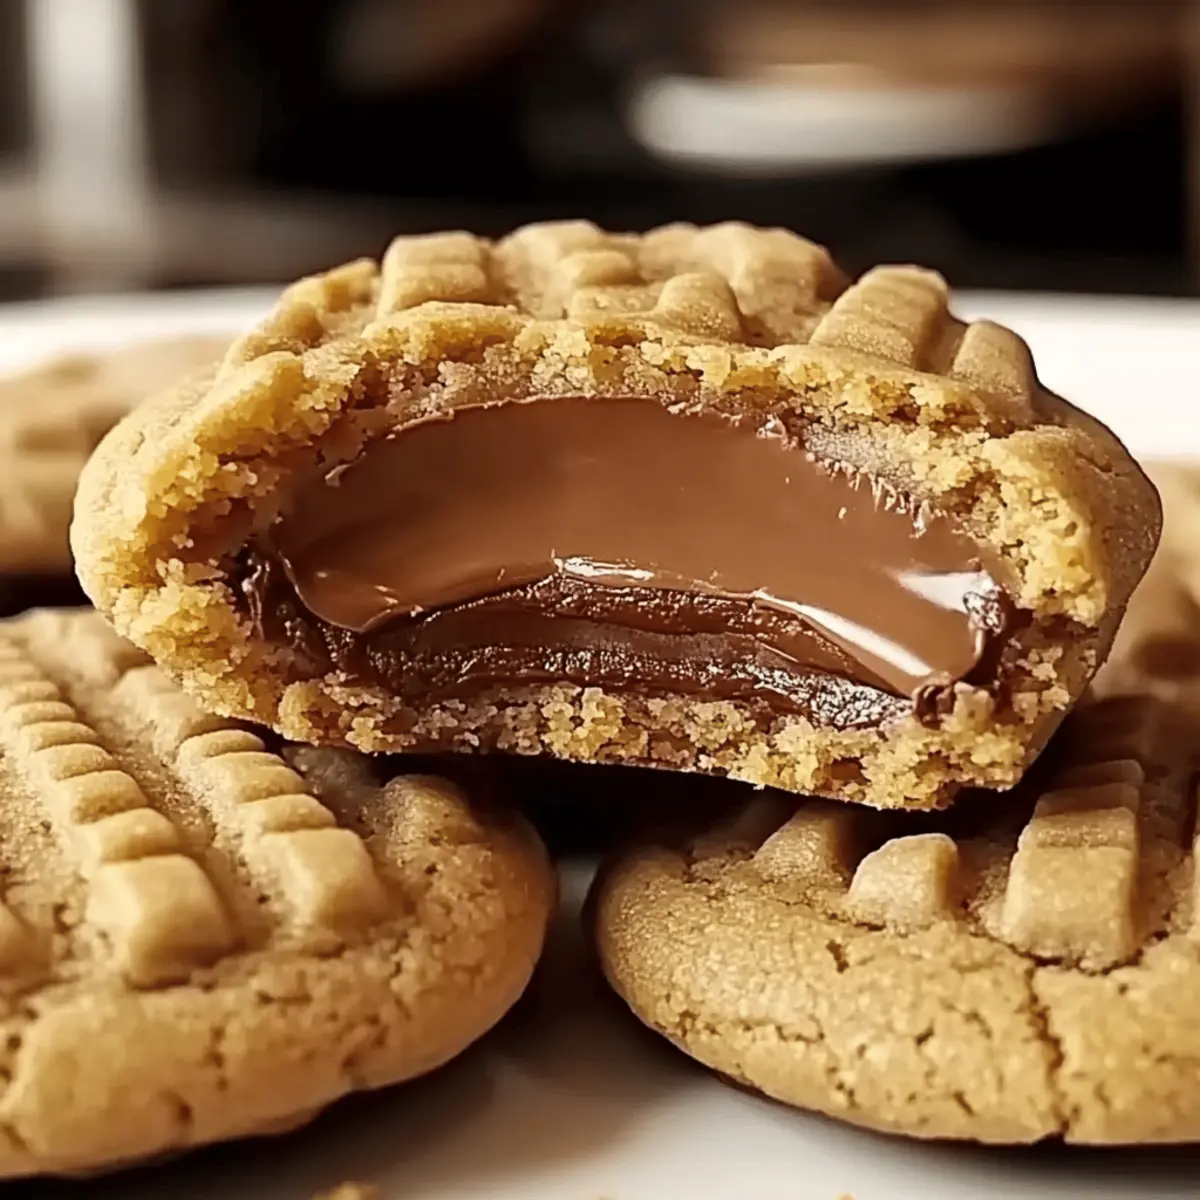
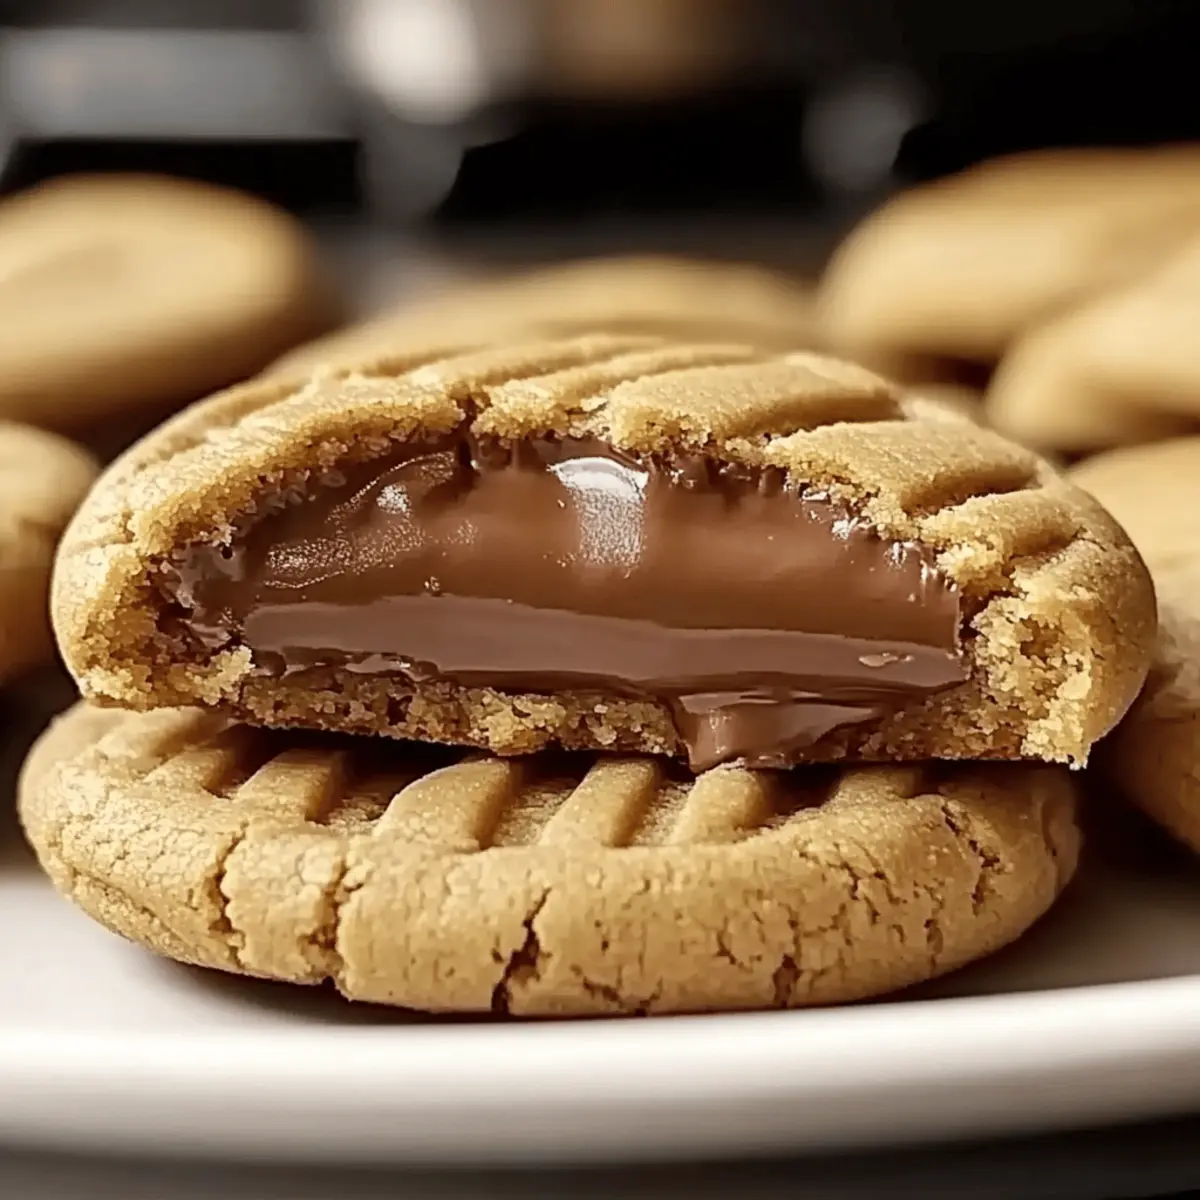
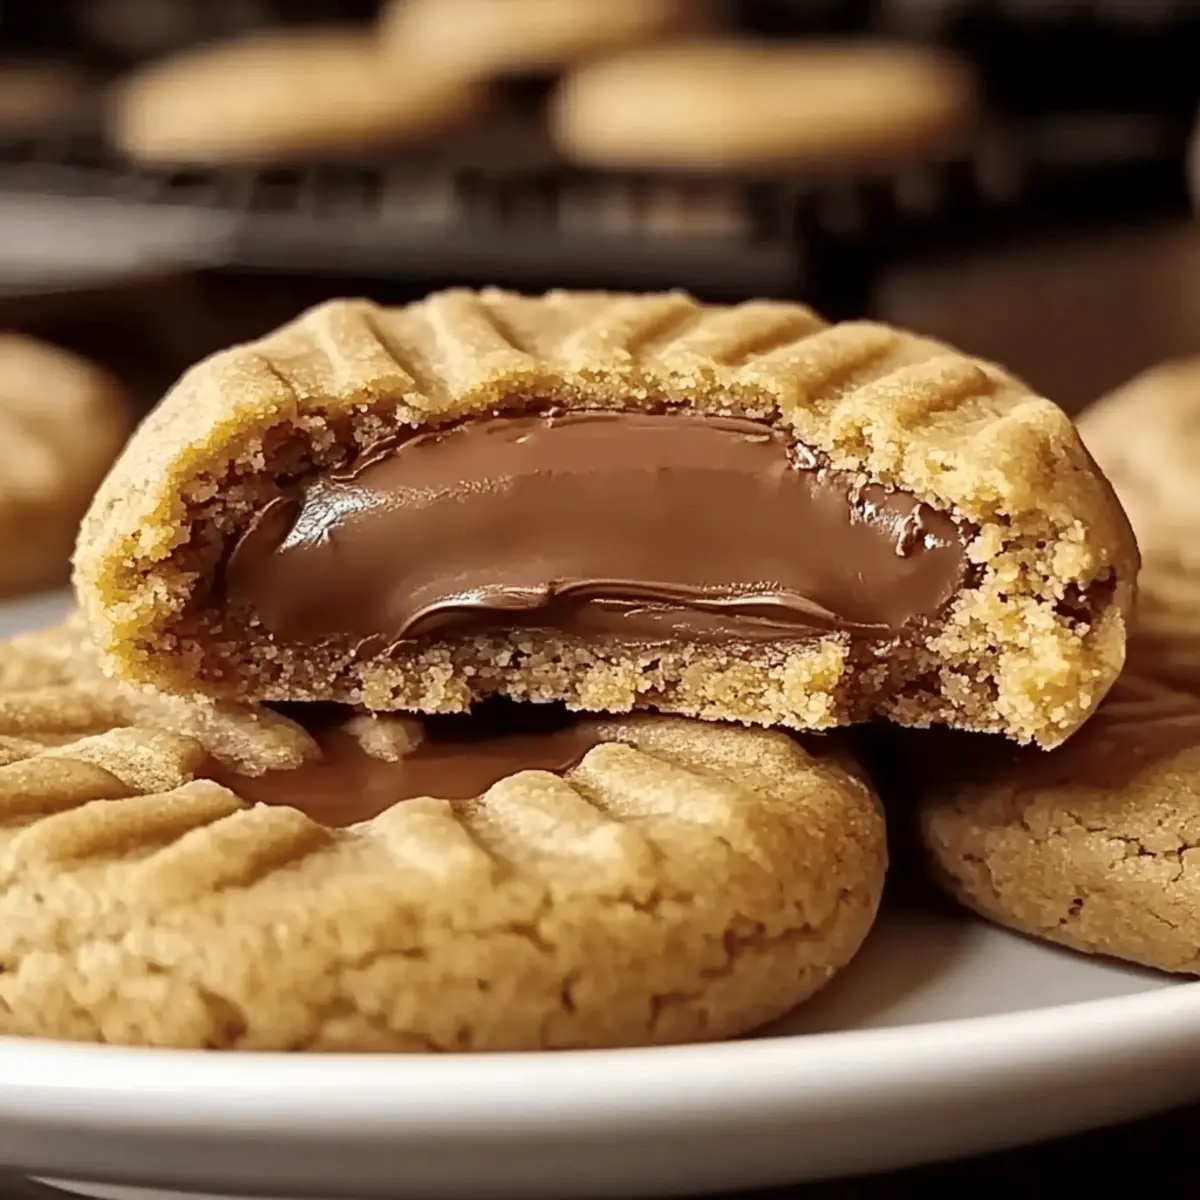
There’s something magical about the combination of peanut butter and chocolate that instantly transports me back to carefree childhood days. These Peanut Butter Cookies Stuffed with Chocolate Cups promise that same rush of joy with every bite, filling your home with a dreamy aroma while they bake. Not only are they a quick and satisfying treat for any occasion, but their customizability ensures everyone is included—whether you’re vegan, gluten-free, or simply in search of that exact flavor profile. Imagine surprising friends and family with warm cookies that have hidden pools of chocolate melting from the center. Are you ready to embark on a baking adventure that satisfies nostalgia while delighting your taste buds? Let’s dive into this delicious recipe!
Why Are These Cookies So Special?
Irresistible Flavor: The perfect pairing of creamy peanut butter and rich chocolate makes each bite a delight.
Quick and Easy: With just a few simple steps, you’ll have a batch of cookies ready in no time—ideal for busy bakers!
Versatile Options: From nut-free to vegan, customizing these cookies is a breeze, ensuring everyone can join in on the fun.
Nostalgic Comfort: These cookies evoke childhood memories, wrapping you in warmth and happiness with every gooey, chocolate-filled bite.
Crowd-Pleasing Treat: Whether for a family gathering or a casual snack, these cookies are sure to impress—and disappear! Try pairing them with a glass of milk for a classic combination or serve alongside vanilla ice cream for an indulgent dessert.
Peanut Butter Cookies Stuffed with Chocolate Cups Ingredients
For the Cookie Base
- All-purpose flour – Provides structure and a tender bite. Substitution: Use gluten-free flour blend for a gluten-free version.
- Baking soda – Helps the cookies rise, creating a light texture.
- Salt – Enhances the overall flavor and balances the sweetness.
- Unsalted butter – Adds richness and aids in creaming for a smooth batter. Note: Ensure it’s softened at room temperature.
- Creamy peanut butter – The star of the cookies, offering rich flavor and creaminess.
- Granulated sugar – Sweetens the dough and contributes to browning for a nice finish.
- Brown sugar – Adds moisture and a hint of caramel flavor.
- Large egg – Binds the ingredients together for a cohesive dough.
- Vanilla extract – Infuses the cookies with warm, aromatic flavor.
- Milk – Adds moisture for the right consistency.
For the Chocolate Filling
- Mini peanut butter cups – Create the surprise filling with chocolatey goodness in each cookie. These peanut butter cups are essential for that delightful melt-in-the-mouth experience!
Feel free to explore different variations—whether making these Peanut Butter Cookies Stuffed with Chocolate Cups nut-free or vegan. Happy baking!
Step‑by‑Step Instructions for Peanut Butter Cookies Stuffed with Chocolate Cups
Step 1: Preheat the Oven
Begin by preheating your oven to 350°F (175°C), filling the air with anticipation. While the oven warms up, take a mini muffin pan and grease it lightly or line it with paper for easy removal. This will create the ideal base for your Peanut Butter Cookies Stuffed with Chocolate Cups, setting the stage for delicious baking.
Step 2: Mix Dry Ingredients
In a medium bowl, combine the all-purpose flour, baking soda, and salt, whisking them together until well incorporated. This step is essential for creating structure and balance in your cookies. Set this mixture aside, visualizing how it will come together with the creamy wet ingredients later on.
Step 3: Cream the Butters and Sugars
In a large mixing bowl, add the softened unsalted butter and creamy peanut butter. Using an electric mixer, cream them together with granulated sugar and brown sugar until the mixture appears smooth and fluffy, roughly 2 minutes. The texture should be light, indicating it’s ready to welcome the next flavors into your Peanut Butter Cookies.
Step 4: Incorporate Wet Ingredients
Now, beat in the large egg, vanilla extract, and milk to your creamed mixture until fully combined. The batter should look creamy and homogeneous, unveiling a luscious base for your cookies. This step adds moisture and richness, ensuring every bite of your Peanut Butter Cookies Stuffed with Chocolate Cups is delightful.
Step 5: Combine Dry and Wet Ingredients
Gradually fold your dry ingredients into the wet mixture, stirring gently until just combined. Be cautious not to overmix to ensure your cookies remain soft and tender. Picture the delightful aroma that will soon fill your kitchen as your batter transforms into a cohesive dough ready for the next step.
Step 6: Scoop the Dough
Using a cookie scoop or spoon, portion out the dough into each cavity of the mini muffin pan, pressing down gently to fill the space halfway. This approach allows for the perfect “cookie cup” shape—ideal for holding your surprise filling. Each scoop brings you closer to the delicious Peanut Butter Cookies you’re about to bake.
Step 7: Bake the Cookies
Place your pan in the preheated oven and bake for 10-12 minutes. You’ll know they’re ready when the edges turn a golden hue, while the centers remain soft and slightly underbaked. The tantalizing smell of warm peanut butter cookies making its way through your home means you’re on the right track!
Step 8: Add the Chocolate Surprise
As soon as you remove the cookie cups from the oven, immediately press a mini peanut butter cup into the center of each warm cookie. Watch as the chocolate begins to melt slightly, creating a gooey and delicious core that defines each Peanut Butter Cookies Stuffed with Chocolate Cups.
Step 9: Cool and Transfer
Allow the cookies to cool in the muffin pan for about 10 minutes. This gentle cooling will help them set while ensuring you retain that delightful soft texture. Afterward, carefully transfer them to a wire rack to cool completely, allowing the chocolate center to firm up just a bit, enhancing the experience even more.
What to Serve with Peanut Butter Cookies Stuffed with Chocolate Cups
There’s nothing quite like wrapping up a warm baking session with the perfect pairings alongside your fresh cookies, inviting warmth into the kitchen.
-
Cold Glass of Milk: The classic pairing brings out the rich flavors, creating a comforting experience for your taste buds.
-
Vanilla Ice Cream: Gentle sweetness and creamy texture enhance the cookies, creating a delightful contrast with the gooey chocolate center. It makes for an indulgent dessert that’s hard to resist.
-
Fresh Fruit Salad: Crisp, juicy fruits provide a refreshing counterpoint to the rich cookies. Try combining strawberries, blueberries, and kiwi for a colorful, vibrant touch.
-
Chocolate Milkshake: For a true treat, sip on a rich chocolate milkshake. The combination of flavors will add to the nostalgic charm of peanut butter and chocolate.
-
Coffee or Espresso: The slightly bitter notes of a warm cup of coffee balance the sweetness, ensuring you have the perfect afternoon pick-me-up alongside your cookies.
-
Caramel Sauce Drizzle: A touch of caramel adds a luxurious flair to your cookies. Imagine decadent, melt-in-your-mouth bites that balance salty and sweet.
-
Nutty Snack Mix: A crunchy nut mix with a sprinkle of sea salt offers contrasting texture and flavor. It’s the perfect way to incorporate some wholesome elements after a decadent treat.
Make Ahead Options
These Peanut Butter Cookies Stuffed with Chocolate Cups are perfect for busy weeknights! You can prepare the cookie dough up to 24 hours in advance by mixing all the ingredients and storing it in an airtight container in the refrigerator. When you’re ready to bake, scoop the dough into the mini muffin pan, then bake as directed. For added convenience, you can also freeze the cookie cups before adding the chocolate filling; simply wrap each one individually and store for up to 3 months. When it’s time to enjoy, bake directly from frozen, then add the chocolate centers immediately after baking for a gooey treat that’s just as delicious as fresh-baked cookies.
How to Store and Freeze Peanut Butter Cookies Stuffed with Chocolate Cups
- Room Temperature: Keep the cookies in an airtight container for up to 3 days. This way, you can easily grab a sweet treat whenever the craving strikes.
- Refrigeration: If you’re planning to enjoy them later, refrigerate the cookies for up to 1 week. Just make sure they’re well-sealed to maintain their texture.
- Freezer: For longer storage, freeze the completely cooled cookies for up to 3 months. Place them in a freezer bag, and when you’re ready for a delicious bite, simply thaw before serving.
- Reheating: To restore their warm, gooey goodness, pop the thawed cookies in a microwave for about 10 seconds, and enjoy the delightful melt of chocolate once again!
Expert Tips for Peanut Butter Cookies Stuffed with Chocolate Cups
-
Avoid Overmixing: Lightly fold in dry ingredients until just combined. Overmixing can make cookies tough and chewy instead of soft.
-
Use Room Temperature Ingredients: Ensure your butter and eggs are at room temperature for a smoother batter and even baking, making your Peanut Butter Cookies even more delightful.
-
Watch the Baking Time: Keep an eye on the cookies; they should have lightly golden edges while remaining soft in the center. This balance is key to the perfect texture.
-
Press Chocolate Cups Immediately: For that lovely melty center, press mini peanut butter cups into warm cookies right out of the oven—allowing the chocolate to melt beautifully.
-
Customize Your Recipe: Feel free to experiment with nut-free or vegan versions to accommodate different dietary preferences. Enjoy the creative process!
Peanut Butter Cookies Stuffed with Chocolate Cups Variations
Feel free to get creative and customize these delightful cookies with a few simple tweaks that will excite your taste buds!
-
Nut-Free: Substitute sunflower seed butter for peanut butter for a safe, delicious alternative.
-
Chocolate Lovers: Swap regular mini chocolate cups with dark chocolate or caramel-filled versions for a rich treat.
-
Gluten-Free: Replace all-purpose flour with a gluten-free flour blend, allowing everyone to enjoy the goodness!
-
Extra Crunch: Add chopped nuts or granola into the dough for a delightful texture contrast.
-
Spiced Delight: Incorporate a pinch of cinnamon or nutmeg for a warm, cozy flavor twist.
-
Vegan-Friendly: Use a flax egg and non-dairy butter or milk to make these cookies plant-based without sacrificing taste.
-
Sea Salt Finish: Sprinkle a little sea salt on top before baking for that perfect sweet-and-salty balance.
-
Mini Treats: Make mini versions by using a mini cookie scoop and baking time accordingly for bite-sized indulgence.
Experiment with these variations, and don’t forget—these cookies are fantastic alongside a glass of milk or a scoop of vanilla ice cream for the ultimate dessert experience! Enjoy your baking adventure!
Peanut Butter Cookies Stuffed with Chocolate Cups Recipe FAQs
What type of peanut butter should I use?
I recommend using creamy, unsweetened peanut butter for the best flavor and texture in your cookies. Crunchy peanut butter can also be used if you enjoy a little added texture, but stick to natural options without added sugars or oils for the best results.
How should I store leftover cookies?
To keep your Peanut Butter Cookies Stuffed with Chocolate Cups fresh, store them in an airtight container at room temperature for up to 3 days. If you want to prolong their freshness, refrigerate them for up to a week. Just remember to seal them well to avoid any drying out!
Can I freeze these cookies?
Absolutely! Once your cookies are completely cooled, place them in a freezer-safe bag or container, separating layers with parchment paper if necessary. They can be frozen for up to 3 months. When you’re ready to indulge, simply thaw at room temperature or warm them in the microwave for about 10 seconds for that gooey chocolate goodness.
What can I do if my dough seems too dry?
If you find your dough is too dry, this could be due to flour measuring inconsistencies or environmental factors. Try adding a splash of milk (about 1 tablespoon at a time) until you reach a smoother consistency. Remember, your dough should be soft but not overly sticky!
Are these cookies safe for people with nut allergies?
To make these cookies suitable for those with peanut allergies, you can substitute peanut butter with sunflower seed butter or another allergen-friendly alternative. Always ensure the chocolate filling is also nut-free to keep your cookies safe for everyone to enjoy!
Can I create different flavors with this recipe?
The sky’s the limit for flavor variations! You can swap peanut butter for almond butter, add spices like cinnamon, or even switch the chocolate cups for caramel-filled options. Adjust each substitute gradually, and enjoy experimenting to find your favorite cookie combination!
Peanut Butter Cookies Stuffed with Chocolate Cups Bliss
Ingredients
Equipment
Method
- Preheat your oven to 350°F (175°C) and prepare a mini muffin pan.
- In a medium bowl, whisk together the all-purpose flour, baking soda, and salt.
- Cream together the softened unsalted butter, creamy peanut butter, granulated sugar, and brown sugar until smooth and fluffy.
- Beat in the egg, vanilla extract, and milk until fully combined.
- Gradually fold the dry ingredients into the wet mixture until just combined.
- Scoop the dough into the mini muffin pan, filling each cavity halfway.
- Bake for 10-12 minutes until the edges are golden and the centers are soft.
- Press a mini peanut butter cup into the center of each warm cookie.
- Cool the cookies in the muffin pan for 10 minutes before transferring to a wire rack.
Leave a Reply