
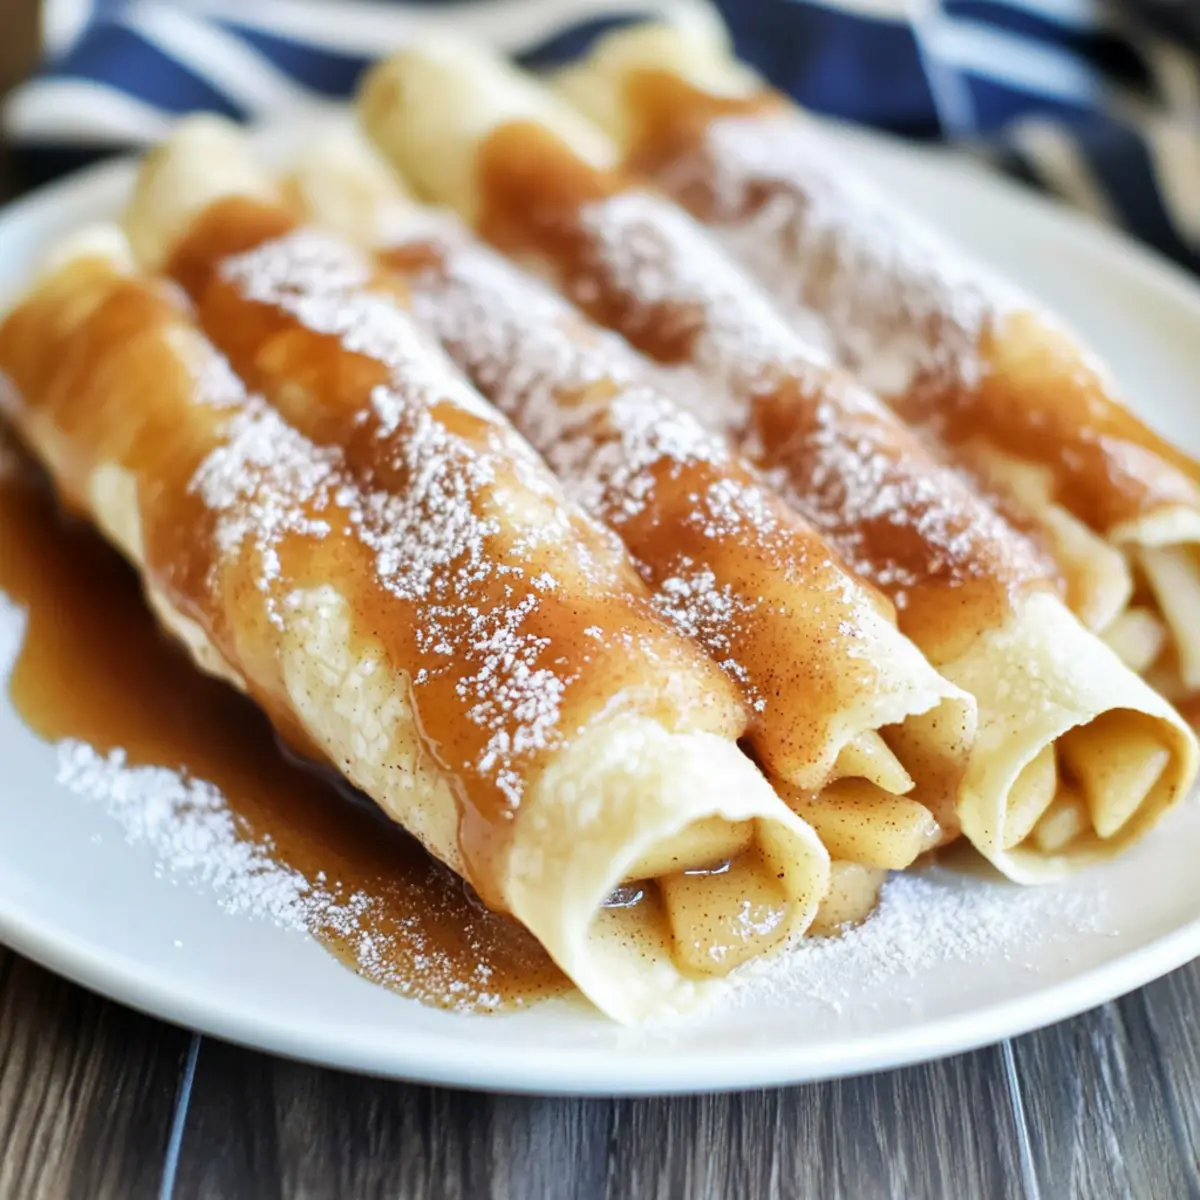
Every holiday season, I find myself crafting memories around the table, where sweet treats turn ordinary moments into something magical. This year, I’ve been on a quest for a fun and quick dessert that brings a twist to the traditional—enter the delicious Apple Pie Taquitos! These crispy delights marry the comforting taste of classic apple pie with an easy-to-enjoy format, making them perfect for family gatherings or a cozy night in. With simple ingredients and the option for gluten-free tortillas, they’re not just scrumptious but also accessible for everyone. Plus, they can be whipped up in no time, letting you focus more on creating those cherished memories rather than spending hours in the kitchen. Ready to delve into this delightful dessert? Let’s get rolling!
Why are Apple Pie Taquitos a Must-Try?
Crispy Delight: Each bite of these Apple Pie Taquitos is a harmonious blend of crunchy tortillas and warm, gooey apple filling that captures the essence of classic pie.
Quick & Easy: With a straightforward process, you can whip these up in no time, perfect for busy weeknights or unexpected guests.
Family-Friendly: Everyone loves finger foods! These taquitos make dessert a delightful shared experience, sure to charm both kids and adults alike.
Endless Variations: From cherry to pumpkin filling, the possibilities are endless. You might even enjoy trying your hand at other desserts like Custard Apple Rice or Berry Slab Pie for a fun twist!
Comfort Factor: As the weather cools, there’s nothing quite like these warm treats to provide comfort, making them a perfect addition to your holiday festivities.
Apple Pie Taquitos Ingredients
-
For the Filling
• Apple Pie Filling – Provides the sweet and spiced apple flavor; can be substituted with homemade filling for a fresher taste. -
For the Taquitos
• Flour Tortillas – The base, offering a soft yet crispy texture when baked; ensure medium-sized tortillas for best results.
• Melted Butter – Adds richness and helps the sugar and cinnamon adhere; use less for a lighter option. -
For the Coating
• Sugar – Sweetens the coating for the taquitos; consider brown sugar for a deeper flavor.
• Cinnamon – Enhances the flavor profile with warm spice notes; optional for less spice preference. -
Optional Topping
• Caramel Syrup – Adds a sweet and gooey finish to elevate the dessert experience; drizzle just before serving.
Step‑by‑Step Instructions for Apple Pie Taquitos
Step 1: Preheat the Oven
Begin by preheating your oven to 350°F (175°C). This ensures that your Apple Pie Taquitos will bake evenly and achieve that perfect crispy texture. While the oven is heating, gather all your ingredients and lay them out on your countertop for easy access.
Step 2: Prepare the Cinnamon-Sugar Coating
On a plate, combine ½ cup of sugar with 1 teaspoon of cinnamon. Mix well until the two ingredients are evenly incorporated. This sweet and fragrant mixture will give your Apple Pie Taquitos a lovely finish, enhancing their flavor and making them irresistible!
Step 3: Prepare the Apple Filling
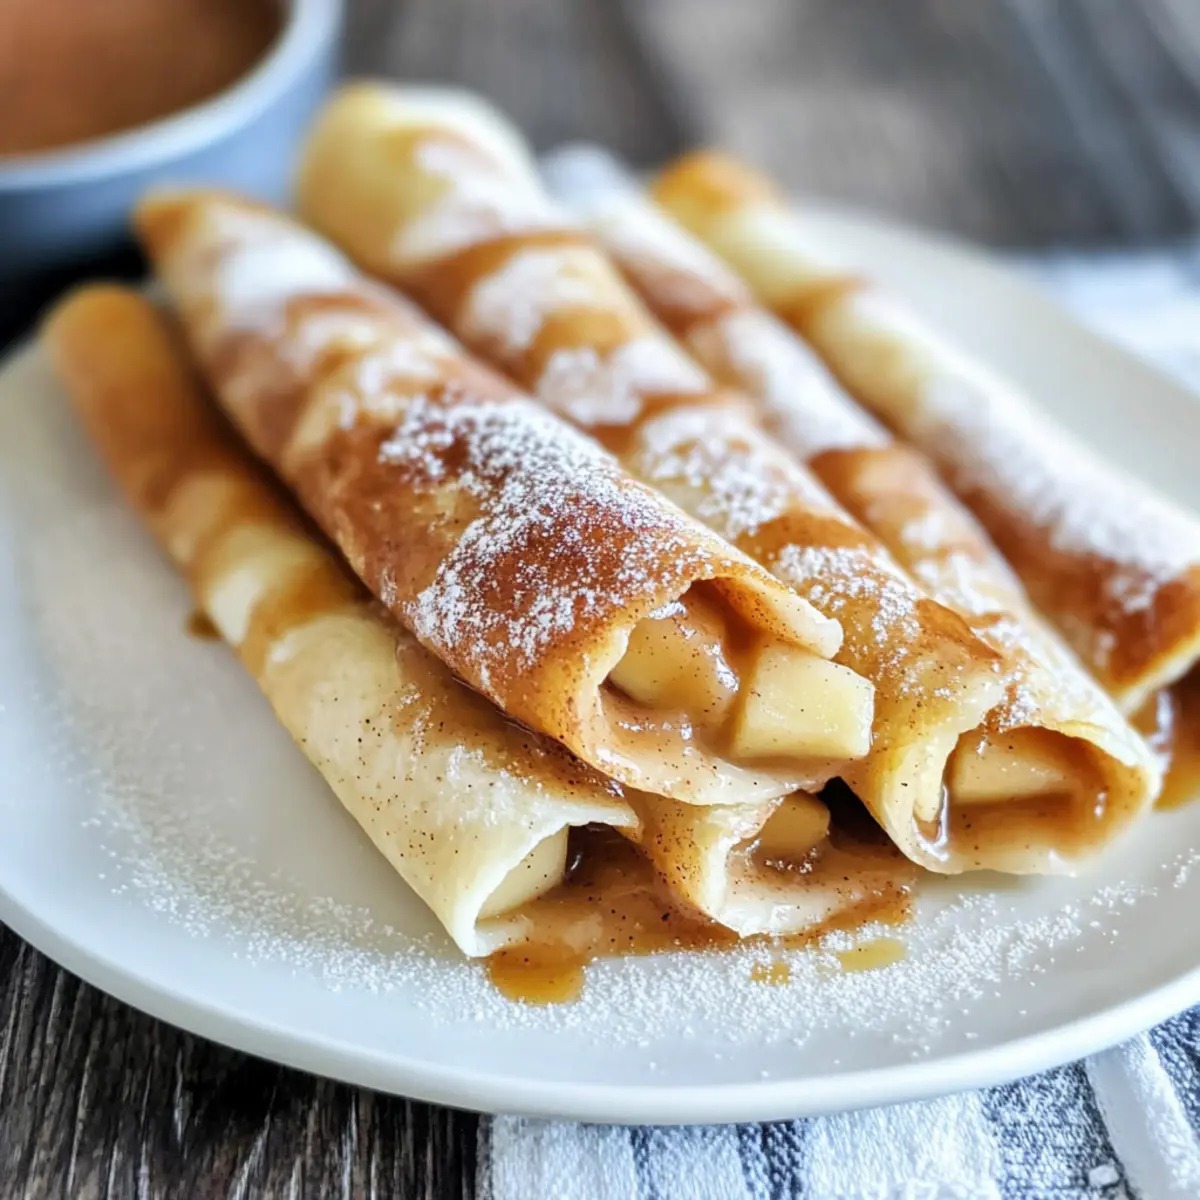
Next, empty your apple pie filling onto a cutting board. Using a sharp knife, chop the apples into bite-sized pieces, if necessary. This step helps to ensure that every taquito is filled with delicious bits of apple and makes for a delightful texture in each crunchy bite.
Step 4: Assemble the Taquitos
Take a flour tortilla and lay it flat on your work surface. Spoon approximately 3 tablespoons of the prepared apple filling down the center of the tortilla, then roll it tightly like a jelly roll. Make sure to keep the filling secure inside for the perfect bite of flavor in your Apple Pie Taquitos.
Step 5: Coat with Butter and Cinnamon-Sugar
Brush the outside of each rolled taquito with melted butter using a pastry brush. Immediately roll the taquito in the cinnamon-sugar mixture, ensuring it is well-coated. The warmth of the melted butter helps the sugar and cinnamon adhere beautifully, giving a sweet crunch to each taquito.
Step 6: Arrange in Baking Dish
Place the cinnamon-sugar coated taquitos seam-side down in a greased 9×13 inch baking dish. Make sure to leave a little space between each one to allow for even cooking. Continue this process with the remaining tortillas and apple filling until all are rolled and placed in the dish.
Step 7: Bake to Perfection
Once all the taquitos are arranged, pop the baking dish into the preheated oven. Bake for about 15 minutes or until the tops are golden brown and crispy. Keep an eye on them as they bake; you want to reach that perfect golden color that indicates they are ready to enjoy!
Step 8: Optional Caramel Drizzle
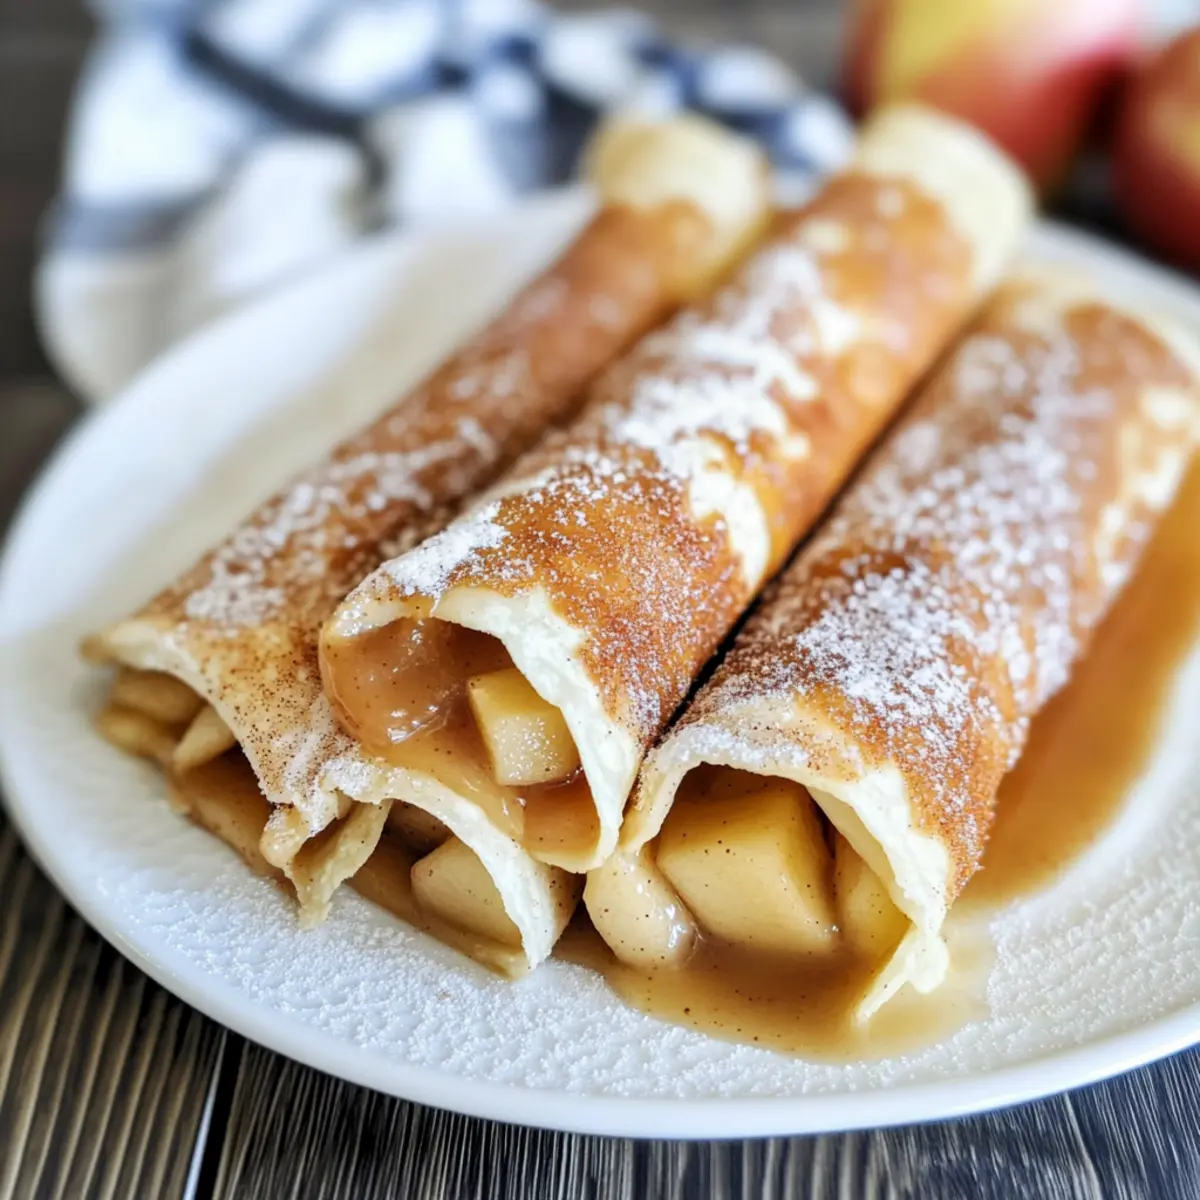
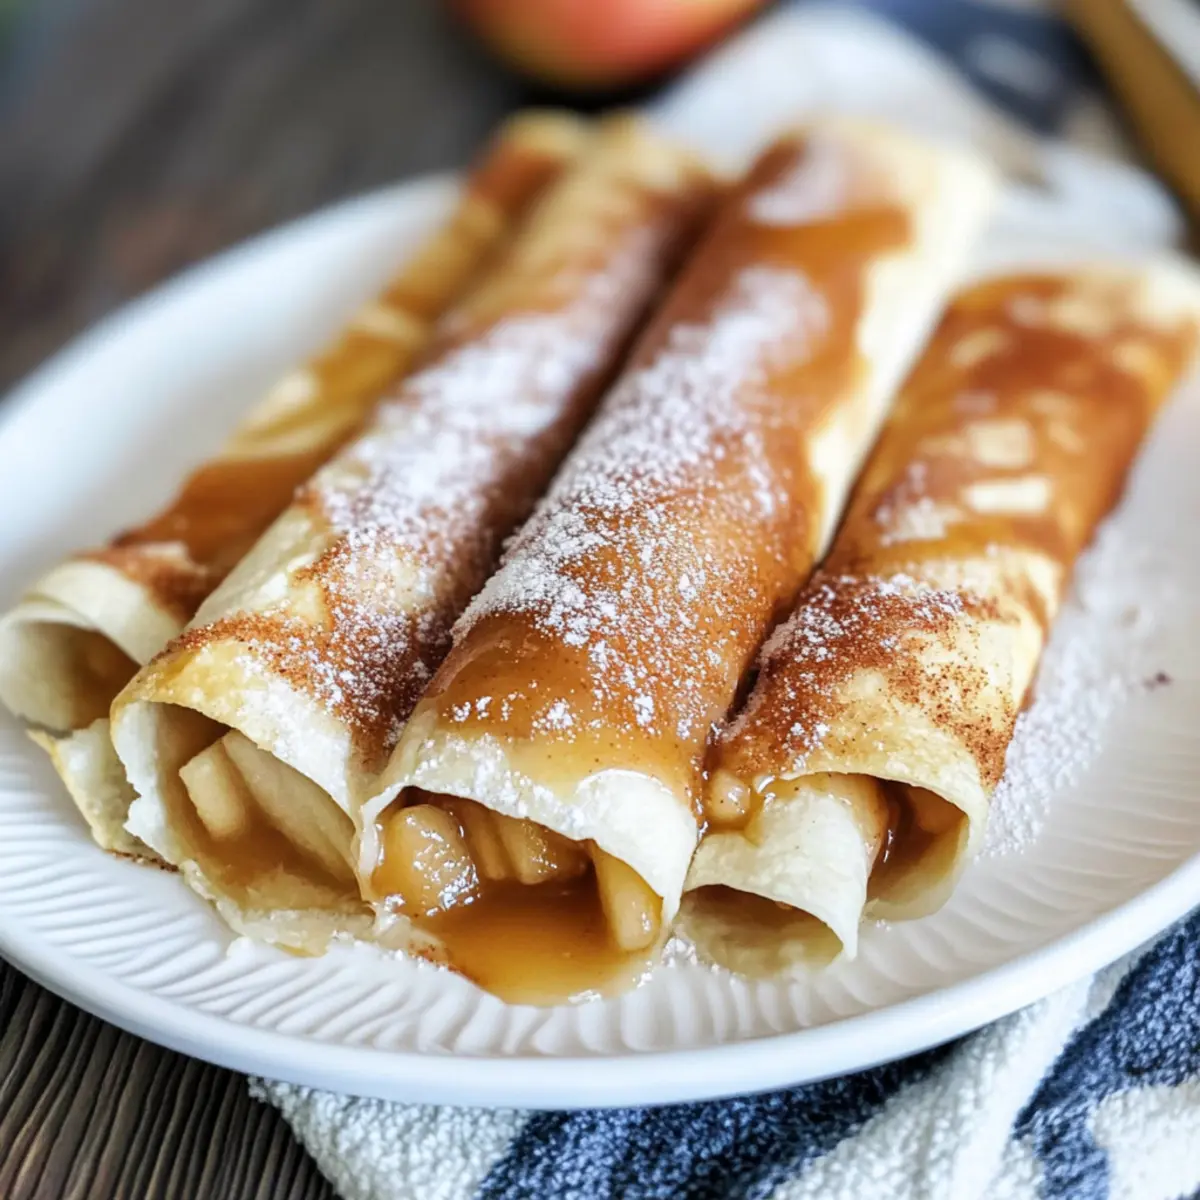
If desired, take your Apple Pie Taquitos out of the oven and allow them to cool slightly. For an indulgent touch, drizzle warm caramel syrup over the taquitos just before serving. This adds a delicious layer of sweetness and makes for an even more delightful presentation.
Apple Pie Taquitos: Tasty Twists
Get ready to unleash your creativity in the kitchen with these delightful twists on the classic Apple Pie Taquitos!
-
Gluten-Free: Use gluten-free tortillas to make this dessert friendly for those with gluten sensitivities. They taste just as good and maintain the delightful crunch!
-
Fruit Variations: Try using cherry, peach, or even mixed berry fillings for a fresh take on this classic dessert. Each fruit brings a unique burst of flavor that your family will love.
-
Creamy Addition: Spread a thin layer of cream cheese or vanilla pudding inside the tortilla before adding the apple filling for an added richness. This creamy touch transforms every bite into sheer bliss!
-
Spice It Up: Crank up the flavor with spices—try incorporating nutmeg, allspice, or even a hint of cardamom into the cinnamon-sugar mix. A little twist can elevate the entire dish.
-
Nutty Crunch: Add finely chopped nuts, like pecans or walnuts, to the apple filling for a delightful crunch and extra texture that pairs perfectly with the soft apples.
-
Sweet Topping: Instead of caramel syrup, consider drizzling with a homemade vanilla glaze. Just mix powdered sugar with a splash of vanilla and a bit of milk for a sweet finish.
-
Mini Bites: For a snack-sized treat, cut the tortillas in half before filling and rolling them. Serve these bite-sized bits at parties for a fun, shared experience!
-
Double the Treat: Layer a little chocolate spread along with the apple filling for a sweet surprise inside. Chocolate and apple is a match made in dessert heaven!
Feel free to explore these variations, and let your imagination run wild! If you’re looking for more dessert ideas, why not try out some Custard Apple Rice or indulge in a delicious Berry Slab Pie? You’ll create memorable desserts that will have everyone asking for seconds!
What to Serve with Apple Pie Taquitos?
Looking to craft a memorable meal to accompany your delightful sweet treat?
-
Vanilla Ice Cream: The creamy, cold contrast to the warm taquitos makes each bite even more indulgent. A scoop enhances the flavors beautifully.
-
Whipped Cream: A light dollop adds a fluffy richness that complements the cinnamon-sugar coating and brings a festive touch to the dessert.
-
Chocolate Sauce: Drizzling this velvety sauce provides a luscious chocolatey twist, making your Apple Pie Taquitos even more irresistible.
-
Fresh Fruit Salad: A blend of vibrant seasonal fruits brings a refreshing balance, enhancing the flavors of the dessert without overpowering them.
-
Chai Tea: The warm spices of chai mirror the cinnamon in the taquitos, creating an aromatic pairing that warms both the heart and the palate.
From creamy delights to refreshing bites, these pairings will enhance your Apple Pie Taquitos experience and make your dessert the star of the meal!
Make Ahead Options
These Apple Pie Taquitos are a fantastic option for meal prep enthusiasts looking to save time; you can assemble them up to 24 hours in advance! To do this, prepare your taquitos following the assembly instructions and place them in a greased baking dish before covering with plastic wrap. This will keep the tortillas from drying out. When you’re ready to bake, simply remove the wrap and pop them in the oven for about 15 minutes, or until they’re golden brown and crispy. For the best flavor, add the cinnamon-sugar coating just before baking to ensure that delightful crunch. Enjoy delicious, homemade Apple Pie Taquitos with minimal effort when the time comes to serve!
Expert Tips for Apple Pie Taquitos
-
Fresh Tortillas: Ensure your tortillas are soft and fresh for easy rolling. If they’re stiff, microwave them briefly with a damp paper towel to soften.
-
Light Butter Coating: Use a light brush of melted butter on the taquitos. Too much butter can lead to a greasy texture instead of achieving that desirable crispy finish.
-
Even Rolling: Roll the taquitos tightly to prevent the filling from leaking during baking. This ensures every bite is packed with delicious apple flavor!
-
Serve Warm: For the best experience, serve your Apple Pie Taquitos warm right out of the oven. They taste divine with a scoop of vanilla ice cream.
-
Experiment with Fillings: Feel free to swap the apple pie filling for other flavors like cherry or pumpkin. Just ensure it’s well-cooked to avoid sogginess.
How to Store and Freeze Apple Pie Taquitos
Airtight Container: Store any leftover apple pie taquitos in an airtight container at room temperature for up to 2 days to maintain their crispiness.
Refrigeration: If you prefer, you can also refrigerate the taquitos for up to 4 days. Just ensure they are well-wrapped to avoid drying out.
Freezing: For longer storage, freeze taquitos individually on a baking sheet before transferring them to a freezer bag or container. They can be frozen for up to 3 months.
Reheating: To reheat, place frozen or refrigerated apple pie taquitos in a preheated oven at 350°F (175°C) for about 10-15 minutes until warmed through and crisp.
Apple Pie Taquitos Recipe FAQs
How do I select ripe apples for the filling?
Absolutely! If you’re going the homemade route for apple pie filling, pick apples that are firm and slightly sweet. Varieties like Granny Smith, Honeycrisp, or Fuji work wonderfully. Look for smooth skin without bruises or dark spots, indicating freshness.
How should I store leftover apple pie taquitos?
Very simply! Store any leftover apple pie taquitos in an airtight container at room temperature for up to 2 days. If you’re worried about them losing their crunch, I often refrigerate them for freshness, but use them within 4 days for best taste.
Can I freeze apple pie taquitos?
Yes, you can! To freeze your apple pie taquitos, place them on a baking sheet in a single layer until frozen solid, then transfer them to a freezer bag or airtight container. They can be frozen for up to 3 months. This method helps maintain their crispy texture when you reheat them later.
What if my taquitos are soggy after baking?
Very rarely, sogginess can happen if there’s too much filling or the tortillas aren’t rolled tightly. Ensure your filling is not overly watery and roll each taquito securely. If they still end up soggy, try baking them a bit longer, checking every 2-3 minutes until they’re golden and crispy.
Are apple pie taquitos suitable for gluten-free diets?
Indeed! You can easily make apple pie taquitos using gluten-free tortillas. Just ensure that all your other ingredients, particularly the apple pie filling, are gluten-free as well. It’s a delightful way to share a sweet treat with everyone, regardless of dietary needs!
Crispy Apple Pie Taquitos for an Irresistibly Sweet Treat
Ingredients
Equipment
Method
- Preheat your oven to 350°F (175°C). Gather all your ingredients.
- Mix sugar and cinnamon on a plate until well incorporated.
- Chop the apples in the apple pie filling into bite-sized pieces.
- Lay a flour tortilla flat and spoon 3 tablespoons of apple filling down the center.
- Roll the tortilla tightly like a jelly roll.
- Brush the outside with melted butter and roll in the cinnamon-sugar mixture.
- Place taquitos seam-side down in a greased baking dish.
- Bake for about 15 minutes until golden brown and crispy.
- Drizzle warm caramel syrup over the taquitos just before serving.
Leave a Reply