
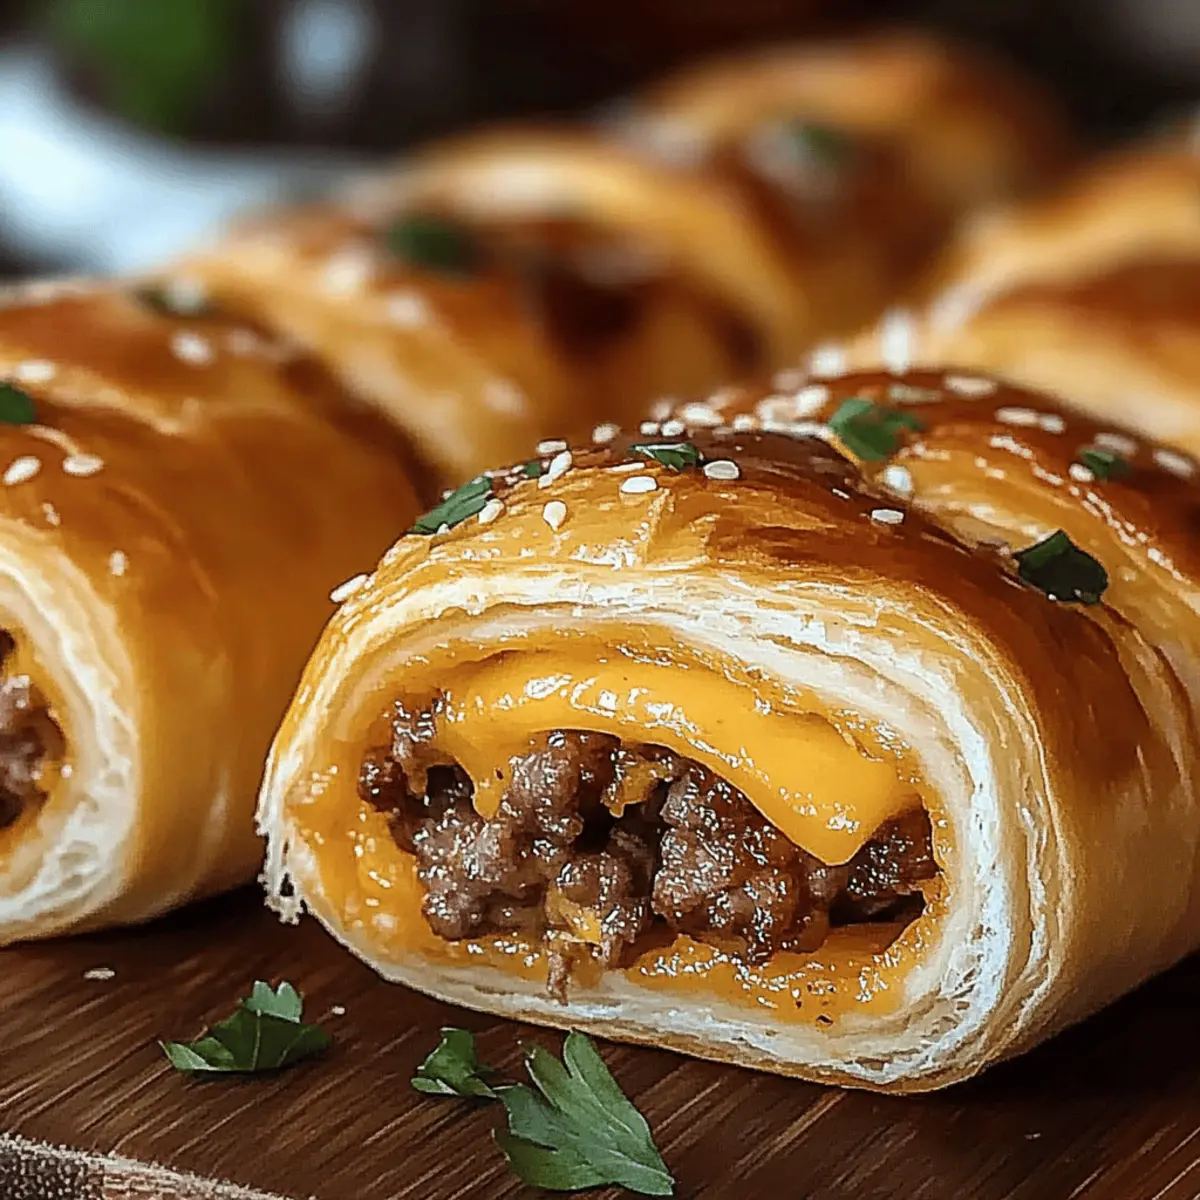
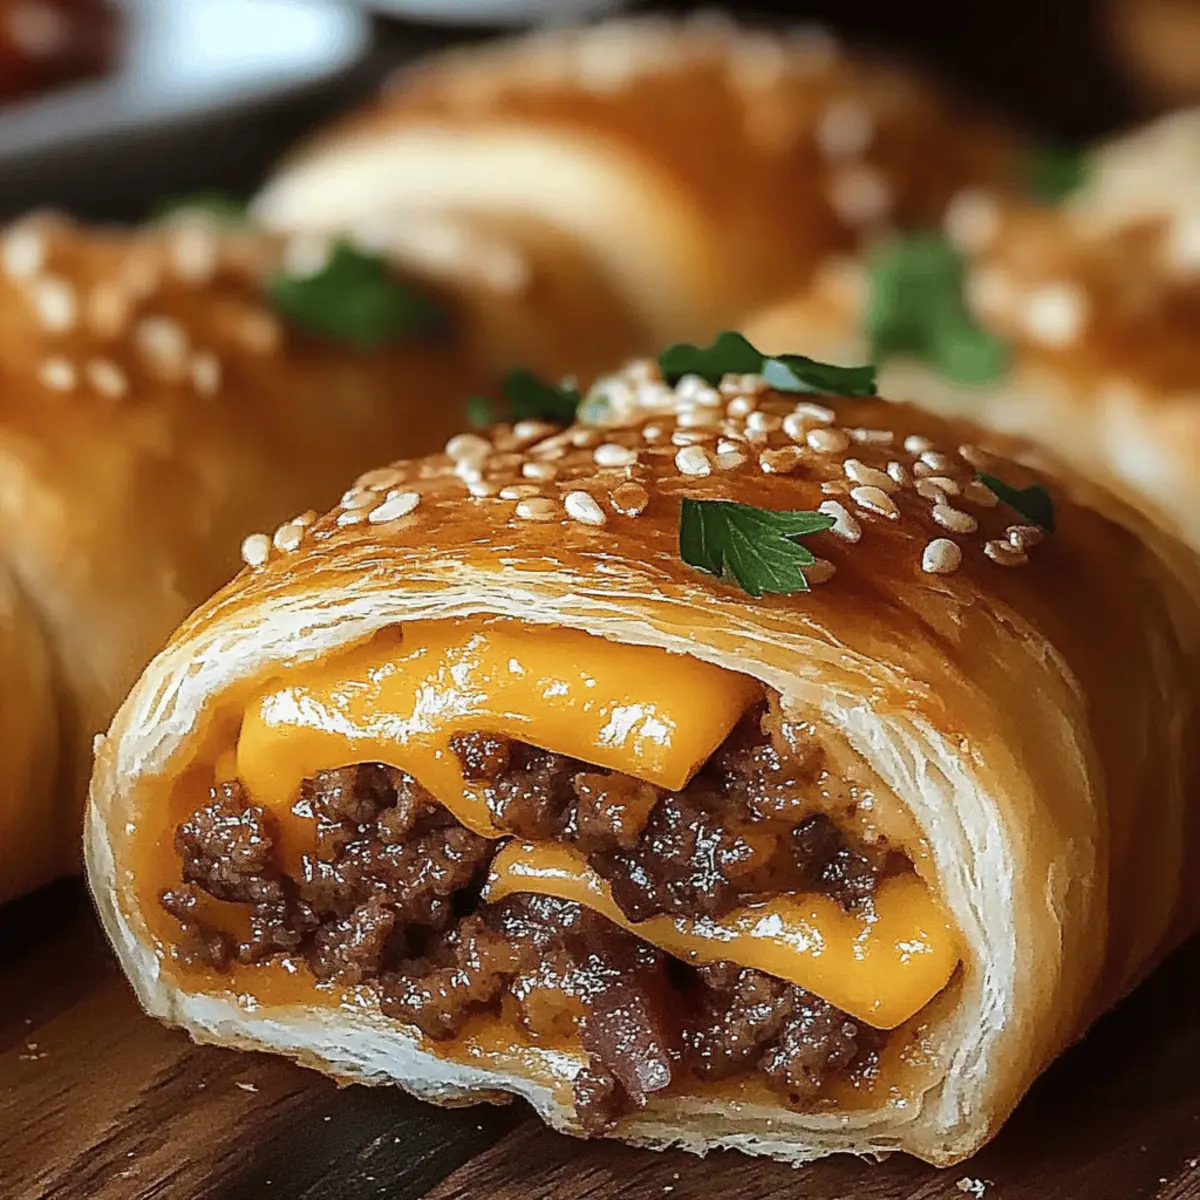
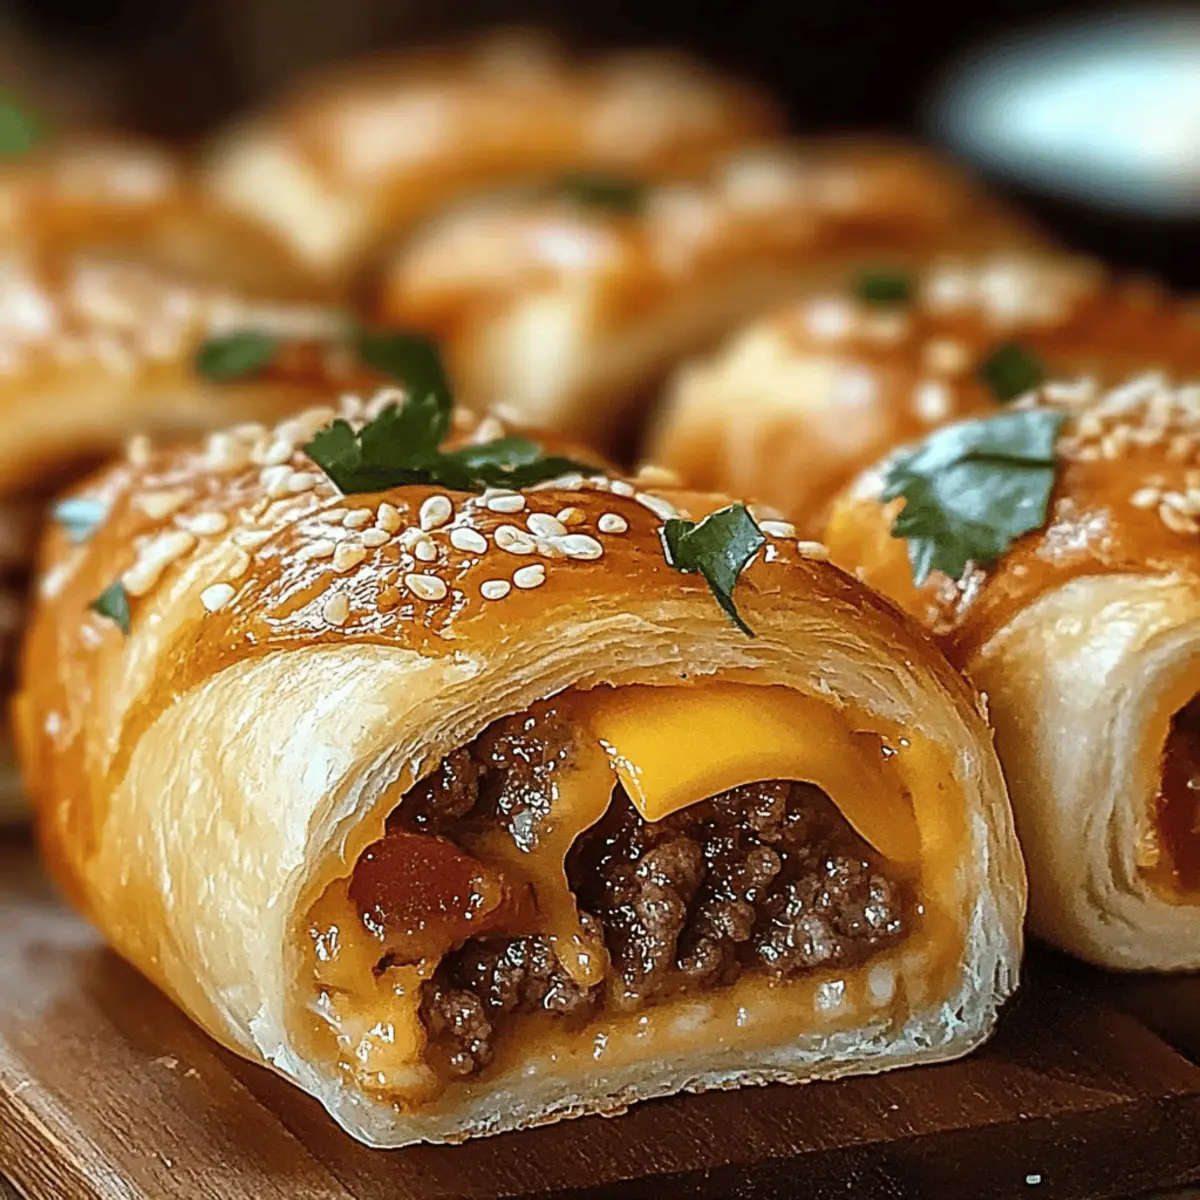
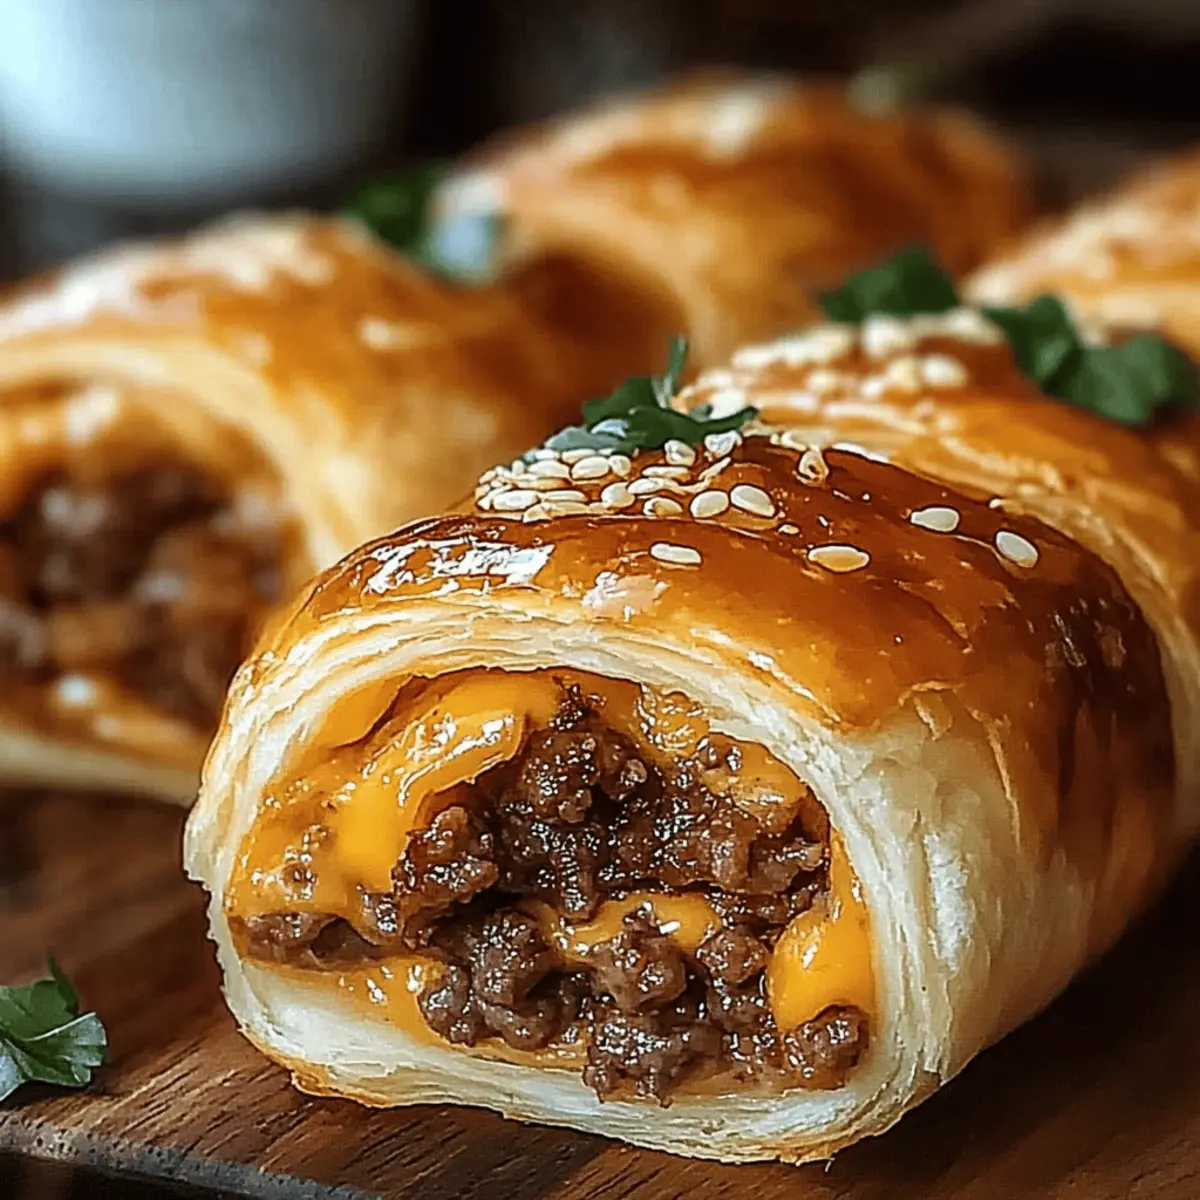
As I sat down to enjoy yet another takeout meal, a wave of inspiration hit me—why not bring the burger experience home? This led to the delightful creation of Garlic Butter Beef Cheeseburger Rollups, a scrumptious twist on a classic. With crispy, flaky dough encasing juicy ground beef and melty cheese, these handheld wonders are not just a treat for the taste buds but also a breeze to prepare. Ready in just 30 minutes, they’re perfect for game day or any casual gathering, and the best part? You can customize them to suit your cravings! Imagine adding spicy jalapeños or crumbled bacon to the mix. Who wouldn’t want to dive into that? Grab your apron; let’s roll into these crowd-pleasing delights that everyone will love!
Why are Cheeseburger Rollups so Amazing?
Quick Preparation: These cheeseburger rollups are ready in just 30 minutes, making them the perfect last-minute snack or appetizer!
Customizable Creation: With endless filling options—from spicy jalapeños to different cheeses—you can tailor these rollups to fit every guest’s palate.
Crowd-Pleasing Delight: Guests will rave about them and come back for seconds, making them ideal for game day gatherings or parties.
On-the-Go Convenience: Enjoy these rollups anytime, anywhere—great for lunchboxes or after-school snacks! Plus, you can prep the filling ahead of time.
Satisfying Flavor: Each bite bursts with rich flavors and gooey cheese, offering all the deliciousness of a cheeseburger in a portable format.
Elevate your snack game with these delightful rollups that are sure to impress!
Cheeseburger Rollups Ingredients
Note: Get ready for a flavor-packed delight with these Cheeseburger Rollups!
For the Filling
- Lean Ground Beef – A savory base for your rollups; ground turkey can be used for a leaner option.
- Salt – Enhances the overall flavor profile.
- Black Pepper – Adds a mild heat and depth of flavor.
- Garlic Powder – Provides a rich flavor; feel free to substitute with fresh garlic for a brighter taste.
- Smoked Paprika – Introduces a subtle smokiness; if you prefer, regular paprika can be a good alternative.
- Worcestershire Sauce – Adds a deep umami flavor; soy sauce works great as a substitution.
- Shredded Cheddar Cheese – Melts beautifully for a creamy texture; swap it for pepper jack to add some spice.
For the Dough
- Refrigerated Crescent Roll Dough – A convenient base for ease of preparation; homemade dough can elevate the taste.
For Brushing
- Unsalted Butter – Essential for brushing; olive oil can be used for a healthier alternative.
- Minced Garlic (for brushing) – Boosts the delicious flavor of the rollups.
- Fresh Parsley (chopped) – Adds a fresh finish; feel free to omit if it’s not your style.
Optional Fillings & Dips
- Optional Additions – Customize with pickles, jalapeños, different cheeses, or crumbled bacon for an exciting touch.
- Dipping Sauces – Classic mustard and ketchup pair perfectly for that cheeseburger taste!
Step‑by‑Step Instructions for Cheeseburger Rollups
Step 1: Preheat Oven
Begin by preheating your oven to 375°F (190°C) while you gather your ingredients. Line a baking sheet with parchment paper for easy cleanup and to prevent sticking. This preparation will set the stage for your Cheeseburger Rollups as they bake to a golden perfection.
Step 2: Brown Beef
In a skillet over medium heat, add your lean ground beef. Cook for about 5-7 minutes, stirring occasionally until the beef is nicely browned and no longer pink. Once browned, drain any excess fat to keep your rollups light and delicious. This will form the flavorful base of your cheeseburger experience.
Step 3: Season Beef
Return the cooked beef to the skillet and sprinkle in salt, black pepper, garlic powder, smoked paprika, and Worcestershire sauce. Stir well to combine and cook for an additional 1-2 minutes. You’ll know it’s ready when the spices are nicely blended, and the mixture is aromatic, enhancing the overall flavor of your Cheeseburger Rollups.
Step 4: Prepare Dough
Unroll the refrigerated crescent roll dough on a clean surface, carefully separating it into individual triangles. Ensure that the dough is cold for easier handling, and let it rest for a moment if necessary. This dough will serve as the crispy outer layer that wraps around your flavorful filling.
Step 5: Fill Dough
At the wide end of each triangle, spoon a generous amount of the seasoned beef mixture. Then, sprinkle your shredded cheddar cheese on top of the beef. This step builds the cheesy goodness that will melt beautifully as the Cheeseburger Rollups bake in the oven.
Step 6: Roll Up
Starting from the wider end, gently roll each triangle towards the pointed tip, tucking the filling in as you go. Place each roll seam-side down on the prepared baking sheet. Arranging them with a little space in between will allow them to crisp up nicely while baking.
Step 7: Brush with Garlic Butter
In a small bowl, melt your unsalted butter before stirring in minced garlic and chopped parsley. Using a pastry brush, generously brush the garlic butter over the tops of each rollup. This step not only adds flavor but will also help achieve a delightful golden finish upon baking.
Step 8: Bake
Carefully place the baking sheet in your preheated oven and bake for 12-15 minutes. Keep an eye on them; they should turn golden brown and the cheese should be bubbling. Once they look deliciously inviting, remove them from the oven, allowing them to cool slightly before serving your Cheeseburger Rollups.
Cheeseburger Rollups: Customization Galore!
Feel free to explore these delicious alternatives and make this recipe your own with a sprinkle of creativity!
- Turkey Swap: Use ground turkey for a lighter filling; still savory and satisfying!
- Dairy-Free: Opt for vegan cheese or skip cheese altogether for a tasty dairy-free version. It’s just as flavorful!
- Spicy Kick: Add diced jalapeños or a dash of hot sauce to the beef mixture for an exciting heat level.
- Extra Cheesy: Blend in cream cheese or ricotta for an ultra-creamy filling that will delight cheese lovers everywhere. Enjoy each gooey bite!
- Herb Infusion: Incorporate fresh herbs like dill or thyme into the beef mixture for a fragrant twist that brightens the flavors.
- Gluten-Free: Substitute with gluten-free crescent roll dough to cater to those with gluten sensitivities; everyone will enjoy these scrumptious snacks!
- Bacon Lovers: Crumble crispy bacon into the beef mixture for a smoky, savory punch that adds an irresistible crunch!
- Veggie Delight: Toss in some sautéed mushrooms or spinach for a veggie-packed version, proving that cheeseburger rollups can be nutritious and tasty.
Feel free to seize the moment and let your taste buds guide you to the perfect Cheeseburger Rollups for any occasion! And don’t forget to explore serving ideas like pairing them with crispy potato chips or preparing a delightful dipping sauce for an extra flavor boost!
Make Ahead Options
These Cheeseburger Rollups are perfect for meal prep enthusiasts! You can prepare the filling up to 24 hours in advance by cooking and seasoning the ground beef mixture and then storing it in an airtight container in the refrigerator. Additionally, you can unroll the crescent roll dough and keep it wrapped in the refrigerator until you’re ready to assemble. When you’re ready to bake, simply fill and roll the dough with the prepped filling, brush with garlic butter, and then bake as directed for a delicious snack that remains just as fresh and flavorful. This makes it incredibly easy to pull together a crowd-pleasing treat with minimal last-minute effort!
What to Serve with Garlic Butter Beef Cheeseburger Rollups?
Elevate your meal with these delightful accompaniments that perfectly complement the rich, cheesy goodness of your rollups.
- Crispy Potato Chips: Add a satisfying crunch that balances the soft, cheesy interior of the rollups. Opt for seasoned chips for an exciting flavor fusion.
- Garden Salad: A fresh, crunchy salad with a tangy vinaigrette brightens up the meal while providing a refreshing contrast to the savory rollups.
- Creamy Coleslaw: This cool, tangy side adds a delightful crunch and pairs wonderfully with the warm cheeseburger flavors. It’s a classic picnic choice!
- Spicy Jalapeño Poppers: Kick things up a notch with these fiery bites. Their creamy filling and heat can be a fun contrast to the cheeseburger rollups.
- Vegetable Platter with Dip: Serve colorful, fresh veggies alongside a creamy dip to balance the richness of the rollups—a nutritious option everyone will appreciate.
- Sweet Potato Fries: Crispy and slightly sweet, these fries add another layer of deliciousness while also providing a different texture to your meal.
- Refreshing Lemonade: A cool glass of homemade lemonade can help cleanse the palate between bites, making each rollup feel as exciting as the first.
- Brownies or Cookie Bars: End your meal on a sweet note with decadent brownies or chocolate chip cookie bars. They offer that perfect finish after the hearty rollups.
- Craft Beer or Cider: Pair these rollups with a chilled craft beer or a fruity cider for a delightful combination that enhances the flavors of the dish!
- Apple Slices with Peanut Butter: For a light and healthy dessert option, crisp apple slices dipped in creamy peanut butter provide a lovely balance of sweetness and protein.
How to Store and Freeze Cheeseburger Rollups
Fridge: Store leftovers in an airtight container for up to 3 days to maintain freshness and flavor. Reheat them in the oven to keep the crust crispy.
Freezer: Wrap individual rollups in plastic wrap and place them in a freezer-safe bag. They can be frozen for up to 2 months. Just pop them in the oven straight from the freezer for a quick snack!
Reheating: For the best texture, reheat rollups in the oven at 350°F (175°C) until warmed through and crispy. Avoid microwaving to prevent sogginess.
Make-Ahead Tip: Prepare the filling in advance and store it in the fridge for up to 24 hours. Assemble and bake the rollups just before serving for a warm and delicious treat!
Expert Tips for Cheeseburger Rollups
Choose Lean Meat: Use lean ground beef to avoid excess grease, ensuring that your Cheeseburger Rollups stay light and crispy.
Don’t Overfill: Be cautious not to overfill the dough—just enough filling allows for easy rolling and prevents spills while baking.
Check Dough Temperature: Make sure your crescent roll dough is cold before handling. Cold dough is easier to roll and holds its shape better.
Mind the Bake Time: Keep an eye on your rollups as they bake; if they brown too quickly, lower the temperature to 350°F (175°C) to cook evenly without burning.
Cool Before Serving: Let the Cheeseburger Rollups cool slightly after baking. This helps the cheese set and makes for easier eating, especially for little hands!
Cheeseburger Rollups Recipe FAQs
How do I choose the right ground beef for my Cheeseburger Rollups?
Absolutely! Look for lean ground beef that appears bright red, as this indicates freshness. Avoid any packages with dark spots or an unpleasant odor. Ground turkey is a great alternative if you’re seeking a leaner option without sacrificing flavor.
How should I store leftover Cheeseburger Rollups?
To keep your rollups fresh, store them in an airtight container in the refrigerator for up to 3 days. For the best results, reheat them in the oven at 350°F (175°C) until heated through and crispy, avoiding the microwave to prevent sogginess.
Can I freeze Cheeseburger Rollups?
Yes! To freeze, individually wrap each rollup in plastic wrap and place them in a freezer-safe bag. They can be stored in the freezer for up to 2 months. When you’re ready to enjoy, simply bake them straight from the freezer at 375°F (190°C) until golden brown and hot.
What can I do if my rollups are browning too quickly in the oven?
If you notice your Cheeseburger Rollups browning too fast, reduce the oven temperature to 350°F (175°C). This will allow them to cook evenly throughout without burning the outside.
Are there any dietary considerations for Cheeseburger Rollups?
These rollups can be easily customized for various dietary needs! For a gluten-free option, use gluten-free crescent roll dough. If you have cheese allergies, try substituting with dairy-free cheese. When preparing for children or pets, remove any spicy additions like jalapeños to keep them safe and comfortable.
How long can I keep the filling for Cheeseburger Rollups before assembling?
You can prepare the filling ahead of time and store it in the refrigerator for up to 24 hours. This is a fantastic way to save time; just assemble and bake the rollups fresh whenever you’re ready to serve!
Cheeseburger Rollups: Quick, Cheesy Game Day Delight
Ingredients
Equipment
Method
- Preheat your oven to 375°F (190°C) and line a baking sheet with parchment paper.
- In a skillet, cook the lean ground beef over medium heat for 5-7 minutes until browned. Drain excess fat.
- Add salt, black pepper, garlic powder, smoked paprika, and Worcestershire sauce to the beef. Stir and cook for 1-2 minutes.
- Unroll the crescent roll dough into triangles on a clean surface.
- At the wide end of each triangle, place a spoonful of the beef mixture and sprinkle with shredded cheese.
- Roll each triangle towards the pointed tip and place seam-side down on the baking sheet.
- Melt the unsalted butter and mix with minced garlic and parsley. Brush over the rollups.
- Bake for 12-15 minutes, until golden brown and cheese is bubbling. Allow to cool slightly before serving.
Leave a Reply