
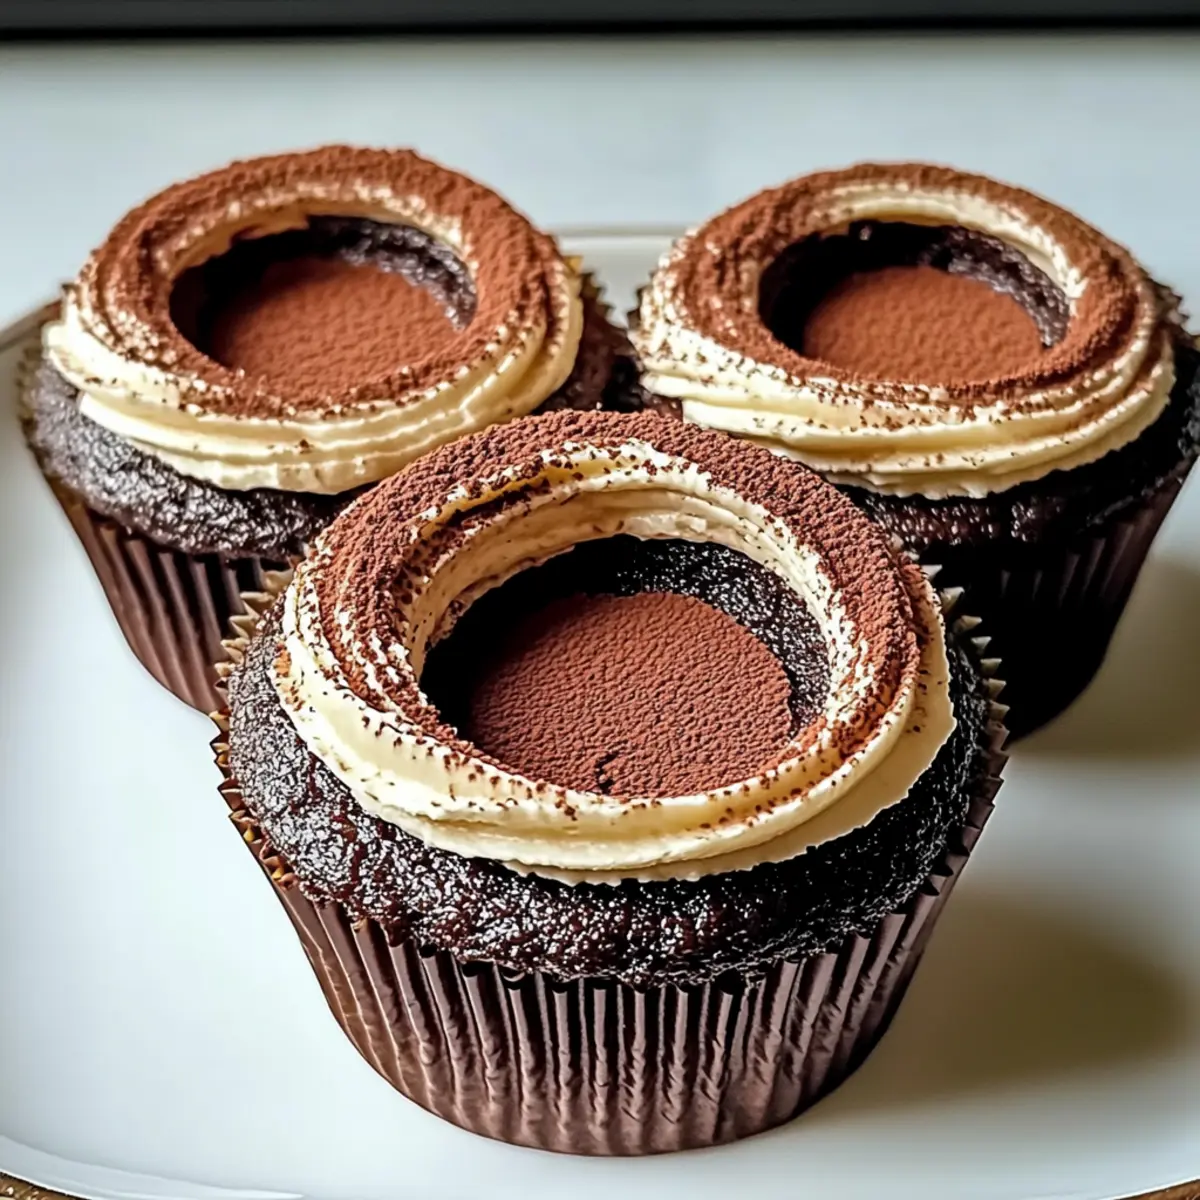
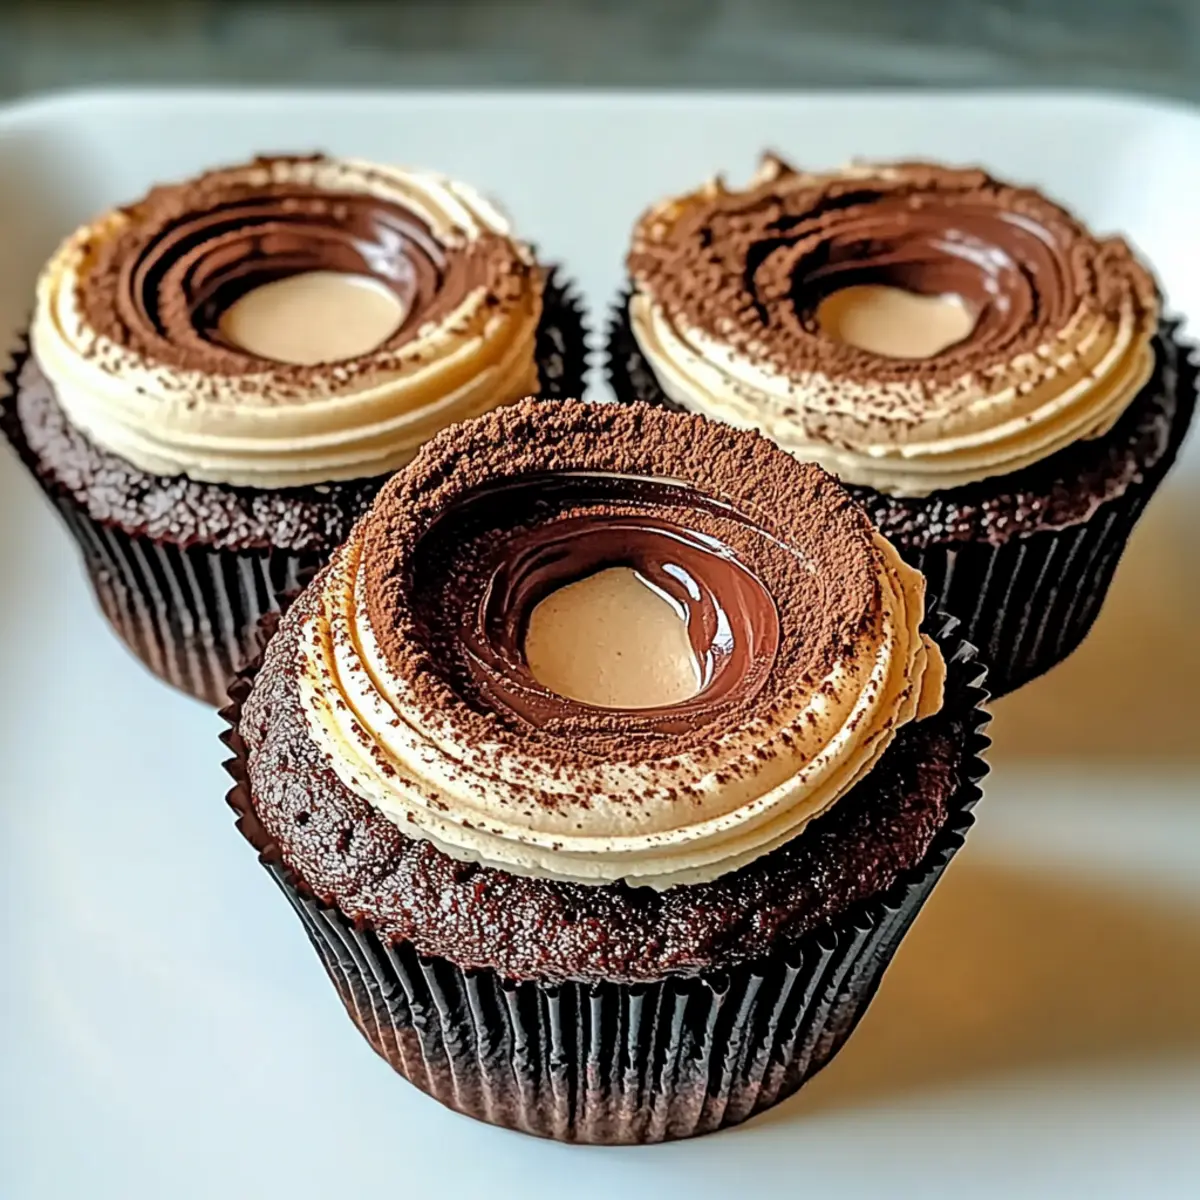
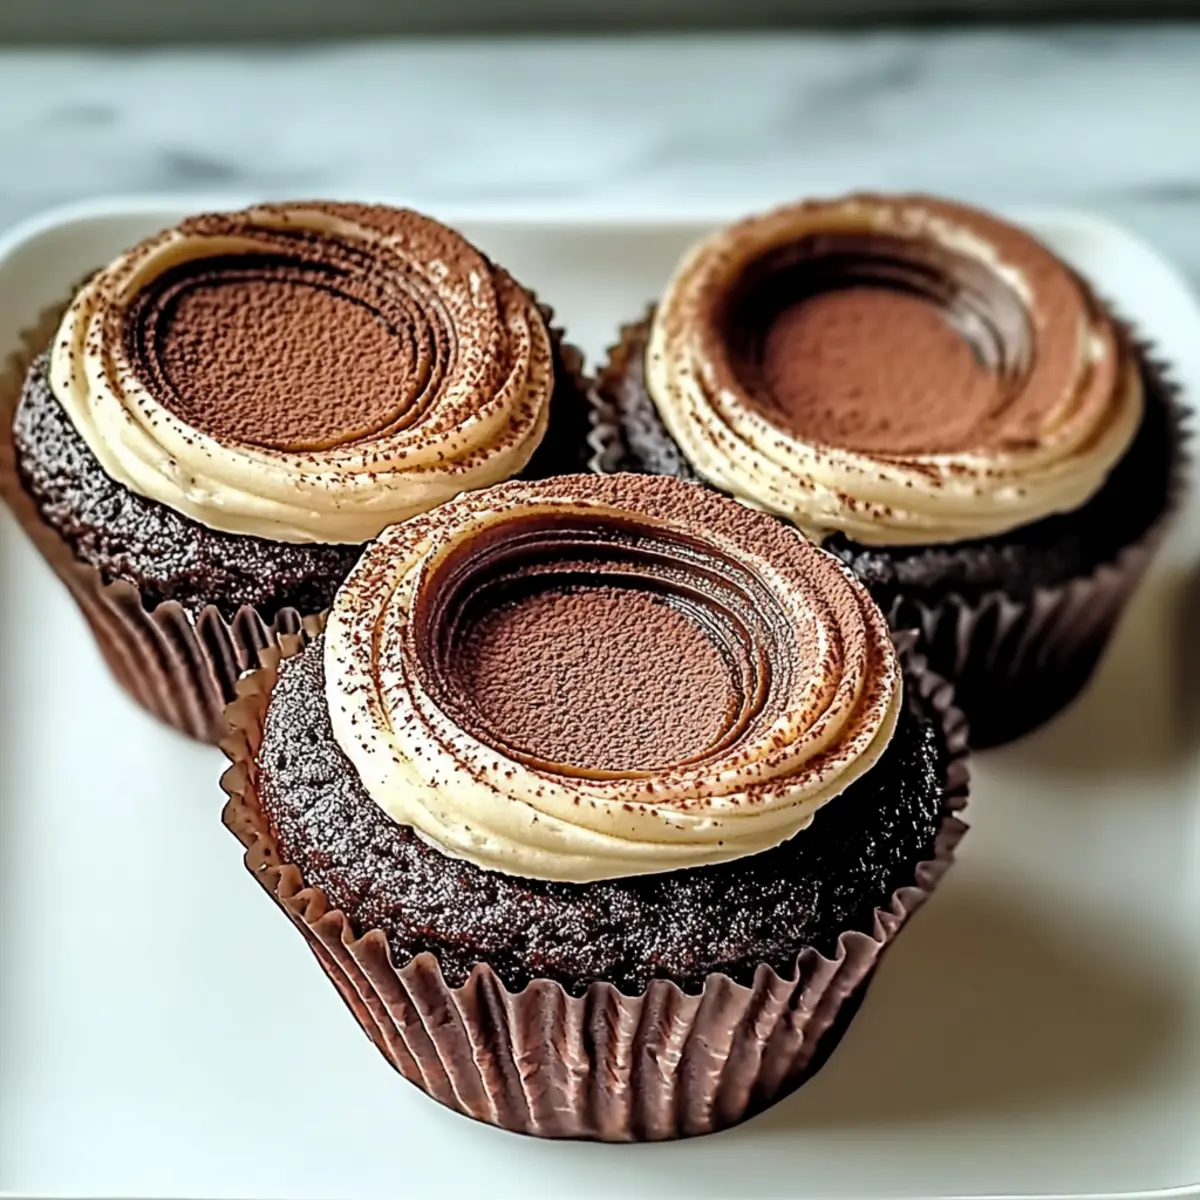
With a gentle swirl of nostalgia and a dash of excitement, I recently found myself craving something that combines my two favorite desserts: tiramisu and cupcakes. Enter the star of the show—these Indulgent Gluten-Free Chocolate Tiramisu Cupcakes! They’re incredibly quick to whip up, taking less than 30 minutes from start to finish, making them perfect for spontaneous gatherings or a sweet treat after dinner. Each cake is filled with a luscious espresso mascarpone filling, merging the classic flavors of tiramisu into a delightful cupcake. Plus, these are easily customizable—whether you want a gluten-free option or plan to dress them up with unique fillings and toppings, the possibilities are endless! Are you ready to impress your friends and family with this incredible fusion dessert? Let’s dive into the recipe together!
Why are these cupcakes a must-try?
Decadent Flavor: These Chocolate Tiramisu Cupcakes deliver a rich, satisfying chocolate and coffee experience in every bite.
Quick and Easy: Ready in under 30 minutes! Perfect for those last-minute dessert cravings or gatherings.
Customizable Options: Choose the gluten-free variation or mix it up with different fillings and toppings to suit your taste.
Crowd-Pleaser: Impress friends and family with these delightful cupcakes that combine beloved flavors, making them a hit at any event.
Flexible Ingredients: With simple swaps, you can adapt this recipe to accommodate dietary needs, just like the Salted Caramel Chocolate option.
Indulgent Texture: The creamy mascarpone filling is a delicious surprise, turning each cupcake into a luxurious treat.
Chocolate Tiramisu Cupcakes Ingredients
For the Cupcakes
• All-Purpose Flour – Provides structure; substitute with gluten-free all-purpose blend for gluten-free option.
• Cocoa Powder – Adds rich chocolate flavor; use dark cocoa for a deeper taste.
• Baking Powder – Leavening agent for fluffiness; always check for freshness.
• Granulated Sugar – Sweetens the cupcakes; coconut sugar can serve as a natural alternative.
• Eggs – Provide moisture and structure; flax eggs may be used for a plant-based substitute.
• Milk – Adds moisture; consider almond milk for a dairy-free alternative.
• Vegetable Oil – Keeps cupcakes moist; melted butter can be an option too.
• Espresso – Infuses coffee flavor; instant coffee can work as a substitute.
For the Filling
• Mascarpone Cheese – The creamy filling that lends richness; ricotta can serve as a dairy alternative.
• Espresso – Enhances the coffee flavor in the filling; double the flavor for coffee enthusiasts.
For Dusting
• Cocoa Powder – Finishing touch that enhances flavor; it’s a must for a classic tiramisu experience.
Step-by-Step Instructions for Chocolate Tiramisu Cupcakes
Step 1: Preheat the Oven
Begin by preheating your oven to 350°F (175°C). While the oven warms up, line a muffin tin with cupcake liners to prepare for the luscious Chocolate Tiramisu Cupcakes. This crucial first step ensures your cupcakes bake evenly and achieve that perfect fluffy texture.
Step 2: Mix Dry Ingredients
In a large mixing bowl, whisk together the all-purpose flour, cocoa powder, baking powder, and granulated sugar until well combined. Ensure there are no lumps for an even mixture, which is vital for the flavor and texture of the cupcakes. This dry ingredient blend creates the rich chocolate foundation of your tasty cupcakes.
Step 3: Combine Wet Ingredients
In a separate bowl, whisk the eggs, milk, and vegetable oil together until smooth and well blended. This mixture should become creamy and slightly frothy, signaling it’s ready to be incorporated into the dry ingredients. The combination of wet ingredients will bring moisture and richness to your Chocolate Tiramisu Cupcakes.
Step 4: Combine Wet and Dry Mixtures
Gently fold the wet ingredients into the dry mixture using a spatula. Stir just until combined—be cautious not to overmix, as this can lead to dense cupcakes. The batter should be thick and slightly glossy, indicating it’s ready for the next step in creating your delightful cupcakes.
Step 5: Fill the Cupcake Liners
Spoon the cupcake batter into the prepared liners, filling them about two-thirds full to allow space for rising. This will result in perfectly sized cupcakes that won’t overflow while baking. Place the muffin tin in the preheated oven and bake for 18-20 minutes, or until a toothpick inserted in the center comes out clean.
Step 6: Cool the Cupcakes
Once baked, remove the muffin tin from the oven and allow the Chocolate Tiramisu Cupcakes to cool in the pan for about 5 minutes. Afterward, carefully transfer the cupcakes to a wire rack to cool completely. Skipping this step may result in a gooey filling, so be patient while they cool.
Step 7: Prepare the Mascarpone Filling
While your cupcakes are cooling, whip together the mascarpone cheese and espresso in a bowl until the mixture is light and fluffy. This creamy filling brings the traditional tiramisu flavors to life in your cupcakes. Keep whipping until it reaches a smooth and spreadable consistency, perfect for the next step.
Step 8: Fill the Cupcakes
Once the cupcakes have cooled completely, cut off the tops and scoop out a small portion from the center using a spoon or cupcake corer. Fill each cupcake with the delicious mascarpone filling, ensuring they are generously stuffed to enjoy the rich flavors in every bite.
Step 9: Dust and Serve
Finally, dust the filled cupcakes lightly with cocoa powder for that classic tiramisu finish. This last touch enhances the flavor and looks delightful. Serve your Chocolate Tiramisu Cupcakes to friends and family, and prepare for them to be your new favorite dessert!
Chocolate Tiramisu Cupcakes Variations
Feel free to elevate your Chocolate Tiramisu Cupcakes with these fun and tasty variations!
-
Gluten-Free: Substitute all-purpose flour with a gluten-free blend to enjoy this dessert without dietary concerns. The flavors remain just as delightful, catering to everyone’s needs.
-
Dairy-Free: Use almond milk and dairy-free mascarpone to create a creamy filling that tastes just as indulgent. It allows those avoiding dairy to enjoy this decadent treat!
-
Different Liqueurs: Switch out the espresso for a splash of amaretto or coffee liqueur in the filling for an extra flavor boost. Think of the warm, inviting flavors that will take your cupcakes to a whole new level!
-
Fruit-Filled: Add a spoonful of raspberry or cherry jam to the filling for a fruity twist that complements the chocolate and coffee beautifully. The tartness of the fruit adds a refreshing contrast with each bite.
-
Seasonal Variations: Embrace the seasons by mixing in pumpkin spice for fall or peppermint extract for the holidays. These seasonal touches bring an extra layer of warmth and fun to your cupcakes!
-
Nutty Texture: Incorporate finely chopped nuts, such as hazelnuts or walnuts, into the cupcake batter for an added crunch. Each nibble becomes a delightful surprise with this lovely texture contrast!
-
Mocha Delight: Enhance the espresso flavor by adding instant coffee granules directly into the batter. The deep coffee taste will appeal to coffee lovers and enhance that rich tiramisu experience.
-
Sugar Swaps: Try using coconut sugar instead of granulated sugar for a hint of caramel flavor. Not only does it taste amazing, but it also brings a hint of sophistication to your cupcakes, reminiscent of gourmet treats.
Feel inspired? You can also explore delightful versions like these Strawberry Chocolate Decadent or even indulge in irresistible Chewy Oreo Chocolate options. The kitchen is your playground!
Make Ahead Options
Chocolate Tiramisu Cupcakes are an excellent choice for meal prep, saving you time during busy weeknights or gatherings. You can prepare the cupcake batter and refrigerate it up to 24 hours before baking. Simply mix the wet and dry ingredients, then cover and store in an airtight container to maintain freshness. When you’re ready to enjoy, bake them as directed and allow to cool completely before filling. The mascarpone filling can also be whipped and stored in the refrigerator for up to 3 days. Just fill the cooled cupcakes shortly before serving to ensure they remain deliciously fresh and fluffy!
How to Store and Freeze Chocolate Tiramisu Cupcakes
Fridge: Store your Chocolate Tiramisu Cupcakes in an airtight container for up to 3 days to keep them fresh and moist.
Freezer: For longer storage, freeze unfilled cupcakes in a single layer, wrapped well in plastic wrap for up to 2 months. Thaw in the fridge before filling.
Reheating: If desired, reheat cooled cupcakes in the microwave for about 10-15 seconds, ensuring they remain soft and delightful before adding filling.
Make-Ahead Option: Bake the cupcakes in advance and fill them just before serving to preserve their perfect texture and flavor.
What to Serve with Chocolate Tiramisu Cupcakes
Indulging in Chocolate Tiramisu Cupcakes opens a world of delightful pairings that will elevate your dessert experience.
-
Rich Vanilla Ice Cream: Creamy and sweet, it complements the chocolate and coffee notes beautifully, adding a cool contrast to the cupcakes.
-
Fresh Berries: Strawberries or raspberries add a tart burst that balances the richness of the cupcakes, providing a refreshing bite.
-
Espresso Shots: Enhance the coffee flavor by pairing these sweet treats with a shot of espresso. It’s the ultimate coffee lover’s duo!
-
Whipped Cream: A dollop of lightly sweetened whipped cream brings a light, airy texture that complements the cupcake’s moistness perfectly.
-
Chocolate Ganache Drizzle: Intensify the chocolate experience! A warm, luscious ganache adds a decadent touch that chocolate lovers will adore.
These pairings don’t just complement; they create a symphony of flavors that turn an ordinary dessert into an extraordinary occasion. Whether enjoying a quiet evening or celebrating with family and friends, these suggestions promise to leave everyone craving more!
Expert Tips for Chocolate Tiramisu Cupcakes
Cool Completely: Allow cupcakes to cool entirely before adding the mascarpone filling, ensuring a better texture.
Avoid Overmixing: Gently combine wet and dry ingredients to prevent dense cupcakes. A light touch is key for fluffy Chocolate Tiramisu Cupcakes.
Use Fresh Ingredients: Always check the freshness of your baking powder and replace if it has expired for optimal rise.
Customize Wisely: Experiment with fillings and liqueurs, but keep balance in mind to avoid overwhelming the chocolate flavor.
Store Properly: Keep cupcakes in an airtight container to maintain moisture. They stay fresh in the fridge for up to 3 days.

Chocolate Tiramisu Cupcakes Recipe FAQs
What type of flour should I use for gluten-free options?
Absolutely! For a gluten-free version of these Chocolate Tiramisu Cupcakes, substitute regular all-purpose flour with a high-quality gluten-free all-purpose blend. Look for a mix that includes xanthan gum, as it helps mimic the structure that gluten provides.
How long can I store these cupcakes?
You can store your Chocolate Tiramisu Cupcakes in an airtight container in the refrigerator for up to 3 days. To maintain their moist texture, ensure the container is well-sealed. If you notice any drying out, a slice of bread placed in the container can help retain moisture, thanks to its natural moisture-absorbing properties.
Can I freeze the cupcakes?
Yes, you can! For freezing, it’s best to freeze unfilled cupcakes. Wrap each cupcake individually in plastic wrap and then place them in a freezer-safe bag. They can stay frozen for up to 2 months. When you’re ready to enjoy, simply thaw them in the refrigerator overnight before filling with the mascarpone mixture.
What should I do if my cupcakes sink in the middle?
If your Chocolate Tiramisu Cupcakes sink in the middle, it could be due to overmixing the batter or inadequate baking time. To avoid this, mix the wet and dry ingredients until just combined and stick to the recommended baking time of 18-20 minutes. Always check with a toothpick; it should come out clean or with few crumbs.
Are there any allergy considerations for this recipe?
Certainly! This recipe contains potential allergens like eggs, dairy (mascarpone cheese), and gluten (if using regular flour). If accommodating allergies, use flax eggs instead of eggs, opt for dairy-free cheese like ricotta or cream cheese, and choose a gluten-free flour blend. Always double-check ingredient labels if you’re serving someone with allergies, especially with pre-packaged items like cocoa powder and baking powder.
Can I customize the filling or toppings?
Very much so! You can add flavored liqueurs such as amaretto or coffee liqueur to the mascarpone filling for an adult twist. For toppings, consider fresh berries, a drizzle of chocolate sauce, or toasted nuts for extra texture. The more the merrier—let your creativity shine!
Decadent Chocolate Tiramisu Cupcakes You’ll Crave Again
Ingredients
Equipment
Method
- Preheat your oven to 350°F (175°C) and line a muffin tin with cupcake liners.
- In a large mixing bowl, whisk together the all-purpose flour, cocoa powder, baking powder, and granulated sugar until well combined.
- In a separate bowl, whisk the eggs, milk, and vegetable oil together until smooth.
- Gently fold the wet ingredients into the dry mixture using a spatula until combined.
- Spoon the batter into the prepared liners, filling them about two-thirds full. Bake for 18-20 minutes.
- Allow cupcakes to cool in the pan for about 5 minutes, then transfer to a wire rack to cool completely.
- Whip together the mascarpone cheese and espresso until light and fluffy.
- Once cooled, cut off the tops of the cupcakes and scoop out a small portion. Fill each with the mascarpone mixture.
- Dust the filled cupcakes with cocoa powder before serving.
Leave a Reply