
As the scent of freshly baked cookies wafts through the air, my heart is taken back to carefree childhood days filled with laughter and cozy family gatherings. These Classic Candy Cane Cookies capture that joyous spirit of the holidays, offering a delightful blend of butteriness and a refreshing peppermint twist. Perfect for holiday celebrations or as charming gifts to share, this easy recipe provides not just tasty treats but also a wonderful way to create lasting memories with loved ones. Plus, whether you’re a seasoned pro or a kitchen novice, these cookies are a breezy fit for any baking adventure. Ready to whip up these festive delights? Let’s dive into the magic of baking and fill our homes with the spirit of the season!

Why are Candy Cane Cookies a Must-Bake?
Festive Fun: Baking these Candy Cane Cookies isn’t just about the cookies; it’s an opportunity for family bonding. Picture the joy of twisting the colors together with loved ones.
Delightfully Simple: With straightforward steps, even beginners can produce stunning results, making it a perfect holiday project.
Irresistibly Flavorful: The combination of buttery dough and peppermint essence offers a nostalgic taste, ensuring they’ll be a hit at any holiday gathering or as sweet gifts.
Versatile Options: From Chocolate Candy Cane Cookies to gluten-free versions, there’s a delightful variation for every preference, ensuring everyone’s cravings are satisfied this season.
Stunning Presentation: Visually appealing and festive, these cookies are not just treats but show-stoppers on your dessert table, capturing the spirit of the holidays beautifully.
Classic Candy Cane Cookies Ingredients
For the Cookie Dough
- All-Purpose Flour – This is the foundation of the cookies, so make sure to sift it for a light and fluffy texture.
- Baking Powder – Essential for helping the cookies rise, ensuring a soft and delightful bite.
- Salt – A crucial ingredient that enhances flavors and balances sweetness in your classic candy cane cookies.
- Unsalted Butter – Adds richness and moisture; be sure to soften it to room temperature for easy mixing.
- Granulated Sugar – Provides sweetness and contributes to the perfect texture of your cookies.
- Large Egg – Binds all the ingredients and adds moisture; using a fresh egg gives the best results.
- Vanilla Extract – Infuses a warm aromatic flavor that pairs beautifully with peppermint.
- Peppermint Extract – Delivers that signature minty flavor; can be swapped with almond extract for a unique twist.
- Red Gel Food Coloring – Necessary for achieving the iconic red color, gel gives you vibrant hues without moisture interference.
- Crushed Candy Canes or Sugar Topping – Optional for decoration, adding a delightful crunch and holiday flair.
For Optional Decoration
- Melted Chocolate – Drizzle over the cooled cookies for a rich finish and extra sweetness if desired.
- Sprinkles – Use festive sprinkles to enhance the visual appeal of your cookies.
Now that we have the ingredients ready, it’s time to embrace the joy of baking and bring the delicious aroma of classic candy cane cookies into your kitchen!
Step‑by‑Step Instructions for Classic Candy Cane Cookies
Step 1: Prepare the Dough
In a large mixing bowl, combine 2 cups of sifted all-purpose flour, 1 teaspoon of baking powder, and a pinch of salt. In another bowl, cream together 1 cup of softened unsalted butter and 1 cup of granulated sugar until light and fluffy, about 3-4 minutes. Beat in 1 large egg and add 1 teaspoon each of vanilla and peppermint extracts, mixing until well combined.
Step 2: Incorporate Flour Mixture
Gradually add the dry flour mixture to the butter mixture, stirring gently after each addition until a soft dough forms. The dough should be slightly sticky but manageable; this creates the delicious base for your Classic Candy Cane Cookies. Be sure to scrape down the sides of the bowl to incorporate all ingredients evenly.
Step 3: Color the Dough
Divide the prepared dough in half and place one half in a separate bowl. Using red gel food coloring, add a few drops to one portion of the dough, kneading until the color is evenly distributed and vibrant. This red dough will create the signature stripes for your festive cookies, making them visually appealing.
Step 4: Chill the Dough
Wrap each section of dough in plastic wrap and refrigerate for at least 30 minutes. Chilling is crucial for firming up the dough, which prevents the cookies from spreading too much while baking. This step will help maintain the delightful shape of your Classic Candy Cane Cookies.
Step 5: Shape the Cookies
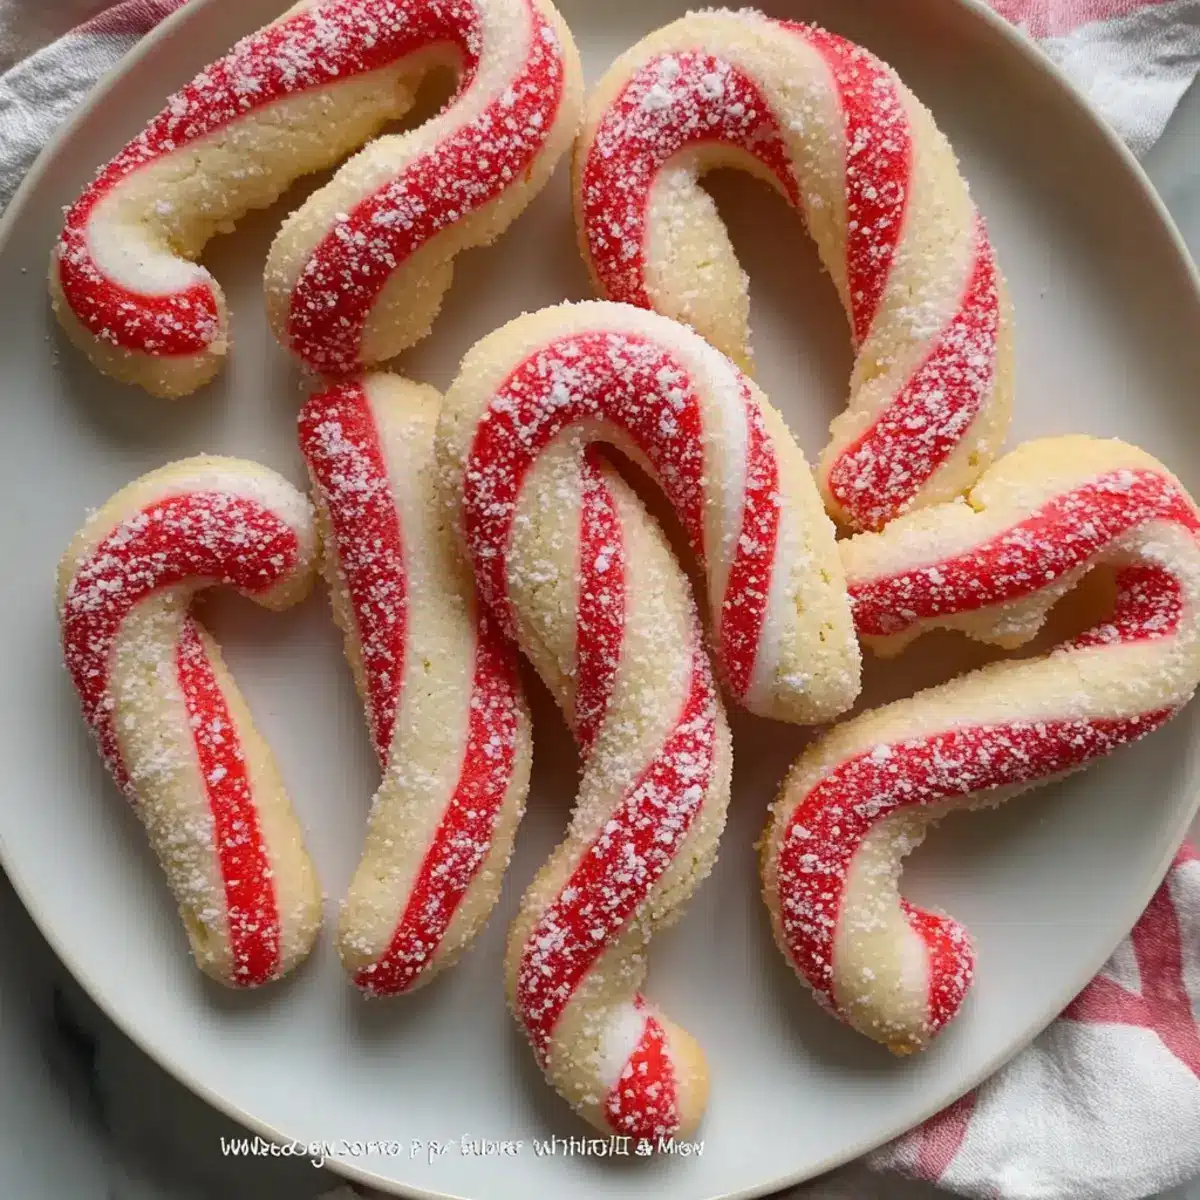
Preheat your oven to 350°F (175°C). Once chilled, remove the dough from the refrigerator and take small pieces of each color. Roll them into 6-inch ropes, then twist the red and white ropes together to form charming candy cane shapes. Place each cookie on a parchment-lined baking sheet, leaving space for spreading.
Step 6: Bake
Bake the cookies in the preheated oven for 10-12 minutes, or until the edges are lightly golden. The soft centers will firm up as they cool. Keep an eye on them, as overbaking may lead to crispier edges, which deviates from the classic chewy texture.
Step 7: Decorate (Optional)
Once the cookies are completely cool, sprinkle them with crushed candy canes or drizzle with melted chocolate for an extra festive touch. These decorations enhance not only the flavor but also the visual appeal of your Classic Candy Cane Cookies, making them perfect for holiday gatherings or as delightful gifts.

Classic Candy Cane Cookies Variations
Embrace the joy of customization with these delightful twists on Classic Candy Cane Cookies that will surprise and enchant your taste buds!
-
Chocolate Candy Cane Cookies: Add cocoa powder to half the dough for a rich chocolatey flavor that pairs beautifully with peppermint.
-
Vanilla Almond Candy Canes: Replace peppermint extract with almond extract for a uniquely nutty and aromatic cookie experience that’s sure to delight.
-
Peppermint Swirl Cookies: Instead of shaping into canes, roll and swirl both colors together for a delightful peppermint surprise in each bite.
-
Gluten-Free Option: Simply swap all-purpose flour for a 1:1 gluten-free flour blend, ensuring everyone can enjoy the holiday cheer.
-
Chocolate-Dipped Version: Dip the cooled cookies in melted chocolate and sprinkle with colorful holiday sprinkles for an extra festive touch.
-
Mini Candy Cane Bites: Roll smaller pieces of dough into bite-sized candy canes for quick treats that are perfect for sharing at gatherings.
-
Sparkling Sugar Candy Canes: Before baking, sprinkle the cookie shapes with sparkling sugar to achieve a delightful crunch and shimmering appearance.
-
Stuffed Candy Cane Cookies: Create a surprise filling by adding chocolate chips or a spoonful of Nutella in the center of your cookie before shaping them.
For even more inspiration, consider the tempting flavors of Chewy Oreo Cookies or the scrumptious Pistachio Cream Cookies to spruce up your dessert trays!
What to Serve With Classic Candy Cane Cookies
Prepare to create a festive feast as you enjoy these delightful cookies with a variety of delectable accompaniments.
- Rich Hot Chocolate: A creamy cup of hot chocolate balances the peppermint flavor, creating a cozy pairing perfect for sipping alongside your cookies.
- Peppermint Mocha: For coffee lovers, the enticing blend of coffee and peppermint enhances the refreshing taste of these cookies, making every bite a holiday delight.
- Creamy Vanilla Ice Cream: The smooth creaminess of vanilla ice cream provides a contrasting texture, beautifully complementing the chewy cookie. Enjoy it a la mode!
- Festive Fruit Salad: Pair with a vibrant fruit salad featuring citrus and berries for a refreshing side that cuts through the richness of the cookies.
- Chilled Sparkling Water: A crisp sparkling water adds a refreshing effervescence to cleanse the palate between bites of these rich, minty treats, making it a lighter option.
- Chocolate Dipped Fruit: The addition of chocolate-covered strawberries or bananas adds a touch of elegance and decadence that pairs perfectly with the cookies.
- Mini Cheesecakes: These little bites of cheesecake offer a creamy richness with a hint of tang, balancing the sweet peppermint notes of the cookies beautifully.
- Gingerbread Cookies: Embrace the holiday spirit further by serving alongside gingerbread cookies, where their spicy notes create a delightful contrast to the peppermint.
- Eggnog: A traditional favorite! This festive drink adds a rich, nutmeg-flavored creaminess that complements the cookies and enhances the season’s warmth.
- Pecan Pie Bars: If you’re looking for a sweet finish, the nutty richness of pecan pie bars offers a wonderfully contrasting flavor while celebrating the essence of the holidays.
Make Ahead Options
These Classic Candy Cane Cookies are perfect for busy home cooks looking to streamline their holiday baking! You can prepare the dough up to 24 hours in advance. Simply follow the dough preparation steps, then wrap each colored section tightly in plastic wrap and refrigerate. This chilling not only helps enhance the flavors but also prevents spreading during baking, ensuring your cookies keep their charming shapes. When you’re ready to bake, simply remove the dough from the fridge, shape the cookies, and bake as directed. This way, you’ll have delicious, fresh-baked treats with minimal effort on your busy day!
Expert Tips for Classic Candy Cane Cookies
Chill the Dough: Ensure you chill the dough for at least 30 minutes to prevent spreading. This step is critical for maintaining the shape of your Classic Candy Cane Cookies.
Use Gel Food Coloring: Opt for gel food coloring instead of liquid. It offers vibrant color without adding extra moisture, keeping your dough’s texture perfect.
Gentle Twisting: When forming candy canes, be gentle while twisting the dough. Too much pressure can flatten the design, resulting in less distinct stripes.
Check for Doneness: Keep an eye on your cookies while baking; they should be lightly golden at the edges but still soft in the center for that classic chewy texture.
Storage Tips: Store baked cookies in an airtight container at room temperature for up to five days. This keeps them fresh and delightful for your holiday gatherings.
How to Store and Freeze Classic Candy Cane Cookies
Room Temperature: Store your baked cookies in an airtight container at room temperature for up to 5 days. This helps retain their soft texture and delicious flavor.
Freezer: For longer storage, freeze the cookies in a single layer on a baking sheet. Once frozen, transfer them to a zip-top bag or airtight container and store for up to 2 months.
Reheating: When you’re ready to enjoy your Classic Candy Cane Cookies, thaw at room temperature or warm them in the oven at 350°F (175°C) for about 5-10 minutes to regain their delightful softness.
Layering: If stacking in a container for freezing, place parchment paper between layers to prevent sticking and preserve their charming shapes.

Classic Candy Cane Cookies Recipe FAQs
What kind of flour is best for Candy Cane Cookies?
Absolutely, all-purpose flour is ideal for these cookies! It provides the structure needed for the candy canes to hold their shape. Just be sure to sift it for a light and fluffy texture, which will result in a delightfully tender cookie.
How should I store my baked Candy Cane Cookies?
Very simply! Keep your baked cookies in an airtight container at room temperature for up to 5 days. This method preserves their soft texture and delightful flavor, making them perfect for snacks throughout the week!
Can I freeze Classic Candy Cane Cookies?
Absolutely! To freeze your cookies, first freeze them in a single layer on a baking sheet until firm. Then, transfer them to a zip-top bag or airtight container. You can store them in the freezer for up to 2 months. When you’re ready to enjoy, thaw them at room temperature or warm them in the oven at 350°F (175°C) for about 5-10 minutes to bring back that fresh-baked softness.
What if my dough is too sticky?
If your dough feels too sticky, it may help to add a little more sifted flour—about a tablespoon at a time—until it reaches a manageable consistency. Remember, it’s also essential to chill the dough for about 30 minutes as this will firm it up, making it easier to handle and shape.
Are there any dietary considerations for Candy Cane Cookies?
For those who have allergies, you can make these cookies safer by replacing the all-purpose flour with a 1:1 gluten-free flour blend. Also, if you’re baking for someone with a nut allergy, make sure to stick with pure peppermint extract instead of any flavored extracts that could contain nuts. Always double-check packaging if allergies are a concern.
How do I get vibrant red stripes on my cookies?
Using gel food coloring is the best way to achieve vibrant red stripes! When tinting one half of the dough, add a few drops of gel food coloring and knead until the color is evenly mixed in. This ensures the color is bright without adding excess moisture to the dough. Enjoy creating those beautiful, festive candy cane shapes!
Classic Candy Cane Cookies for Festive Family Fun
Ingredients
Equipment
Method
- In a large mixing bowl, combine 2 cups of sifted all-purpose flour, 1 teaspoon of baking powder, and a pinch of salt.
- In another bowl, cream together 1 cup of softened unsalted butter and 1 cup of granulated sugar until light and fluffy, about 3-4 minutes.
- Beat in 1 large egg and add 1 teaspoon each of vanilla and peppermint extracts, mixing until well combined.
- Gradually add the dry flour mixture to the butter mixture, stirring gently after each addition until a soft dough forms.
- Divide the prepared dough in half and color one half with red gel food coloring, kneading until even.
- Wrap each section of dough in plastic wrap and refrigerate for at least 30 minutes.
- Preheat your oven to 350°F. Roll small pieces of each color into 6-inch ropes and twist together for shapes.
- Place on a parchment-lined baking sheet and bake for 10-12 minutes.
- Once cool, decorate with crushed candy canes or melted chocolate.
Leave a Reply