
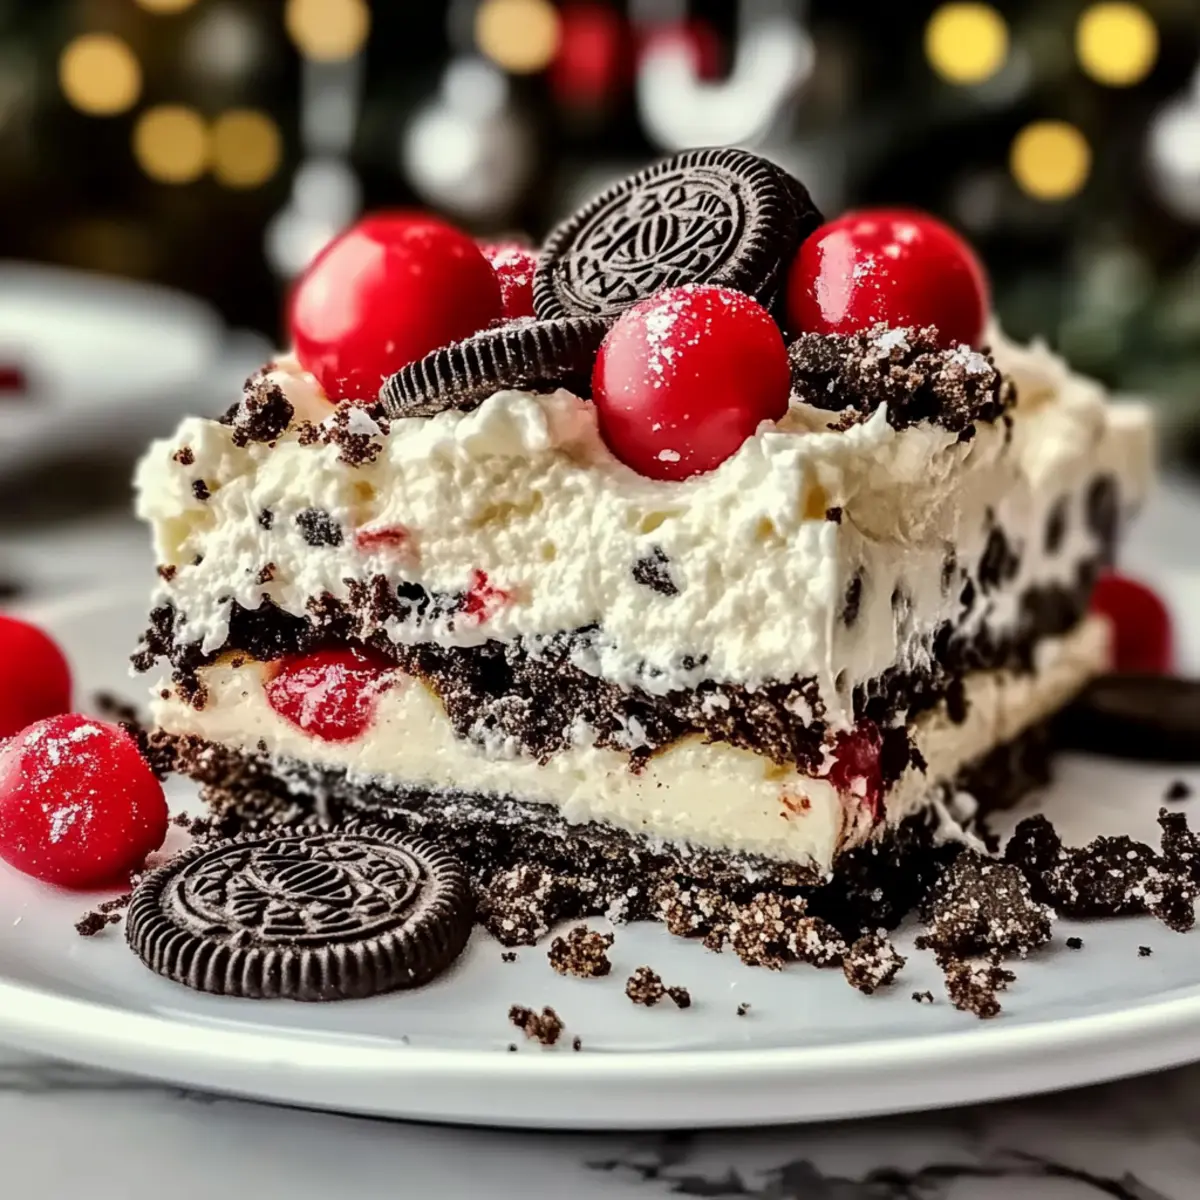
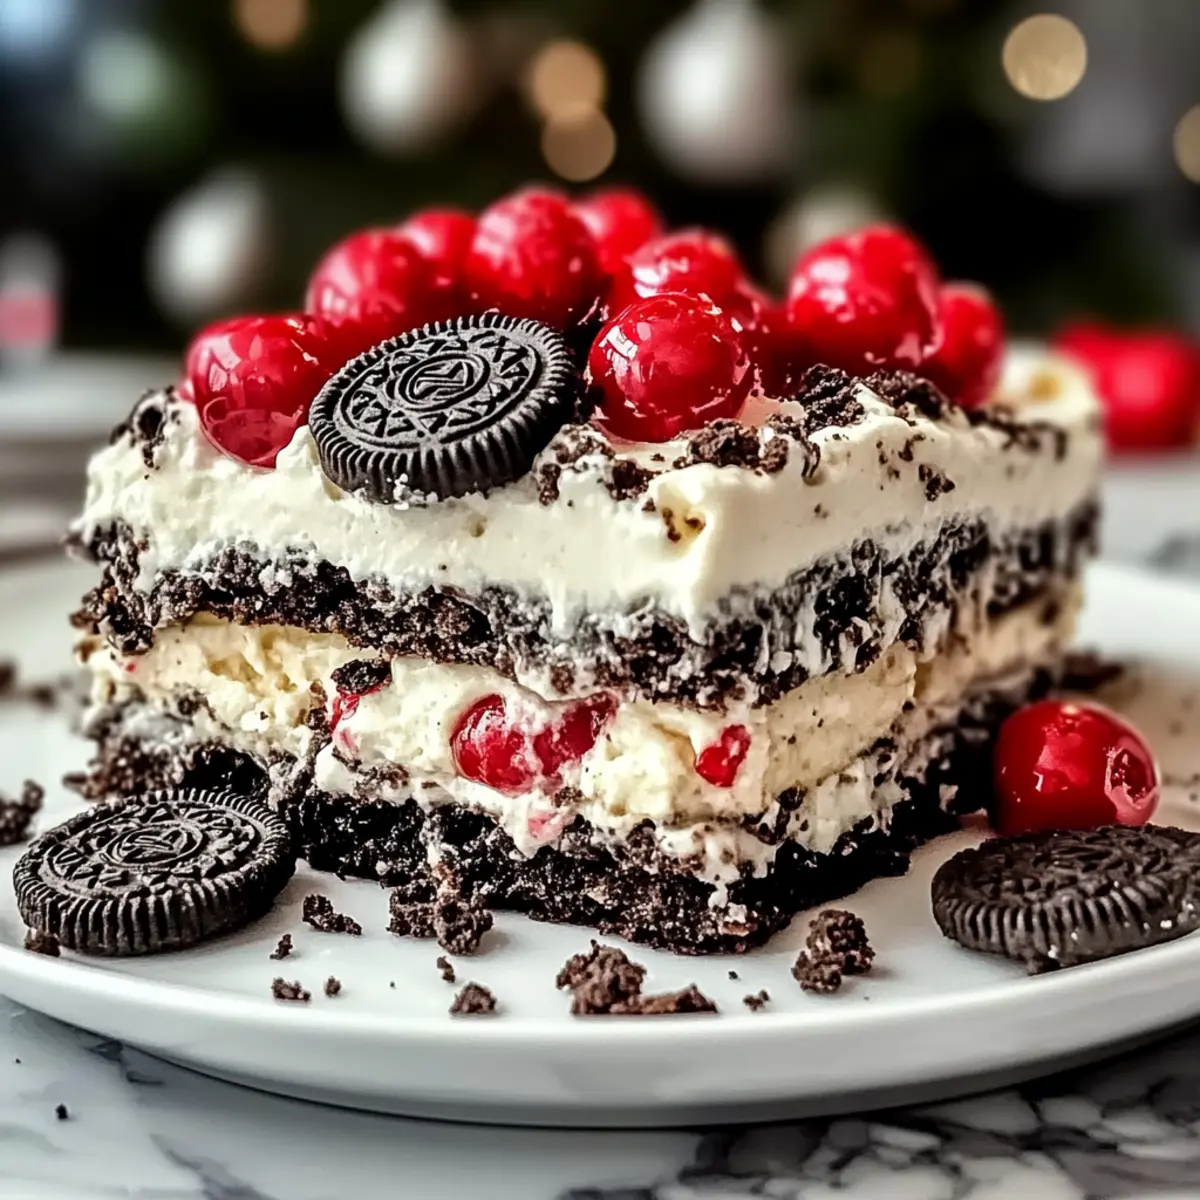
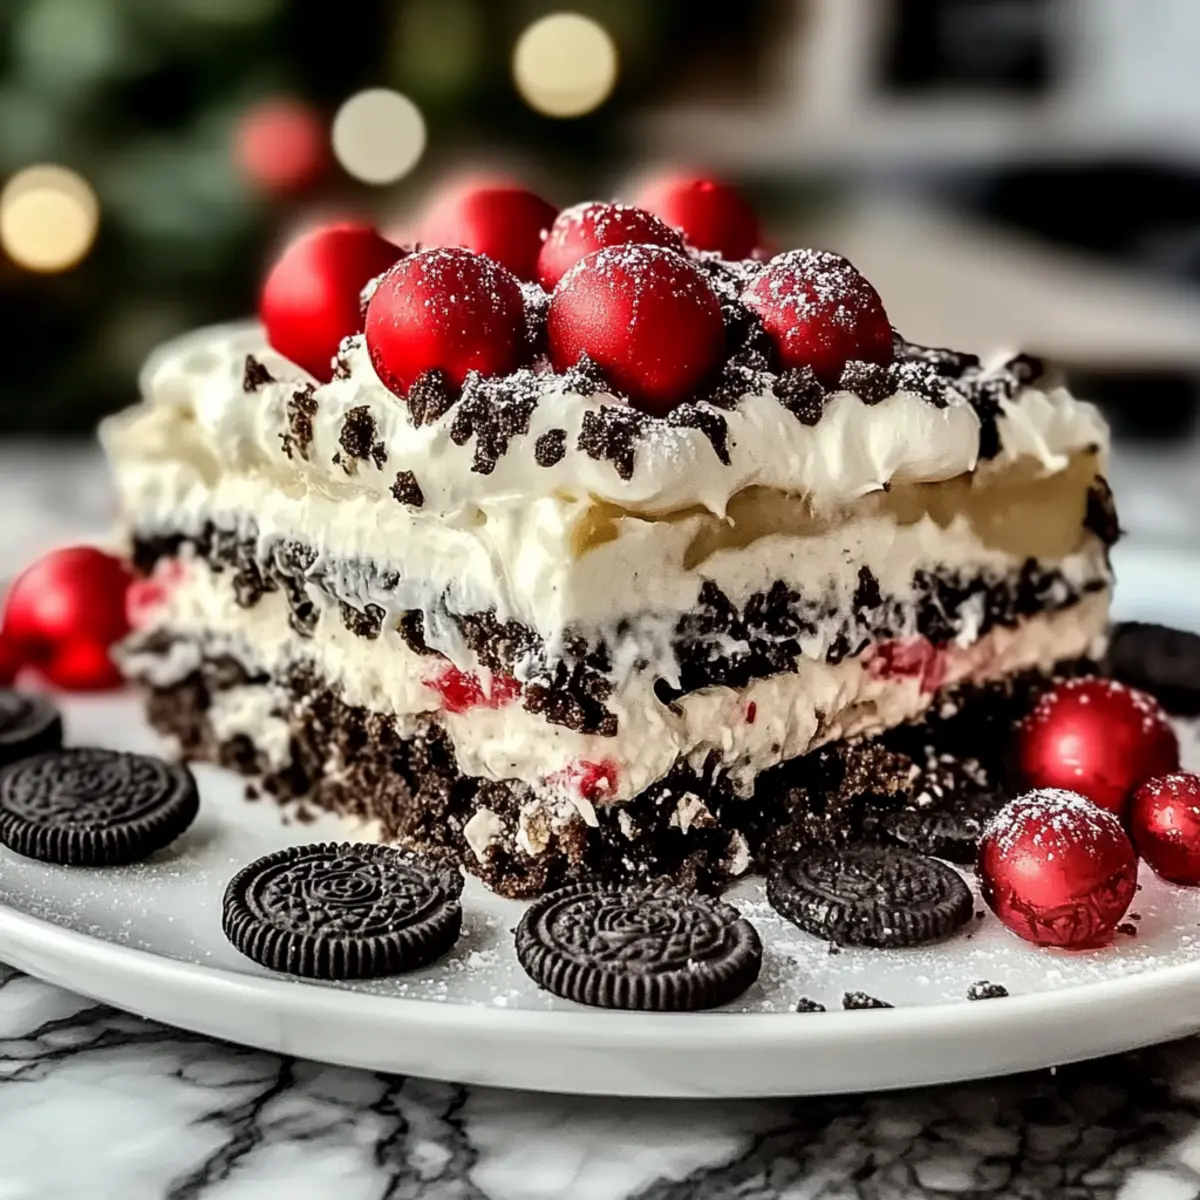
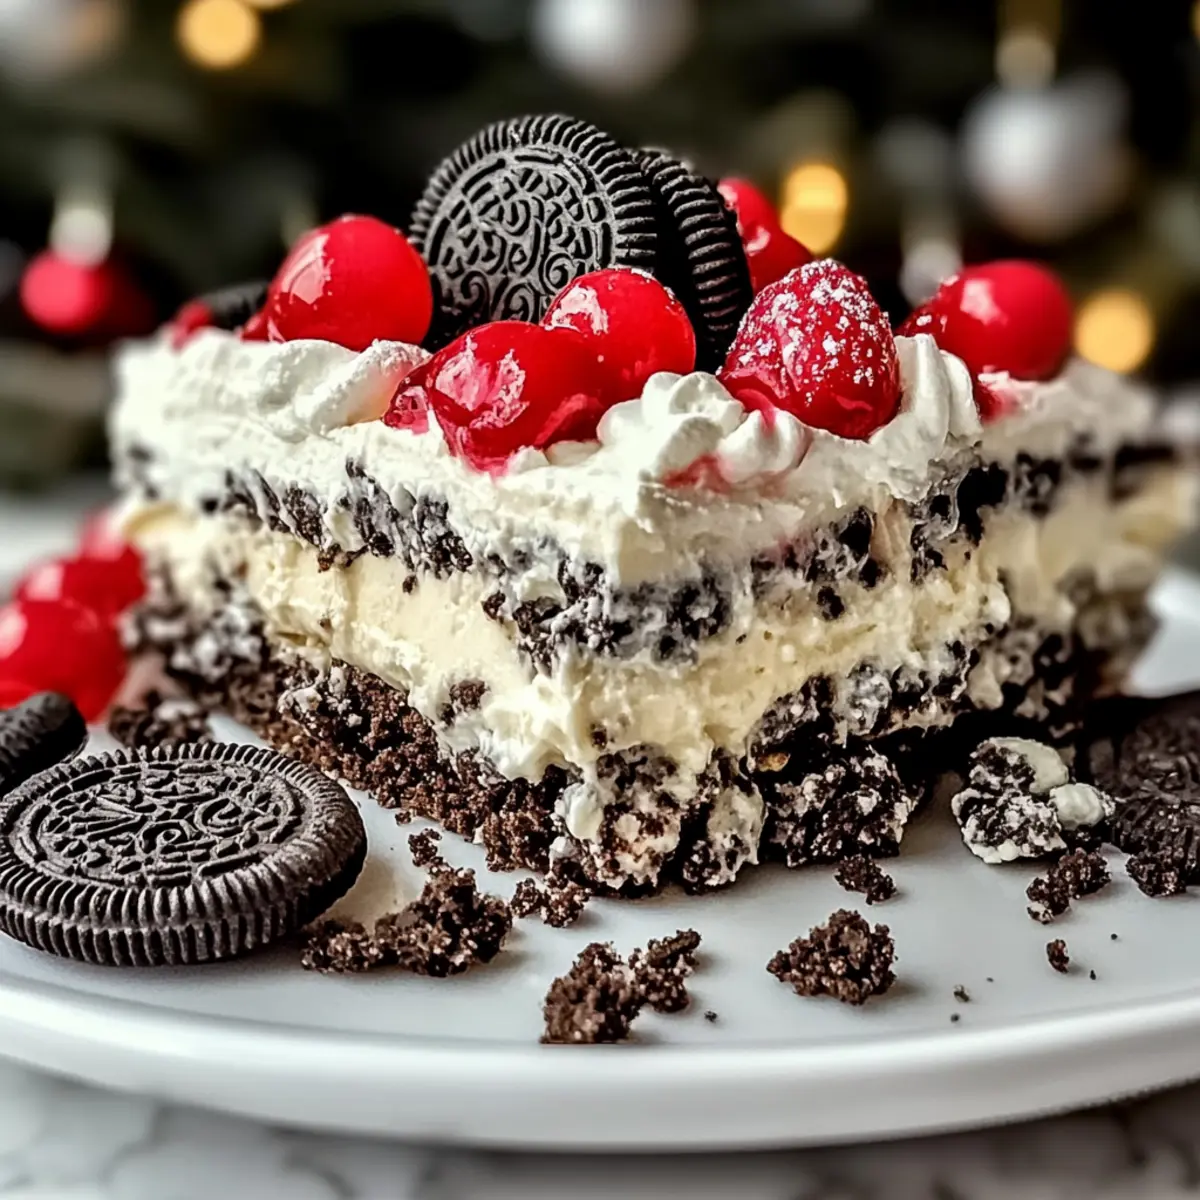
The aroma of peppermint and chocolate wafts through my kitchen, instantly transforming me into a kid again, eagerly anticipating holiday sweets. That’s the magic of my Easy No-Bake Christmas Oreo Lasagna—a blissful, layered dessert that turns a handful of ingredients into a holiday showstopper. With its creamy filling and delightful crunch from Oreo cookies, this treat comes together in a flash, making it the perfect solution for busy festive gatherings. Not only is it a guaranteed crowd-pleaser, but it’s also completely customizable, inviting you to experiment with flavors like mint or different cream cheese variations. Whether you’re hosting a holiday party or simply want a decadent treat for yourself, this no-bake delight will have everyone coming back for seconds. Ready to dive into this chocolatey wonder that’s as simple to make as it is enchanting to share? Let’s get started!
Why is this dessert a holiday must-have?
Decadent Layers: The combination of creamy filling and crunchy Oreos creates a dessert that’s both indulgent and light. Each slice reveals beautiful layers that visually entice and satisfy all your sweet cravings.
No-Bake Convenience: With minimal prep time and no oven required, this recipe is perfect for those busy holiday gatherings, allowing you to spend more time with loved ones.
Customizable Delights: Add a twist with peppermint infusions or flavored cream cheese to make it uniquely yours. Want more chocolate? Just toss in some mini chocolate chips to amp up the flavor!
Perfect for Crowds: This crowd-pleaser is ideal for potlucks or family gatherings; it serves easily and disappears quickly, leaving everyone wanting the recipe!
Pair it with warm drinks like rich hot chocolate, or if you prefer something lighter, a fresh fruit salad complements its indulgent nature perfectly. Dive into this holiday tradition and check out other delicious treats like Chewy Oreo Chocolate cookies and Oreo Ice Cream for more festive inspiration!
Easy No-Bake Christmas Oreo Lasagna Ingredients
For the Base
• Oreo Cookies – These provide a rich chocolate crunch for the base; opt for gluten-free Oreos if needed.
For the Cream Filling
• Cream Cheese – Adds depth and stability; make sure it’s softened for easier blending.
• Whipped Topping – Lightens the filling, creating an airy texture; consider homemade whipped cream for extra freshness.
• Powdered Sugar – Sweetens the mixture to achieve a smooth consistency, with no substitutes needed.
For the Topping
• Whipped Cream – Completes the dish with a light finish; you can sprinkle on optional crushed Oreos for added decoration.
• Additional Crushed Oreos – Perfect for sprinkling on top, enhancing the flavor and visual appeal.
Feel free to explore your creativity with this Easy No-Bake Christmas Oreo Lasagna!
Step‑by‑Step Instructions for Easy No-Bake Christmas Oreo Lasagna
Step 1: Crush Oreos
Begin by crushing 24 Oreo cookies into fine crumbs, which will serve as the base for your Easy No-Bake Christmas Oreo Lasagna. Use a food processor for this task, or place the cookies in a ziplock bag and crush them with a rolling pin until they resemble sand. This should take about 2-3 minutes.
Step 2: Prepare Cream Filling
In a large mixing bowl, combine 8 oz of softened cream cheese, 1 cup of whipped topping, and 1 cup of powdered sugar. Whisk the mixture until it is smooth and creamy, which should take around 2-3 minutes. Ensure there are no lumps for the best texture; this creamy filling is crucial for the lasagna.
Step 3: Layer the Ingredients
In a rectangular dish, spread half of the crushed Oreo cookies evenly across the bottom. This forms a delightful foundation for your dessert. Next, pour half of the creamy filling over the crumbs, smoothing it out with a spatula. You will repeat this process to build layers, so make sure each layer is even.
Step 4: Finish Layering
Add the remaining crushed Oreo cookies on top of the first layer of cream filling. Then, pour the rest of the creamy filling over the cookies, again smoothing it out gently. The layers should now be beautifully structured, creating a festive look that will impress when served.
Step 5: Top with Whipped Cream
For the finishing touch, spread a generous layer of whipped cream over the top of your Easy No-Bake Christmas Oreo Lasagna. This not only adds a light finish but also serves as a canvas for your creative garnishing. If desired, sprinkle additional crushed Oreos on top to enhance the aesthetic appeal.
Step 6: Chill to Set
Cover the dish with plastic wrap and place it in the refrigerator to chill for at least 4 hours, though preferably overnight. This chilling period is essential for allowing the layers to set properly and meld together, ensuring a delightful texture and flavor when it’s time to serve.
Step 7: Serve and Enjoy
Once fully chilled, slice your Easy No-Bake Christmas Oreo Lasagna into squares and serve with a smile! This dessert pairs fantastically with festive drinks or fresh fruit, making it a perfect treat for your holiday gatherings. Enjoy the compliments from your friends and family!
Make Ahead Options
These Easy No-Bake Christmas Oreo Lasagna is perfect for busy home cooks looking to save time during the festive season! You can prepare the lasagna up to 24 hours in advance, covering it tightly and refrigerating before serving to maintain its freshness. To ensure the flavors meld beautifully, assemble the layers and refrigerate overnight, giving you a delightful dessert that’s just as delicious the next day. Remember to add the whipped cream topping right before serving to keep it fluffy and appealing. By prepping ahead, you’ll have more time to enjoy the festivities while impressing everyone with this crowd-pleasing treat!
Easy No-Bake Christmas Oreo Lasagna Variations
Feel free to let your creativity shine with these delightful twists on the classic dessert!
-
Peppermint Twist: Add crushed peppermint candies to the cream filling for a festive minty flavor that dances on your palate. It’s the perfect way to embrace the holiday spirit!
-
Flavored Cream Cheese: Use chocolate or vanilla cream cheese to elevate flavor complexity and give your filling a rich, unique taste. Each bite will surprise and delight your guests!
-
Mini Chocolate Chips: Fold mini chocolate chips into the cream mixture for an extra chocolatey burst that kids and adults alike will declare scrumptious. This delightful addition will add a nice texture contrast too.
-
Individual Servings: Create fun mini versions of your lasagna in cups, perfect for gatherings or parties. These charming treats not only look adorable but also make serving easier!
-
Nutty Crunch: Sprinkle chopped nuts, like pecans or walnuts, between the layers to add an enticing crunch that complements the creamy filling beautifully. This variation is perfect for those who adore a bit of nutty flavor.
-
Berry Bliss: Consider adding a layer of fresh berries like raspberries or strawberries for a fruity contrast to the rich chocolate. The tartness of the berries balances the sweetness perfectly—a refreshing twist!
-
Cookie Crust Layer: Mix crumbled Oreos with melted butter for a more traditional crust at the bottom. This swap enhances the texture and adds an extra depth of chocolateiness!
Give these variations a try, and don’t forget to share your creations! If you love the versatility of Oreos, exploring treats such as Funfetti Oreo Icebox Cake or Oreo Cheesecake Cookie Cups might inspire your next baking adventure. Let the holiday fun begin!
How to Store and Freeze Easy No-Bake Christmas Oreo Lasagna
Fridge: Store leftovers in an airtight container for up to 3 days. Ensure it’s sealed well to keep it fresh and maintain its delicious texture.
Freezer: While you can freeze many desserts, it’s best to avoid freezing this Easy No-Bake Christmas Oreo Lasagna to preserve its creamy layers and crunchy Oreos.
Reheating: There’s no need to reheat. Simply slice and serve chilled directly from the fridge for that perfect refreshing treat.
Make-Ahead Tips: This dessert can be prepared up to 24 hours in advance. Keep it covered in the fridge, and add the whipped cream topping just before serving for the best presentation.
Expert Tips for Easy No-Bake Christmas Oreo Lasagna
-
Chill Time Counts: Refrigerate overnight for better flavor melding, achieving the ultimate creamy texture that everyone loves.
-
Layer Evenly: Ensure each layer is distributed evenly for a beautiful presentation when serving. Uneven layers can cause the dessert to fall apart.
-
Quality Ingredients: Use high-quality cream cheese to avoid lumps, which creates a silky filling that pairs perfectly with the crunchy Oreos.
-
Storage Savvy: Keep leftovers in an airtight container for up to three days in the fridge, but avoid freezing to maintain that delightful texture.
-
Creative Variations: Don’t hesitate to mix in crushed peppermint or flavored cream cheese to customize your Easy No-Bake Christmas Oreo Lasagna for a special touch!
What to Serve with Easy No-Bake Christmas Oreo Lasagna
Indulging in a slice of this creamy delight calls for perfect accompaniments to elevate your festivities.
-
Rich Hot Chocolate: A warm mug of hot chocolate creates a delightful contrast to the cool, creamy lasagna, enveloping you in holiday cheer.
-
Fresh Fruit Salad: The bright, juicy flavors of a fruit salad cut through the richness, adding a refreshing balance to each decadent bite.
-
Chocolate Mint Cookies: For the cookie lovers, serving these alongside your lasagna brings out the chocolatey goodness while adding a crunchy texture that complements the dessert.
-
Eggnog: This festive drink pairs beautifully with the layers of chocolate, enhancing the holiday spirit with its creamy, spiced notes.
-
Coffee: A warm cup of coffee provides a robust counterpoint, perfect for balancing the sweetness and grounding the dessert experience.
-
Mini Cheesecakes: Bite-sized cheesecakes add another layer of creaminess and flavor variety, making for an exciting dessert spread at your holiday table.
-
Gingerbread Cookies: The warm spices of gingerbread cookies create a cozy pairing, evoking classic holiday flavors while harmonizing with the Oreo crunch.
Easy No-Bake Christmas Oreo Lasagna Recipe FAQs
How do I choose the best Oreos for this recipe?
Absolutely! When selecting Oreos, look for those with no dark spots, indicating freshness. If gluten-free is a concern, gluten-free Oreo cookies are a fantastic substitute that still delivers that beloved crunchy texture.
What’s the best way to store leftovers?
Very important! Store any leftover Easy No-Bake Christmas Oreo Lasagna in an airtight container in the fridge for up to 3 days. This keeps the layers fresh. Just make sure it’s well-sealed to maintain its delightful texture.
Can I freeze this dessert for later?
I recommend against freezing this lasagna to preserve its creamy layers and crunchy Oreos. Freezing can lead to a less-than-ideal texture once thawed. However, you can make it up to 24 hours in advance and keep it in the fridge until you’re ready to serve!
What should I do if my filling seems lumpy?
Oh no! If your cream filling isn’t smooth, make sure your cream cheese is softened properly before mixing. Beat it on its own for a minute or two until smooth before adding the whipped topping and powdered sugar. This should help achieve that luxurious, creamy texture you want.
Are there any dietary considerations for guests?
Of course! This Easy No-Bake Christmas Oreo Lasagna can be made gluten-free by using gluten-free Oreos. Additionally, it’s dairy-heavy due to the cream cheese and whipped topping, so be cautious if you have guests with lactose intolerance. You can substitute with dairy-free cream cheese and whipped toppings that are available in stores.
How long does it need to chill before serving?
Chilling is key! Let it chill for at least 4 hours, or preferably overnight. This time allows the flavors to meld beautifully, resulting in a texture that is pure perfection when you serve it up.
Easy No-Bake Christmas Oreo Lasagna Your New Holiday Favorite
Ingredients
Equipment
Method
- Crush 24 Oreo cookies into fine crumbs using a food processor or a rolling pin in a ziplock bag.
- In a large bowl, whisk together 8 oz of softened cream cheese, 1 cup of whipped topping, and 1 cup of powdered sugar until smooth.
- In a rectangular dish, spread half of the crushed Oreo cookies as the base.
- Pour half of the creamy filling over the crumbs and smooth with a spatula.
- Add the remaining crushed Oreo cookies on top of the first layer of cream filling.
- Pour the rest of the creamy filling over the top and smooth it out.
- Spread a layer of whipped cream over the top and add optional crushed Oreos.
- Cover and chill the lasagna in the refrigerator for at least 4 hours or overnight.
- Once chilled, slice into squares and serve.
Leave a Reply