
Have you ever found yourself yearning for a satisfying treat that doesn’t derail your healthy eating goals? Let me introduce you to my Healthy No-Bake Vegan Peanut Butter Balls! These delightful bites combine the smooth, nutty goodness of natural peanut butter with a touch of maple sweetness, making them a perfect quick fix for your sweet tooth. Not only are they super easy to whip up—ideal for busy weeknights—but they’re also gluten-free, making them a versatile snack for everyone. Whether you’re prepping for a holiday gathering or simply indulging in a guilt-free dessert after dinner, these peanut butter balls are sure to impress. Are you ready to discover how simple it is to create this wholesome, deliciously addictive treat?
Why are Healthy Peanut Butter Balls a Must-Try?
Simplicity at Its Best: These Healthy Peanut Butter Balls require minimal ingredients and just a few steps, making them ideal for both novice and seasoned cooks.
Rich, Nutty Flavor: The combination of natural peanut butter and maple syrup creates a sumptuous taste that satisfies cravings without guilt.
No-Bake Convenience: With no baking required, you can whip these up in no time—perfect for busy individuals or spontaneous snackers.
Crowd-Pleasing Treat: Whether for a family gathering or a quick snack, everyone will adore these delightful bites.
Versatile and Customizable: Swap in different nut butters or add a sprinkle of sea salt for a unique twist! If you love easy desserts, you might also enjoy my Healthy Sweet Potato Bars or Biscoff Cookie Butter Cinnamon Rolls.
Nutrient-Rich Delight: Each ball is packed with energy-boosting ingredients, making them a healthy option for when you need a quick pick-me-up.
Healthy Peanut Butter Balls Ingredients
For the Base
• Natural Peanut Butter – Make sure there are no added sugars or oils for the purest flavor.
• Maple Syrup – Acts as a natural sweetener; substitute with honey or agave syrup if needed, but this may change the texture.
• Vanilla Extract – Enhances the overall flavor depth.
• Salt – Balances sweetness and intensifies the nutty flavors.
For the Structure
• Coconut Flour – Provides structure while being gluten-free; remember it absorbs more liquids than other flours, so adjust as necessary.
For the Coating
• Semi-Sweet Chocolate Chips – Adds a sweet, chocolatey finish; use vegan chocolate for a plant-based option.
• Coconut Oil – Ensures chocolate melts smoothly; butter is a suitable substitute for non-vegan versions.
Step‑by‑Step Instructions for Healthy Peanut Butter Balls
Step 1: Combine the Ingredients
In a medium mixing bowl, add 1 cup of natural peanut butter, 1/4 cup of maple syrup, 1 teaspoon of vanilla extract, and a pinch of salt. Use a spatula to thoroughly mix until the mixture is smooth and creamy, which should take about 2-3 minutes. You want to see a cohesive blend with no streaks of peanut butter remaining.
Step 2: Thicken the Mixture
Now, gently stir in 1/2 cup of coconut flour, ensuring it is evenly distributed throughout the mixture. Allow the dough to sit for about 10 minutes to let the coconut flour absorb moisture and thicken. As it rests, you’ll notice the mixture becomes firmer and easier to handle, perfect for shaping into balls.
Step 3: Chill the Dough
Transfer the mixture to the refrigerator and let it chill for about 1 hour. This step is crucial as it helps firm up the dough, making it easier to roll into balls. After an hour, check the texture; the dough should be quite set but pliable enough to mold into your desired shape.
Step 4: Shape the Balls
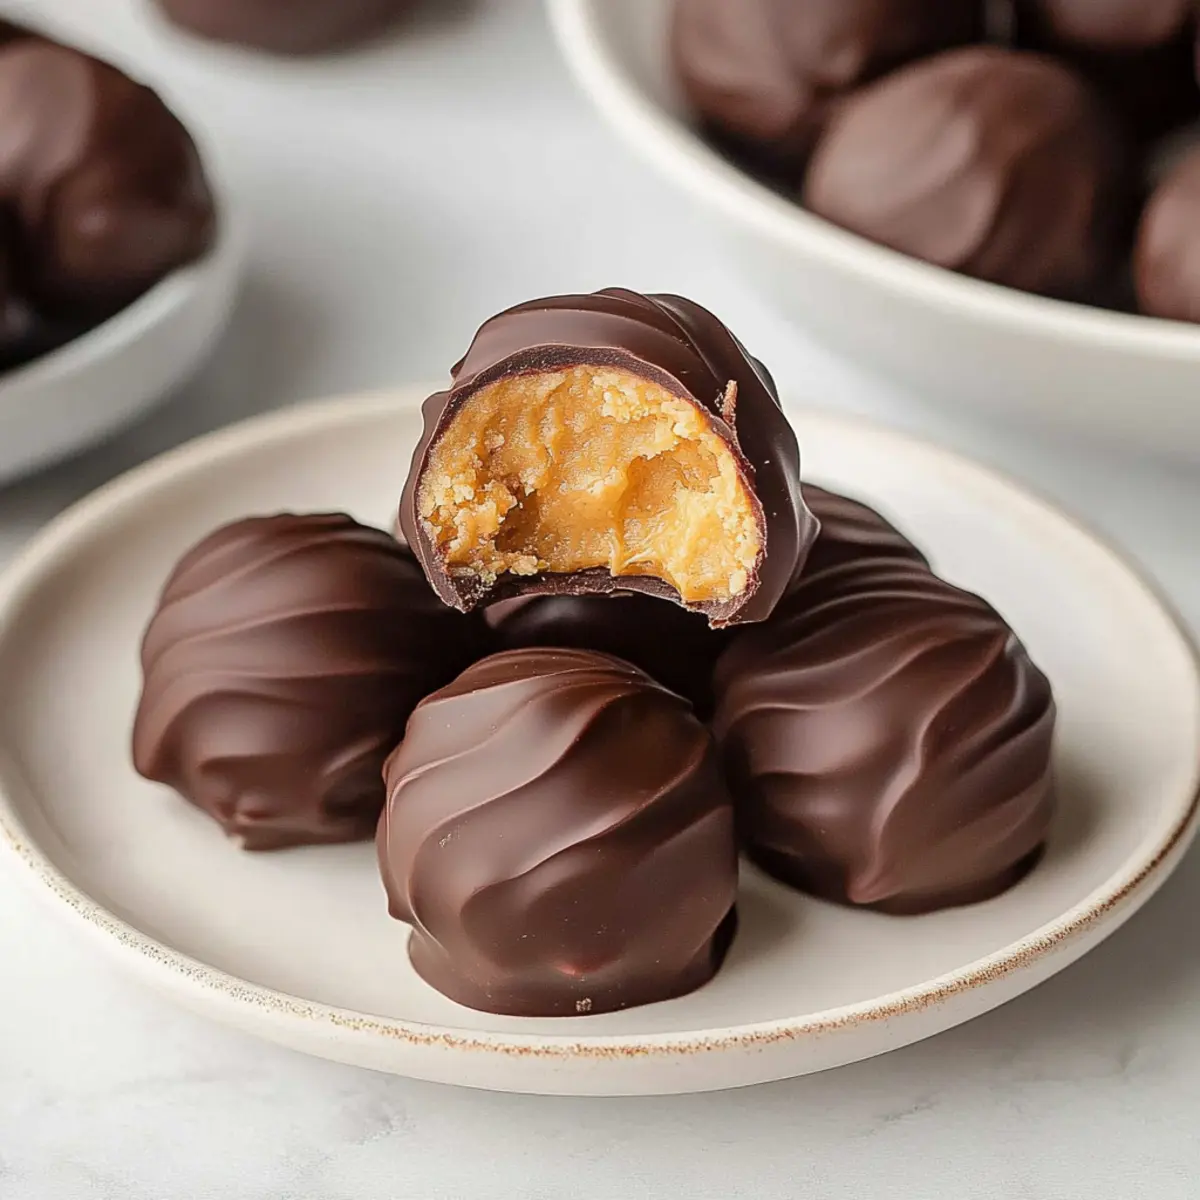
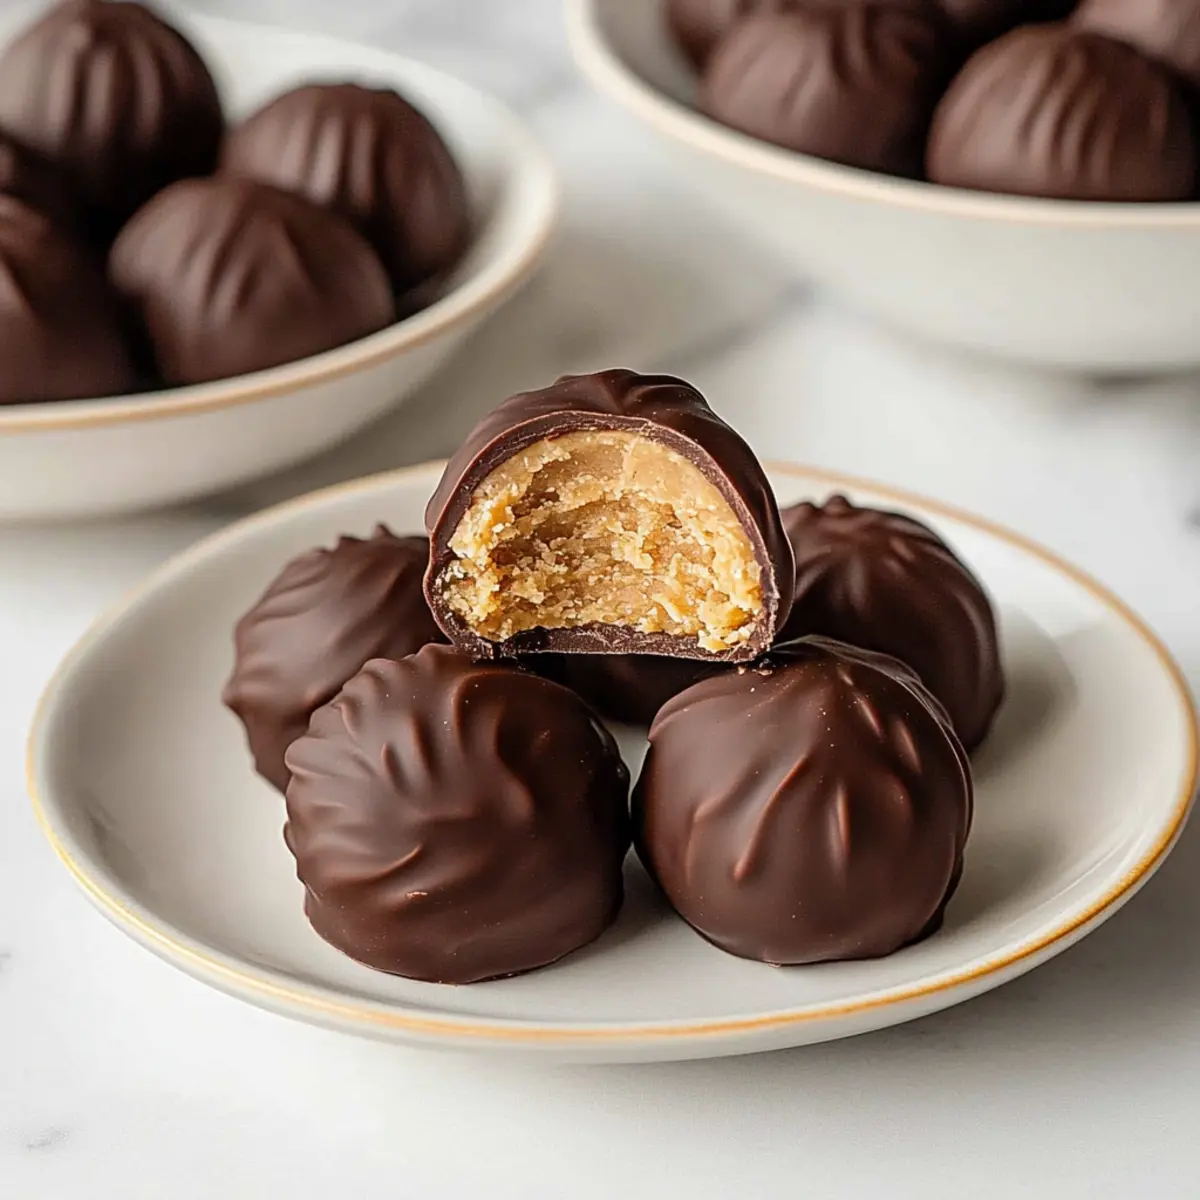
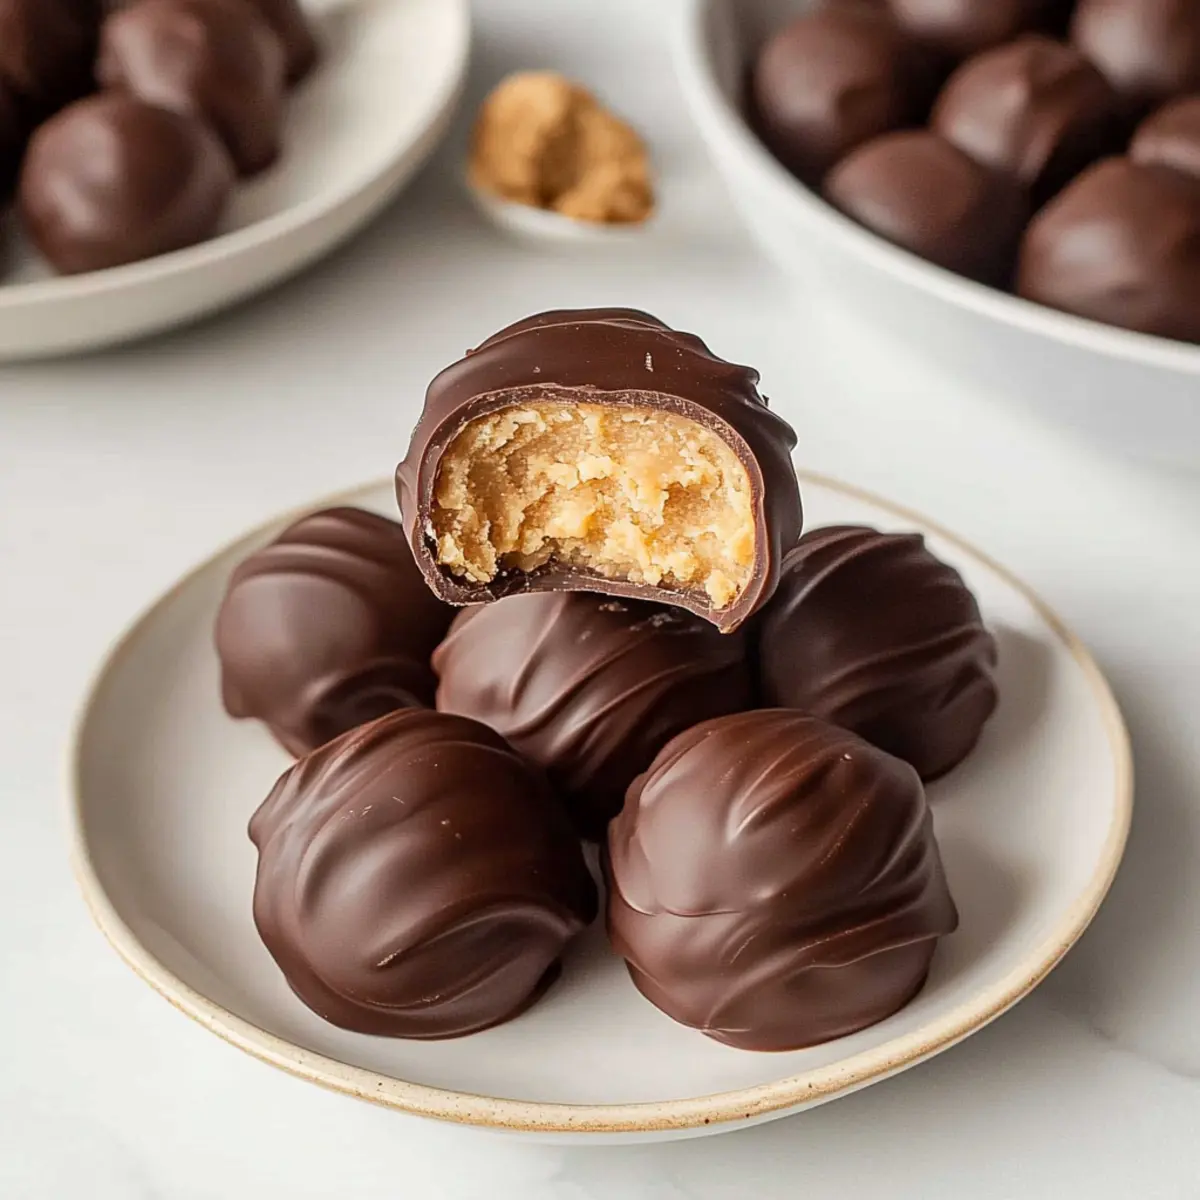
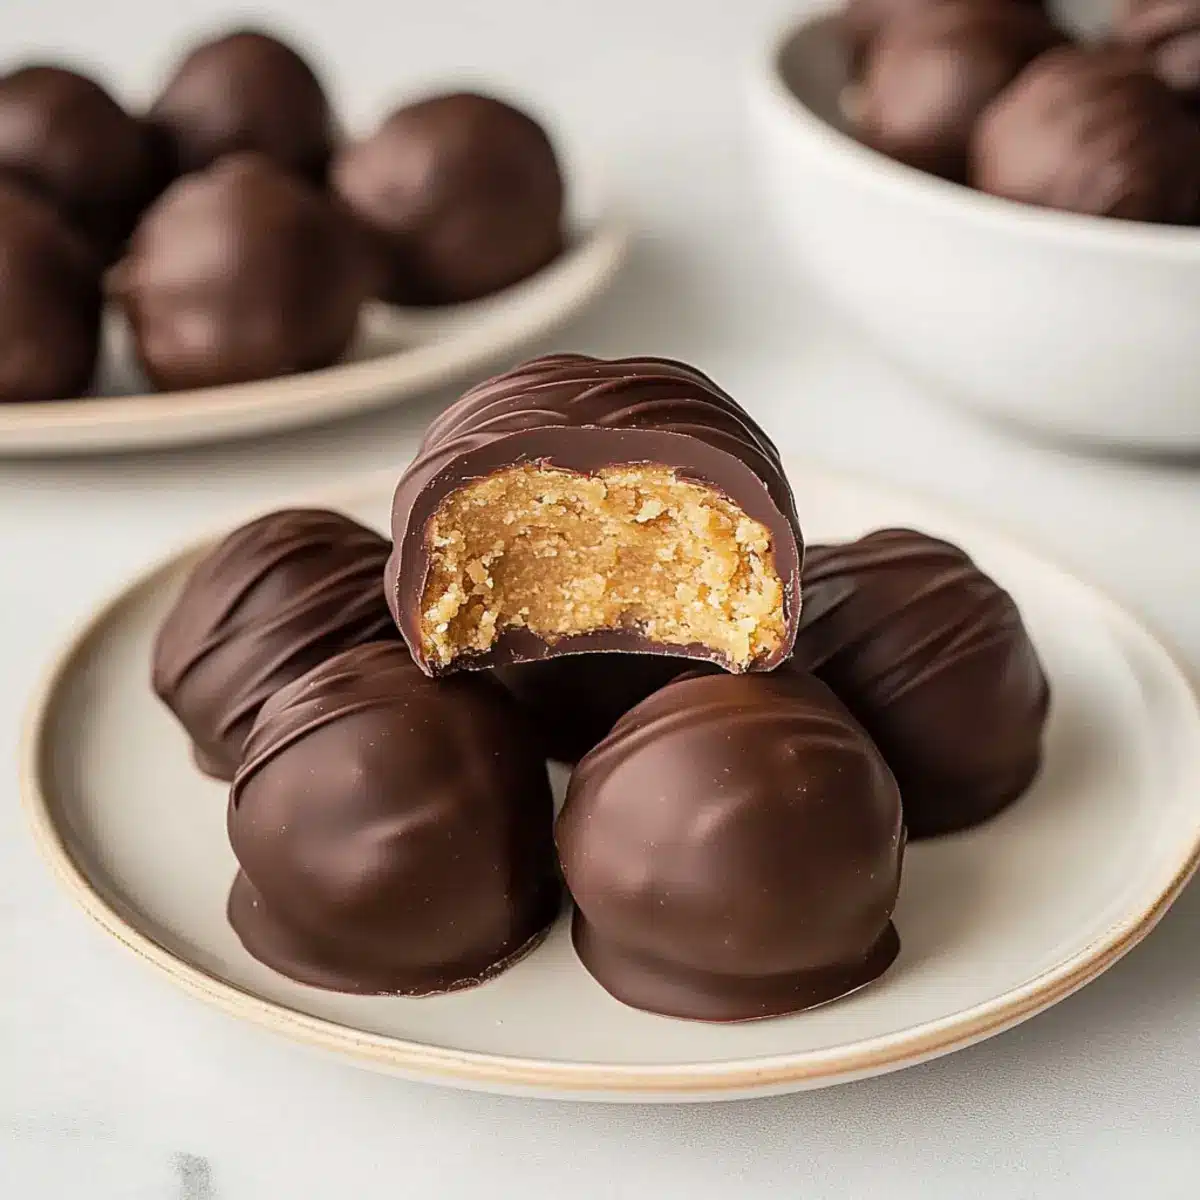
Once chilled, use your hands or a small cookie scoop to form approximately 28 balls, each about the size of a tablespoon (20 grams). Place them on a tray lined with parchment paper. As you work, make sure the balls are smooth and evenly shaped—this helps them look appealing once coated.
Step 5: Prepare the Chocolate Coating
In a small saucepan over low heat, melt 1 cup of semi-sweet chocolate chips along with 1 tablespoon of coconut oil. Stir continuously until the chocolate is smooth and completely melted, about 5 minutes. The coconut oil aids in achieving a silky finish, making the coating easier to work with.
Step 6: Coat the Peanut Butter Balls
Once your chocolate is melted, dip each peanut butter ball into the chocolate, ensuring it is fully coated. Allow any excess chocolate to drip off before placing the coated balls back on the wax paper-lined tray. This step adds a rich, chocolaty layer to your Healthy Peanut Butter Balls, enhancing their deliciousness.
Step 7: Set and Serve
Finally, refrigerate the chocolate-coated balls for about 30 minutes to allow the chocolate to harden. Once set, they are ready to be enjoyed! If you prefer, you can store them in an airtight container in the refrigerator or freezer for later snacking.
What to Serve with Healthy Peanut Butter Balls
Elevate your snack game by pairing these delightful bites with fresh flavors and comforting sides.
-
Fresh Fruit Platter: A colorful array of strawberries, apples, and bananas adds a refreshing crunch that beautifully complements the creamy peanut butter. Enjoy the contrast of textures!
-
Creamy Yogurt Dip: Serve with a side of vanilla or coconut yogurt for a velvety dipping experience, enhancing the flavors of the peanut butter balls while adding a touch of indulgence.
-
Chilled Almond Milk: A glass of smooth, chilled almond milk brings a nutty nuance, creating a perfect pairing that feels wholesome and satisfying after each blissful bite.
-
Dark Chocolate Covered Almonds: For an extra chocolate fix, these crunchy bites accentuate the rich chocolate coating on the peanut butter balls—truly a match made in dessert heaven!
-
Granola Bars: Pairing your peanut butter balls with homemade or store-bought granola bars offers additional textures and flavors, making snack time both nutritious and exciting.
-
Afternoon Tea or Coffee: Enjoy a warm cup of herbal tea or rich coffee alongside these bites for a relaxing treat. The warm beverages enhance the sweet, nutty notes wonderfully.
-
Nutty Trail Mix: Combine the peanut butter balls with a mix of nuts and dried fruit for a wholesome, energy-boosting snack ideal for on-the-go moments or cozy evenings at home.
Healthy Peanut Butter Balls Variations & Substitutions
Feel free to get creative and adapt these Healthy Peanut Butter Balls to cater to your taste buds!
-
Nut Butter Swap: Substitute natural peanut butter with almond butter or sunflower seed butter for a different flavor profile. You’ll find that each nut brings a unique richness.
-
Sweetener Options: If you prefer an alternative sweetener, try using honey or agave syrup. Just keep in mind that it may slightly alter the texture and moisture content.
-
Protein-Packed: Mix in a scoop of your favorite protein powder to boost nutritional value. This is a great way to turn these treats into a post-workout snack!
-
Decadent Finishing Touch: For an indulgent flair, sprinkle sea salt on top of the chocolate coating before it sets. This adds a delightful contrast to the sweetness of the chocolate.
-
Cocoa Twist: Add a tablespoon of cocoa powder to the dough for a chocolaty version. This adds an extra layer of flavor that chocolate lovers will adore.
-
Bite-Sized Balls: For a fun twist, roll smaller balls or even make them into bars instead! This makes them perfect for sharing during gatherings.
-
Crunchy Texture: Consider mixing in chopped nuts or seeds for added crunch in every bite. This offers both texture and extra nutrients, making your snack even more satisfying.
-
Spiced Up: Add a dash of cinnamon or a hint of cayenne pepper for a warm, spicy kick. This little touch can transform your peanut butter balls into a flavor adventure!
If you’re looking for more inspiration, don’t forget to check out my Healthy Sweet Potato Bars for another wholesome treat!
Expert Tips for Healthy Peanut Butter Balls
-
Quality Ingredients: Use natural peanut butter with no added sugars or oils for the best flavor in your Healthy Peanut Butter Balls.
-
Coconut Flour Caution: Be careful not to over-mix the coconut flour; it can make the mixture dry if added too aggressively.
-
Chilling is Key: Don’t skip the chilling step! This ensures your dough is firm enough to shape easily into perfectly round balls.
-
Smooth Coating: To achieve a smooth chocolate coating, ensure the chocolate mixture is melted gently and stirred continuously to avoid clumping.
-
Flavor Variations: Feel free to experiment! Different nut butters and a sprinkle of sea salt on top can elevate your Healthy Peanut Butter Balls to new flavor heights.
Storage Tips for Healthy Peanut Butter Balls
Fridge: Store your Healthy Peanut Butter Balls in an airtight container in the refrigerator for up to 1 week. This keeps them fresh and ready to enjoy whenever you crave a tasty snack.
Freezer: For longer storage, you can freeze them for up to 3 months. Just make sure to place them in a freezer-safe bag or container to prevent freezer burn.
Room Temperature: If you prefer, these treats can be kept at room temperature for up to 3 days, but only in cooler weather. Avoid leaving them out in warm conditions to maintain their texture and flavor.
Reheating: There’s no need to reheat these bites—enjoy them chilled or at room temperature for the best flavor experience!
Make Ahead Options
These Healthy Peanut Butter Balls are perfect for meal prep enthusiasts! You can prepare the peanut butter and coconut flour mixture and refrigerate it for up to 3 days, allowing the flavors to meld beautifully. Alternatively, you can shape the balls and freeze them for up to 3 months. Just remember to store them in an airtight container to maintain their freshness. When you’re ready to enjoy, dip the frozen balls in melted chocolate and refrigerate for about 30 minutes until set. This way, you’ll have a delightful, guilt-free treat ready at a moment’s notice—ideal for busy weeknights or unexpected guests!
Healthy No-Bake Vegan Peanut Butter Balls Recipe FAQs
How do I choose the best peanut butter for this recipe?
Absolutely! When selecting peanut butter, look for natural varieties that contain only peanuts and salt, avoiding those with added sugars or oils. The best peanut butter features a smooth texture and a rich flavor. If you notice any separation, just give it a good stir before using.
What is the best way to store Healthy Peanut Butter Balls?
You can keep your Healthy Peanut Butter Balls fresh by storing them in an airtight container in the refrigerator, where they’ll last for up to 1 week. If you want to save some for later, freeze them in a freezer-safe bag or container for up to 3 months. Just remember to label the bag so you don’t forget about them!
Can I freeze the Healthy Peanut Butter Balls? If so, how?
Absolutely! To freeze your Healthy Peanut Butter Balls, first, place them on a tray lined with parchment paper in a single layer until they are solid (about 1 hour). Then, transfer them to a freezer-safe bag or container, separating layers with parchment paper to prevent sticking. They can be kept frozen for up to 3 months and can be enjoyed straight from the freezer or thawed in the fridge for a few hours.
What should I do if the mixture is too dry or too wet?
Very good question! If the dough feels too dry, you can add a bit more peanut butter or maple syrup, one tablespoon at a time, until the desired consistency is achieved. On the other hand, if it’s too wet, gradually incorporate small amounts of coconut flour until the mixture is manageable. It’s all about achieving the perfect balance for rolling those delightful balls!
Are there any allergen considerations I should be aware of?
Absolutely! If you or someone you’re serving has nut allergies, consider using sunflower seed butter or a seed-based alternative instead of peanut butter. Additionally, ensure that any chocolate chips used are dairy-free if you’re catering to a vegan diet. Always check the labels for allergen warnings to be on the safe side!
Deliciously Easy Healthy Peanut Butter Balls to Satisfy Cravings
Ingredients
Equipment
Method
- In a medium mixing bowl, add 1 cup of natural peanut butter, 1/4 cup of maple syrup, 1 teaspoon of vanilla extract, and a pinch of salt. Mix until smooth and creamy for about 2-3 minutes.
- Gently stir in 1/2 cup of coconut flour and let the dough sit for about 10 minutes to thicken.
- Transfer the mixture to the refrigerator and chill for about 1 hour to firm up.
- Once chilled, form approximately 28 balls about the size of a tablespoon and place on a tray lined with parchment paper.
- In a small saucepan over low heat, melt 1 cup of semi-sweet chocolate chips and 1 tablespoon of coconut oil, stirring until smooth.
- Dip each peanut butter ball into the melted chocolate, allowing excess to drip off before placing them on the tray.
- Refrigerate the chocolate-coated balls for about 30 minutes to harden before serving.
Leave a Reply