
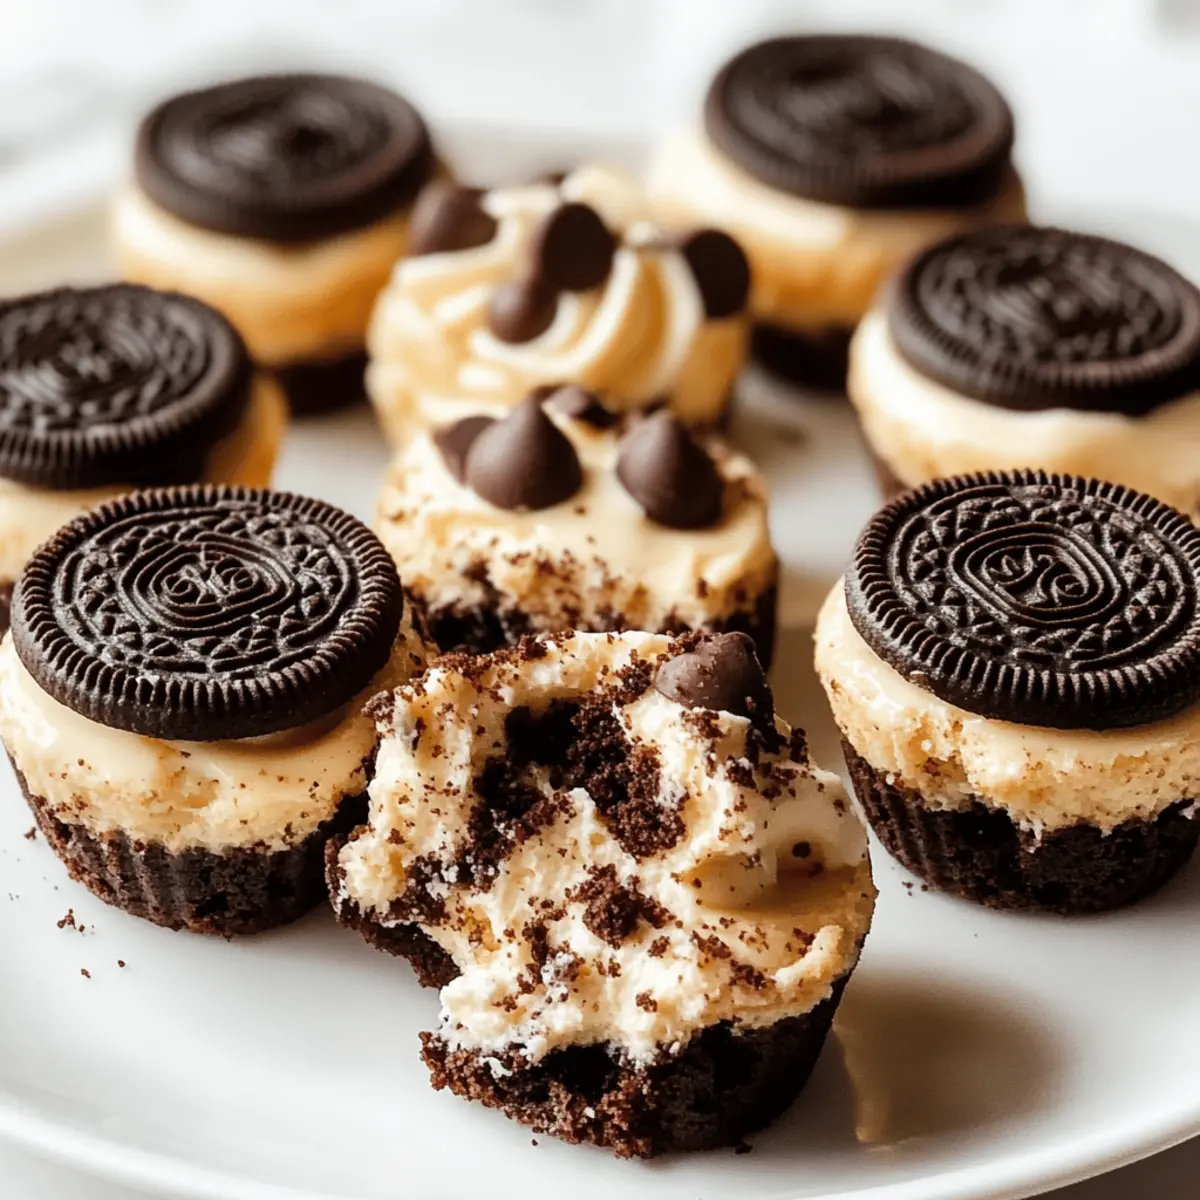
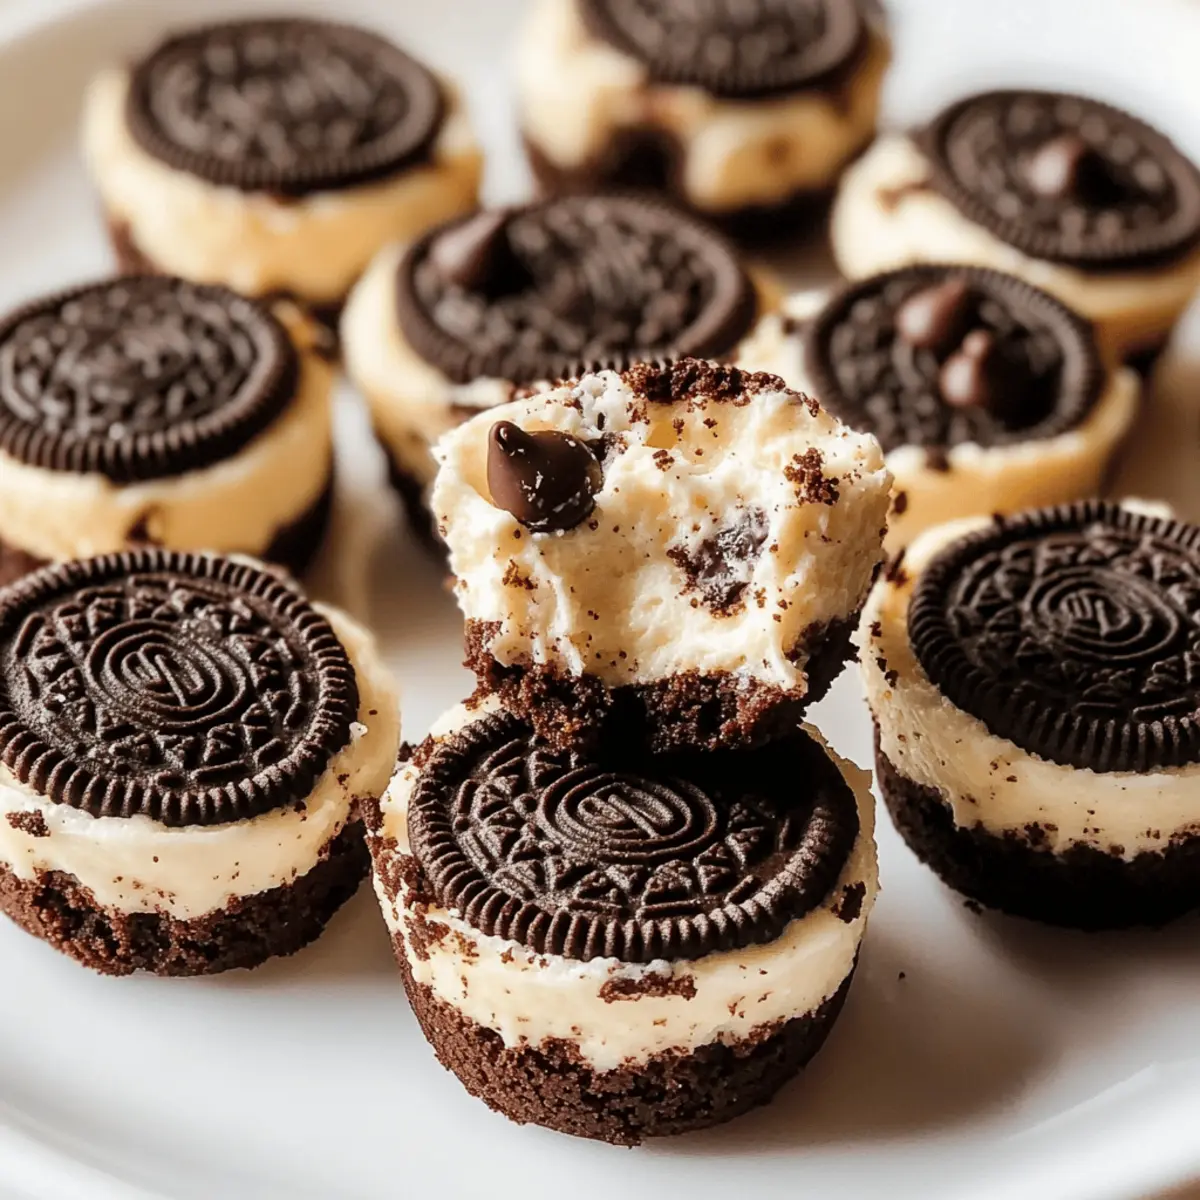
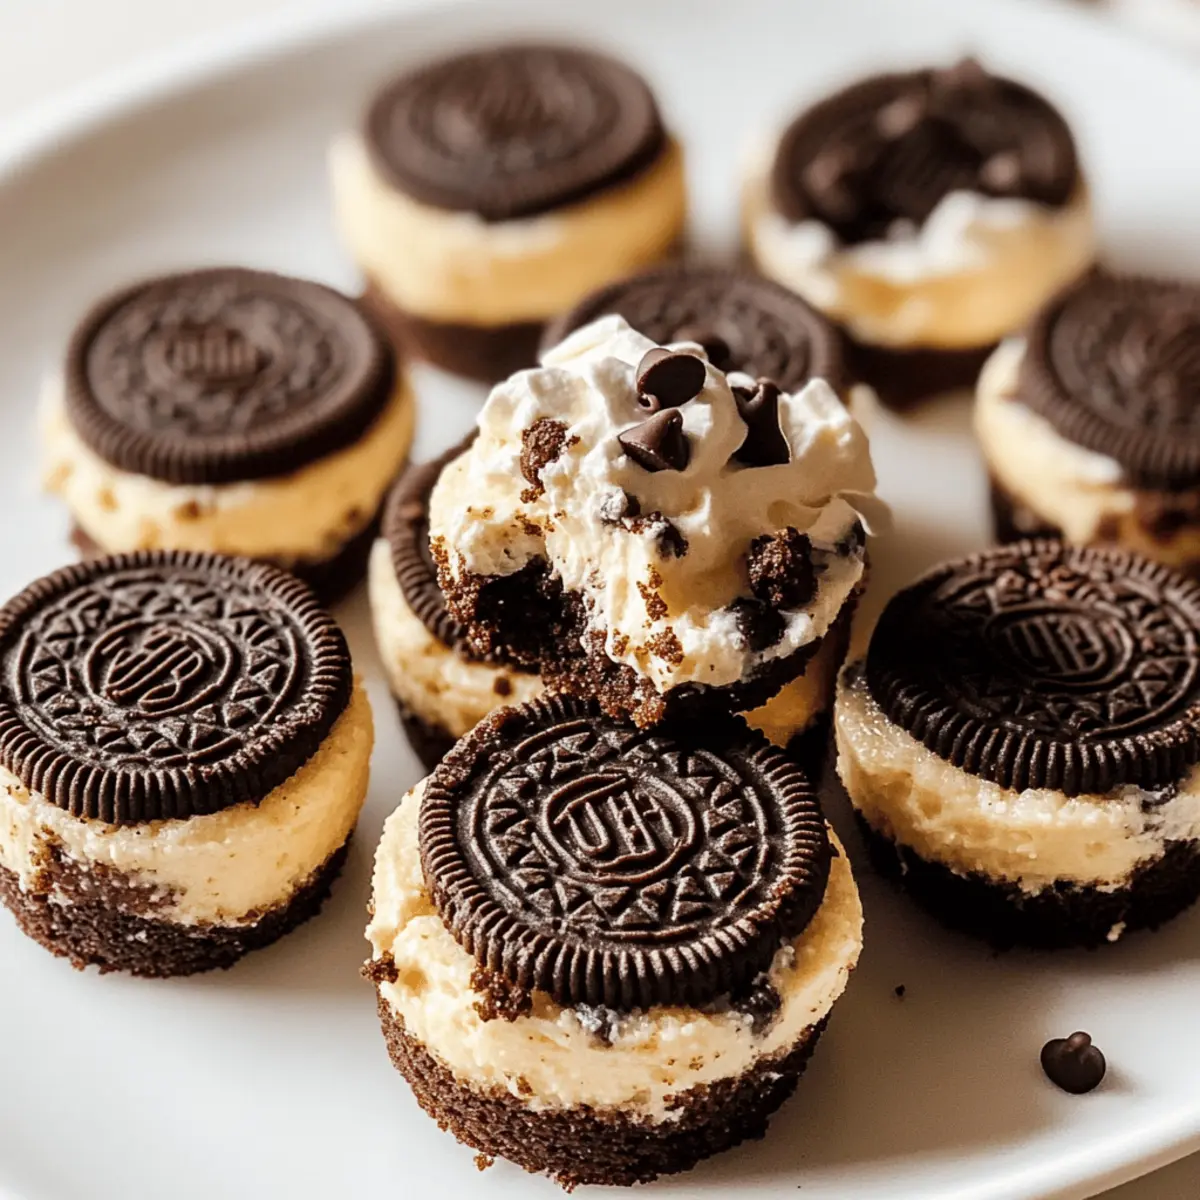
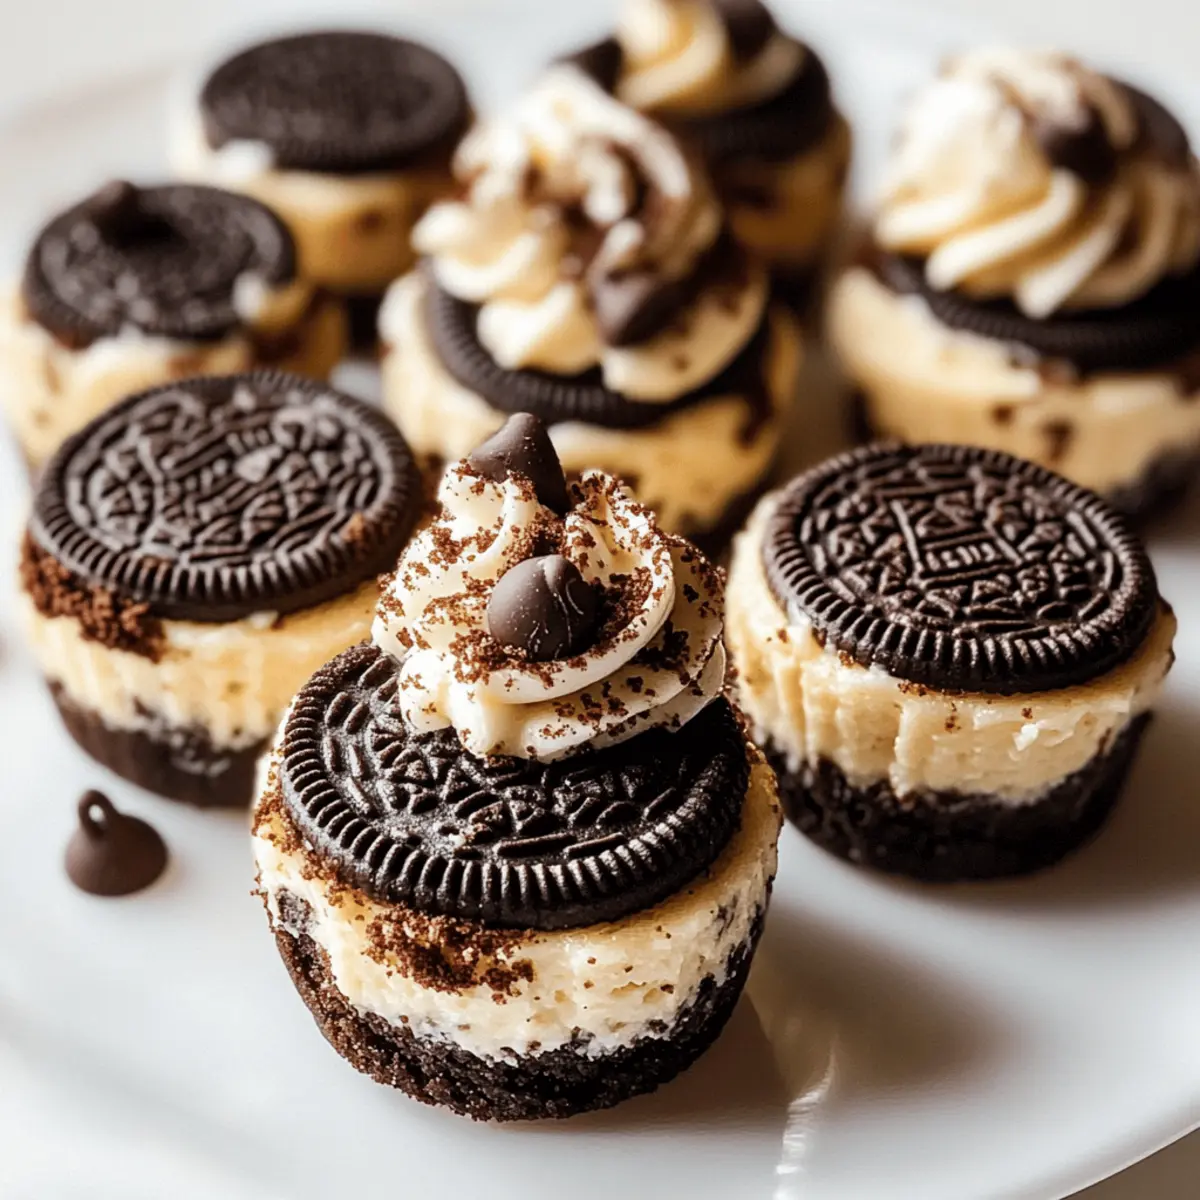
As I stood in my kitchen, the aroma of freshly baked cookies wafted through the air, instantly transporting me back to my childhood. The star of the show? Oreo Cheesecake Cookie Cups! These delightful mini desserts combine the beloved crunch of Oreo crust with a smooth, creamy cheesecake filling that leaves everyone reaching for seconds. What makes this recipe a true gem is its effortless preparation and the ability to customize it to your heart’s desire. Whether you’re looking to impress guests at a dinner party or simply satisfy your sweet tooth, these cookie cups deliver on all fronts. Plus, they’re make-ahead friendly—perfect for busy schedules. Curious how to whip up this delightful treat? Let’s dive into the recipe!
Why Are Oreo Cheesecake Cookie Cups So Irresistible?
Decadent Flavor: The rich combination of creamy cheesecake and crunchy Oreo crust creates an explosion of taste that you’ll crave.
Effortless Prep: Simple enough for beginners, yet impressive enough to captivate any gathering—with just a few steps!
Customizable: Feel free to swap ingredients or add flavors; the possibilities are endless! Try variations like mini chocolate chips or seasonal cookie flavors for a personalized touch.
Make-Ahead Wonder: Prepare them in advance for a stress-free hosting experience—just chill and serve! Dive into their indulgence paired with a scoop of vanilla ice cream for a heavenly treat. You’ll love serving these at any occasion, and they’re perfect for sharing with friends! Check out my Oreo Cheesecake Cookie for more delicious ideas!
Oreo Cheesecake Cookie Cups Ingredients
• Let’s gather everything you need to create these delicious treats!
For the Crust
- Oreo Cookies – Crumbled for that irresistible crunch; classic Oreos provide the best flavor.
- Unsalted Butter – Melted to bind the crumbs together; feel free to use margarine in a pinch!
For the Filling
- Cream Cheese – Softened to ensure a creamy and luxurious texture; full-fat works best for richness.
- Sugar – Adds the perfect sweetness to the filling; brown sugar can deepen the flavor.
- Sour Cream/Greek Yogurt – Contributes tang and creaminess; Greek yogurt offers a lighter option without losing flavor.
- Mini Chocolate Chips – Optional for an extra burst of chocolatey goodness; you can also substitute with nuts or skip entirely.
For the Topping
- Whipped Cream – Lightly sweetened, it tops off your cookie cups beautifully; try coconut whipped cream for a dairy-free delight.
Now that you have all the ingredients, let’s get ready to create some Oreo Cheesecake Cookie Cups that are sure to impress!
Step‑by‑Step Instructions for Oreo Cheesecake Cookie Cups
Step 1: Preheat the Oven
Begin by preheating your oven to 350°F (175°C) to ensure even baking for your Oreo Cheesecake Cookie Cups. This step creates the perfect environment for the crust and filling to cook thoroughly. While the oven heats, gather your ingredients and prepare your muffin tin with cupcake liners, ready for the delicious cookie cups.
Step 2: Prepare the Crust
Crush about 20 Oreo cookies into fine crumbs using a food processor or a zip-top bag and a rolling pin. Transfer the crumbs into a mixing bowl and combine them with 5 tablespoons of melted unsalted butter, mixing until the mixture resembles wet sand. Press one tablespoon of this mixture firmly into the bottom of each cupcake liner to form a sturdy crust base, ensuring it holds together when baked.
Step 3: Mix the Filling
In a large bowl, beat 16 ounces of softened cream cheese and ½ cup of sugar together using an electric mixer until the mixture is fluffy and smooth. Next, blend in ½ cup of sour cream or Greek yogurt until fully combined, creating a creamy and tangy filling. If desired, gently fold in ½ cup of mini chocolate chips for an extra layer of flavor in your Oreo Cheesecake Cookie Cups.
Step 4: Assemble the Cookie Cups
Carefully spoon the creamy filling over the prepared crusts in the muffin tin, ensuring you leave a little space at the top for any expansion during baking. Fill each cup evenly to make sure all your Oreo Cheesecake Cookie Cups have the same delightful taste and texture. This layering creates a beautiful contrast between the crust and the rich filling.
Step 5: Bake to Perfection
Place your muffin tin in the preheated oven and bake for 15-18 minutes. The centers should still be slightly jiggly when you gently shake the pan, as they will continue to set while cooling. Keep an eye on them to prevent overbaking, as you want that perfect creamy consistency in your Oreo Cheesecake Cookie Cups.
Step 6: Cool Before Refrigerating
Once baked, remove the muffin tin from the oven and let the cookie cups cool to room temperature. This cooling period is crucial for achieving the right texture. After they’ve cooled, transfer the tin to the refrigerator and chill the Oreo Cheesecake Cookie Cups for at least 1 hour, allowing them to firm up and develop their delightful flavor.
Step 7: Serve with Whipped Cream
When you’re ready to serve, pipe lightly sweetened whipped cream onto each Oreo Cheesecake Cookie Cup for an extra touch of decadence. For a delightful finishing touch, sprinkle crushed Oreo cookies on top for that irresistible crunch. This step transforms your homemade treats into a stunning dessert worthy of any occasion!
What to Serve with Oreo Cheesecake Cookie Cups
Indulging in these delightful Oreo Cheesecake Cookie Cups is just the beginning; let’s create a full dessert experience that enchants every palate.
-
Rich Coffee: A warm cup of brewed coffee enhances the chocolatey flavors and adds a sophisticated touch to your dessert table.
-
Vanilla Ice Cream: Creamy vanilla ice cream perfectly balances the richness of the cookie cups, making every bite a delightful contrast.
-
Chocolate Drizzle: A drizzle of melted chocolate adds an extra layer of decadence and looks inviting on your servings. Try dark or white chocolate for variety!
-
Fresh Berries: Light, juicy berries like strawberries or raspberries provide a refreshing burst of flavor that beautifully cuts through the richness of the cheesecake.
-
Caramel Sauce: Drizzling homemade or store-bought caramel sauce over each cup intensifies that sweet finishing note, creating a delicious synergy with the Oreo base.
-
Sparkling Water: For a refreshing beverage, serve sparkling water with a slice of lemon to cleanse the palate between bites of these creamy treats.
Pairing these delightful options with your Oreo Cheesecake Cookie Cups will elevate your dessert experience and impress guests with a feast for the senses!
Oreo Cheesecake Cookie Cups Variations
Feel free to unleash your creativity in the kitchen with these fun twists on the classic recipe!
-
Flavored Crust: Use Peanut Butter Oreos or Mint Oreos for a unique take. The flavor infusion goes straight to the base!
-
Gluten-Free: Substitute regular Oreos with gluten-free cookie options. You won’t compromise on taste while catering to dietary needs.
-
Fruit-Infused: Add chopped strawberries or raspberries to the cream cheese filling. The fruity twistlightens the richness beautifully!
-
Nutty Crunch: Incorporate chopped nuts like pecans or walnuts into the crust or filling for an added layer of texture. The crunch creates a delightful contrast to the creamy filling.
-
Chocolate Lovers: Fold in double the mini chocolate chips or top with drizzles of melted chocolate. This decadent addition is sure to satisfy any chocolate cravings!
-
Seasonal Spice: Experiment with pumpkin spice or cinnamon in the filling for a cozy fall vibe. The warmth will make every bite feel like a hug!
-
Caramel Swirl: Drizzle caramel sauce on top before adding whipped cream, giving your cookie cups a sweet twist that elevates the experience!
By trying new ingredients or swapping flavors, you can create a memorable dessert every time! If you’re looking for more inspiration, check out my delicious Biscoff Cookie Butter Cinnamon Rolls or tantalizing Strawberry Crunch Cheesecake Tacos. The options are endless on your journey to dessert perfection!
Make Ahead Options
These Oreo Cheesecake Cookie Cups are a delightful solution for busy home cooks looking to save time while still serving a delicious dessert! You can prepare the crust up to 24 hours in advance by mixing the crushed Oreos with melted butter and storing it in an airtight container. The cheesecake filling can be made ahead and refrigerated for up to 3 days; just mix everything as directed, and place it in a separate container. To maintain the best quality, ensure both components are kept sealed and chilled until you are ready to assemble. When you’re set to serve, simply spoon the filling over the crusts and bake as instructed for a fresh, creamy treat that tastes just as delightful as if made that day!
How to Store and Freeze Oreo Cheesecake Cookie Cups
Refrigerator: Store your Oreo Cheesecake Cookie Cups in an airtight container for up to 5 days. For the best texture, keep them chilled until serving.
Freezer: If you want to enjoy them later, freeze the cookie cups in a freezer-safe container for up to 2 months. Thaw them overnight in the refrigerator before serving.
Wrapping: To maintain freshness, consider wrapping each cookie cup individually in plastic wrap before placing them in a container or freezer bag.
Reheating: While these treats are best served cold, if desired, you can allow them to sit at room temperature for a few minutes before serving to soften slightly.
Expert Tips for Oreo Cheesecake Cookie Cups
-
Chill Time Matters: Allow the cookie cups to chill for at least 1 hour after baking. This helps the filling set perfectly and enhances flavor.
-
Adjust Sweetness: Taste your filling before baking; feel free to add more sugar or swap with brown sugar for a different flavor profile.
-
Watch the Bake: Keep a close eye on your Oreo Cheesecake Cookie Cups while they bake. A slightly jiggly center is a sign of a creamy filling, but overbaking can lead to cracks.
-
Customize with Ease: Don’t hesitate to add your favorite flavors—swap Oreo cookies for others like peanut butter or add fruit to the filling for a new twist!
-
Proper Cooling: Let cookie cups cool at room temperature before refrigerating to maintain texture and prevent cracking.
-
Presentation Perks: For an impressive touch, decorate with chocolate drizzle or fresh berries just before serving for a beautiful presentation!
Oreo Cheesecake Cookie Cups Recipe FAQs
How do I know if my Oreo cookies are fresh enough to use?
Absolutely! Ensure your Oreo cookies are fresh by checking for any dark spots or a rancid smell. If the cookies still taste good and have no visible signs of spoilage, they’re perfect for your crust.
What’s the best way to store leftover Oreo Cheesecake Cookie Cups?
Very! Store your Oreo Cheesecake Cookie Cups in an airtight container in the refrigerator for up to 5 days. This keeps them chilled and fresh for snacking. If you want to keep them longer, wrap each cup individually in plastic wrap and place them in a freezer-safe container.
Can I freeze Oreo Cheesecake Cookie Cups for later?
Absolutely! To freeze, place your cookie cups in a single layer in a freezer-safe container, separating layers with parchment paper. They can be frozen for up to 2 months. When you’re ready to enjoy, simply thaw them overnight in the refrigerator for the best texture.
What should I do if my cheesecake filling looks curdled?
Don’t worry! If your filling looks curdled, it might be due to not fully softening the cream cheese before mixing or overbeating. To fix this, try reheating your cream cheese slightly in the microwave (10-15 seconds) until it’s softer, then remix until smooth.
Are there gluten-free options for this recipe?
Very! To make your Oreo Cheesecake Cookie Cups gluten-free, simply use gluten-free Oreo cookies or any gluten-free cookies you prefer for the crust. This ensures everyone can enjoy this decadent treat!
How can I ensure my cookie cups won’t crack after baking?
To prevent cracking, bake at the correct temperature and time, keeping an eye on slight jiggliness in the center as they come out. After baking, let them cool down to room temperature before refrigerating. This helps maintain their texture and prevents cracks from forming.
Oreo Cheesecake Cookie Cups: A Decadent Treat to Impress
Ingredients
Equipment
Method
- Preheat the oven to 350°F (175°C) and prepare a muffin tin with cupcake liners.
- Crush about 20 Oreo cookies into fine crumbs and mix with 5 tablespoons of melted butter. Press one tablespoon into each cupcake liner.
- Beat 16 ounces of softened cream cheese and 0.5 cups of sugar until fluffy. Blend in 0.5 cups of sour cream or Greek yogurt. If desired, fold in 0.5 cups of mini chocolate chips.
- Spoon the filling over the prepared crusts in the muffin tin, leaving space for expansion.
- Bake for 15-18 minutes until the centers are slightly jiggly. Cool to room temperature.
- Refrigerate for at least 1 hour to firm up the filling.
- Serve with whipped cream and sprinkle crushed Oreos on top.
Leave a Reply