
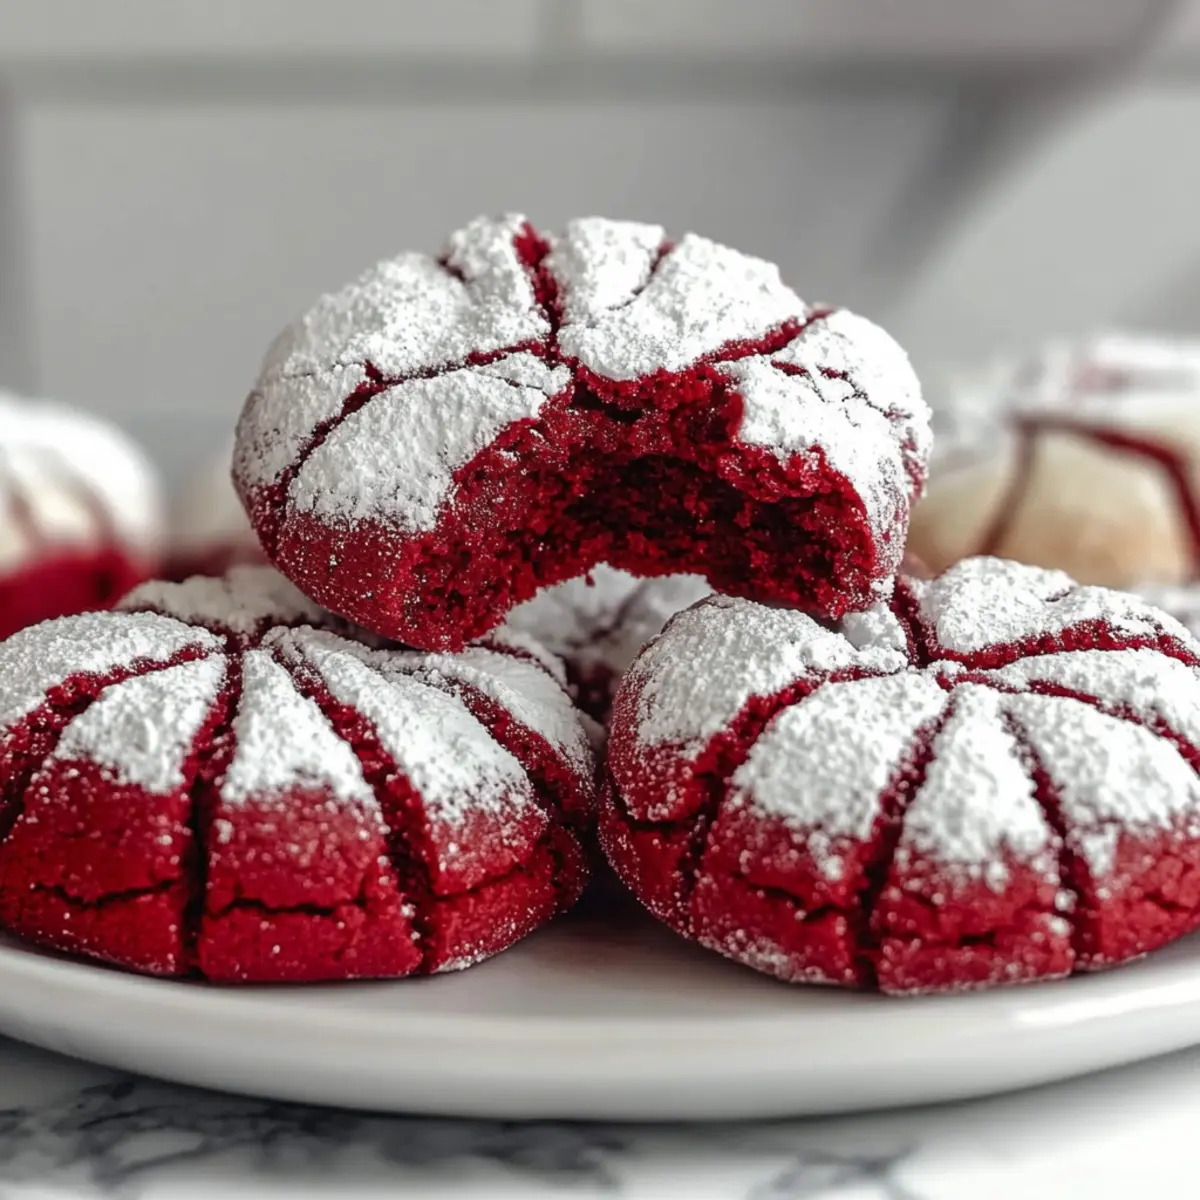
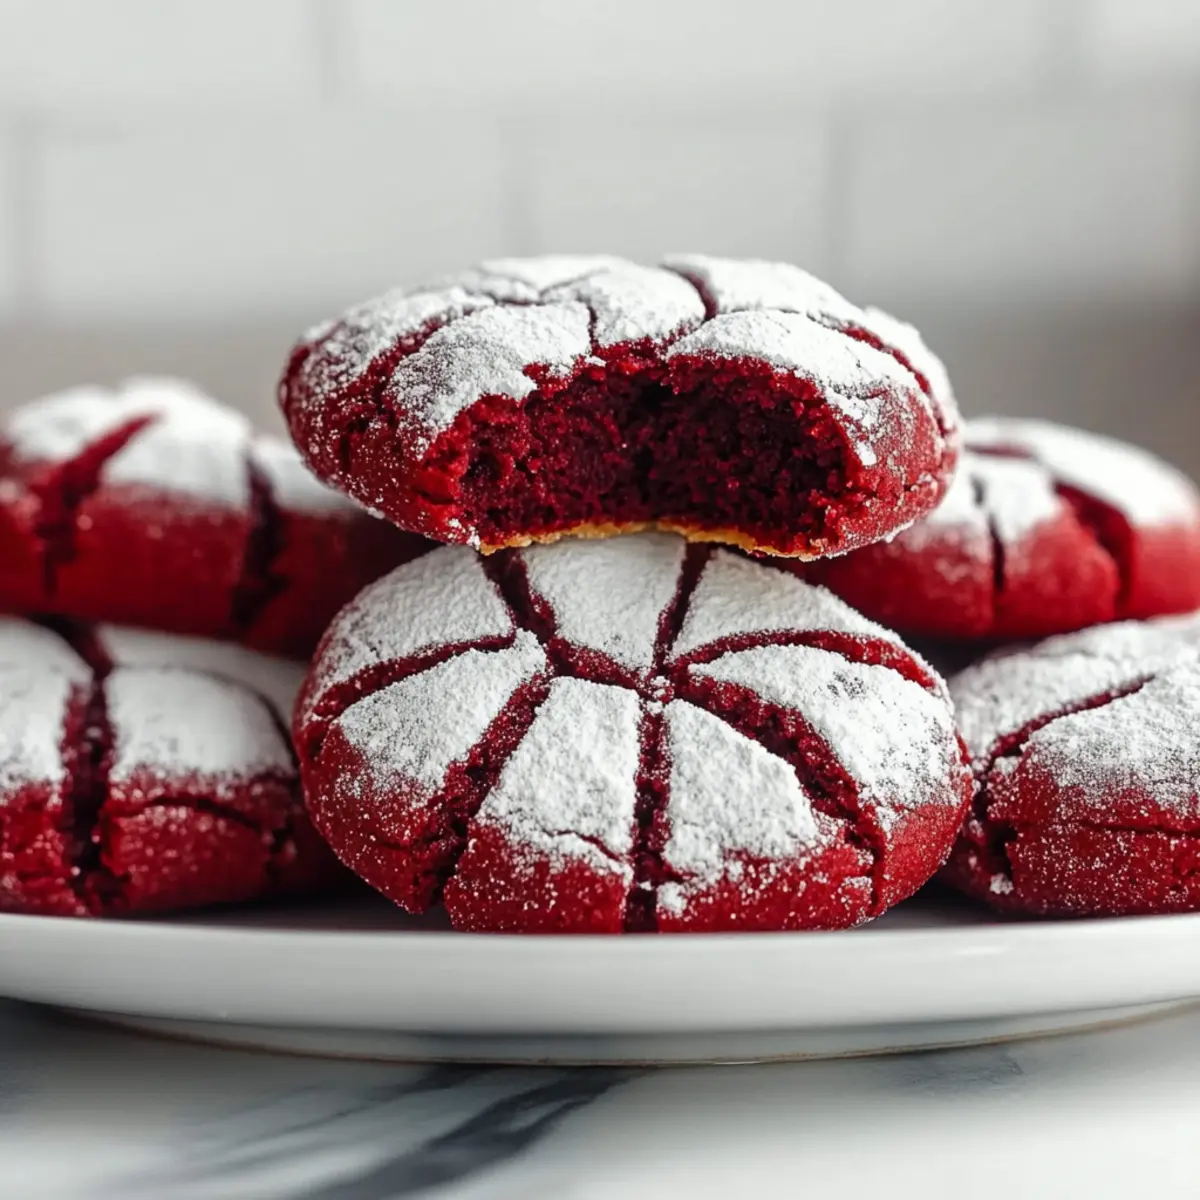
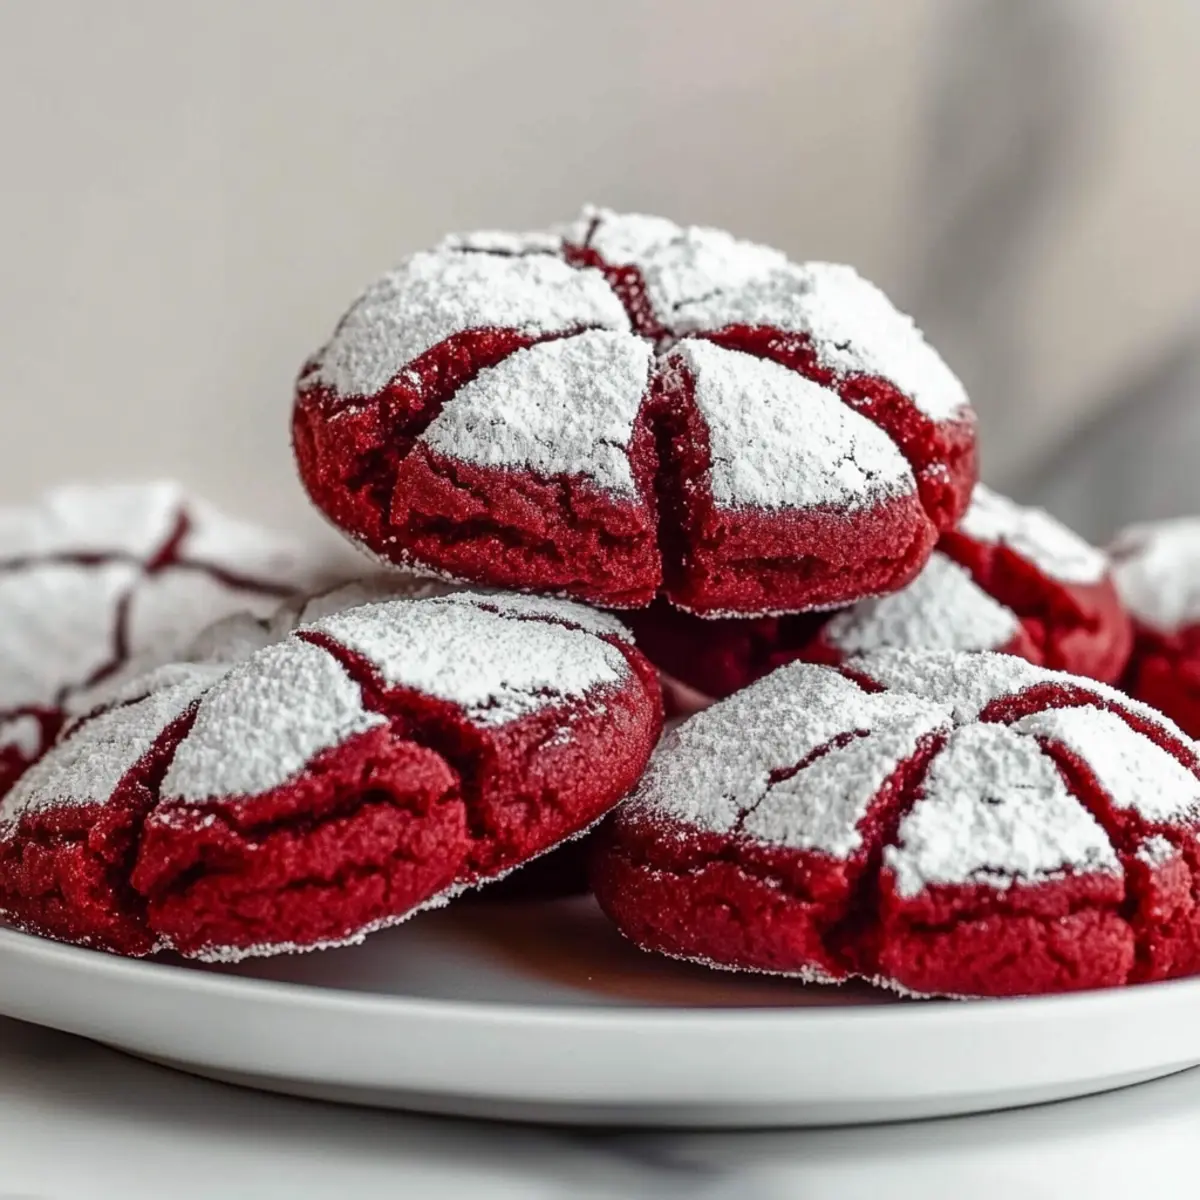
As I watched a swirl of vibrant red dough come together, the inviting scent of cocoa began to fill the kitchen—there’s something magical about making Red Velvet Crinkle Cookies: A Sweet Bite of Comfort. With their stunning appearance and delicate texture, these festive cookies are not just a treat for the eyes; they bring warm flavors reminiscent of traditional red velvet cake, layered with a hint of cream cheese tang. The best part? They’re incredibly easy to share and perfect for cozy gatherings or special occasions. Plus, their unique crinkled finish means they look just as delightful on a dessert platter as they taste! Ready to make a batch and indulge in pure happiness? Let’s dive into the recipe!
Why Are These Cookies So Irresistible?
Visual Appeal: The vibrant red and snowy white crinkle finish creates a stunning centerpiece for any gathering. Cocoalicious Flavor: Each bite delivers a delightful cocoa-infused sweetness, reminiscent of classic red velvet cake. Easy to Share: Perfectly portioned for gift-giving or dessert platters, these cookies invite everyone to indulge. Flexible and Fun: Try variations like chocolate chips or cream cheese frosting to elevate your cookie game further! Whether for holiday festivities or just a cozy evening at home, you’ll love how these cookies brighten up any occasion.
Red Velvet Crinkle Cookie Ingredients
For the Cookie Dough
- All-Purpose Flour – Provides structure to cookies; feel free to swap with gluten-free flour for a gluten-free adaptation.
- Unsweetened Cocoa Powder – Adds a rich, chocolate flavor; for the best results, use regular cocoa rather than Dutch-processed.
- Baking Powder – Acts as a leavening agent for a light texture; make sure it’s fresh for optimal performance.
- Salt – Enhances the overall flavor of the cookies; sea salt makes a lovely substitute if you have it on hand.
- Butter (softened) – Adds richness and contributes to that gooey texture; vegan butter works beautifully for a dairy-free version.
- Granulated Sugar – Sweetens the cookies while playing a key role in texture; consider using coconut sugar for a healthier twist.
- Eggs – Bind the ingredients together and help with rising; if you’re looking for an egg-free option, flaxseed meal is a great substitute.
- Vanilla Extract – Provides aromatic depth and flavor; always go for pure extract for the best tasting cookies.
- Red Gel Food Coloring – Gives those iconic red hues; gel is more concentrated than liquid, ensuring vibrant results.
- Powdered Sugar – Creates the classic crinkle effect on the cookie surface; for a delightful texture, a dash of cornstarch can enhance the coating.
Let’s embark on this delicious journey of making Red Velvet Crinkle Cookies: A Sweet Bite of Comfort, where each ingredient contributes to a whimsical treat that will enchant your senses and delight your friends and family!
Step‑by‑Step Instructions for Red Velvet Crinkle Cookies: A Sweet Bite of Comfort
Step 1: Prep Dry Ingredients
In a medium bowl, whisk together 2 cups of all-purpose flour, 1/4 cup of unsweetened cocoa powder, 1 teaspoon of baking powder, and a pinch of salt until fully combined. This step sets the foundation for your Red Velvet Crinkle Cookies, ensuring an even blend of flavors and textures. Set aside while you prepare the wet mixture.
Step 2: Mix Wet Ingredients
In a large mixing bowl, cream together 1/2 cup of softened butter and 1 cup of granulated sugar using an electric mixer on medium speed for about 2-3 minutes, until light and fluffy. Gradually beat in 2 eggs, one at a time, ensuring the mixture is well combined. Stir in 1 teaspoon of vanilla extract and add your desired amount of red gel food coloring to achieve that iconic crimson hue.
Step 3: Combine Ingredients
Slowly blend the dry mix into the wet batter, using a spatula to gently fold it in until just combined, avoiding overmixing. The goal is to keep the mixture airy to ensure optimal texture for your cookies. Once the dough is unified, you’ll see its deep red color come alive—this is when your Red Velvet Crinkle Cookies truly start to shine!
Step 4: Chill Dough
Cover the bowl with plastic wrap and refrigerate the dough for at least 30 minutes, allowing it to firm up. Chilling is crucial for these cookies, as it prevents excessive spread during baking and enhances the crinkle effect, leading to perfectly shaped treats that are both visually appealing and tasty.
Step 5: Shape Cookies
Preheat your oven to 350°F (175°C) and line two baking sheets with parchment paper. Once chilled, scoop small balls of dough, about 1 inch in diameter, and roll them in a generous amount of powdered sugar until fully coated. This sugary exterior is what creates the delightful crinkle effect on your Red Velvet Crinkle Cookies when baked.
Step 6: Bake
Place the sugared cookie balls on the prepared baking sheets, leaving enough space between each one to allow for spreading. Bake in the preheated oven for about 12 minutes; the tops should crackle, revealing hints of red underneath. Keep a close eye as you approach the end of the baking time to ensure they remain soft and chewy.
Step 7: Cool
Once baked, remove the cookies from the oven and let them cool on the baking sheet for about 5 minutes before transferring them to a wire rack. This initial cooling allows them to set while maintaining their soft texture, making your Red Velvet Crinkle Cookies an irresistible treat, ready to be shared or enjoyed warm!
What to Serve with Red Velvet Crinkle Cookies
These inviting treats shine even brighter when paired with complementary flavors and textures that enhance their festive charm.
-
Creamy Vanilla Ice Cream: The cold, creamy texture contrasts beautifully with the soft cookies, creating a delightful dessert experience.
-
Fresh Berries: Juicy raspberries or strawberries add a burst of freshness, balancing the richness of the cookies with their vibrant flavor.
-
Chocolate Milkshake: A classic pairing, the thick chocolate shake deepens the cocoa experience, inviting indulgence with each bite and sip.
-
Coffee or Espresso: The warm, robust flavors of coffee provide a pleasant counterpoint to the sweetness of the cookies, making it a cozy treat for any time of day.
-
Coconut Macaroons: These chewy, sweet delights offer a different texture and a hint of tropical flavor that beautifully complements the red velvet notes.
-
Whipped Cream: A dollop of lightly sweetened whipped cream adds a light, airy texture that enhances every bite, perfect for a festive finish.
-
Cinnamon Hot Chocolate: The warm spices in hot chocolate pair perfectly with the cookies’ cocoa flavor, creating a comforting drink to sip while enjoying your treats.
Each of these combinations brings out the best in your Red Velvet Crinkle Cookies, turning your charming bakings into a delightful feast!
How to Store and Freeze Red Velvet Crinkle Cookies
Room Temperature: Store baked cookies in an airtight container at room temperature for up to 4 days to maintain their soft, chewy texture.
Fridge: If you prefer, you can refrigerate the cookies for a longer shelf life; they will stay fresh for about 1 week. Just ensure they are well-wrapped.
Freezer: Baked cookies can be frozen for up to 2 months. Place them in a single layer on a baking sheet until frozen, then transfer to an airtight container.
Dough Storage: For fresh-baked cookies anytime, freeze scooped dough balls for up to 3 months. Just roll them in powdered sugar before baking, without needing to thaw beforehand.
Make Ahead Options
These Red Velvet Crinkle Cookies are perfect for meal prep enthusiasts and busy home cooks alike! You can prepare the cookie dough up to 3 days in advance by mixing all your ingredients and chilling the dough, which enhances the flavors. Simply cover the bowl with plastic wrap and refrigerate until you’re ready to bake. For even more convenience, you can scoop and roll the cookie balls in powdered sugar, then freeze them for up to 2 months. When you’re ready to indulge, bake them straight from the freezer; they may need an extra minute or two. This way, you can have freshly baked Red Velvet Crinkle Cookies whenever the craving strikes, without all the last-minute fuss!
Expert Tips for Red Velvet Crinkle Cookies
Chill for Success: Ensure your dough is adequately chilled for at least 30 minutes; this is key to achieving that beautiful crinkle effect and preventing spread.
Gel Food Coloring: Use gel food coloring for a vivid red hue. Start with 1 teaspoon and adjust according to your preference for the perfect shade.
Don’t Overmix: When combining dry and wet ingredients, mix until just combined. Overmixing can lead to dense cookies instead of the soft, chewy texture you want.
Powdered Sugar Coating: Roll your cookie balls generously in powdered sugar. This creates the classic crinkle effect, so don’t be shy with the sugar!
Watch Baking Time: Pay attention to your cookies as they bake. Keep them in until they crack but ensure they remain soft in the center for the ultimate chewy bite.
Serving & Storage: These delectable Red Velvet Crinkle Cookies can be stored in an airtight container for up to 4 days or frozen for up to 2 months—perfect for sharing during festive occasions!
Red Velvet Crinkle Cookie Variations
Feel free to customize and elevate your Red Velvet Crinkle Cookies beyond the classic recipe with some delightful twists!
-
Cream Cheese Frosting:
Top your cookies with a thick layer of cream cheese frosting for a decadent treat that mirrors the beloved red velvet cake experience. This delightful addition enhances the sweetness and adds a creamy texture that’s simply irresistible. -
Chocolate Chips:
Mix in semi-sweet or white chocolate chips to the dough for an extra layer of gooey goodness. Each bite of these cookies will be a delightful surprise, creating a more indulgent version that will have chocolate lovers swooning. -
Nutty Crunch:
Add chopped walnuts or pecans to the dough for a delightful crunch. The nuttiness pairs beautifully with the chocolate flavor, bringing a lovely texture contrast that makes each cookie even more festive! -
Spicy Twist:
Incorporate a pinch of cinnamon or nutmeg into the dough for a warm, spiced flavor that’s perfect for cozy gatherings. This subtle twist can turn your cookies into a memorable seasonal treat that guests will rave about. -
Gluten-Free:
Swap all-purpose flour for a gluten-free blend. Make sure to check the mix includes a binding agent to keep that chewy texture intact. Everyone can enjoy these festive gems regardless of dietary needs! -
Citrus Zest:
Add some lemon or orange zest to your dough for a refreshing citrusy brightness. This unexpected flavor twist will uplift your cookies and make each bite even more enjoyable, adding a refreshing hit amidst the cocoa. -
Minty Freshness:
Introduce a few drops of peppermint extract for a refreshing mint sensation in every bite. This variation is perfect for holidays, offering a bright and festive aroma that complements the rich chocolate beautifully. -
Colored Sugar Coating:
Instead of powdered sugar, roll your cookie balls in colored sugar before baking. This will give your cookies a fun visual flair—perfect for festive occasions where presentation shines just as bright as flavor!
Let your culinary creativity flow as you explore these variations, and don’t forget to share your delicious creations with friends and family or even alongside a warm mug of hot cocoa. And if you’re in the mood for more sweet treats, check out my recipes for Choco Cheesecake Cookie Bites or Cheesy Chicken Casserole. Happy baking!

Red Velvet Crinkle Cookies: A Sweet Bite of Comfort Recipe FAQs
What is the best way to select fresh ingredients for my Red Velvet Crinkle Cookies?
Absolutely! When choosing fresh ingredients, look for all-purpose flour that is bright and free of clumps. The cocoa powder should be unsweetened and have a rich aroma, while eggs should be fresh with no cracks. For red gel food coloring, opt for high-quality brands to get the most vibrant and lasting color.
How should I store my Red Velvet Crinkle Cookies, and how long do they last?
To maintain their delightful texture, store your cookies in an airtight container at room temperature, where they’ll stay fresh for about 4 days. If you want to prolong their deliciousness, you can refrigerate them for up to 1 week in a well-wrapped container.
Can I freeze the Red Velvet Crinkle Cookies?
Yes! You can freeze baked cookies for up to 2 months. Place them on a baking sheet in a single layer until fully frozen, then transfer them to an airtight container or freezer bag. For fresh cookies on demand, freeze the dough balls for up to 3 months. Just roll them in powdered sugar before baking, and bake directly from frozen without the need to thaw!
What if my dough is too firm after chilling?
If you find that your dough has become too firm after chilling, don’t worry! Just let it sit at room temperature for about 5-10 minutes until it softens slightly, making it easier to roll into cookie balls. This method also helps in achieving that lovely crinkle finish.
Are Red Velvet Crinkle Cookies safe for pets?
Very! These cookies are meant for human enjoyment, so it’s best to keep them away from pets. Ingredients like chocolate and butter can be harmful to our furry friends. Always double-check ingredient lists if you’re baking for guests with pets to ensure a safe environment for everyone!
Can I use alternatives for any of the ingredients in the Red Velvet Crinkle Cookies?
Absolutely! You can substitute gluten-free flour for a gluten-free version. For a dairy-free option, use vegan butter in place of regular butter. If you’re avoiding eggs, mix 1 tablespoon of flaxseed meal with 2.5 tablespoons of water for each egg needed. This not only binds your cookies but also adds an extra nutty flavor!
Red Velvet Crinkle Cookie: A Sweet Bite of Comfort Delight
Ingredients
Equipment
Method
- In a medium bowl, whisk together 2 cups of all-purpose flour, 1/4 cup of unsweetened cocoa powder, 1 teaspoon of baking powder, and a pinch of salt until combined.
- In a large mixing bowl, cream together 1/2 cup of softened butter and 1 cup of granulated sugar until light and fluffy. Gradually beat in 2 eggs, then stir in 1 teaspoon of vanilla extract and red gel food coloring.
- Slowly blend the dry mix into the wet batter until just combined.
- Cover and refrigerate the dough for at least 30 minutes.
- Preheat your oven to 350°F (175°C) and line two baking sheets with parchment paper. Scoop small balls of dough and roll them in powdered sugar.
- Place the cookie balls on the prepared baking sheets and bake for about 12 minutes.
- Allow the cookies to cool on the sheet for about 5 minutes before transferring them to a wire rack.
Leave a Reply