
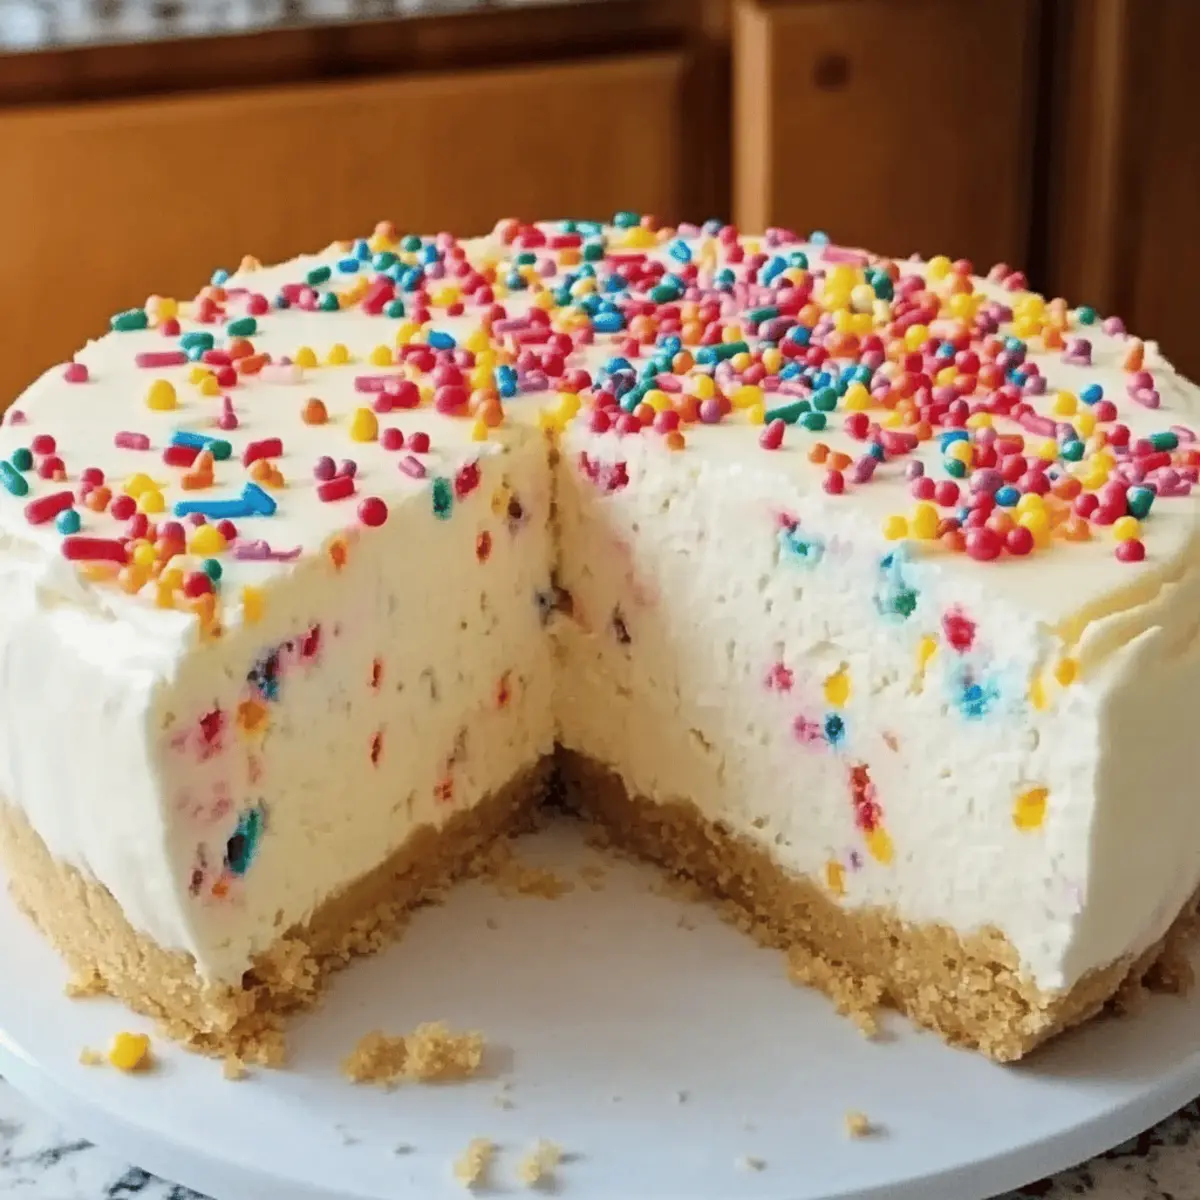
As I rummaged through my pantry one afternoon, a vision of creamy, luscious cheesecake began to dance in my mind. This was no ordinary dessert; I was craving a Rich & Creamy Cheesecake that would make any birthday celebration truly unforgettable. With its buttery graham cracker crust and velvety filling topped with vibrant rainbow jimmies, this recipe is perfect for both novice bakers and seasoned pros. It promises to be the star of your gathering, effortlessly bringing together friends and family around the table. Plus, it’s a versatile crowd-pleaser that can be easily tailored to fit gluten-free or dairy-free diets. Who can resist a slice of joy that not only looks stunning but also tastes divine? Are you ready to create some sweet memories?
Why Is This Cheesecake So Special?
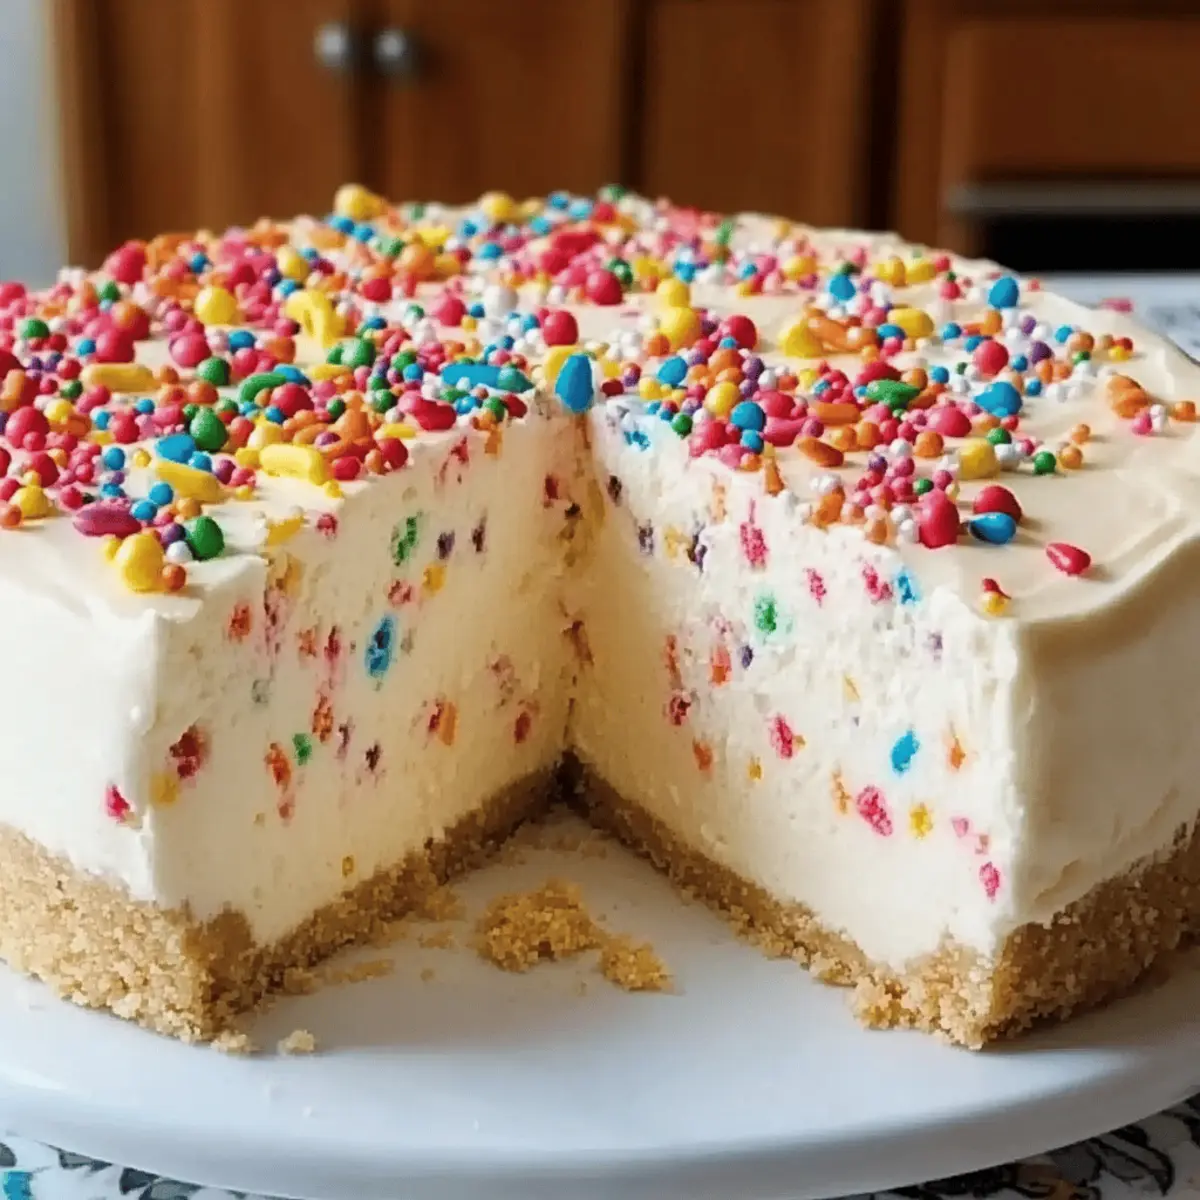
Indulgence Awaits: Each bite of this Rich & Creamy Cheesecake is pure perfection, marrying a buttery graham cracker crust with a silky filling.
Versatile Treat: This recipe effortlessly accommodates gluten-free and dairy-free diets, ensuring everyone can enjoy.
Easy to Make: The straightforward steps make it perfect for bakers of all levels, so you can create it with confidence.
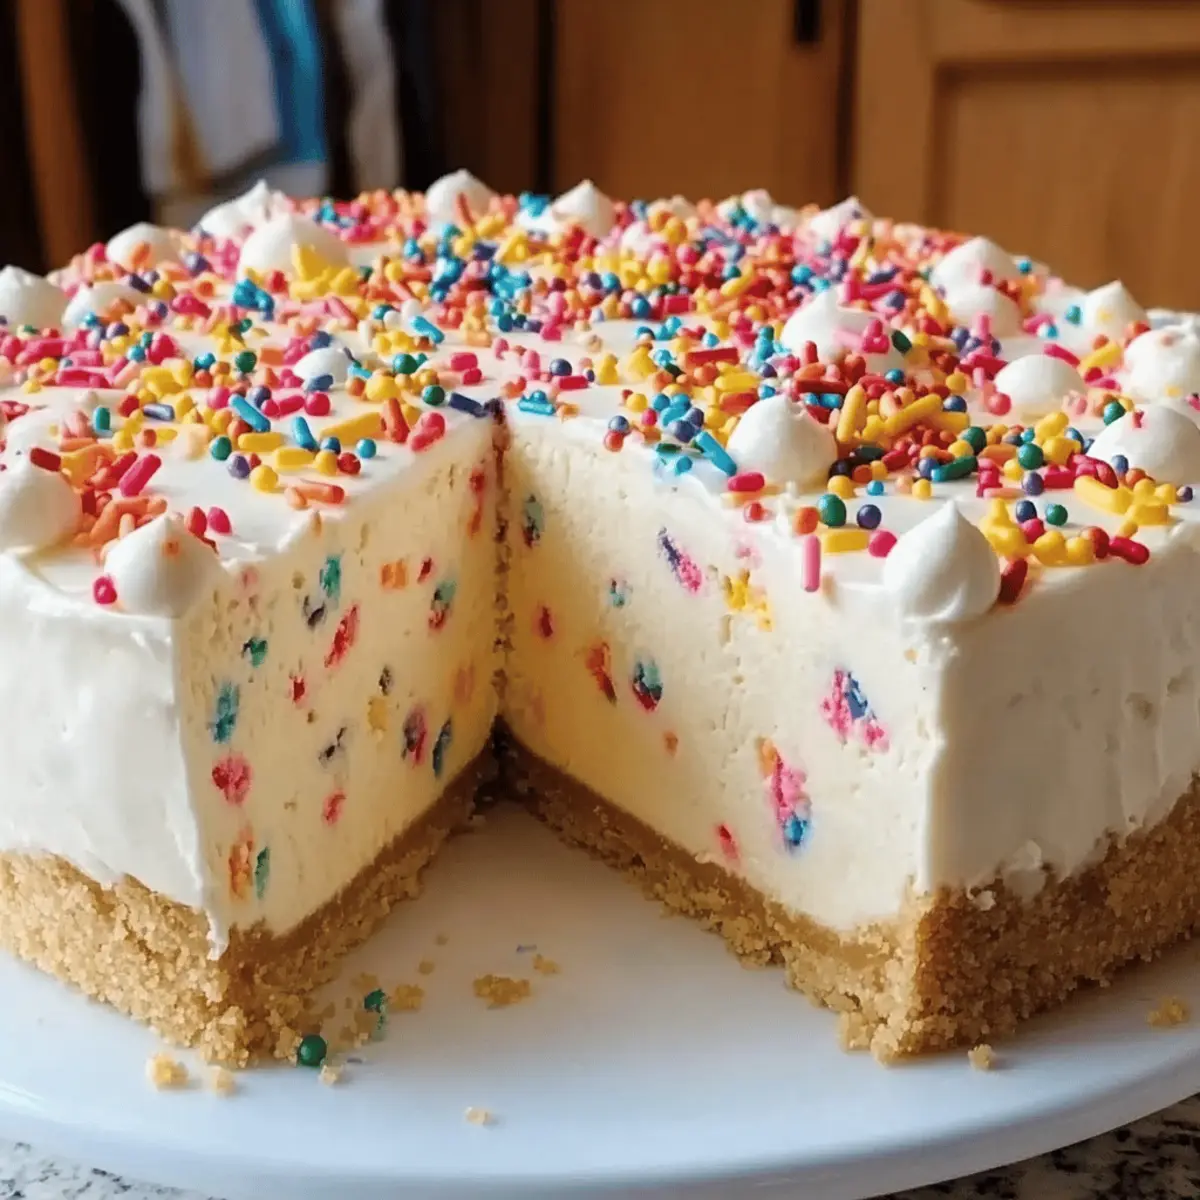
Festive Touch: Adorned with rainbow jimmies, it’s not just delicious—it’s a visual delight that sets the mood for any celebration!
Memorable Gatherings: It’s not just a dessert; it’s a centerpiece that brings family and friends together, creating sweet moments to cherish.
Rich & Creamy Cheesecake Ingredients
For the Crust
- Graham Cracker Crumbs – Provides structure and crunch for the crust. Substitution: Use any crushed cookies, like Oreos, for a different flavor.
- Granulated Sugar – Sweetens the crust and cheesecake. Substitution: Consider coconut sugar for a deeper flavor.
- Unsalted Butter – Binds the crust ingredients together. Substitution: Use coconut oil for a dairy-free option.
For the Filling
- Cream Cheese – Gives the cheesecake its rich and creamy texture. Ensure it’s softened for blending.
- Sour Cream – Adds tanginess and smoothness to the filling. Essential for flavor balance.
- Vanilla Extract – Enhances the overall flavor profile of the cheesecake.
- Eggs – Provide structure and stability to the cheesecake filling. Must be at room temperature for even blending.
- Rainbow Jimmies – Decorative element that adds a festive touch. Optional: Use other sprinkles or omit for a classic look.
For the Topping
- Whipped Cream – For topping. Optional: Use heavy whipped cream or omit based on preference.
Embrace the joy of creating this Rich & Creamy Cheesecake, where every ingredient plays a critical role in crafting a dessert that’s not only delicious but also a stunning centerpiece for your celebrations!
Step‑by‑Step Instructions for Rich & Creamy Cheesecake
Step 1: Preheat the Oven
Begin by preheating your oven to 350°F (175°C). This ensures that your baking environment is hot enough for the Rich & Creamy Cheesecake to rise properly and develop a beautiful golden hue. While the oven warms up, gather your ingredients and prepped equipment, creating a smooth workflow for the upcoming steps.
Step 2: Prepare the Crust
In a large mixing bowl, combine graham cracker crumbs, granulated sugar, and melted unsalted butter. Use a fork or your fingers to blend the mixture until it resembles wet sand. Press this mixture firmly into the bottom of a 9-inch springform pan, ensuring an even layer that will hold up during baking.
Step 3: Wrap the Springform Pan
Next, wrap the outside of your springform pan with heavy-duty aluminum foil. This will help create a water bath that keeps the cheesecake moist during baking, preventing cracks. Be sure to seal it well, as this protects the crust from the water, ensuring a perfect finish for your Rich & Creamy Cheesecake.
Step 4: Make the Filling
In a large mixing bowl, beat the softened cream cheese until smooth, using an electric mixer on medium speed. Gradually add in the granulated sugar, mixing thoroughly until incorporated. Next, blend in the sour cream and vanilla extract until the filling is creamy and well combined.
Step 5: Add the Eggs
With the mixer on low speed, add the eggs one at a time to your filling, mixing just until each one is blended in. This gentle approach helps maintain airiness and prevents overmixing, crucial for achieving a flawless, dense texture in your Rich & Creamy Cheesecake.
Step 6: Fold in the Jimmies
Now, gently fold in the rainbow jimmies with a spatula, ensuring they’re evenly distributed throughout the filling. Be careful not to overstir; you want to keep the mixture light and fluffy while infusing it with festive color.
Step 7: Bake in a Water Bath
Pour the creamy cheesecake filling over the prepared crust in your springform pan. Place the springform pan into a larger baking dish, then fill the dish with hot water halfway up the sides of the pan. Bake your cheesecake for 60-70 minutes until the edges are set and the center is just slightly jiggly.
Step 8: Cool & Refrigerate
After baking, carefully remove the cheesecake from the oven and allow it to cool on a wire rack for about an hour. This gradual cooling process helps prevent cracks. Once cooled, refrigerate the cheesecake for at least four hours, or overnight, to set fully and develop its flavors.
Step 9: Serve the Cheesecake
When you’re ready to serve your Rich & Creamy Cheesecake, carefully remove it from the springform pan. Top it generously with whipped cream and extra rainbow jimmies for that final festive touch. Slice into beautiful pieces and relish sharing this delightful dessert with your loved ones.
Make Ahead Options
These Rich & Creamy Cheesecake preparations are ideal for busy home cooks looking to save time! You can prepare the crust up to 24 hours in advance; simply combine the graham cracker crumbs, sugar, and melted butter, press into the pan, and refrigerate. The cheesecake filling can also be made a day ahead and stored in the fridge until you’re ready to bake. Just remember to bring all ingredients to room temperature before mixing to ensure a smooth batter. When it’s time to bake, pour the filling over the crust and follow the regular baking instructions. This way, you’ll have a stunning cheesecake ready for the party with minimal last-minute effort!
What to Serve with Creamy Birthday Cheesecake?
Surround your stunning cheesecake with delightful accompaniments that elevate the dessert experience and create a memorable dining moment.
-
Fresh Berries: Their tartness perfectly balances the sweetness of the cheesecake, adding a burst of color and freshness to every slice.
-
Chocolate Drizzle: A rich chocolate sauce drizzled on top adds indulgent flavor and a luxurious touch, making each bite extra special.
-
Berry Coulis: This vibrant fruit sauce enhances the cheesecake’s creamy texture while adding a tangy flavor kick that pairs wonderfully with the sweetness.
-
Chilled Iced Tea: A refreshing drink that cleanses the palate, allowing the creamy cheesecake to shine without overwhelming your taste buds.
-
Lemonade: The zesty brightness of lemonade cuts through the richness, providing a perfect contrast that keeps your guests feeling refreshed.
-
Rich Coffee: A velvety cup of good-quality coffee brings out the cheesecakes’ flavors beautifully, making it an ideal dessert pairing for deeper conversations.
-
Vanilla Ice Cream: A scoop of creamy vanilla ice cream alongside the cheesecake creates a delightful contrast in temperatures and textures that will please everyone.
-
Whipped Cream: Enhance the cheesecakes’ richness with a dollop of freshly whipped cream for extra texture and added creaminess with every bite.
-
Citrus Zest: A sprinkle of lemon or orange zest on top brings brightness and a hint of aromatic freshness, elevating the overall flavor profile.
Expert Tips for Rich & Creamy Cheesecake
- Room Temperature Ingredients: Ensure that all ingredients, especially cream cheese and eggs, are at room temperature to achieve a silky filling and smooth texture in your Rich & Creamy Cheesecake.
- Avoid Overmixing: Be cautious when blending in the eggs; overmixing can lead to cracks during baking. Mix just until incorporated to maintain the cheesecake’s density.
- Use a Water Bath: Baking in a water bath prevents the cheesecake from drying out and reduces the risk of cracks. It helps create a creamy texture by maintaining even heat.
- Cool Gradually: Let the cheesecake cool at room temperature before refrigerating. This slow cooling method prevents drastic temperature changes that can lead to cracks.
- Flavor Variations: Don’t hesitate to get creative! Add spices, fruit purees, or swap ingredients for gluten-free or dairy-free options to tailor your Rich & Creamy Cheesecake to your guests’ preferences.
Rich & Creamy Cheesecake Variations
Feel free to let your imagination run wild as you customize this delightful cheesecake recipe with these enticing twists!
-
Gluten-Free: Substitute with gluten-free graham cracker crumbs or almond flour for a crumbly crust that everyone can enjoy. This simple switch allows those with gluten sensitivities to dig in without a second thought.
-
Dairy-Free: Replace cream cheese and sour cream with cashew cheese and coconut yogurt for a dairy-free treat. Indulging in this variation means reveling in creamy goodness without dairy, making it a thoughtful choice for vegan guests.
-
Chocolate Lovers: Use chocolate cream cheese for a richer, more decadent flavor. Imagine each slice filled with a luscious chocolatey twist that tempts your taste buds—it’s hard to resist!
-
Fruit-Infused: Add fruit puree like raspberry or strawberry into the filling for a burst of fruity flavor. This lightens the dessert and brings a refreshing sweetness, making it perfect for summer celebrations.
-
Spices: Mix in cinnamon or nutmeg for a warm flavor twist that adds a cozy depth. Just a pinch of these spices can transform your cheesecake into an inviting slice of comfort that warms the heart.
-
Citrus Zest: Incorporate lemon or lime zest for a bright taste contrast that balances the richness. This little addition awakens the dessert and gives it a zing, ensuring each bite is perfectly tantalizing.
-
Nutty Crust: Try incorporating ground nuts like almonds or pecans into your crust for added texture and flavor. Those nutty notes will complement the creaminess of the cheesecake, creating a delightful harmony.
-
Hash of Jimmies: Mix up the toppings by using chocolate or caramel jimmies instead of traditional rainbow ones. Each festive touch guarantees that your dessert dazzles while staying true to your unique style.
For more delightful inspirations, consider pairing this cheesecake with a refreshing slice of Antilles Coconut Flan or indulge in a decadent Strawberry Crunch Cheesecake. Let your creativity flourish as you conjure up new delicious variations that will leave everyone asking for seconds!
How to Store and Freeze Rich & Creamy Cheesecake
Fridge: Keep your homemade cheesecake in an airtight container for up to 3 days. This preserves its creamy texture and delicious flavor.
Freezer: To freeze, wrap individual slices tightly in plastic wrap, then secure them in a freezer-safe bag. Enjoy your rich & creamy cheesecake for up to a month.
Thawing: When ready to indulge, transfer the slices to the fridge for several hours or overnight to thaw, ensuring the cheesecake retains its creaminess.
Reheating: There’s no need to reheat cheesecake; serve it chilled, allowing its flavors to shine through beautifully.

Rich & Creamy Cheesecake Recipe FAQs
How do I select the best cream cheese for my cheesecake?
Absolutely! When choosing cream cheese, opt for a full-fat variety for the richest texture and flavor. Look for blocks instead of spreadable cream cheese, as they have a firmer consistency that’s ideal for baking. Ensure it’s fresh with no discoloration or off smells.
What’s the best way to store leftover cheesecake?
To keep your Rich & Creamy Cheesecake fresh, store it in an airtight container in the refrigerator for up to 3 days. If you’ve got leftovers, slice the cheesecake and wrap them individually in plastic wrap. These can last in the freezer for up to a month, preserving that creamy texture and delectable taste.
Can I freeze my cheesecake? If so, how?
Absolutely! To freeze your cheesecake, wrap the entire cake tightly in plastic wrap, ensuring no air is trapped, and then place it in a freezer-safe container or bag. For sliced portions, individually wrap each slice to make it easy to enjoy just one at a time. When you’re ready to savor your dessert, thaw the cheesecake in the refrigerator overnight—no need to rush it!
What are common troubleshooting tips for a cheesecake that cracks?
Very! If your cheesecake cracks, it’s often a sign of overmixing or sudden temperature changes. First, ensure your cream cheese and eggs are at room temperature before mixing, as this leads to a smoother batter. Also, bake the cheesecake in a water bath to maintain moisture, reducing the chances of cracks. If cracks do occur, don’t worry! You can hide them with whipped cream or decorations.
Can I make this recipe dairy-free?
Yes, indeed! For a dairy-free option, substitute the cream cheese and sour cream with cashew cheese and coconut yogurt, respectively. These alternatives create a creamy texture while keeping the cheesecake delicious and friendly for those with dairy sensitivities. Always check labels to ensure all ingredients used are dairy-free.
Is there a way to make gluten-free cheesecake?
Very much so! To make your Rich & Creamy Cheesecake gluten-free, simply swap out regular graham cracker crumbs for gluten-free variations or even crushed almond flour mixed with coconut oil. This way, you can enjoy the same delightful cheesecake experience without compromising on flavor!
Indulge in Rich & Creamy Cheesecake for Perfect Celebrations
Ingredients
Equipment
Method
- Preheat your oven to 350°F (175°C).
- In a large mixing bowl, combine graham cracker crumbs, granulated sugar, and melted unsalted butter. Press this mixture into the bottom of a 9-inch springform pan.
- Wrap the outside of your springform pan with heavy-duty aluminum foil to create a water bath.
- Beat the softened cream cheese until smooth. Gradually add granulated sugar, then blend in sour cream and vanilla extract.
- With the mixer on low speed, add the eggs one at a time, mixing until blended in.
- Gently fold in the rainbow jimmies with a spatula.
- Pour the filling over the crust. Place the springform pan into a larger baking dish filled with water halfway up the sides. Bake for 60-70 minutes.
- Cool on a wire rack for about an hour and then refrigerate for at least four hours.
- Carefully remove from the springform pan, top with whipped cream and extra rainbow jimmies, and serve.
Leave a Reply