
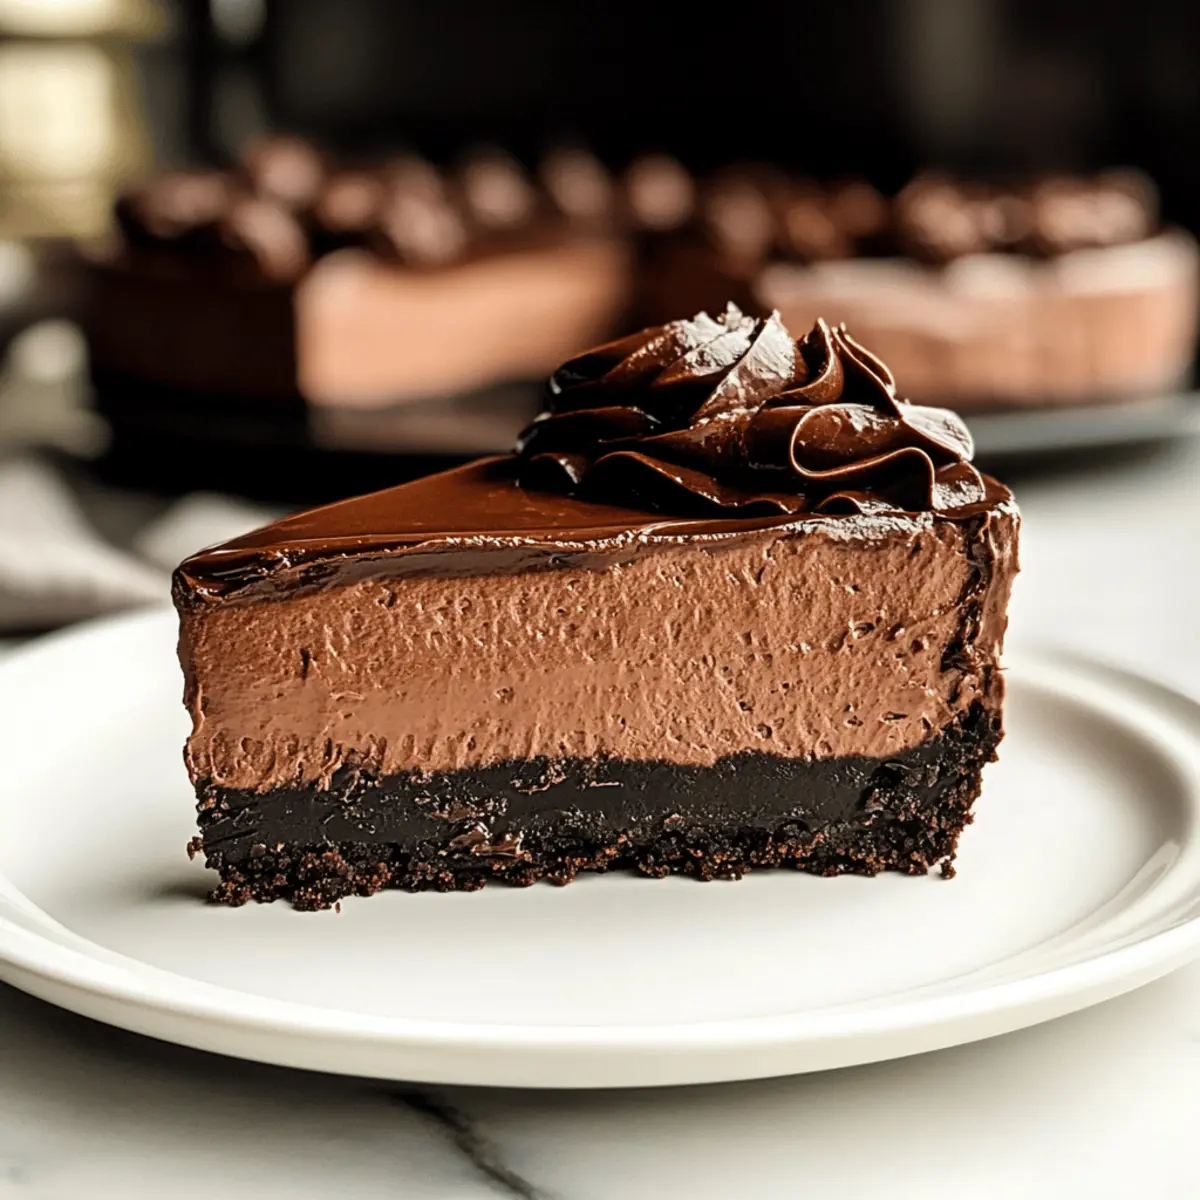
The aroma of melting chocolate fills my kitchen, whispering promises of a heavenly dessert. Today, I’m diving into the world of indulgence with my Irresistible No-Bake Chocolate Cheesecake. This rich and creamy chocolate cheesecake is so simple to make; it practically prepares itself! With a crunchy Oreo crust and a glossy ganache on top, it’s a striking centerpiece for any gathering or even a little self-care treat after a long day. Plus, no baking means you can whip it up in no time—perfect for those spontaneous dessert cravings or last-minute guest arrivals. Are you ready to indulge in a slice of chocolate heaven? Let’s get started!
Why is this cheesecake so irresistible?
Decadent, rich flavor: This no-bake cheesecake boasts deep chocolate notes that satisfy every chocolate lover’s craving. Easy to whip up: You’ll be amazed at how quickly this recipe comes together, making it ideal for busy days when you need a treat fast. Versatile toppings: Dress it up with berries, chocolate shavings, or a sprinkle of sea salt for a gourmet touch. And if you’re seeking more delicious desserts, make sure to check out my Strawberry Crunch Cheesecake or Salted Caramel Chocolate Chip Cookie Bars. No baking required: Enjoy a guilt-free baking experience while still impressing your guests. Crowd-pleaser: This cheesecake is sure to be the star of any gathering, leaving everyone asking for seconds!
Rich & Creamy Chocolate Cheesecake Ingredients
For the Crust
• Oreo Cookies – The chocolatey base adds a delightful crunch; try substituting with chocolate graham crackers for a unique flavor.
• Melted Butter – Binds the crust together, adding moisture; margarine can work if you prefer a non-dairy option.
For the Filling
• Cream Cheese – Creates the luscious filling that’s rich and creamy; opt for mascarpone for a more decadent texture.
• Powdered Sugar – Sweetens the filling without grittiness; granulated sugar can be used, but it may result in a less smooth consistency.
• Vanilla Extract – Enhances the overall flavor; try almond extract for an intriguing twist.
• Semi-Sweet/Dark Chocolate – The star ingredient that gives the cheesecake its rich chocolate flavor; always choose high-quality chocolate for the best results.
• Heavy Whipping Cream – Provides lightness to the filling; coconut cream is an excellent dairy-free substitute.
For the Ganache
• Chopped Semi-Sweet Chocolate – Adds a rich and glossy finish to the cheesecake; consider using dark chocolate for a bolder flavor profile.
• Heavy Cream – Contributes richness to the ganache; full-fat coconut milk can also work as a good alternative.
This rich & creamy chocolate cheesecake will definitely win over your heart, so gather these ingredients and let’s embark on this delightful dessert adventure!
Step‑by‑Step Instructions for Irresistible No-Bake Chocolate Cheesecake
Step 1: Prepare the Crust
Begin by crushing Oreo cookies into fine crumbs using a food processor or a rolling pin. In a medium bowl, mix the crumbs with melted butter until well combined, resembling wet sand. Press this mixture firmly into the bottom of a 9-inch springform pan, ensuring an even thickness. Chill the crust in the refrigerator for 30 minutes to set while you prepare the filling.
Step 2: Create the Filling
In a microwave-safe bowl, melt the semi-sweet or dark chocolate until smooth, stirring every 30 seconds to prevent burning. Allow it to cool slightly. In a large mixing bowl, beat the cream cheese, powdered sugar, and vanilla extract together until creamy and well-blended. Gently fold in the melted chocolate until just combined, creating a luscious chocolate mixture for your rich & creamy chocolate cheesecake.
Step 3: Incorporate Whipped Cream
In a separate bowl, whip the heavy cream using an electric mixer until stiff peaks form. This will add lightness to your filling. Carefully fold the whipped cream into the chocolate mixture in batches, ensuring each portion is fully incorporated before adding the next. This preserves the fluffy texture of the filling, creating a decadent, airy consistency.
Step 4: Assemble & Chill
Spread the chocolate filling evenly over the chilled Oreo crust, smoothing the top with a spatula for a professional finish. Cover the cheesecake with plastic wrap and refrigerate for at least 6 hours; overnight is ideal to ensure it sets perfectly. The filling should be firm yet creamy, ready to be transformed with a luscious ganache.
Step 5: Prepare Ganache
To create the glossy ganache, heat heavy cream in a pan over medium heat until it’s steaming but not boiling. Pour the hot cream over the chopped semi-sweet chocolate in a bowl. Let it sit for about 5 minutes, then stir until smooth and shiny. Allow the ganache to cool slightly before drizzling it over the chilled cheesecake for that indulgent finish.
Step 6: Final Chill
After drizzling the ganache, return the cheesecake to the refrigerator for an additional 30 to 60 minutes to allow the ganache to set. When ready to serve, carefully remove the cheesecake from the springform pan. Slice into generous pieces, revealing the rich, creamy layers of chocolate that await to be enjoyed!
What to Serve with Irresistible No-Bake Chocolate Cheesecake
Indulging in this decadent dessert opens the door to a world of delicious pairings, perfect for elevating your meal.
-
Fresh Berries: A medley of raspberries, strawberries, or blueberries introduces a tart freshness, beautifully balancing the cheesecake’s rich sweetness. Their vibrant colors also add a pop of freshness to your dessert table.
-
Whipped Cream: Light and fluffy, a dollop of homemade whipped cream adds a creamy layer on top, making every bite even more indulgent and elevating the overall experience.
-
Coffee: A steaming cup of strong coffee creates the perfect harmony with the chocolate, offering a delightful contrast that makes each sip and bite a moment of bliss.
-
Chocolate Sauce: Drizzling extra chocolate sauce over the cheesecake enhances the chocolate explosion, satisfying the true chocolate lover’s dreams. It also adds an elegant touch when guests are served.
-
Mint Leaves: Adding fresh mint leaves as a garnish adds a refreshing note that cuts through the richness, making each slice feel light and invigorating.
-
Red Wine: A glass of Merlot or any full-bodied red wine complements the deep chocolate flavors, turning dessert into a sophisticated dining experience.
-
Vanilla Ice Cream: Creamy vanilla ice cream offered alongside the cheesecake introduces a delightful textural contrast and coolness that pairs beautifully with the indulgent dessert.
-
Nutty Crust Dessert: Try serving slices alongside a nutty crust dessert for a delightful mix of textures and flavors that are sure to impress.
These pairings invite guests to engage in delightful conversations and amplify the joy of indulging in your rich & creamy chocolate cheesecake!
Rich & Creamy Chocolate Cheesecake Variations
Feel free to unleash your creativity and customize your cheesecake experience to your heart’s content!
- Gluten-Free: Substitute Oreo cookies with gluten-free chocolate cookies to ensure everyone can indulge in this treat.
- Dairy-Free: Use coconut cream and dairy-free cream cheese for a deliciously creamy texture without the dairy.
- Flavor Infusion: Add a teaspoon of espresso powder to the filling for a delightful coffee kick that enhances the chocolate flavor.
- Fruit-Topped: Slice fresh strawberries or add raspberry puree on top for a burst of fruity freshness that pairs beautifully with chocolate.
- Nutty Crust: Swap out plain crushed cookies for crushed nuts mixed with melted butter for a crunchy, nutty base.
- Swirl & Twirl: Swirl in some peanut butter or Nutella into the filling before chilling for a whole new flavor profile.
- Savory Touch: Sprinkle a tiny pinch of sea salt on the ganache before it sets for that sweet-and-salty combo that will have guests begging for the recipe!
- For an even more decadent dessert experience, you might also consider trying my scrumptious Oreo Cheesecake Cookie Cups or a delightful Strawberry Chocolate Decadent treat!
How to Store and Freeze Rich & Creamy Chocolate Cheesecake
Fridge: Store the cheesecake covered in the refrigerator for up to 5 days. This keeps it fresh and maintains its rich flavors.
Freezer: For longer storage, freeze the cheesecake without ganache for up to 2 months. Wrap it tightly in plastic wrap and then in aluminum foil to protect it from freezer burn.
Thawing: When ready to enjoy, thaw the frozen cheesecake in the refrigerator overnight for the best texture.
Reheating: No reheating is necessary; simply slice and serve chilled! Enjoy your rich & creamy chocolate cheesecake whenever the craving strikes.
Expert Tips for Rich & Creamy Chocolate Cheesecake
-
Room Temperature Cream Cheese: Ensure your cream cheese is at room temperature before mixing to achieve a perfectly creamy filling without lumps.
-
Chill for Success: Always chill the cheesecake for at least 6 hours, or overnight if possible. This allows the flavors to meld and the texture to set properly.
-
Gentle Folding: When incorporating whipped cream into the chocolate mixture, fold gently to maintain airiness; overmixing can deflate the filling.
-
Wait for Ganache: Allow the melted chocolate ganache to cool slightly before drizzling. This helps it set on the cheesecake instead of running off.
-
Fixing the Set: If the cheesecake doesn’t set as expected, more chilling time in the refrigerator may be necessary to achieve that rich & creamy chocolate cheesecake texture.
Make Ahead Options
These rich & creamy chocolate cheesecakes are a dream for busy cooks looking to save time! You can prepare the cheesecake filling up to 24 hours in advance and refrigerate it, ensuring it’s tightly covered to maintain its luscious texture. The crust can also be made ahead of time, simply press it into the pan and store it in the fridge for maximum crunch. When you’re ready to enjoy your dessert, spread the filling over the chilled crust, let it chill again for at least 6 hours (or overnight for best results), and finish with the ganache just before serving. This way, you’ll have an indulgent treat ready to impress without the last-minute rush!
Rich & Creamy Chocolate Cheesecake Recipe FAQs
What type of chocolate should I use for the filling?
Absolutely! It’s best to use high-quality semi-sweet or dark chocolate for the filling. It not only provides the rich chocolate flavor you desire but also enhances the overall creaminess of your cheesecake. Look for brands that are labeled as 60% cacao or higher for that deep indulgence!
How do I ensure my cheesecake sets properly?
Very important! Chilling your cheesecake for at least 6 hours, or ideally overnight, is crucial. If it doesn’t set, you may need to return it to the refrigerator for additional time. Make sure your cream cheese is at room temperature before mixing to avoid lumps, and gently fold in whipped cream to maintain that airy texture.
Can I freeze my chocolate cheesecake?
Yes, indeed! You can freeze your rich & creamy chocolate cheesecake without the ganache for up to 2 months. To freeze, wrap it tightly in plastic wrap and then in aluminum foil to prevent freezer burn. When you’re ready to enjoy it, simply thaw overnight in the refrigerator.
How should I store leftover cheesecake?
Store your cheesecake covered in the refrigerator for up to 5 days. This helps keep the flavors fresh and allows you to enjoy those decadent flavors for longer. Just remember to slice it before serving, as it’s best enjoyed chilled!
What if I don’t have Oreo cookies for the crust?
Not a problem at all! If you’re out of Oreo cookies, feel free to substitute with any favorite chocolate cookie or even graham crackers for a different twist. Simply crush them into fine crumbs and mix with melted butter just like you would with Oreos.
Can pets eat chocolate cheesecake?
No, chocolate cheesecake is not safe for pets. Chocolate contains theobromine, which is toxic to dogs and other animals. Always keep your delicious desserts out of reach of your furry friends to keep them safe!

Decadent Rich & Creamy Chocolate Cheesecake Made Easy
Ingredients
Equipment
Method
- Crush Oreo cookies into fine crumbs and mix with melted butter. Press into a 9-inch springform pan and chill for 30 minutes.
- Melt the semi-sweet or dark chocolate in a microwave until smooth and let cool slightly. Mix cream cheese, powdered sugar, and vanilla until creamy, then fold in the chocolate.
- Whip the heavy cream until stiff peaks form. Fold into the chocolate mixture until combined and fluffy.
- Spread the chocolate filling over the chilled crust, smooth the top, cover, and refrigerate for at least 6 hours.
- Heat heavy cream until steaming, pour over chopped chocolate, stir until smooth, let cool, then drizzle over the cheesecake.
- Chill the cheesecake for an additional 30 to 60 minutes before slicing and serving.
Leave a Reply