
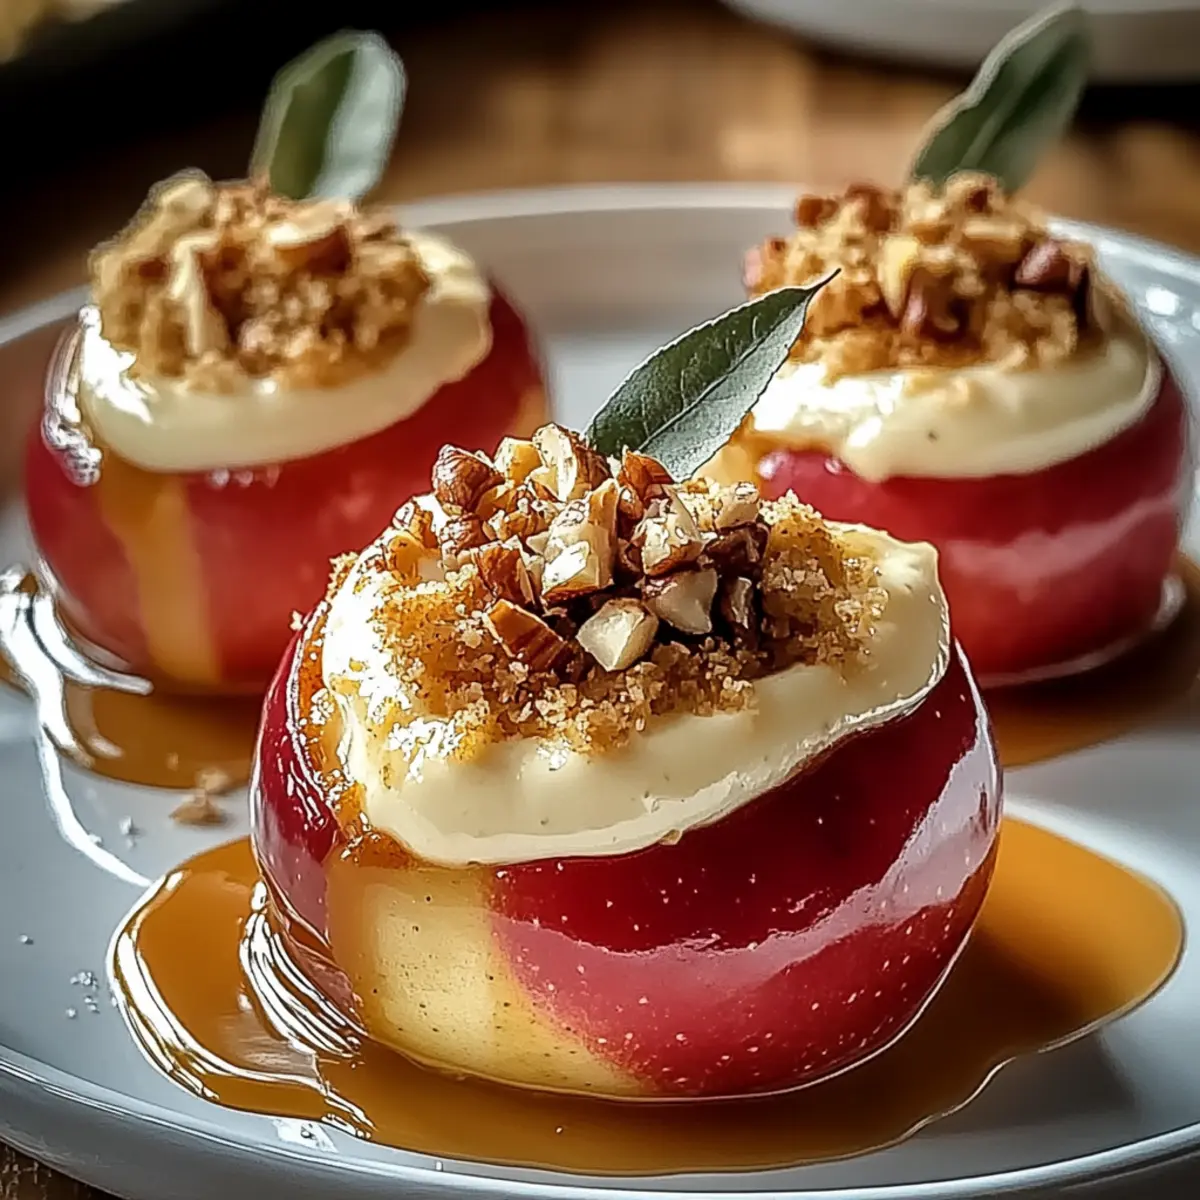
The sweet aroma of baked apples wafts through my kitchen, instantly transporting me to cozy autumn evenings spent with friends and family. This recipe for Tasty Cheesecake-Stuffed Baked Apples marries the comforting flavors of warm spices with a creamy cheesecake filling, transforming simple fruit into a delightful dessert. Not only is it a breeze to whip up—great for a last-minute gathering—but it also offers a gluten-free option, making it a perfect treat to share with everyone. Whether you’re hosting a Thanksgiving feast or just indulging in a sweet moment after dinner, these baked apples bring warmth and a touch of nostalgia to the table. Curious about how to turn your favorite fall flavors into a stunning dessert? Let’s dive in!
Why are these apples so irresistible?
Comforting aroma: The scent of cinnamon and baked fruit fills your home, creating an inviting atmosphere.
Customizable delight: Easily swap in your favorite nuts or add a dairy-free cream cheese option to cater to all diets.
Quick preparation: With just a few simple steps, you can have these apples ready in no time for any gathering.
Crowd-pleaser: Ideal for holidays or weeknight desserts, they appeal to everyone from kids to adults.
Perfectly balanced: Each bite combines sweet, tart, and spiced flavors, making for an unforgettable treat.
For more delicious fall recipes, check out our guide on Easy Fall Desserts or explore these Healthy Gluten-Free Options to satisfy your cravings while being mindful of dietary needs!
Tasty Cheesecake-Stuffed Baked Apples Ingredients
For the Apples
• Apples – Firm varieties like Honeycrisp or Gala work best, holding their shape during baking.
• Lemon Juice – Prevents the apple interiors from browning; use fresh for maximum flavor.
For the Cheesecake Filling
• Cream Cheese – A smooth, creamy base for your filling; soften it first for easy mixing, and dairy-free options are available.
• Granulated Sugar – Sweetens the cheesecake mixture; adjust based on the natural sweetness of your apples.
• Vanilla Extract – Enhances the overall flavor profile of your filling.
• Ground Cinnamon – Adds that quintessential autumn spice; use more for a pronounced warmth.
• Ground Nutmeg – Provides a subtle, earthy undertone that complements the apples perfectly.
For the Crunchy Topping
• Graham Cracker Crumbs – Create a textured layer reminiscent of traditional cheesecake crust; opt for gluten-free crumbs for a gluten-free version.
• Chopped Nuts – Walnuts or pecans add delightful crunch; customize based on your preference.
• Melted Butter – Drizzle over the tops of apples to promote golden browning and an inviting look.
Serving Suggestions
• Whipped Cream – An optional topping that adds a fluffy finish for serving, perfect for those who want an extra touch of indulgence.
These Tasty Cheesecake-Stuffed Baked Apples are sure to become a delightful staple in your dessert repertoire!
Step‑by‑Step Instructions for Tasty Cheesecake-Stuffed Baked Apples
Step 1: Preheat Oven
Begin by preheating your oven to 350°F (175°C). This ensures optimal baking conditions for the Tasty Cheesecake-Stuffed Baked Apples. Preheating creates a warm environment, allowing the apples to soften while their filling becomes deliciously creamy. Grab your baking dish to prepare for the next steps.
Step 2: Prepare Apples
Carefully cut off the tops of your chosen apples, making a small “lid,” and scoop out the cores while leaving the bottoms intact. This crucial step creates a cavity for the cheesecake filling. Brush the insides of the apples with fresh lemon juice to prevent browning, keeping them looking fresh and vibrant as you proceed.
Step 3: Make Filling
In a mixing bowl, combine softened cream cheese, granulated sugar, vanilla extract, ground cinnamon, and nutmeg. Blend these ingredients until smooth and creamy using an electric mixer or a whisk, which should take about 2-3 minutes. The mixture should be free of lumps, creating a rich filling that enhances the flavors for your Tasty Cheesecake-Stuffed Baked Apples.
Step 4: Add Texture
Gently fold in the graham cracker crumbs and any chopped nuts you desire into your cheesecake filling. This step will add a delightful texture that complements the creamy filling. Use a spatula to ensure ingredients are evenly distributed without overmixing, maintaining the opulent creaminess of your filling.
Step 5: Stuff Apples
Spoon the cheesecake filling into each apple cavity, mounding it slightly above the rim. This generous stuffing creates an inviting look and ensures every bite is packed with that rich cheesecake goodness. Arrange the stuffed apples upright in your prepared baking dish, ready for baking while you proceed to the next step.
Step 6: Arrange & Butter
Before baking, drizzle melted butter over the tops of each stuffed apple. This step not only promotes an enticing golden-brown color but adds a rich flavor to the finished dessert. Make sure the butter is evenly distributed for a beautiful caramelization during the baking process.
Step 7: Bake Covered
Cover the baking dish with aluminum foil and place it in the preheated oven. Bake for 25-30 minutes, until the apples are tender yet not mushy. You’ll know they’re ready when the apples are easily pierced with a fork, while the cheesecake filling remains luscious inside, enveloping that delightful spiced apple.
Step 8: Brown Tops
Remove the foil and return the baking dish to the oven for an additional 10 minutes. This step gives your Tasty Cheesecake-Stuffed Baked Apples a beautiful, golden-brown finish. Keep an eye on the apples as they bake, ensuring they reach a perfect caramelized color without over-baking.
Step 9: Cool & Serve
After baking, let your apples cool for a few minutes before serving. This resting time allows the filling to set slightly. Serve the Tasty Cheesecake-Stuffed Baked Apples warm, optionally topped with a dollop of whipped cream for an extra touch of indulgence on this delicious dessert.
How to Store and Freeze Tasty Cheesecake-Stuffed Baked Apples
Fridge: Store leftovers in an airtight container for up to 3 days. This helps maintain the flavor and texture of your delicious baked apples.
Freezer: For longer storage, individually wrap each apple in plastic wrap and place them in a freezer-safe container. They can last up to 2 months without losing their delightful taste.
Reheating: To enjoy, thaw overnight in the fridge, then reheat in the oven at 350°F (175°C) for 10-15 minutes, ensuring they are heated through but still tender.
Prep Ahead Tips: You can prepare the cheesecake filling and stuff the apples up to 24 hours in advance. Just keep them stored in the fridge until you’re ready to bake your Tasty Cheesecake-Stuffed Baked Apples!
Tasty Cheesecake-Stuffed Baked Apples Variations
Feel free to explore these delightful twists and substitutions to make this recipe truly your own!
-
Nuts Galore: Swap in your favorite nuts such as sliced almonds or pecans for a different crunch. The nutty flavor adds a delightful contrast to the creamy filling.
-
Dairy-Free Delight: Substitute cream cheese with a dairy-free alternative to create an accessible option for those with lactose sensitivities. This provides the same luscious texture without the dairy.
-
Spice It Up: For a unique flavor, add a pinch of cardamom or a dash of orange zest to the filling. These additions will brighten the overall flavor profile and bring an unexpected twist.
-
Sweet Drizzle: Drizzle homemade caramel sauce over the baked apples for an indulgent touch. This extra layer of sweetness can take your dessert to the next level.
-
Fruit Fusion: Consider mixing in other fruits such as dried cranberries or raisins into the cheesecake filling for bursts of sweetness. This adds a delightful chewiness with each bite.
-
Maple Syrup Boost: Instead of using granulated sugar, try a splash of maple syrup for a natural sweetness and deeper flavor. Maple pairs wonderfully with apples and complements the fall spices beautifully.
-
Granola Crunch: Replace graham cracker crumbs with your favorite granola for some additional crunch and flavor variety. It makes a lovely texture contrast against the creamy filling.
-
Heat It Up: Add a pinch of cayenne pepper or chili flakes to the spice mix for a surprising kick that balances the sweetness of the apples. This subtle warmth creates an intriguing layer of flavor.
For even more ideas, be sure to check out our guide on Creative Dessert Customizations or browse through Gluten-Free Dessert Inspirations for additional tasty options!
What to Serve with Tasty Cheesecake-Stuffed Baked Apples
Bring your dessert experience to new heights with delicious pairings that complement the cozy flavors of warm baked apples.
-
Vanilla Ice Cream: A classic accompaniment that adds creamy richness, melting delightfully with each warm bite of apple.
-
Caramel Sauce: Drizzling this sweet sauce over your apples enhances their sweetness and creates a luxuriously decadent finish.
-
Crumbly Shortbread Cookies: These buttery treats provide a delightful crunch, balancing the creamy cheesecake filling with contrasting textures.
-
Spiced Chai Tea: Sipping on this warm drink, infused with comforting spices, perfectly enhances the fall flavors of the baked apples.
-
Whipped Cream: Light and airy, a dollop of whipped cream adds a cloud-like indulgence, elevating the overall presentation.
-
Cinnamon Sugar Pecan Crumble: This nutty topping offers an addictive crunch and a sweet profile that echoes the apple’s spice notes.
-
Fresh Cranberry Sauce: A tangy, vibrant side that contrasts beautifully with the rich cheesecake filling, ensuring a well-rounded palate.
-
Hot Caramel Apple Cider: Sipping on this spiced drink brings warmth and enhances the seasonal vibe of your dessert gathering.
-
Nutty Granola: A sprinkle of granola adds crunchy texture and nutty flavors for a delightful topping to your baked apples.
Enjoy your Tasty Cheesecake-Stuffed Baked Apples with these delightful pairings for a truly memorable dessert experience!
Expert Tips for Tasty Cheesecake-Stuffed Baked Apples
-
Choose the Right Apples: Sweet-tart varieties such as Honeycrisp or Gala not only taste great but hold their shape beautifully while baking.
-
Lemon Juice is Key: Fresh lemon juice prevents apple browning and enhances flavor, so don’t skip this step during preparation!
-
Soften Cream Cheese: Ensure your cream cheese is at room temperature to create a smooth filling—this avoids lumps in your cheesecake mix.
-
Avoid Over-Baking: Keep a close eye on your apples to prevent them from becoming mushy; they should be tender yet hold their shape.
-
Make Ahead: Prepare and stuff the apples up to 24 hours in advance; simply cover and refrigerate until ready to bake for a quick dessert option.
-
Experiment with Additions: Feel free to customize your filling with different nuts or spices to create your own unique version of these Tasty Cheesecake-Stuffed Baked Apples!
Make Ahead Options
These Tasty Cheesecake-Stuffed Baked Apples are perfect for meal prep, saving you time on busy weeknights! You can prepare the cheesecake filling and stuff the apples up to 24 hours in advance. To keep everything fresh, store the stuffed apples in an airtight container in the refrigerator. When you’re ready to bake, simply drizzle melted butter on top and pop them in a preheated oven at 350°F (175°C). Bake covered for 25-30 minutes, remove the foil, and then brown the tops for an additional 10 minutes. This way, you’ll achieve the same delightful, comforting taste without the last-minute rush!
Tasty Cheesecake-Stuffed Baked Apples Recipe FAQs
What type of apples should I choose for baking?
For the best results, select firm varieties like Honeycrisp or Gala. These apples hold their shape well during baking and offer a delightful sweet-tart flavor that complements the cheesecake filling beautifully.
How should I store leftover baked apples?
Absolutely! Store any leftovers in an airtight container in your refrigerator for up to 3 days. This keeps your Tasty Cheesecake-Stuffed Baked Apples fresh and flavorful, making for a lovely dessert to enjoy later.
Can I freeze the baked apples?
Yes, you can! Wrap each Tasty Cheesecake-Stuffed Baked Apple individually in plastic wrap, then place them in a freezer-safe container. They will maintain their taste and texture for up to 2 months. When you’re ready to enjoy, simply thaw overnight in the fridge and reheat in the oven.
What if my cream cheese filling has lumps?
No worries! Lumpy filling can happen if the cream cheese is too cold. I recommend ensuring it’s room temperature by letting it sit out for about 30 minutes before mixing. If lumps persist, use an electric mixer for 1-2 minutes longer, or try passing the mixture through a fine mesh sieve for a super smooth filling.
Are there gluten-free options available for this recipe?
Very much so! To make your Tasty Cheesecake-Stuffed Baked Apples gluten-free, simply use gluten-free graham cracker crumbs in your filling and ensure that any other ingredients, like vanilla extract, are also labeled gluten-free. This way, everyone can enjoy this delightful dessert without worry!
Can I prepare the filling ahead of time?
Of course! You can make the cheesecake filling ahead of time, and even stuff the apples up to 24 hours in advance. Just cover the filled apples with plastic wrap and store them in the refrigerator. When you’re ready to bake, simply pop them in the oven for a delicious dessert in no time!
Delicious Tasty Cheesecake-Stuffed Baked Apples Recipe
Ingredients
Equipment
Method
- Preheat your oven to 350°F (175°C).
- Cut off the tops of the apples and scoop out the cores, brushing the insides with lemon juice.
- In a mixing bowl, combine softened cream cheese, granulated sugar, vanilla extract, ground cinnamon, and nutmeg until smooth.
- Fold in the graham cracker crumbs and chopped nuts.
- Stuff each apple cavity with the cheesecake filling, mounding it above the rim.
- Drizzle melted butter over the tops of each stuffed apple.
- Cover the baking dish with aluminum foil and bake for 25-30 minutes.
- Remove the foil and bake for an additional 10 minutes until golden brown.
- Let cool for a few minutes before serving warm, optionally topped with whipped cream.
Leave a Reply