
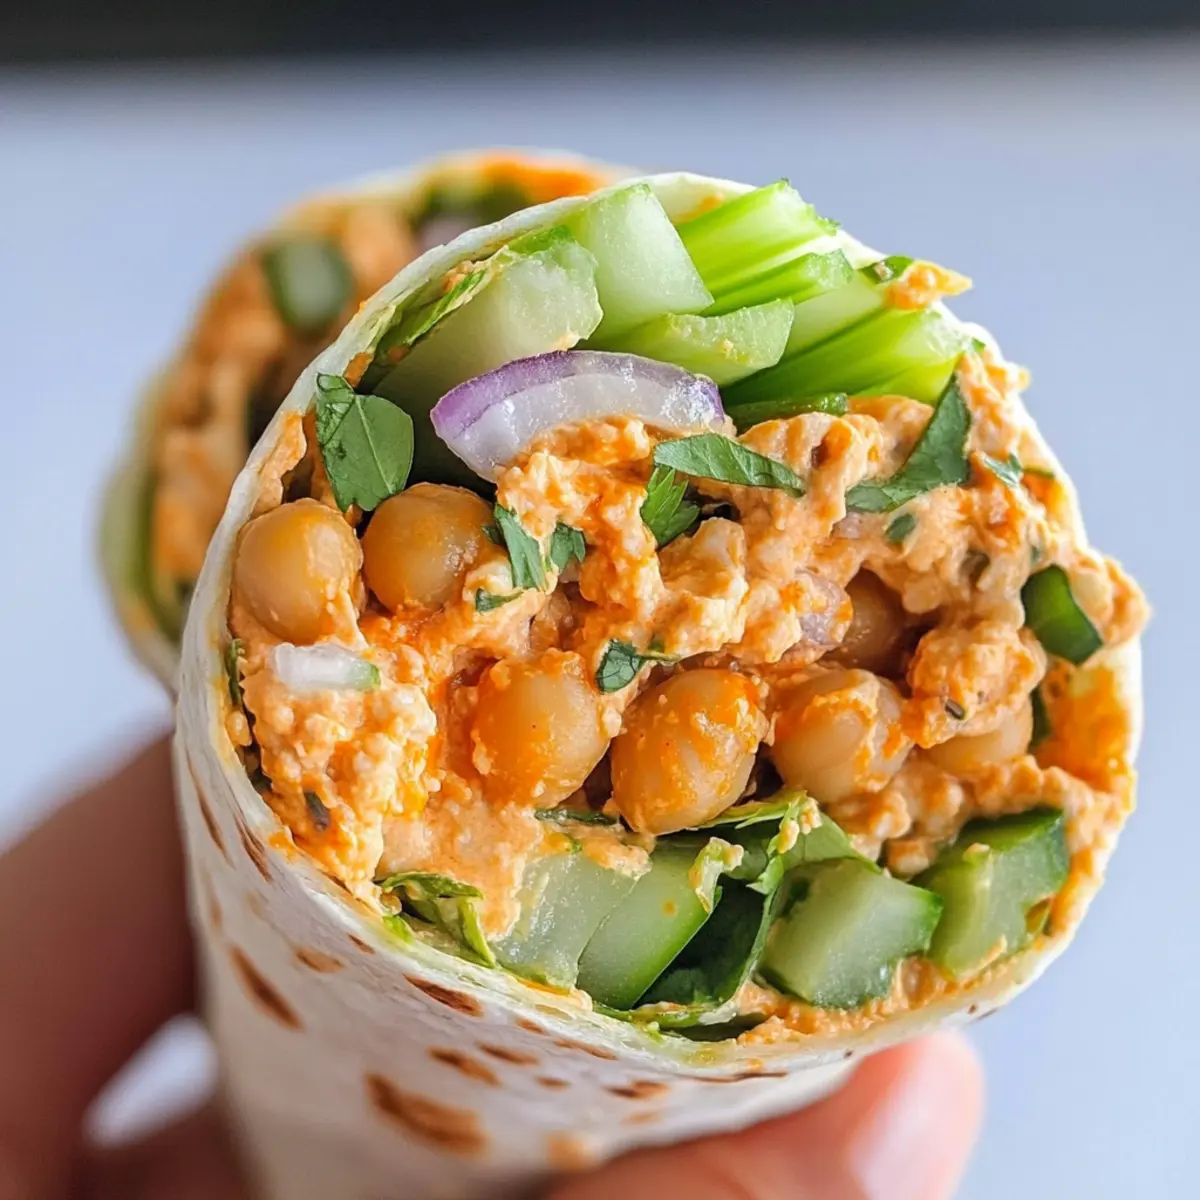
As I rolled up the last wrap, the vibrant colors of the fresh veggies and chickpeas made me smile. Buffalo Chickpea Wraps are not just another meal—they’re a celebration of bold flavor and hearty satisfaction. Packed with protein and a spicy kick, this vegetarian delight is ready in just 20 minutes, making it the perfect guilt-free indulgence for a busy day. These wraps are not only a breeze to prepare, but they also lend themselves beautifully to meal prep, ensuring you’ll have a delicious and healthy option on hand for those hectic mornings. Curious about how to create this flavor-packed lunch that’s perfect for on-the-go eating? Let’s dive into the recipe!
Why are Buffalo Chickpea Wraps a Must-Try?
Quick and Easy: In just 20 minutes, you can enjoy a delicious, homemade meal that’s as simple as it is satisfying.
Flavor-Packed: The vibrant buffalo sauce combined with fresh veggies creates a zesty explosion in every bite!
Health-Conscious: High in protein and fiber, these wraps will keep you full longer, making them a guilt-free choice for lunch.
Versatile Ingredient Swaps: Feel free to customize with different beans or add shredded carrots for a colorful twist, just like in my popular Asian Style Wraps!
Meal Prep Friendly: Prepare the chickpea salad ahead of time for effortless assembly, just like with my Buffalo Ranch Chicken recipe! Enjoy the convenience without sacrificing flavor!
Buffalo Chickpea Wraps Ingredients
• Get ready for a flavor adventure with these Buffalo Chickpea Wraps!
For the Wrap Filling
- Chickpeas – A protein powerhouse that forms the hearty base of your wrap.
- Celery – Adds a delightful crunch and freshness that complements the chickpeas.
- Green Onion – Offers a mild onion flavor; chives can be a great substitute if needed.
- Red Onion – Imparts a touch of sweetness; use less for a milder taste.
- Parsley – Brightens the wrap with freshness; feel free to swap with cilantro for a unique twist.
For the Creamy Base
- Tahini – Provides a rich, creamy consistency; mayo or cashew butter can work as alternatives for sesame allergies.
For the Flavor Kick
- Buffalo Sauce – The star ingredient that adds that spicy, tangy flavor; adjust to suit your heat preference—after all, it’s what makes these Buffalo Chickpea Wraps sing!
- Lemon Juice – A splash of acidity that balances all the flavors; fresh lemon juice makes a huge difference.
For Seasoning
- Spices (salt, pepper, additional spices) – Enhance the overall flavor; season to taste for the perfect blend.
This ingredient lineup makes it easy to whip up some scrumptious Buffalo Chickpea Wraps that you’ll love!
Step‑by‑Step Instructions for Buffalo Chickpea Wraps
Step 1: Prepare the Chickpeas
In a large mixing bowl, open a can of chickpeas and thoroughly drain and rinse them under cold water. Using a fork, lightly mash the chickpeas for about 30 seconds, leaving some whole for added texture. This creates a hearty base for your Buffalo Chickpea Wraps, providing both protein and a satisfying bite.
Step 2: Chop the Fresh Ingredients
While the chickpeas are being prepared, finely chop the celery, green onion, red onion, and parsley. Aim for even pieces to ensure a consistent texture throughout the wraps. This fresh crunch will enhance the flavor profile, making the Buffalo Chickpea Wraps even more delicious and vibrant.
Step 3: Combine the Filling
Add the chopped vegetables to the mashed chickpeas. Then, drizzle in the tahini, buffalo sauce, and lemon juice. Season with salt, pepper, and any additional spices you desire. Stir the mixture with a spatula until all ingredients are fully combined, generally taking about 2–3 minutes. The colors and aromas will let you know your filling is ready!
Step 4: Assemble the Wraps
Lay out your tortillas or wraps on a clean, flat surface. Spoon a generous amount of the chickpea mixture down the center of each wrap, ensuring you leave enough space on the edges for rolling. Aim for about 1/4 to 1/2 cup of filling per wrap, which will give you a hearty yet manageable Buffalo Chickpea Wrap.
Step 5: Roll and Serve
Starting at one end, gently roll the wrap tightly around the filling. Tuck in the sides as you go to secure the ingredients inside. Once rolled, place the wraps seam-side down on a plate. Serve immediately for optimal freshness or wrap them tightly in foil for a delightful meal later in the day.
Make Ahead Options
Buffalo Chickpea Wraps are fantastic for meal prep and can be assembled effortlessly! You can prepare the chickpea filling up to 3 days in advance. Simply mash the chickpeas and mix in the chopped veggies, tahini, buffalo sauce, and seasonings, then store the mixture in an airtight container in the refrigerator. To prevent browning, add the lemon juice just before serving. When you’re ready to enjoy, just spoon the chilled filling onto your wraps, roll them up tightly, and you’ll have a delicious and satisfying meal in no time. This makes weeknight dinners or lunch on-the-go a breeze, keeping your routine stress-free and flavorful!
What to Serve with Buffalo Chickpea Wraps
These wraps are not just an easy meal; they’re the start of a delightful spread that will leave everyone reaching for more!
-
Crispy Sweet Potato Fries: The natural sweetness and crunch of these fries perfectly balance the spicy buffalo flavor in the wraps. They create a satisfying contrast that’s hard to resist.
-
Fresh Garden Salad: A mix of greens, cucumbers, and cherry tomatoes dressed in light vinaigrette adds a refreshing crunch, complementing the spiciness of the wraps beautifully. Toss in some nuts for a healthy crunch!
-
Creamy Avocado Dip: The richness of avocado dip helps soften the heat from the buffalo sauce. Simple to whip up, it can also double as a delightful spread for your wraps.
-
Zesty Coleslaw: A tangy and crunchy coleslaw offers bright notes against the warm flavors of the wraps. This combination transforms your meal into a full-on flavor fest!
-
Roasted Vegetables: A medley of roasted carrots, bell peppers, and zucchini introduces a smoky flavor while enhancing the overall nutrition. The caramelization adds depth, making every bite delightful.
-
Sparkling Lemonade: Cool and refreshing, a glass of sparkling lemonade enhances the meal with a zesty lift. Its balance of sweetness and acidity is a perfect drink pairing with the spicy wraps.
-
Fruit Salad: A vibrant fruit salad brings a sweet and juicy counterpoint to the wraps. The natural sugars create a lovely balance, ensuring your palate enjoys a pleasing variety of flavors.
Whether it’s a light salad or some crispy fries, these pairings will elevate your Buffalo Chickpea Wraps to a full-on dining experience!
How to Store and Freeze Buffalo Chickpea Wraps
- Fridge: Keep your Buffalo Chickpea Wraps wrapped tightly in foil or plastic wrap for up to 3 days to maintain freshness and flavor.
- Freezer: If you want to save some for later, freeze the filling in an airtight container for up to 3 months. Just assemble fresh wraps when you’re ready to enjoy!
- Reheating: To reheat, remove the wraps from the fridge or freezer and warm them in a skillet over medium heat for about 5 minutes or until heated through. This keeps the wraps crisp and delicious!
- Meal Prep Tips: Prepare the chickpea filling in advance, store it in the fridge, and assemble the wraps fresh as needed throughout the week for hassle-free lunches.
Expert Tips for Buffalo Chickpea Wraps
-
Chickpea Prep: Ensure chickpeas are thoroughly drained and rinsed to prevent a watery filling. This keeps your Buffalo Chickpea Wraps from becoming soggy.
-
Spice Management: Adjust the amount of buffalo sauce based on your preference for heat. Start small and taste as you mix to find your ideal spice level.
-
Flavor Boost: Let the chickpea salad sit for a few minutes after mixing. This allows the flavors to meld beautifully, enhancing the overall taste of your wraps.
-
Freshness Matters: Use fresh lemon juice instead of bottled for a bright, zesty flavor. It makes a huge difference in the finished wrap!
-
Wrap Storage: If meal prepping, store individual wraps tightly wrapped in plastic or foil to maintain freshness. They last up to 3 days in the fridge.
-
Customizations: Don’t hesitate to swap out veggies or beans based on what you have on hand. The flexibility of this recipe makes your Buffalo Chickpea Wraps uniquely yours!
Buffalo Chickpea Wraps Variations
Feel free to get creative with these wraps and make them your own, bringing new flavors and textures to life!
-
Bean Swaps: Substitute chickpeas for black beans or lentils to switch up the flavor profile. Each option brings its unique essence to the party!
-
Crunchy Add-Ins: For extra crunch, mix in shredded carrots or sliced bell peppers. They not only add color but also boost the nutritional value of your wraps.
-
Gluten-Free Option: Swap traditional tortillas for gluten-free wraps or lettuce leaves, making this a perfect low-carb alternative without sacrificing taste.
-
Heat Levels: Adjust the amount of buffalo sauce based on your spice tolerance. For a milder option, try using a creamy ranch dressing instead!
-
Herb Variations: Experiment with herbs by replacing parsley with cilantro or dill for a fresh twist, each herb adding its signature flavor to the mix.
-
Nut-Free Alternative: If you’re avoiding tahini, use Greek yogurt for a creamy texture or opt for cashew butter to keep it dairy-free.
-
Mediterranean Flair: Add diced cucumbers, olives, and feta cheese for a Mediterranean twist; it complements the buffalo sauce surprisingly well!
-
Softened Wraps: To enjoy a softer bite, lightly toast the tortillas before filling them. This adds warmth and keeps everything cozy!
The beauty of these wraps lies in their adaptability. Just like my popular Asian Style Wraps, they are a canvas for your culinary creativity! Want more inspiration? Check out my Buffalo Ranch Chicken for another delicious twist on a classic flavor.
Buffalo Chickpea Wraps Recipe FAQs
What type of chickpeas should I use?
Absolutely! Canned chickpeas are a convenient option, but if you prefer, you can use dried chickpeas. Just soak them overnight and cook until tender before mashing.
How should I store leftover wraps?
For sure! Wrap any remaining Buffalo Chickpea Wraps tightly in foil or plastic wrap and store them in the refrigerator for up to 3 days. This will help maintain their freshness and flavor.
Can I freeze the chickpea filling?
Very much so! To freeze, place the chickpea filling in an airtight container, ensuring it’s sealed well. It can last for up to 3 months in the freezer. When you’re ready to enjoy, simply defrost in the fridge overnight and assemble your wraps!
What should I do if my filling is too watery?
No worries, this happens! If the filling is too watery, try adding more chopped celery or a tablespoon of breadcrumbs to absorb the excess moisture. Mixing it well will help bind everything together.
Are these wraps safe for people with nut allergies?
Definitely! If you or someone you’re serving has nut allergies, you can substitute the tahini with mayo or sunflower seed butter for a creamy consistency without the risk. Always check labels to ensure all ingredients are allergy-safe.
How spicy are these wraps?
The level of heat is totally up to you! Start with a smaller amount of buffalo sauce and gradually increase it until you reach your desired spice level. Each person has different heat preferences, so make it your own!
Delicious Buffalo Chickpea Wraps for a Quick Vegetarian Meal
Ingredients
Equipment
Method
- In a large mixing bowl, open a can of chickpeas and thoroughly drain and rinse them under cold water. Using a fork, lightly mash the chickpeas for about 30 seconds, leaving some whole for added texture.
- While the chickpeas are being prepared, finely chop the celery, green onion, red onion, and parsley.
- Add the chopped vegetables to the mashed chickpeas. Then, drizzle in the tahini, buffalo sauce, and lemon juice. Season with salt, pepper, and any additional spices you desire. Stir the mixture until all ingredients are fully combined, taking about 2–3 minutes.
- Lay out your tortillas on a clean surface. Spoon a generous amount of the chickpea mixture down the center of each wrap, leaving space on the edges for rolling.
- Starting at one end, gently roll the wrap tightly around the filling. Tuck in the sides as you go. Place the wraps seam-side down on a plate and serve immediately or wrap for later.
Leave a Reply