
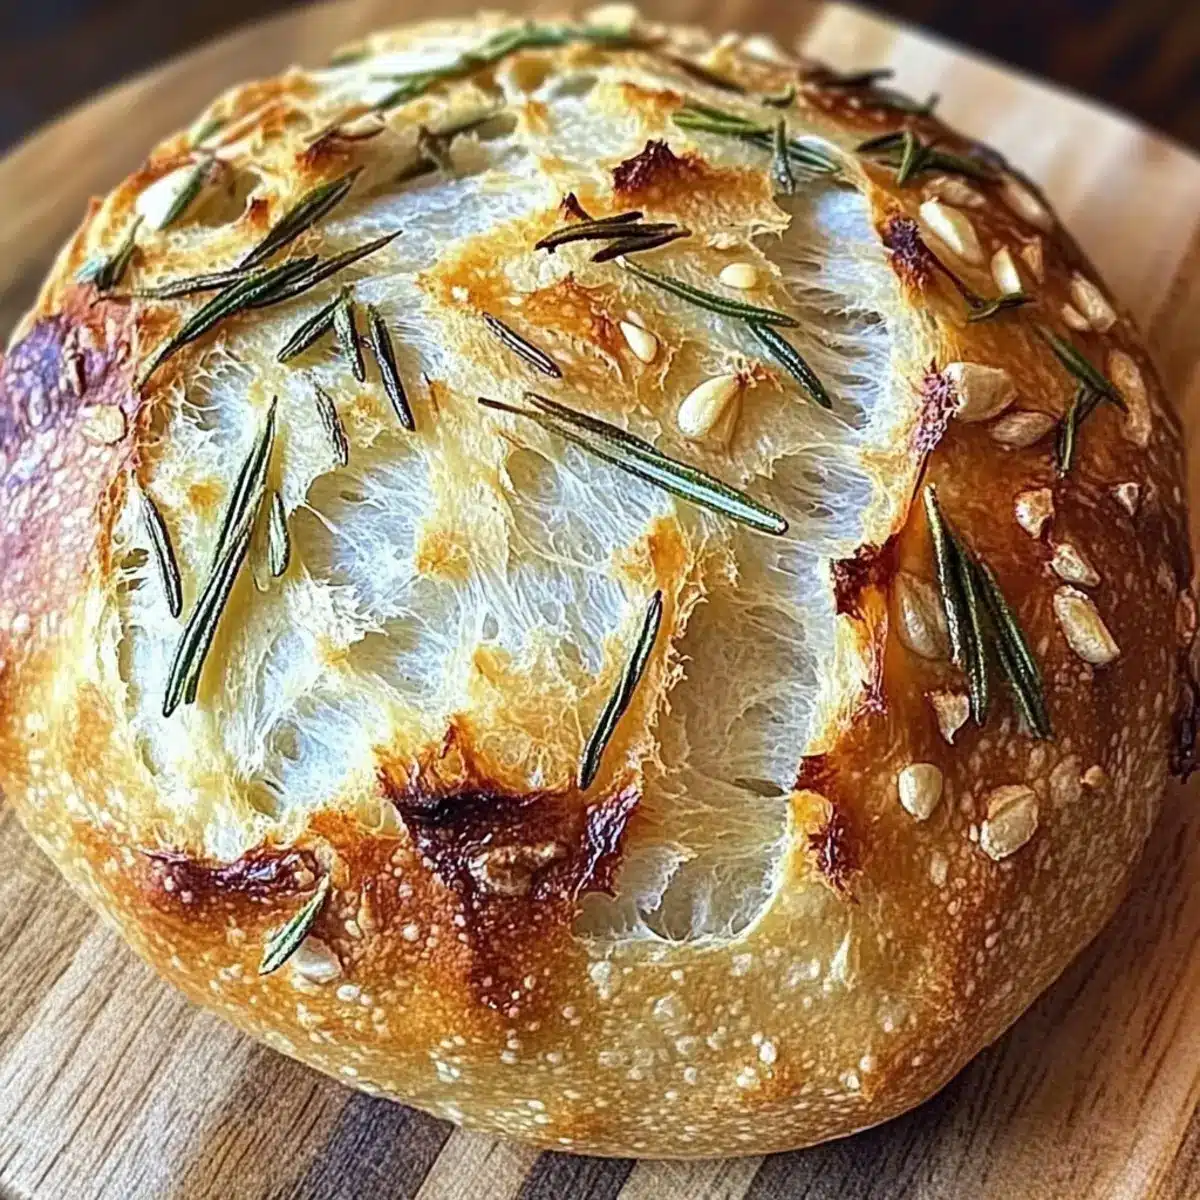
As I pulled open the oven door, a captivating aroma enveloped my kitchen, pulling me into a blissful moment of anticipation. There’s something magical about the process of creating your own bread, and today, I invite you to experience that with my Rosemary & Roasted Garlic Artisan Bread. This easy no-knead recipe yields a perfectly crusty and chewy loaf, elevating any meal from mundane to memorable with its fragrant herbs and sweet roasted garlic. Not only is it a delightful option for busy weeknights, but it also brings a homemade charm to family gatherings. The best part? You can prep it ahead of time and let the dough work its magic while you get on with your day. Ready to discover how simple it is to fill your home with the comforting scent of warm bread? Let’s dive in!
Why Is This Bread So Special?
Ease of Preparation: This no-knead recipe means you can enjoy bakery-level bread without the workout.
Irresistible Aroma: The combined scents of roasted garlic and fresh rosemary fill your kitchen, creating a cozy atmosphere that beckons family and friends.
Versatility: Whether served as a side to warm soups, featured in sandwiches, or enjoyed with a drizzle of olive oil, this bread adapts perfectly to any meal.
Make-Ahead Friendly: Prepare the dough in advance and bake when it’s convenient; no need to reroute your busy schedule!
Impressive Yet Simple: Achieve that artisan look and taste with little effort, making it a crowd-pleaser at gatherings or family dinners.
Ready for more delicious ideas? Pair this rustic bread with my Garlic Chicken Roasted for a complete meal!
Rosemary & Roasted Garlic Artisan Bread Ingredients
• For the Dough
- Active Dry Yeast – Helps the bread rise; ensure it’s fresh for best results.
- Room Temperature Water – Activates yeast; use filtered water for optimal flavor.
- All-Purpose Flour – Provides essential structure; substitute with bread flour for added chewiness.
- Sea Salt (Kosher or Coarse) – Enhances flavor; adjust according to dietary preferences.
- Fresh Rosemary – Infuses aromatic flavor; feel free to swap with other herbs like thyme or basil.
- Olive Oil – Adds richness and moisture; extra virgin is preferred for its robust flavor.
- Garlic – Roasted to sweetness; fresh garlic can be used but tends to be sharper.
Let’s get ready to create a delicious Rosemary & Roasted Garlic Artisan Bread that turns every meal into a celebration!
Step‑by‑Step Instructions for Rosemary & Roasted Garlic Artisan Bread
Step 1: Prepare Roasted Garlic
Start by preheating your oven to 400°F (204°C). Cut a head of garlic in half horizontally, drizzle the exposed cloves with olive oil, and sprinkle a pinch of salt and pepper over it. Wrap the garlic in aluminum foil and place it in the oven. Roast for 40 minutes, until the cloves are soft and caramelized, filling your kitchen with a heavenly aroma.
Step 2: Activate Yeast
While the garlic roasts, it’s time to activate the yeast. In a medium mixing bowl, pour in room-temperature filtered water and sprinkle the active dry yeast on top. Allow it to sit for about 10 to 15 minutes until it becomes frothy, indicating that the yeast is alive and ready to work its magic in your Rosemary & Roasted Garlic Artisan Bread.
Step 3: Mix Dry Ingredients
In a large bowl, combine the all-purpose flour, kosher salt, and chopped fresh rosemary. Whisk the dry ingredients together until they are well-mixed. This blend will serve as the base for your dough, so make sure to incorporate the aromatic rosemary evenly for that delightful flavor boost in your artisan bread.
Step 4: Combine Mixtures
Once the garlic is roasted, let it cool slightly, then squeeze the softened cloves into the yeast mixture, smashing them as you go. Pour this mixture into the bowl of dry ingredients. Stir gently until the dough begins to come together; it should be sticky and shaggy but well-combined. This is what gives your Rosemary & Roasted Garlic Artisan Bread its unique texture.
Step 5: First Rise
Cover your mixing bowl with a damp kitchen towel and place it in a warm area. Allow the dough to rise for 8 to 10 hours, or until it has doubled in size. This slow fermentation is what creates the rich flavor and airy texture in your artisan bread, so be patient and let the magic happen!
Step 6: Shape Dough
After the first rise, lightly flour a clean surface and gently turn the dough out onto it. Fold the dough over itself a few times until it forms a soft ball. Transfer it seam side up into a floured bowl, then cover it again and refrigerate overnight or for up to 48 hours for enhanced flavor development.
Step 7: Preheat Oven
On the day you plan to bake the bread, place a Dutch oven in the oven and preheat to 450°F (232°C). Preheating the Dutch oven is crucial as it creates a steam-filled environment that will help achieve a beautifully crispy crust on your Rosemary & Roasted Garlic Artisan Bread.
Step 8: Prepare for Baking
Once the oven is hot and your dough has chilled, carefully turn the dough out onto a piece of parchment paper. Shape it as desired, and use a sharp knife to score the top. This scoring allows the bread to expand while baking, ensuring a decorative and professional finish on your artisan loaf.
Step 9: Bake
Using oven mitts, carefully lift the parchment paper with the dough and place it into the hot Dutch oven. Cover with the lid and bake for 30 minutes. After that time, remove the lid and continue baking for an additional 15 to 20 minutes, until the bread is golden brown and sounds hollow when tapped on the bottom.
Step 10: Cool Before Slicing
Once baked to perfection, remove your Rosemary & Roasted Garlic Artisan Bread from the Dutch oven and let it cool on a wire rack for at least one hour. Allowing it to cool fully before slicing will help set the texture, resulting in an irresistible, crusty loaf that’s ready to be enjoyed fresh from your kitchen.
Storage Tips for Rosemary & Roasted Garlic Artisan Bread
Room Temperature: Keep the bread in a bread box or wrap it in a clean kitchen towel for up to 3 days to maintain its crusty exterior and soft interior.
Fridge: For extended freshness, you can refrigerate the bread, but be mindful it may lose some texture. Consume within one week.
Freezer: Slice the bread and store it in airtight bags for up to 3 months. This way, you can enjoy your Rosemary & Roasted Garlic Artisan Bread anytime! Just thaw at room temperature before serving.
Reheating: To enjoy warm, preheat your oven to 350°F (175°C), place the bread directly on the rack, and warm for 10-15 minutes for a fresh-out-of-the-oven experience.
What to Serve with Rosemary & Roasted Garlic Artisan Bread
Imagine a cozy dinner filled with laughter and the comforting aroma of fresh bread; it’s the perfect backdrop for a delightful meal.
-
Olive Oil Dip: Drizzle some high-quality extra virgin olive oil with a pinch of sea salt. This straightforward accompaniment highlights the bread’s flavors beautifully.
-
Hearty Vegetable Soup: A warm, chunky vegetable soup pairs perfectly, balancing the textures and adding a nutritious element to your meal.
-
Mixed Green Salad: Toss fresh greens with a tangy vinaigrette. The bright flavors and crisp textures contrast wonderfully with the warm, chewy bread.
-
Cheese Platter: Serve with an assortment of cheeses, like sharp cheddar or creamy brie. The diversity of flavors enhances each slice of your aromatic bread.
-
Garlic Chicken: Pair this artisan bread with a savory garlic chicken dish, creating a wholesome, mouthwatering combination that will satisfy everyone at the table.
-
Dessert Wine: A light dessert wine, like a sweet Riesling, will cleanse the palate in between bites of rich, flavorful bread.
-
Citrus Fruit Salad: Fresh, juicy citrus fruits will refresh the meal, offering a sweet and tangy combination that compliments the savory bread.
-
Homemade Pesto: Spread this vibrant and herby sauce across the bread for a quick, flavorful appetizer that is sure to impress your guests.
Rosemary & Roasted Garlic Artisan Bread Variations
Feel free to get creative with your bread baking! These delightful twists will elevate your Rosemary & Roasted Garlic Artisan Bread to a whole new level.
-
Cheesy Enchantment: Add grated parmesan cheese to the dough for a savory, rich depth. The warm, melted cheese creates a delightful surprise in every bite.
-
Herbaceous Delight: Swap fresh rosemary for fresh thyme or a blend of Italian herbs. These fragrant substitutions beautifully infuse the bread with new aromatic notes.
-
Savory Surprise: Mix in chopped sundried tomatoes for a hint of tangy sweetness. They offer pops of flavor that complement the roasted garlic perfectly.
-
Nutty Texture: Incorporate chopped walnuts or sunflower seeds for added crunch. The texture contrast will make each slice an experience!
-
Spicy Kick: Toss in a pinch of red pepper flakes before mixing to bring a mild heat to the bread. It pairs wonderfully with the aromatic base.
-
Olive Oil Drizzle: Enhance flavor by replacing a portion of the water with a high-quality, robust olive oil. This will give your bread a luxurious richness.
-
Garlic Twist: Double the roasted garlic or mix in chopped roasted garlic cloves. This delivers a bolder flavor for garlic lovers who can’t get enough!
-
Sweet Hint: Add a tablespoon of honey for a touch of sweetness that balances out the savory flavors wonderfully. It adds a delightful complexity to every bite.
Pair your scrumptious bread with my Garlic Parmesan Roasted shrimp for a delightful meal! Enjoy the journey of baking with endless possibilities.
Expert Tips for Rosemary & Roasted Garlic Artisan Bread
-
Roast the Garlic: Don’t skip roasting the garlic; it enhances the flavor bringing out a sweet and rich taste that can’t be replicated with raw garlic.
-
Use Fresh Yeast: Ensure your active dry yeast is fresh for optimal rising; expired yeast can lead to flat, dense bread.
-
Watch the Dough: The dough should be sticky; if it’s too dry, it won’t have that perfect chewy texture typical of a great Rosemary & Roasted Garlic Artisan Bread. Adjust with a touch more water if needed.
-
Let it Rise: Patience is key! Allow adequate time for the first rise; it’s crucial for developing flavor and texture without kneading.
-
Score Correctly: Use a sharp knife for scoring the top of the dough, helping to prevent it from bursting unpredictably while baking. This simple step adds to the artisan look of your bread!
-
Cool Before Slicing: Waiting an hour before slicing might be hard, but it sets the crust and crumb, ensuring the best possible taste and texture.
Make Ahead Options
These Rosemary & Roasted Garlic Artisan Bread loaves are perfect for meal prep enthusiasts! You can prepare the dough up to 48 hours in advance, allowing all the flavors to deepen while saving valuable time on busy days. After the first rise, simply shape the dough and refrigerate it in a floured bowl, covered tightly to maintain moisture and prevent drying. When you’re ready to bake, just take it out, allow it to come to room temperature, and follow the final baking instructions. With this make-ahead method, you’ll enjoy fresh, crusty artisan bread on demand—just as delicious as if you’d baked it the same day!
Rosemary & Roasted Garlic Artisan Bread Recipe FAQs
What type of garlic works best for this recipe?
For the best flavor, I highly recommend using roasted garlic. It enhances the sweetness of the bread. If you prefer a more pungent flavor, you can opt for fresh garlic, but be aware that it can overpower the other flavors.
How should I store my Rosemary & Roasted Garlic Artisan Bread?
To keep your bread fresh, store it at room temperature in a bread box or wrapped in a clean kitchen towel for up to 3 days. For longer storage, slice the bread, place it in airtight bags, and freeze for up to 3 months. Thaw at room temperature when you’re ready to enjoy!
Can I make the dough ahead of time?
Absolutely! You can prepare the dough and let it rise overnight or refrigerate it for up to 48 hours. This not only develops the flavor but provides the flexibility to bake it at your convenience.
What should I do if my dough isn’t rising?
If your dough isn’t rising, it may be due to inactive yeast. Check the expiration date of your active dry yeast and ensure that your water was at room temperature when you activated it. If all else fails and the dough still appears flat, you can add a bit more water to help revive it.
Can my dogs eat this bread?
While the ingredients used in Rosemary & Roasted Garlic Artisan Bread are generally safe, avoid giving your dog bread with garlic as it can be toxic to them. Always consult your veterinarian if you’re unsure about introducing new foods to your pet’s diet.
Is it possible to substitute the herbs in the recipe?
Yes! Feel free to swap rosemary for other herbs like thyme, basil, or Italian seasoning, depending on your preference. Each herb brings a new flavor to the forefront of this artisan bread, so experiment and discover what you love best!
Heavenly Rosemary & Roasted Garlic Artisan Bread Made Easy
Ingredients
Equipment
Method
- Preheat your oven to 400°F. Cut a head of garlic in half, drizzle with olive oil, and sprinkle salt and pepper. Wrap in foil and roast for 40 minutes.
- Activate the yeast by combining water and yeast in a bowl. Let sit for 10-15 minutes until frothy.
- Mix flour, salt, and rosemary in a large bowl. Whisk together until well-combined.
- Squeeze roasted garlic into the yeast mixture, then mix with the dry ingredients until a sticky dough forms.
- Cover the bowl with a towel and let the dough rise for 8-10 hours until doubled.
- Flour a surface, turn out the dough, and fold it a few times to form a ball. Place seam side up in a floured bowl, cover, and refrigerate overnight.
- Preheat the oven to 450°F with a Dutch oven inside.
- Turn the dough onto parchment paper, shape as desired, and score the top with a knife.
- Transfer the dough to the hot Dutch oven, cover, and bake for 30 minutes then remove lid and bake for 15-20 minutes until golden.
- Cool on a wire rack for at least one hour before slicing.
Leave a Reply